A few words about forms and types
Extended nails provide a lot of advantages: manicure lasts much longer on them, they do not break or bend.
Unlike your own, they are perfectly smooth and always the same; you can choose the required length yourself, not limited by physiological factors. In addition, the own plates underneath do not peel off or break. If you want to wear short nails for the sake of fashion, you can also extend them and forget about problems such as an uneven free edge or an unattractive shape of the plate. Several years ago, almost all masters removed work using acrylic from the list of services and left gel extensions on tips or forms. This procedure is relatively inexpensive, takes about 3 hours and requires correction after 3-4 weeks, depending on how quickly your own nails grow.
Forms can be disposable from paper and foil or reusable from Teflon. The former are sold in large rolls, the latter must be disinfected every time.
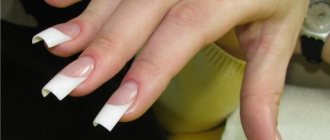
Tips can be transparent or with a pattern already applied, including a French tip. In the latter option, you will have a ready-made jacket on your nails, but as it grows, it will need to be covered. In appearance they are curved, with a slight bend, narrowed or straight. Usually long so that the master can make corrections.
Tips or forms?
Which is better: tips or forms? What is the difference between types and forms? Which nails are more durable? These and other questions are asked very often. And then the master has doubts: what to recommend? How will be better? Therefore, the master should know in which cases it is worth extending nails with tips, and in which cases with forms.The right combination
Working on tips is the knowledge of masters 15 years ago, forms are a relatively new direction in extensions; On tips, nails are lengthened, and on forms, they are modeled. The main task of the masters when doing extensions is not to emphasize the flaws of natural nails, but to hide them as much as possible. Therefore, it should be remembered that tips are a continuation of the natural nail (no matter how it grows - straight, up or down), and when working on forms, the master can visually adjust the direction of its growth.
Most masters mistakenly believe that tips give additional strength to the extended nail. However, both tips and forms are only support for the material, and wearability lies in the correct combination of all the requirements for modeling an artificial nail. In addition, full compliance with them brings the modeled nail as close as possible to the natural one.
The result of working on tips is visually different from working on forms. Let's take the classic shape, a square, as an example. This is a universal shape; all others are modeled from a square.
The differences in the simulation result are clearly visible in the figure. A nail extended with tips expands in the stress zone - since it is most susceptible to fractures, it is additionally strengthened with material. On forms, this thickening can be clamped, so the appearance of the modeled nail is more aesthetic and closer to natural.
The type of extension (tips or forms) is influenced by:
a) material (acrylic or gel);
b) type of natural nail;
c) the client’s wishes;
d) knowledge of the master.
The first two factors are the main ones for selection. The last two can be changed, that is, to improve the qualifications of the master or to correctly explain to the client the reason for your choice. The correct combination of these factors determines the final result and meets the client's expectations.
Features of nail shapes
In the master class presented below, we use acrylic, natural nail shapes - oval, almond-shaped, trapezoidal and bitten. For each shape, a top and side view of natural nails is shown.
Trapezoidal shape
Features: a) the presence of side rollers; b) the nail expands towards the free edge (lack of parallelism of the sides); c) short and wide nail plate.
"Rodents"
Features: a) clearly defined side ridges; b) the nail plate grows upward; c) the nail is wide, very short in length.
Oval or almond shape (pronounced C-curve)
Features: a) elongated natural plate; b) the presence of hyponychium; c) the natural plate has its own C-bend.
Subtleties of modeling
What will the extended nails look like on tips and forms (top and side views):
Trapezoidal shape
Features: a) the sides expand (“flared”); b) slightly raise the sides: up (due to the subnail fold); c) the extended nail is visually wider than the natural nail.
Features: a) the sides are parallel (squeezing in the stress zone); b) the side is smooth and is a continuation of the natural nail; c) flaws in the natural nail are hidden (the nail becomes visually narrower due to its regular arch).
"Rodents"
Features: a) difficulty in gluing tips (very short natural plate and pronounced subungual ridge); b) the extended nail is very wide (short length of the extended edge); c) the sides are raised (portability worsens).
Features: a) the extended nail has become a little narrower (squeezing); b) the sides are smooth and parallel; c) the arch is clearly visible and the pronounced side ridges are hidden.
Oval or almond shape
Features: a) expansion in the stress zone (there is no parallelism of the sides); b) the sides are strongly lowered and curved; c) a pronounced C-curve (the nail resembles a claw).
Features: a) the sides are parallel; b) the sides are slightly lowered down; c) smooth C-curve (hides the curve of the natural nail).
Thus, the presented drawings clearly demonstrate the dependence of the result of extension not only on the shape of natural nails, but also on the modeling method. Every master should know what to prefer in each specific case - only with such knowledge will he be able to perform quality work and have regular grateful clients.
Alexander Finko, training instructor
Features of extensions on forms
Here are some facts to help you determine if curve extensions are right for you:
- Working with this technology gives an ideal result in case of an uneven nail plate. The gel fills all irregularities and grooves.
- Makes it possible to lengthen the nail bed itself if the plates are severely bitten.
- More suitable for shaping a free edge rather than lengthening. Therefore, they are almost always chosen for the correction of cracks and fractures.
- It goes faster, although the step-by-step procedures look almost the same.
- Can be used even with very soft nail plates.
- It is a little more difficult to secure it correctly than tips.
- Requires special skill in shaping the direction of nail growth.
It should be noted that this technique is more common among masters.
Nail extension on forms step by step
The forms are a ready-made template, a base on which the modeling material – gel – is laid out. For the extension to be successful and of high quality, you need to follow a simple sequence:
- Remove the gloss from a natural nail using a soft file. At the same time, the cuticle and natural shine are removed, the nail becomes matte. The surface is swept with a large brush.
- The plates are degreased, primer and bonder are applied to them.
- A stand is glued to each nail.
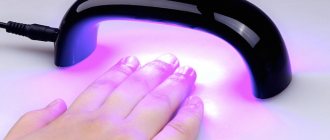
- The gel is applied. The first layer - starting from the cuticle and up to the expected length (with a gap, taking into account the finishing sawdust). Dry in the lamp for 3 minutes. We also apply the second layer sparingly and dry it again. Make sure that the substance is distributed more or less evenly across the entire plate.
- The paper base is removed.
- The sticky layer is removed (including from the inside).
- The sawdust is carried out and the nail is given the required thickness and roundness.
Proper nail filing is a very important part. To be on the safe side, watch the corresponding video at the end of the article on how exactly this is done.
So, before you make a choice, types or forms, you need to understand these concepts, understand how they differ from each other. And only then begin the nail extension procedure.
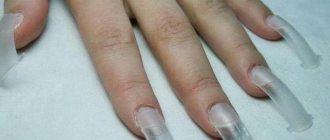
Tips are used to lengthen the free edge of the nail plate. This is an elastic plastic that can be matte, transparent, pure white or colored. In addition, the shape of the tips can also be different. To connect the tip and the natural nail, a special glue is used.
Forms for nail extensions are called a special template (Teflon or paper-Teflon), on which a certain scale (marking) is applied. Metal and Teflon forms are considered reusable, so they need to be disinfected and sterilized after each use. But paper forms are disposable. As for professional specialists, recently they have been using only paper forms.
What to choose? Are your nails on tips or on forms? According to some nail service professionals, extensions on forms are more difficult to perform than on tips, but this only relates to the level of professionalism of a particular master, who independently chooses the material with which he prefers to work with a particular client.
Some people claim that nails with tips are much stronger than those with forms. However, this is not the case, since the degree of nail strength depends on how the structure of the nail itself is built, as well as on the correct selection of the extension method. The fact is that everyone's nails are different. Some have a springboard shape, some have flat or even bitten ones, and some have large cushions. In this case, for each specific type it is necessary to select the type of tips.
In particular, it is extremely undesirable to extend nails that grow downwards using tips, while springboard-shaped nail plates cannot be extended using forms. Some even believe that the thicker the tip, the longer the nails will last. This statement is also incorrect, since a natural nail must bear the weight of the tip along with the weight of the material. In addition, the shape of the extended nail is not entirely elegant and beautiful when overly thick tips are used. However, you always want your nails, regardless of the extension method, to look natural.
In the process of extending tips, they need to be selected with an accuracy of 1 mm to the width of each specific nail plate, connected to the nail using special glue so that there are no “bubbles”, since in the future, if they do form, the tips and natural nail will Doesn't stick very well. If the tips are glued well, then during cutting it will not be difficult for the craftsman to create the required shape.
In the case of using forms, first of all, you need to correctly place the forms themselves. If it is placed improperly, then the nail will be modeled incorrectly.
Tips or forms, which is better? This depends on various factors, especially the shape of the nail plates. Nails can be normal, flat, springboard-shaped (growth goes up), or growing down. You can also find short, so-called “bitten” plates with high pads.
Naturally, normal nails with a clear plate shape do not cause any difficulties for the manicurist during extensions. In this case, the choice of extension method will depend on the system by which the extension takes place, on the tastes of the client and the level of professionalism of the specialist.
For narrow, springboard-shaped nails, it is better to use nail tips. In this case, the free edge of the nail plate is filed rather short, and the thickness is removed with a file. Then a tip is selected that will exactly match the shape of the natural nail plate. Here, tips are selected that have a well-defined arch and C-bend and a small contact zone. When using traditionally shaped tips, the resulting gap between the tip and the nail is filled with glue.
However, this form of nails allows you to extend them on forms, but this is more difficult to do.
If your nails are flat, then any nail extension (tips or shapes) is suitable. However, when the nails are quite wide, it is better to use forms, since the master does not always have tips that are suitable in size. In such a situation, a new shape is made from two by cutting and pasting one on top of the other.
When tips are selected, they should be prepared in advance, for which the contact zone is sawed off to the required size or ready-made tips with an area of the required shape are selected.
Forms are more suitable for downward-curving nails, since as the nail grows, the free edge of the plate will begin to bend downward. It is only important to choose a shape that will fit along the smile line.
In a situation with bitten nails, it is better to use tips with a small contact area. It is important to choose the right glue here. Since the surface of these nails is usually uneven, and also with high pads, it is better to use a gel-like glue that can fill the unevenness and create a special “platform” for the tip. In extreme situations, a professional technician can lay out the tip of the nail plate directly on the nail bed.
Thus, the choice of nail extension method (forms or tips) depends on the condition of the natural nails of each specific client, as well as on the degree of professionalism of the artist himself.
Features of extensions with tips
Features that gel extensions onto tips include:
- When working with this technology, the direction of nail growth is already correctly formed.
- In the stress zone it is necessary to thicken it, since in this case it is more vulnerable. Because of this, the nail may look less natural.
- If the tip is filed very thin, then after applying the gel it can also be compressed quite firmly, forming the correct arch. But if the sawdust is carried out incorrectly, it can easily crack. The sawdust stage is very important in this case.
- Using artificial plates with a pattern already applied, the procedure takes much less time.
- They are sometimes difficult to match to the nail.
- To work with this material, you must have smooth nail plates, otherwise air bubbles will remain between the surfaces.
- After such extensions, nails are more vulnerable to prolonged contact with water.
- It is not advisable to use if your nails are very soft.
Here is a brief sequence of the process:
- The hands, in particular the cuticle, are treated with a disinfectant, the free edge is shortened and rounded off.
- The shiny layer of the nail is removed.
- The appropriate tip size is selected.
- Apply glue to the step and attach it to the nail (not on the entire surface, but only on the step).
- We carry out sawdust.
- We model the nail with gel.
This is a step-by-step scheme; we can talk endlessly about each specific point, especially about selection and the correct sawdust.
Among these 2 methods there is no clear leader in demand, since both have their own advantages and features.
Types of tips
Tips are plastic overlays or template forms that are used by masters as a substrate or as a stencil for forming an artificial nail plate.
This is the most convenient and popular extension option for beginners. It is also popular among experienced craftsmen, especially if it is necessary to reduce time and simplify the procedure. There are several varieties of tips, each with its own peculiarity in operation and design nuances.
To form an artificial nail plate, acrylic, gel, biogel and acrylic acrygel, which is a combination of gel and acrylic, can be used. Acrylic dries in air, and gels dry in a lamp.
Tips-tips
These are plastic nail tips with a convenient transition zone for high-quality adhesion along the smile line. Disposable. They are attached using a special glue that comes with them or can be purchased separately.
They come in different sizes within one set. It is necessary to select it individually for each nail, and, if necessary, pre-file it in width so that it perfectly matches the width of its plate. After gluing, the length is cut and filed. Next, everything is covered with camouflage extension material to create an outwardly complete nail plate.
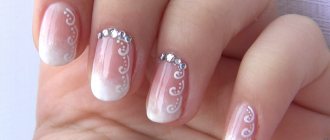
White tips are very convenient for extending French manicure. This is a ready-made perfect smile line; you just need to cover the nail with a thin layer of base or camouflage gel or acrylic, and then with a top coat to add shine.
Camouflage nail gel - let’s figure out what it is and how to use it correctly
Upper forms
Upper forms - used for working with acrylic, gel, acrylic and biogel. The material is applied to the form, pressed against the prepared nail along the entire length under the cuticle or from the middle of the plate, then dried in a lamp and filed.
The top molds are made of a dense material compared to the more flexible liquid molds, and have a more curved design. Thanks to this, they allow already from the first layer to form a convex stress zone or fold zone, which is subject to the greatest loads when worn. The top forms are reusable. On average, they are enough for 100-250 extensions.
Liquid tips
They are used for extensions with all liquid materials, hence their name. Often opaque, with a matte surface. They have short “removal handles” at the ends. Unlike top forms, liquid patterns are more flexible and flat. They do not immediately form a stress zone, but only create the first base layer. Then you need to paint the architecture manually - with camouflage gel or acrylic using a brush.
When working with liquid tips, the material is applied to a mold and pressed against the nail plate. Smile lines are already drawn in the form, which is very convenient for beginners when laying out a French jacket. After drying in a UV or LED lamp, the tip is removed and the plate is filed down. Liquid tips are also reusable, like the top forms.
Depending on the desired result, you can work with any of the three types of tips. Try everything one by one to choose the most convenient and practical for yourself.
Little tips for perfect results
Small nuances that will definitely be useful to you:
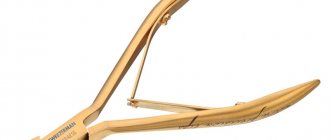
- If your nails are too long, do not use scissors or clippers to shorten them. For these purposes, only a special guillotine or coarse abrasive file is suitable.
- After the procedure, use caring oil. Nails are under stress, so for the first 2 days, use this treatment every 3-4 hours.
- It is better to wash your hands thoroughly before applying extensions.
- Inspect the handles for severe scratches, wounds, damage, warts, etc. It is better to cure all inflammatory processes first.
- After the preparation stage, there should be no particles of cut nail tissue left on your hands.
- If you cannot find a tip that fits your nail perfectly, take a wider one and remove the excess with a file.
You can decide which type of extension is right for you together with the specialist or with us. You can see how to correct nails on the pages of the site.
