Nowadays, getting a stylish manicure at home is not difficult. The stores offer a large assortment of special devices for performing manicures: varnishes, gel coatings, stencils, etc. Until recently, home manicures were distinguished by their fragility, the reason for this was the weak durability of the varnish. But now everything has changed, it has become publicly available gel polish or shellac. The main feature of this material is that it stays on the nails for more than two weeks.
What is application?
This service can be found in all beauty salons, as well as from professionals working at home. Moreover, many women buy all the necessary tools to decorate their fingers themselves. We will definitely provide instructions for the step-by-step process, but for now let's figure out what it is - coating nails with gel polish.
This is the process of painting the nail plate with a product similar to traditional varnish products. But this option saves a lot of time. No more waiting for it to dry and being afraid of smearing the layer. The technology also allows you to grow your nails without any problems, as they are well protected.
Compound
The product has a fairly stable polymer structure. It also contains:
- photoinitiator - promotes drying under the influence of UV rays;
- film former - an ingredient that improves durability;
- thinner - determine lightness, density and texture;
- additives - strengthen nails;
- pigments are coloring elements.
Shades
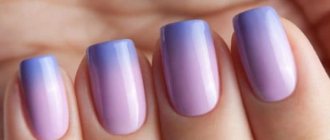
The color range of varnishes is very diverse. But according to fashion trends, preference is given to pastel colors, which make any girl’s hands incredibly feminine and delicate.
The so-called nude category is also in demand. These are powder and nude options. These include cream, pearl, peach, pink, etc.
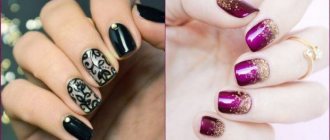
Among the rich colors, the priority is blue, chocolate, and turquoise. Many women have a matte manicure and a nail shape that is close to natural.
Possible mistakes when applying gel polish
Covering nails with gel polish is famous for its strength and durability, in theory this is true if you know all the intricacies of applying gel polish. However, in practice, due to lack of knowledge in this area, girls doing manicures at home make a number of mistakes, which can subsequently shorten the life of the manicure and lead to cracks and chips of the coating. To avoid these unpleasant consequences, we will tell you about the mistakes that should not be made when applying shellac:
- Before treating the cuticles, some masters soak their nails using a bath, so, it is important not to overdo it, otherwise this can lead to excessive moisture in the nail plate, and you will have to resort to the help of a dehydrator.
- If you do not properly treat the cuticle and do not thoroughly clean the nail from the pterygium, then air can get under the gel polish, which will subsequently lead to peeling of the artificial coating.
- If you do not sand the nail plate well enough before applying shellac, especially in the cuticle area and free edge, this can also lead to premature peeling of the polish.
- Insufficient degreasing of the nail plate using special means also shortens the life of the manicure.
- Neglect of treating the end and sides of the nail with special products (primer, ultrabond) that ensure good adhesion of the gel coating to the nail plate.
- Applying too thick a layer of gel polish. Each layer should be thin to avoid insufficient drying.
- It is also important to seal the cut (end) of the nail with each subsequent layer. This way the manicure will last longer.
- If your nails are thin and often break, then it is better not to neglect the use of strengthening gel and leveling the nail plate with a base. It is better to use a soluble gel to avoid cutting off when removing the manicure.
- It is very important to take seriously the choice of products such as base and top, because they are responsible for the quality of your manicure and ensure its durability. Under no circumstances should you skimp on these materials.
- The use of single-phase coatings is also undesirable. Use three-phase gel polishes, then it will be much easier to avoid premature peeling and chipping.
- Avoid using gel polishes, which can only be removed by filing. This procedure can often result in damage to the nail plate. Use coatings that require soaking.
If you follow these simple rules for applying shellac, you will be able to please yourself and those around you with your beautiful nails much longer.
Materials and tools
Before we find out what it’s like to apply gel polish, let’s list the accessories:
- grinder;
- degreaser - ensures maximum attachment of the product to the plate;
- UV lamp for drying products;
- base;
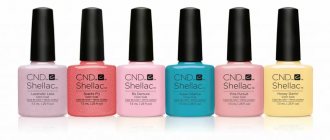
- shellac;
- top - protection and shine;
- alcohol solution to remove stickiness;
- lint-free wipes.
How to use
Often girls complain that all the advantages of soluble gel polish are exaggerated factors, and its durability is the same as that of a regular product. However, it must be remembered that one product may behave differently on nails.
It happens that the very next day the coating begins to peel off. This is due to errors in application technique. The procedure consists of 5 stages. Let's look at each of them.
Preparation
It is important that the free edge of the nail is smooth. Using a nail file, all irregularities are removed, then the cuticle is removed, and the plate is sanded. At the end, the nail becomes matte.
Removing the keratin layer
Skipping this step increases the risk of delamination. Therefore, we carefully remove the gloss using a buff. After this, it is better not to touch the surface.
To remove moisture and dust as much as possible, you can use lint-free wipes and a degreaser. It not only gets rid of impurities, but also restores the acid-base balance.
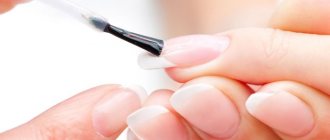
Base coat
The base is applied very thinly. The convenient applicator allows you to apply the product evenly without touching the skin and cuticle. It is important not to forget about the end and “seal” it. After distributing the product, make sure that no dust gets on the surface of the nail.
Afterwards, dry each hand in the lamp for 2 minutes. The plate will be a little sticky, so don't touch it. Then use a dry brush to smooth out this dispersion layer so that the varnish does not spread and is evenly distributed.
Pigment
When applying color, consider the following nuances:
- the layers must be thin, otherwise roughness and bubbles may form;
- We monitor the free edge of the nail: the coating is smooth and without thickening;
- when choosing a pastel or bright palette, the painting procedure should be carried out 2 times. After each placement, dry the fingers in the lamp for two minutes;
- dark shades need two or three layers for even coloring.
Using the "top"
The finishing agent is placed more tightly. Gently apply it to the nail and the end. After drying, apply an alcohol-containing solution or a special degreasing product over the surface.
How to do a manicure using gel polish
The technology for performing the work includes several points:
- First you need to remove the cuticle; you can first use warm baths to soften it.
Then you need to give your nails the desired shape, the one that the girl considers the most harmonious. Stage 1 - Soften the cuticle - Then take a buff and polish the nail plate, carefully working around the base of the nail and at the edge. Remove excess particles under the nails. This procedure will subsequently help the gel polish to better “adhere” to the nail.
Stage 2 - Grinding the plateImportant! We do not treat natural nails with a file, even a finely abrasive one.
- Wipe the surface of the nail plate with a cotton pad previously soaked in a degreaser.
Stage 3 - Degrease the nail surface - Applying the base (gel polish base). It is important not to overdo it with the quantity, that is, you need to cover the nail plate with a thin layer, paying special attention to the edges of the nail, which will ensure that the manicure remains presentable for a longer period of time. Then place your nails under a UV or LED lamp for 30–60 seconds.
Step 4 - Apply base coat to the nailImportant! By leaving the nail too long, you can create a fragile coating that will collapse after 2 days.
- Applying gel polish of the desired color. The coating layer should be thin. If the gel gets on the cuticle, then you need to use an orange stick to remove it. Having carefully distributed the material over the nail, the girl can place it under the lamp for 1–2 minutes.
Stage 5 - Apply the first thin layer of gel polishScheme for applying nail polish
It is important to know how to apply gel polish correctly. Apply as shown in the picture. In the center, at the base of the nail, place a dot of polish, then, with a sharp but gentle movement, pull it to the free edge of the nail plate, and then run the brush along the sides of the nail in the same direction (from top to bottom). Next, carefully pass the brush along the free edge, sealing it (this will extend the life of the manicure). So, the nail is completely painted over.
- Applying another layer of gel polish, but a little thicker.
This will give the manicure greater saturation and make the color deeper. Then, similarly to the first layer, it must be polymerized under an ultraviolet lamp. Stage 6 - Apply the second layer of gel polish - Using a top coat involves applying the product over the gel.
Place your nails in the lamp for 40–60 seconds. Its main purpose is to create a protective layer, prevent chipping, in addition, the top makes the manicure glossy, neat, and more beautiful. Stage 7 - Apply top coat - Repeating the action already done earlier: treating the nail with a degreasing liquid.
It is performed in order to remove the sticky layer. Step 8 - Remove the sticky layer with a cotton pad - At the end of the procedure, it is advisable to soften the skin at the base of the nail using cuticle oil.
There is also a technique for applying gel polish under the cuticle; you can learn more about it in the article: How to apply gel polish under the cuticle.
All about gel polish: how to remove
For this purpose, specialized products are used. We wet a cotton pad with it and apply it to the plate. Then wrap your finger in foil to prevent premature evaporation of the liquid. The procedure takes no more than 25 minutes. The duration depends on how long the manicure was worn. When the layer becomes film-like and rises, it can be easily removed with an orange stick.
Pedicure with shellac
The process is in many ways similar to that already described above. Here is a brief algorithm of actions:
- remove the cuticle;
- polish the nails for more effective adhesion;
- degrease and remove debris;
- apply bondex for uniform coverage;
- place a thin base plate;
- dry in a lamp;
- we do color design;
- Dry each layer for 2 minutes;
- leave the “top” more tightly and wait for it to dry again in the device;
- We treat each nail with a degreaser.
Preparing the nail plate for painting
This is perhaps the most important preparatory process. It will depend on him how smoothly the gel polish will lie on the nails and how long it will stay on them.
- For better adhesion to the polish, treat the nail plate with a buff. It will slightly lift the scales onto the plates, which will allow the base of the varnish to better “catch” to the surface of the nail.
- Brush off the resulting horn dust with a brush.
- Apply a degreasing liquid to the smooth treated surface or simply wipe the nail and skin around it with alcohol, which will also disinfect them. You need to wipe with a lint-free cloth or cotton (smooth) pad. If the skin on your hands is oily, then it would be a good idea to apply nail prep (dehydrator) to your nails and dry it naturally. It is necessary to better dry the nail plate, which is very important for its subsequent tight adhesion to the gel polish.
- Apply a primer to the tips of the nails - this is the so-called “primer”, which will help adhere the most vulnerable place of the nail plate to the varnish for peeling.
The primer is:
- acidic, containing aggressive components: it is good for “oily” nails;
- non-acid - acting like double-sided tape.
After applying the primer, air dry your nails for a couple of minutes.
Applying gel polish to the nail
- First, coat your nails with a base coat. Without it, gel polish will not last long. Apply a thin layer of shellac first to the edges, then to the middle, and finally to the tips of the nails. Dry it for 30 seconds under an LED lamp and about 2 minutes under an ultraviolet lamp.
- If you don’t want to make your nails bright and paint them with a colored base, then apply the base in two layers, drying each layer under the lamp, and then cover your nails immediately with top coat.
- Proceed to cover your nails with a colored gel polish base and apply it in two layers, each time drying (about 1 minute) the layers before re-coating.
- Apply topcoat. If you use it with a sticky layer, then remove the previous sticky layer (on a colored base) with a lint-free sponge soaked in a product specifically designed for this purpose. It is sold complete with gel polishes. Dry under the LED lamp for 1 minute (no more).
Let's move on to nail design
- To decorate nails, they usually use various sliders, stickers, rhinestones, foil, glitter, or simply apply a design with a toothpick.
- Before using designer sliders, there is no need to cover your nails with a top base. Apply cut, soaked in water and slightly dried sliders onto a damp base coat (remembering to separate the film), and only then dry your nails under a lamp. But then cover with topcoat and dry again.
- The stickers are removed from the main backing and applied to nails painted with a base or colored base, from which the sticky layer has previously been removed. Apply top coat and dry under lamp.
- When using foil, do not cover your nails with top coat. After the base coat has dried, press the matte side of the foil against the sticky layer, and then quickly tear off the foil. If stickiness is not enough, then use special glue (sold complete with foil). Dry your nails under the lamp.
As you can see, if you use step-by-step instructions, then painting nails with gel polish is not such a complicated process. And constant practice will make a real manicurist out of any woman or girl.
If you want to know all the secrets and details of applying gel polish at home, watch the video.
Is it difficult to do a manicure yourself?
Most women spend a lot of money going to a beauty salon. Some of them are afraid of damaging the plate, others go for high-quality processing. However, having found out what gel polish means, it becomes clear that decorating your fingers at home is quite simple. It is enough to familiarize yourself with the application technique and purchase the necessary accessories.
Advantages
Among the advantages of such a coating, one can note its durability compared to conventional varnishes, ease of application (if you have special devices, a manicure can be done at home), durable texture, which helps strengthen the nail plate. The gel polish coating remains shiny; when applied correctly, it does not form cracks or chips, so there is no need for additional correction. Nails look natural after applying gel polish. In addition, the use of gel polish is not harmful to health, is safe for pregnant and lactating women, it does not penetrate the pores of the nail and does not affect the condition of the nail plate.
The disadvantages include the complex procedure for removing the coating, as well as the relative high cost of such a manicure. But still, there are much more advantages, which is why many women choose gel polish coating.
Choosing a UV lamp
The 36 W option is best. It dries the product quickly and is unlikely to create the effect of cloudy spots on the nails. The brand in our case does not matter. You should not buy an expensive model, since you will have to change it after 3 months or six months. Otherwise, the durability will no longer be as strong.
It is also not recommended to settle on a device with high power ratings. Such versions often burn out and can cause harm to the body. They not only dry out the skin of the hands and nails, but also have a detrimental effect on the eyes. On the shelves of specialized stores you can find LED varieties. It is considered high-power, but it is not capable of drying all types of varnishes.
Life time
Often the indicator varies from 2 to 3 years. But you still need to check the date. If it is not found on the packaging, then it is better to choose another product. Information includes duration of use from date of manufacture. This is the period during which the components in the product do not change their characteristics.
But they also allocate a second time. It depends entirely on the storage method. The fact is that when the bottle is opened, the heavy ingredients push the solvent to the top, which is why it begins to evaporate.
The varnish thickens and eventually becomes unusable. Therefore, it must be left in a dark place, protected from direct sunlight.
The main nail trend of the year: awareness has reached manicure, so we are switching to regular varnishes
Content
Trends change at the speed of light, but it seemed that universal love for gel polishes would last forever. It dries quickly, lasts a long time, looks perfect - isn’t this the best solution when you’re totally short of time? But top salons have already noticed: clients are increasingly returning to regular coverage or abandoning it altogether.
“So far, this trend is noticeable mainly among businesswomen,” the master told the editor-in-chief of BeautyHack during a manicure at the Diviani salon. – I think there are two determining reasons: on business trips it is not always possible to make corrections. And where can I find time for this in a busy work schedule? But at the same time, removing the long-term coating yourself is not easy. This takes time and at least a minimal manicure kit. It’s easier with varnish: as soon as the manicure stops looking neat, you just wash it off.
In general, the trend is quite natural: experts are increasingly talking about the toxicity of long-lasting coatings, and technologists are coming up with such formulas for varnishes that you can be sure that your manicure will be fine for a week. Plus, let's be honest, almost all of us injure our nails trying to remove the coating at home on our own.
Eleonora Movsisyan
Co-owner of the Nail Sunny art salon chain
— According to my observations, polishes are chosen by three categories of clients: those who do manicures once a week. These are girls for whom it is important that their manicure is always fresh, and there is no point in doing gel polish for them. The second category is those for whom gel polish is contraindicated due to the condition of the nail plate or allergies. Clients aged 50+ - this is more a tribute to habit. It happens that a client is going on a long vacation and realizes that there is no place to make a correction. In this case, they also come to cover with regular varnish.
In most manicure salons we were assured that clients, although they say they are tired of long-lasting coatings, are still not ready to return to long drying after application and frequent correction of manicure.
“I can’t say whether varnishes are gaining popularity, but we are definitely starting to get tired of gel polish,” says Albina Karaeva, nail service master at the SLTB beauty and hair extension studio . – Today, more and more clients choose only a medical coating or abandon it altogether, limiting themselves to a manicure. Life in a metropolis leaves its mark: we all get tired of the hustle and bustle, we want peace, including on our nails.
“Yes, indeed, many girls have recently been choosing varnishes in translucent tones or even completely transparent, as they prefer more natural nails of natural beauty,” Irina Burdakova from Diviani . – But still, our ladies often use gel coatings, as it is very convenient. Perhaps only in winter pedicures is varnish really preferable to gels. Gel polish adds volume to the nail, and the pressure on the nail in shoes increases.
However, perhaps the point is not at all in demand, but in the fact that many salons themselves are not ready to return to varnishes again.
No one will deny that gel coatings are a much more cost-effective story. Especially for small nail services that have built just this business.
– Beauty salons come in different statuses and sizes. The larger the salon, the larger its audience and the greater the range of services it usually offers. And vice versa. Many small companies refuse unpopular services. This definitely includes covering nails with regular varnish,” explains Anastasia Kim, a manicurist at the MA&MI beauty studio chain. – There are several reasons: firstly, the shelf life of varnish is much shorter than that of gel polish. Often it dries faster than the master will use up even half of it. Secondly, out of 10 clients, only one will want to cover their nails with varnish. Therefore, today it is not profitable for small salons to offer regular varnish coating among their services.
At the same time, varnish manufacturers look into the future as positively as possible; they do not believe that their coatings are losing in popularity.
“With the advent of a large number of gel polish brands and the availability of this service, beauty salons and guests have massively switched to durable coating, but at the moment, varnish coating has become equal in frequency to durable coating,” insists Kristina Muslimova, team leader of the nails direction at @authentica_club and @peng_msk. – Recently, clients have become more sensitive to the health and condition of their nails; long-lasting coating is not suitable for everyone. In addition, modern varnishes also hold up well.
These include, for example, glitter coatings from Smith & Cult (last from 5-7 days), new hybrid varnishes by Christina Fitzgerald (lasting, chip-free coating for up to 10 days). Home care with regular varnishes is, of course, much easier, but choose varnishes with a light texture that are easy to remove and easy to apply. Such varnishes are also available in the Smith & Cult line.
Share with us, beauty hackers, which camp are you from? Are you still making a durable coating or have you switched to regular varnish?
Which is better
When choosing a product, preference is given to one that does not contain formaldehyde and dibutyl phthalate.
It is important to choose an option that is easy to apply. It should have a comfortable brush and look natural. Products with a dense consistency are considered good, as they are evenly applied to the nail plate.
Brands
We also pay attention to manufacturers. It is better to purchase products that have positive reviews from customers. Among these, several companies stand out.
Just GelPolish
A huge palette of colors, creamy texture and excellent durability are the advantages of this product. Just two thin layers will be enough to cover. And your nails will retain their attractiveness for 2 weeks.
Gloss
The products have a dense and non-liquid consistency, as well as a self-leveling effect. Tones are divided into gloss and matte categories. After removing the varnish, no yellow tint remains on the plate.
Premiere
The products belong to the budget price group, which does not affect their quality at all. The product is easily placed on the nails, does not burn during drying in the lamp and has excellent durability. The range includes colors with iridescence and “cat’s eye”.
Koto
The palette is rich in more than 500 shades and cannot leave any girl indifferent. The main advantage of this option is strengthening the surface of the nail and protecting it from fragility.
Venalisa
The difference between this version and the others is the viscous texture. The product does not spread beyond the plate and covers it tightly after the first application. The tones are pleasing to the eye and may contain fine shimmer.
Disadvantages of gel polishes
Regardless of the cost, all products have disadvantages. Among them:
- Difficulty with removal. The fixative has to be dissolved for quite a long time - up to 25 minutes. But to speed up the procedure, you can remove the top with a soft nail file.
- High prices if you get a manicure from a good specialist in a salon. But to cover it at home, you will also have to incur some costs for purchasing materials and equipment.
- Damage caused over a long period of time. After 4-5 times, you need to take a break and give your nails a rest.
Contraindications
These include:
- damage to the plate, fresh wounds;
- allergic reactions or personal intolerance to ingredients in the product;
- It is not recommended to use shellac while taking hormonal medications;
- cuticle disorder.
So, we learned what gel polish looks like, what is needed for the procedure and how to choose the right tools.
Using this product is the most reasonable solution for decorating any lady's fingers. To make your manicure pleasing to the eye for as long as possible, you should adhere to the coating technology and wear gloves during prolonged contact with water or household chemicals.
Is it possible to remove gel nail polish at home?
Nails coated with gel polish do not require any specific care or maintenance rules. However, getting rid of an “overgrown” manicure is more difficult than getting rid of regular polish. You need to purchase gel polish remover (Shellac) from a specialized cosmetic store.
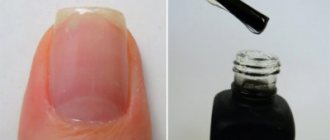
Removing gel polish from nails at home
So, they need to moisten cut cotton pads (Fig. 2), apply them to the nail plate and wrap each nail with foil so that the product does not evaporate (Fig. 3). After waiting about 20 minutes, remove the foil and cotton pads, the gel will come off with them (Fig. 4), its remnants can be removed using an orange stick and filing with a sanding file (Fig. 5).
You can read more about removing gel polish, including using a device, in the article: Methods for removing gel polish at home
Using gel polish for manicure is the most reasonable solution. In order for it to please you for a long time, you need to use rubber gloves during prolonged contact with water and household chemicals.