» Beauty » Nails » Nail design » Creating a design with seashells on nails
0
248
Article rating
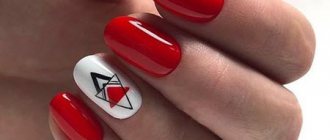
The “Shell” nail design has many variations; its execution depends solely on imagination and creative skills. If you don’t set yourself too difficult tasks, you will be able to create a neat and beautiful relief on your own. This manicure is appropriate in summer. It will go perfectly with a bright dress and will remind you of the sea coast.
Nail preparation
This manicure is quite difficult to perform.
It is unlikely that you will want to redo it often, so it is very important to properly prepare your nails:
- remove the remnants of old varnish using special products. It is preferable to make a choice in favor of those that contain natural oils;
- give your nails the desired shape with a nail file;
- be sure to soften the cuticle with a salt bath and then remove it with nail scissors;
- Apply the moisturizer with massaging movements, allow it to be well absorbed;
- immediately before applying the varnish, remove any remaining cream with any degreaser;
- Apply strengthening gel to the nail plates - it prevents the nail from splitting and hides all imperfections.
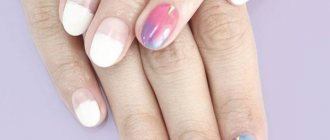
Marine manicure: choice of shades
Marine manicure is a very fashionable nail design that perfectly conveys the sunny mood of summer, sea and relaxation. Marine manicure is considered very popular because it makes it possible to express the theme of the water element with a variety of colors and design options. Thus, marine manicure “gets along” well with classic French manicure and neon nail art. One of the main advantages of marine manicure is that it has virtually no restrictions in the color palette.
To create it, you can safely use not only traditional blue, indigo and white shades, but also gold, ruby, orange and even black. They, in turn, will depict the depths of the ocean, a sailor’s anchor, the coast, shells, fish, sand or waves.
When creating a marine manicure, experts recommend not to be afraid and not to follow templates, since this summer design option creates all the conditions for bringing interesting ideas to life. In this case, the use of sparkles, stickers, rhinestones and other bright decorations is allowed.
This is especially true for creating a manicure on neat short nails, the trend for which has not subsided for several seasons now. Despite this, such a manicure in any case should contain those colors and elements that will symbolize the sea element. The process of preparing nails before applying the design is traditional.
The general technique is:
Step 1
First, you need to remove any old nail polish or gel polish and apply an antibacterial agent to your nails to remove germs.
Step 2
Remove the cuticle, thus doing a cosmetic manicure.
Step 3
Give your nails the desired shape. For a marine theme, oval or round nail shapes are recommended, but if you prefer sharp or elongated almond-shaped nails, there is, of course, no prohibition on this shape.
Step 4
Next, you should degrease the nail plate. This is necessary so that the varnish “lays down” better.
Step 5
If the manicure will be applied with gel polish, then the top layer of the nails must be cleaned off with a buff. If ordinary varnish is used as the material, then this is not necessary.
Step 6
Apply primer and base coat to your nails.
After this, the person’s nails are prepared for the application of colored varnish. You need to choose a specific shade based on the desired design. For marine manicure, patterns in the form of stripes symbolizing waves, cute dots on a blue background or a gradient are most often used. All kinds of combined patterns and techniques can also be used. As mentioned above, this design does not have strict restrictions. The main thing is that the theme of the sea is shown correctly.
Marine manicure for short nails: design ideas
Marine manicure is most often used for short nails. This makes it easier to apply, and it looks more attractive and natural. You can perform a marine manicure on short nails yourself at home. There is room for imagination here, so for people prone to creative thinking, the process of creating such a design will bring great pleasure.
The following can be suggested as ideas for this manicure theme:
- You can paint your nails with a brush, depicting all kinds of sea inhabitants (fish, shells, funny octopuses, etc.). This marine animal theme can look cute, and at the same time quite bright, since red, pink or yellow tones will be used to create it on a blue background.
- A classic marine manicure on short nails would be an image of horizontal or vertical blue stripes on a white background. Today, using stencils you can create very beautiful “waves”. You can also complement this design with images of ships or simple polka dots.
- Rhinestone lovers can be advised to depict “treasures” on the nail plates by gluing large sparkles and using gold polish on a blue and white background. The gradient technique would also look appropriate.
Moreover, marine manicure for short nails has the following design options:
- Traditional French, which is complemented by marine patterns, sparkles and waves. Also, instead of white nail tips, you can paint them bright blue.
- A monochromatic colorful manicure in coral and blue tones, painted on top with images of a marine theme (anchors, a ship’s wheel, etc.).
- A striped nautical manicure for short nails with a sailor print looks great in the summer.
Using acrylic powder
To create this delicate manicure you need to prepare:
- basis;
- white shellac or regular nail polish;
- thin brush;
- top coating;
- UV lamp;
- acrylic powder.
Instructions for implementation:
- prepare your nails;
- apply varnish to the nail plates and dry them in a lamp;
- as soon as the first layer is dry, apply the second and dry it;
- secure the layers with a top coat and also dry the nails in a UV lamp, remove the sticky layer;
- use shellac to draw straight or curved vertical lines on the nail plates;
- fix the gel polish in the lamp;
- The last step remains - to give relief, apply acrylic powder to the nails, remove the excess with a brush. This way you can give the shell a velvety look.
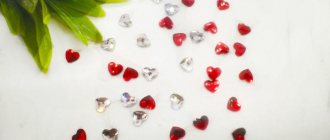
Manicure with natural shells
A great idea for lovers of the sea and vacation. The marigolds are decorated with small elements. Shells can be plastic, metal, natural. Elements can be bought in a store or collected on the coast.
Experts recommend decorating only 1 or 2 nails. Otherwise, the manicure will be ridiculous. To create a fashionable design, you can pay attention to the blue, aquamarine shade. These colors are the most fashionable and stylish.
Without acrylic powder
To create a pearl shell relief without using acrylic powder, prepare:
- basis;
- gel polish or regular nail polish (white or pink);
- thin brush;
- top coating;
- UV lamp.
Execution steps:
- prepare the nail plates;
- Apply polish to your nails and dry them in a lamp;
- after the first layer has dried, apply the second and dry it;
- Using transparent white or pink gel polish using a brush, draw a shell relief on the nail plates, leaving a small distance between the stripes;
- dry your nails in a UV lamp;
- Complete the manicure with a top coat.
To add some zest to your manicure, you can create a marine-themed design on your ring finger nail.
3D plasticine
This material is used relatively rarely, but it also has its place. It is best to use a brush to apply this decor, but other options are also possible. Before using plasticine, dip your brush in degreaser to prevent the bristles of the brush from sticking to the material. Next, we apply plasticine all over the nail, and in the depressions we press down the plasticine with a brush.
Editor's choice: Nail design slider: current types and methods of using them
As already written above, it is better not to use classic rhinestones, as they will greatly overload your manicure, and your nails will look very cheap. It’s better to use glitter instead or do without decor at all.
Stylists say that the pearl shell nail design will become a hit in the spring-summer season. It’s not surprising, because such a manicure will suit any outfit and any occasion. If you are thinking about nail design, then take a closer look at this option. Perhaps this is exactly what you need!
Using a stamp
For girls who prefer not to spend a lot of time creating a spectacular manicure, stamping can be an excellent option. Stencils with shells and a miniature stamp will help you create a beautiful design without unnecessary problems.
You will need:
- clear nail polish;
- stencil;
- stamp.
This manicure is very simple to perform:
- prepare your nails;
- Apply varnish to the stencil and remove any excess with a scraper;
- using a stamp, transfer the patterns to the nail plates;
- secure the resulting images with colorless varnish.
Various options and useful tips
- Choose calm pastel colors for your design. A shell-shaped manicure will look as close as possible to the natural color.
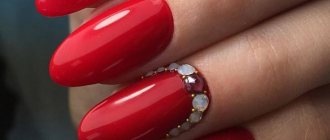
- To make the design more festive, you can decorate it with rhinestones by placing them near the base of the plate. It is not advisable to place additional decorations on the shell ribs. Firstly, they will hide all the beauty of the relief. Secondly, gluing them on a corrugated surface is very problematic, and they will not last long.
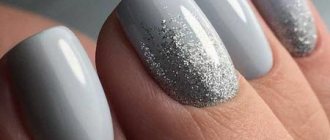
- You can cover the ribs of the shell with glitter. You just need to choose the smallest of all existing ones. And do not cover them too thickly. The glitter should be barely noticeable.
- Most craftswomen prefer to decorate one or three fingers on their hand with a three-dimensional design. But it is quite acceptable to do this design on all nails, because it is not too flashy.
- If you don’t have velvet powder on hand, you can do without it. After drying the lines, the standard procedure for applying the topcoat follows. True, in this case the design will be less embossed, but more shiny and smooth.
- As already mentioned, the “Shell” manicure is suitable for hot summer days. Combine it with light sundresses, white trousers and a blouse. It doesn't have to be a seaside holiday. The delicate, not flashy design can be used not only on vacation days, but also for walks in the parks and meetings with girlfriends. It is quite possible to show up with such nails at work.
- You can draw lines straight, slightly expanding the “fan” towards the free edge. Another option involves curling the strips slightly in an arc near the tip for an even more dramatic manicure.
Design with stickers
Manicure with stickers is also considered very simple, because everyone knows how to apply them since kindergarten. Seashell decals look great on nails of any length. As for the shape, round and square nails look good with this pattern.
Many stores offer a wide selection of nautical themed stickers.
To create a manicure you will need:
- the basis;
- light-colored varnish;
- seashell stickers;
- nail polish remover;
- cotton buds.
Creating a manicure consists of several stages:
- pre-prepare your nails;
- apply a protective layer on them;
- cover them with one layer of varnish and wait until it dries completely;
- apply a second layer and attach stickers;
- wait until the varnish is completely dry;
- remove excess from the skin using nail polish remover and a cotton swab.
Shell nail design: specific features and photos
Summer patterns and motifs for painting nails provide the author with unlimited freedom of action, opening up scope for imagination. Various combinations of bright colors and shades will remind you of vacation, the sea, the beach, which are so pleasing in the summer and warm the soul in the cold season.
“Shell” nail design is a great way to plunge into the atmosphere of summer holidays and also emphasize your style. It is ideal for a bright and expressive look in golden and blue tones, will add the necessary accent to a plain delicate dress, and will emphasize the theme of a red, white and blue look with a marine mood.
To decorate your nails with a spectacular manicure, you can go to a good nail salon. But if you have at least basic artistic skills, imagination and good taste, try doing a manicure with shells yourself. And our simple tips will be a good help.
Colors and shades
Before you begin, think through the design. There are two ways: stick to natural colors or deliberately bright colors without pretending to be natural. If you choose the first method, you will need varnishes of several colors: beige, soft blue, white, golden. Don't try to use a deep blue - sea water is not that color. And in combination with canary yellow, the “Shell” nail design will make your manicure look more like a cartoon about Minions, and not a gentle beach.
The second method does not limit the flight of imagination in any way. Decorate your nails with bright pink, light green, purple shells, add sparkling starfish or mischievous fish to them. What could be better for a beach party?
Invoices
There are several ways to make the Shell nail design even more impressive. The relief and combination of different textures will create a worthy background for the ornament, and will also add additional accents.
You can create a texture reminiscent of sand using a wide variety of techniques. For example, use manicure caviar of the finest fraction. Beige, peach, light yellow will do.
There are many ways to create a water effect, for example, mirror manicure, gradient, crackle. Don't forget about the spectacular combination of glossy and matte surfaces - this helps to add depth and volume. Feel free to use spectacular additions, for example, half beads in the form of pearls.
Necessary materials
Special stickers, decals, stampings, fimo nail bars - all this can make the task a lot easier. For example, the “Shell” nail design, the photo of which is posted below, was made using stamps. They help achieve excellent results due to neat, fine lines.
If your plans include exclusively painting, you will only need a thin brush and dots for the job. In some cases, a thin needle may be useful. It is very convenient to use a sponge or a small piece of cotton wool moistened with nail polish remover. While painting, you can wipe your brush and other tools on it so that the remaining varnish does not dry on them. This will be relevant if you are working with gel - then your nails will turn out neat.
Work order
A few simple tips will help you whether you use regular polishes or practice gel nail designs. “Shell” is a drawing that is performed using one technique. The actual painting technology is not as complicated as it might seem:
- First of all, we perform a standard hygienic manicure to make your hands look neat.
- We treat the surfaces of the nail plates with a buff with soft polishing movements.
- We apply a transparent varnish that protects the nail from pigmentation.
- We cover the plate with the selected background varnish. For example, light blue or beige. If necessary, repeat the procedure two or three times.
- Using a dots (or even a toothpick) we begin to draw the silhouette of a shell. All movements performed must be pressing.
- When the varnish dries, apply a transparent layer - it will fix the pattern and level the surface.
- If you are working with gel, dry each nail under a special lamp.
Practical advice
The beautiful beach landscape and gentle sea breeze inspire the creation of charming miniature masterpieces. To make your “Shell” nail design neat, follow the advice of experts:
- When choosing a background, remember that shells look great on different shades of blue, cyan, and turquoise. This combination creates the illusion of an underwater kingdom.
- Don’t skimp on a good instrument, don’t forget to take care of it. A thin brush and a good dots will make the work much easier - painting shells with these tools is not at all difficult.
- If the “Shell” nail design you have in mind differs from the resulting effect, do not be lazy to redo the work. Correct mistakes immediately until you are completely satisfied with the achieved result.
- Learn to practice, practice on a rough draft. If you really like nautical-style manicure and want to improve your skills in this direction, create an album or folder in which you will save the images you like. Remember: the works of other masters should be used only for inspiration, but not for imitation.
- If you think that shells look lonely on your nails, dilute them with starfish, octopuses, and pearls.
- At the same time, remember to have a sense of proportion. Perhaps you only need a few decorative elements for the entire manicure. Play up the idea of a “special nail” by decorating only your ring fingers with shells. A large, detailed shell drawn on two or three adjacent fingers looks very impressive. Nail designs with gel polish can be complemented with a pair of overlays that imitate precious metal. But if you are doing not an everyday, but a festive manicure, which, according to the idea, should be spectacular and expressive, it is quite acceptable to highlight “special nails” and decorate the rest in the same style, but more modestly.
Jewelry in style
Selected rings and bracelets will highlight the “Shell” nail design. Be sure to play with this idea by decorating your fingers with jewelry with sea creatures, boats, anchors or sea knots. This look is perfect not only for vacation, but also for a cozy winter evening, when you really want sun and warmth.
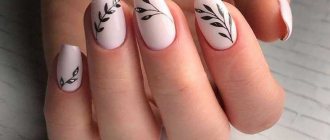
Other interesting ideas
A manicure with shells can be done using different techniques, such as rubbing. In addition, the design with the effect of a broken shell, as well as the use of plastic elements, looks unusual.
Broken shell effect
This design has a very unusual look. To create such a manicure, you do not need to use artistic skills; you just need to buy your favorite small decorations from a specialized store.
These details are sprinkled on the base coat of the nails, dried in a UV lamp, and at the very end they are secured with a top coat. This manicure has a significant drawback - sharp fragments of shells create scratches on any surface and injure the skin. Therefore, a manicure is definitely not suitable for daily use, but it will be just right for relaxing in a nightclub on the seashore.
Plastic blanks
If you need to urgently decorate your nails, plastic shells will come to the rescue. Creating a manicure with such blanks will not require painstaking work and is almost as stylish as other designs.
To perform a manicure, you will need to attach a pre-purchased plastic blank to your nail using special glue. This design is in harmony with sea and sandy shades of varnish and small stars.
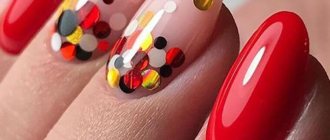
Shell rock
Shell rock is a material for nail design, which consists of plates that imitate the surface of shells and are painted in different shades.
Content
- 1 Features of shell rock
- 2 How to work with shell rock?
- 3 Shell rock in nail design: techniques
Features of shell rock
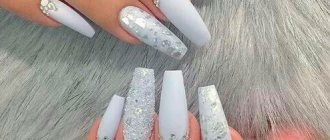
A manicure with whole small shells on one or two nails looks interesting. This decor will be an ideal addition to a festive look, but in everyday life such a manicure is impractical due to many inconveniences. It is more appropriate for this case to use shell rock, which is a natural or artificial mother of pearl of irregular shape.
Small particles of natural shells are painted in different colors and shades. They have gained great popularity due to their holographic effect, with the particles shining like mother-of-pearl. Shell rock is produced in plastic jars in two forms: large solid plates (easily broken, but it is difficult to predict the size of the pieces) and ready-made, crushed into approximately equal pieces of the required size.
How to work with shell rock?
When modeling extensions, shell rock is easily sealed in a small layer of acrylic gel. If gel polish is used, then it is necessary to apply the base, then apply the color of the base and only after that lay the shell rock on the undried fixative. The product should not be applied very tightly so that the decorative elements do not float, since this design material is considered quite voluminous.
You need to lay out shell rock of the required size according to the principle “the smaller the shell rock particles, the more convenient it is to lay them out and the less they will bulge.” Then apply a thicker layer of fixative to the shell rock and dry it in a UV lamp . In this way, the surface of the nail will be leveled, and the shell rock itself will be sealed, which is important, because due to their bulk, the shells can bulge.
Shell rock in nail design: techniques
Shell rock as a decorative material, thanks to its unique pearlescent color and wide palette of different colors, is an excellent addition to the main manicure, which can be decorated in any way you like. Shell rock crumbs are ideal for creating an aquarium design , and due to their volume, they are also suitable for modeling “jewelry stones” on nails.
If shell rock needs to be laid out over the entire surface of the nail, then it is better to try to place large particles in the middle on the densest place on the nail, and smaller ones on the sides and end in order not to create excess thickness and maintain the neatness of the manicure. Shell stone combines beautifully with monogram patterns. On the surface of the fixative, with the help of which the shell rock is sealed, patterns can be applied using any means.
Stamped shells
Shell nail design is not difficult to do, the video will help you get a quality job. Drawings on the nail surface can be created using various techniques. Stamping has burst into fashion and is not losing its leading position. Stencils allow you to create different designs; even a beginner can handle the job.
However, before you start doing a manicure, you should familiarize yourself with the advice of experts. They will help you learn the basic secrets and make clear patterns.
Manicure with 3D effect
You can create a piece of incredible beauty using broken shells. Small particles can be presented in different colors. There are elements with a holographic effect, pearlescent, shiny. You can cover the nail surface completely, or complement a specific pattern. Multi-colored elements look interesting in the sun, shimmer and shine. As a result, you can get a 3D effect.
It is important to understand that this design is impractical. It is best to choose it for a special event. In everyday life it can cause discomfort.
Wedding manicure for short nails
An important role when choosing the design and type of coating is played by the shape and length of the bride’s nails. So, on short nails, a French and moon manicure, laconic floral designs, ombre and stains look good.
Wedding manicure for long nails
Almost anything is suitable for long nails: rhinestones and acrylic modeling, lace and monograms, French manicure and rubbing, gradient and drawings.