Every representative of the fair sex knows that a good manicure is an essential attribute of a finished look, reflecting individuality and a special style. French manicure is a classic option that will look great both at a business meeting and at a noisy party. Therefore, he has not yet lost his popularity.
However, the progress of nail design does not stand still, and skilled masters have come up with a new variety of classic manicure - reverse French.
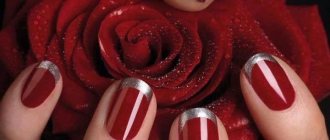
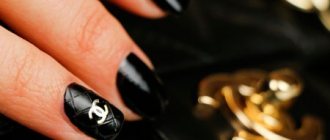
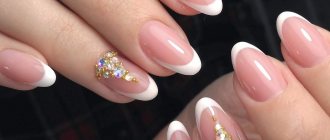
Drawing of a classic reverse French
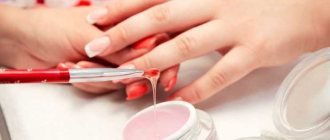
Performing a classic anti-french is very simple, even for non-professionals. To do this, you will need standard equipment for a French manicure performed with gel:
- a set of tools, including a UV lamp;
- nail base;
- degreasing agent;
- gel polish in two shades.
Performing a manicure occurs in several stages:
- Preparation. At this stage, it is necessary to completely prepare the nails - give them the necessary shape, remove the cuticle, etc.
- Degreasing. Produced in a standard way using a special tool.
- Application of gel base. The entire length of the nail is covered to protect it from possible negative influences.
- Application of the main color. It also covers the entire length of the nail. More experienced masters try to make a small indentation from the base of the nail, if the design allows it. Usually, for a classic manicure, pastel colors are chosen - beige, ivory, etc. It is very important to know that a simple transparent varnish will create an unfinished image, so for this type of jacket it is recommended to choose a shade.
Final stage
How to make a reverse French look with gel polish in the video. After drying the shellac, the manicure should be coated with top or finishing gel. Thanks to this coating, the gel polish will last longer on the surface and will not chip or crack. The very last step in the step-by-step instructions is drying the top coat and removing the sticky film using a degreaser. After going through all the steps mentioned in the video tutorial, you should end up with a beautiful reverse French stitch.
Summing up
If you follow the instructions in the master class, then doing a reverse or lunar French manicure will not be difficult. To get a beautiful, durable, flawless manicure, it is important to choose high-quality gel polishes, as well as base and top coats. The durability of the coating depends on the quality of these compounds. Following the recommendations of professionals, be sure to dry each previous layer of shellac before applying the next one. By following the recommendations, any girl can easily make a beautiful manicure with her own hands.
Drawing a smile
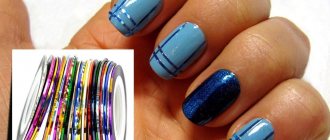
Done in a way convenient for you. There are two possible options - painting with a thin brush or using special strips for a French manicure.
The second option is a simpler method. These strips have a self-adhesive layer, which allows them not to move off the surface of the nail while applying varnish. They should be removed immediately after application and before drying.
The first option is suitable for you if you already have experience painting your nails with a brush. It is the most difficult, but it opens up new opportunities - extending the “smile” along the edges along the nail. When using it, it is best to choose a material for work that does not have quick-drying properties, so that it remains possible to correct deficiencies.
Is it possible to make anti-french at home?
Due to the growing popularity of anti-French nail art, it is not always possible to quickly sign up for a procedure with a professional, because... Many people think that making such an interesting design on their nails, especially on their own, is not an easy task, so they prefer to entrust their nails to masters. But in reality, everything is much simpler; if you stock up on patience, the necessary materials, detailed instructions and inspiration, then a good result is guaranteed.
What is anti-french?
Anti-French manicure comes in two types: classic and multi-layer. Before you decide to get anti-french nails done, decide which type is most suitable for you, because... Application techniques are different and should not be mixed.
- Classic anti-french is a single-layer or two-layer varnish coating technique. As a result, you are left with either a completely unpainted hole on your nails or one painted in one layer.
- Multilayer anti-french is different in that several layers are applied to the nail at once, but each time the coverage area changes, so you get one color at the base of the nail and another in the center of the nail plate.
We make anti-french ourselves
To make anti-French nails at home, you will need detailed instructions that will describe each step step by step. Here she is:
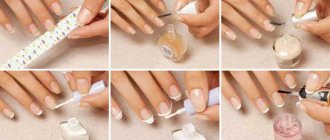
Instruction No. 1 - classic reverse French
This method of applying varnish using the anti-French manicure technique is the simplest and is suitable for those who are just starting to master this type of nail design.
- Remove old nail polish, degrease the surface, and clean it from dirt.
- Carefully glue a sticker strip to the base of the nail, near the cuticle.
- Apply the varnish you prefer to the rest of the plate.
- After the first layer of varnish has completely dried, remove the sticker strip from the base.
- Cover the entire nail with protective enamel.
In this case, you have a reverse jacket with an unpainted smile line.
Instruction No. 2 - multi-layer reverse French manicure
This version of the reverse French is more complex, but if you do everything carefully and correctly, the result will be excellent.
- Clean the nails and degrease their surface.
- Apply the first layer of varnish to the entire plate.
- Place a sticker strip on the base of the nail.
- We cover the rest of the nail with varnish of a different color.
- Wait for it to dry completely and carefully remove the sticker strip.
Instruction No. 3 - anti-french without sticker strip
This technique is suitable for those who have already become proficient and can do without special sticker strips.
- As in the first two options, you first need to completely clean the nails of dirt and grease.
- Then apply varnish to the entire surface of the nail.
- Wait for the first layer to dry completely and choose a different color polish to highlight the center of the nail.
- Dip the brush into the new varnish and wait until the excess varnish drips off. When there is only one drop left on the tip of the brush, you need to carefully place the brush in the middle of the nail, about 1-2 millimeters above the base, and, without lifting the brush from the surface, stretch the drop with the brush to the tip.
- If you don’t quite understand how to do this, then watch the video instructions that show each step.
Instruction No. 4 - reverse French using foil
This lunar anti-french is made not only with varnish, but also with special foil.
- Clean the surface of the nail from dirt.
- Cover the nail with a base protectant.
- Apply special glue to the base of the plate.
- Glue gold or silver foil onto this glue.
- Wait until it dries and tear off the foil with a sharp movement at the edge of the nail. You will have foil imprinted on this place and you will get a golden or silver nail.
- Cover the nail with a varnish of a different color, retreating 3-4 millimeters from the cuticle, creating a smile line at the cuticle.
- Wait until dry.
In all cases, the final stage of the reverse French manicure should be to cover the nails with a protective layer of varnish so that the manicure lasts for a week. If you want to keep this design even longer, then it is better to do reverse French with gel polish, but for this you will need other basic products and additional equipment.
Peculiarities
The only condition that must be strictly observed is to highlight the line of the hole in a contrasting color, which will differ from the main one. The shape of the strip can be convex or concave. However, masters prefer to use the names moon manicure and reverse French, when the contrasting line follows the natural curve. It is this strip that visually lengthens the nails. This is especially important for those who have trouble growing their hair.
The length of the line itself can also vary. This may be a wide strip at the base of the nail. Or, conversely, a narrow line that stretches along the contour of the nail to the free tip.
Some masters offer a combined option. That is, a long contrasting strip that goes around the contour of the nail, and also emphasizes the free tip.
Reverse French manicure (like the classic one) is presented in various variations. That is why every lady will find something she likes.
How to apply French gel polish on short nails
Short nails are no less popular than long manicures, and it’s quite possible to create a beautiful, neat French manicure on them.
If you draw the smile line thin and neat, the jacket will look smooth and stylish.
The process of forming a “smile” on short nails does not differ from the standard one. There are only nuances. So, the line should not be wide.
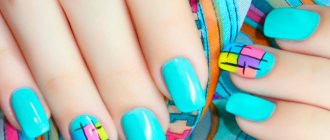
Glitter and other decorative elements will help diversify the French manicure with gel on short nails. This option is suitable for a holiday or a party in a nightclub.
The main thing is that all the designs and patterns are not too large, otherwise they will merge on short nails.
The gradient or ombre effect also looks original, when one shade smoothly transitions into another - while one color imitates the line of a smile.
Graphic designs are still in fashion, which can be used to complement a French jacket, focusing on one finger, for example, the ring finger.
VIDEO DESCRIPTION
Useful tips for those who will make French with their own hands:
- use high-quality consumables from well-known manufacturers,
- It is important to devote exactly as much time to drying the varnish as indicated by the manufacturer on the tube of the product,
- We must not forget about treating the end of the nail, otherwise chips will quickly appear,
- It is important to apply all layers in a thin layer, if necessary, three layers can be applied,
- It’s more convenient to paint two nails at a time and dry them under a lamp.
Experts recommend the following as the most successful color solutions:
- bright blue and orange for parties,
- pastel colors – mint, vanilla for everyday wear,
- metallic shades - golden, silver,
- coral and malachite,
- golden and red,
- wine and milk.
Secrets of creating a French jacket
Creating a French manicure using shellac at home for beginning manicurists can be made easier thanks to several tricks:
- For short nails, a large edge of the nail is not suitable; it will only visually shorten it;
Experiment
You can easily experiment with the classic “smile line” by making it multi-colored, zigzag or covered with sparkles; Among the color combinations you can choose not only natural pink and white, but also white and lilac, distinguished by a diamond tint, white and glossy pink, white and pearlescent pink.
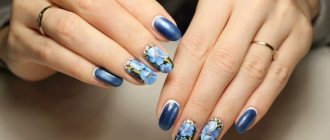
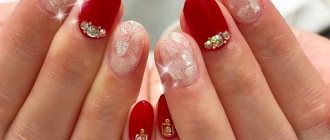
French manicure with a pattern
This trend occupies a special place because of its originality. Flowers on nails, such as roses, daisies or lilies, will be popular in 2018. It is better to apply cute flowers on a transparent background. A geometric jacket and a multi-color stripe that follows the line of a smile will remain fashionable. Young fashionistas can decorate their nails next year in a marine theme or with animal faces, for example, put Mickey Mouse on the edge of the nail. Ethnic designs and abstraction will also look stylish next year.