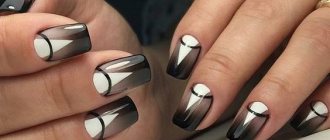
Unlike many complex nail art options, the original newspaper manicure is very easy to do. In addition, it harmoniously combines with both business and casual wear.
Such simple manicure ideas are also good because they are suitable for those with any shape and length of nails.
Paper strip claws
Bend a rectangular strip of paper with an aspect ratio of at least 1:3 - 1:4 into an even pentagon. Fold it in half and mark a diagonal from the bottom corner to the top. Place the side that protrudes more towards it and fold the part in half again. Place the small edge into the large pocket to form a claw. Ready!
Photo: xeonix.ru
Preparation
Before gluing tips, you need to prepare your own nails:
- To ensure that false nails do not come off and stay firmly in place, remove the remaining old polish, then use the soft side of the buff to wipe off the glossy layer from the nails.
- Use an orange stick to push back the cuticles from your natural nail.
- Wipe your nails with an alcohol pad to degrease them.
- To protect the nail plate, it is correct to cover your nails with regular polish.
Dragon Claws
To make small but powerful claws for your fingertips, cut a piece of paper into eight pieces. For the entire claw you will need one such blank. It’s better to take thicker sheets, because otherwise they will be too thin and wrinkled.
To the middle of the small rectangle, fold both corners from opposite sides diagonally. Unfold the piece and bend it in the middle to form a kind of letter “M”. Fold the piece in half again and insert one corner into the other to form and secure the claw.
Photo: novaplastica.ru
Paper origami for children: 10 simple patterns
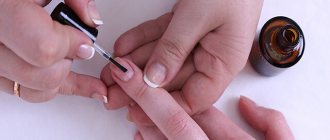
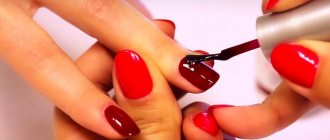
For a “newspaper” manicure you will need:
- Clear nail polish or base coat. We will need it to apply the surface layer (to fix the manicure), so even if you are doing a manicure without a base, a clear varnish is required.
- White nail polish (or another light color) to create a background.
- Alcohol or any liquid containing alcohol. This can be pure medical alcohol, a cosmetic product (facial lotion, alcohol-containing spray, etc.), or an alcoholic drink (vodka, etc.). The higher the alcohol content, the faster and more clearly the imprint will be applied to the nail. This time I used what was on hand - a bottle of dry gin with a strength of 47%.))
- Actually, the newspaper with which you will transfer text onto your nails. I found a newspaper in English because I like the way Latin text looks on my nails, and I chose an article printed in a smaller font. Choose in advance which sections of text from the newspaper you want to use in your manicure. You will need a little text - you can make a “text” manicure a dozen, or even more, times from one newspaper spread.
- Cotton pads. It is not necessary to have a whole pack; 1-2 pieces are enough.
Sharp claws on the entire finger
Turn the paper square towards you and mark a vertical diagonal. Fold both side parts towards it from the top top and fold the workpiece in half again with a fold to the left. Approximately in the middle, turn the lower part to the right and transfer the future claw to the other side.
Bend the tall triangle along the edge to the side, and use the remaining protruding corner to form a pocket to secure the claw. Carefully place them on the phalanges so that the protruding part covers your finger.
Photo: novaplastica.ru
How to glue false nails onto polish, what glue can be used
Artificial nails must be sold complete with special glue or have an adhesive base.
If glue is not included in the kit, it must be purchased separately. It is better to make purchases in specialized stores that sell high-quality and natural products.
Two types of glue are actively used:
- SR Beauty;
- BOHEMIA.
After choosing the glue, you can start gluing.
You need to act sequentially:
- Remove old polish from nail plates.
- Gloves should be worn during the procedure.
- Hangnails are removed and cuticles are pushed back using a wooden stick.
- The minimum length is made with a nail file. Use a soft nail file to go over the entire surface, giving the base a rough finish.
- Now apply a small layer of colorless varnish. This will enhance adhesion.
- Apply one drop of glue and glue the false nail on top of the natural one.
- Use a napkin to wipe off excess glue.
It is important not to glue the product close to the cuticle, but to make a 2 mm indentation. If after a while the nail begins to wobble, it is worth heating it with a hairdryer to restore the properties of the glue.
Let's watch a video on how to glue false nails:
A4 paper claws
Divide a regular sheet of A4 paper into a square and an elongated rectangle. It is not necessary to draw the stripes with a pencil - you can just mark them visually. Fold the corner of the square diagonally to this line and fold it again into a triangle. Fold the top and bottom corners to the same line to create a trapezoid on the right.
Fold the workpiece in half twice, unfold the last fold and place the lower part towards it with the tip. Repeat the same on the other side so that you get a cone-cup. Fold one or both protruding edges inward so that the paper claw holds its shape better and sits firmly on the finger.
Photo: ezidri-market.ru
New Year's paper crafts for children (50 photos)
To create what kind of look do you need to “get” nails?
Before we start figuring out how to make nails out of paper, let’s find out which images they will fit perfectly into.
- Predator (animal image) . Claws must be present here. They look great with a variety of animal prints. Claws with a bright red outfit will look no less impressive. Alternatively, they can be painted to match, red.
- The Snow Queen. Nails made in gold, silver, white, light blue or dark blue would be appropriate here. It all depends on the chosen outfit. They can also be decorated with themed stars, snowflakes and other winter decorations.
- Forest fairy elf. In addition to paper nail plates, you need to make sharp ears from scrap materials, since without them the creation of the image will not be complete. Preference should be given to silver, all shades of green and purple.
- The Witch or Baba Yaga. A black manicure made from paper will complement any outfit of an evil witch or sorceress. With such an “accessory” the created image will certainly be noticed and will not go unnoticed.
- Monster or vampire. For this option, you should make terrifying claws with elements of blood on them. For Halloween, paper scary claws are just the thing.
Wolverine's claws made of paper
You will need six sheets of A4 paper, each of which needs to be marked into six parts along the long side. Fold the edges at the top and bottom twice so that they meet at the center. Fold the corners on one side of the strip, and then again, but more.
Secure the sharp part and the base of the long claws with clear tape or glue. You can attach three of them to a short tube of paper that you squeeze in your hand. When playing with Wolverine's claws, be careful because they are quite long and sharp!
Photo: senao-spb.ru
Paper crafts for children: 8 simple and beautiful ideas
Variations of paper claws. Photo.
And your DIY paper nails for your superhero are ready.
They can be used for joint games or organizing children's pastime.
Paper claws are not too sharp and dense and are therefore safer.
Small claws on the phalanges of the fingers
Take a paper square, fold it diagonally and make a fold in the middle of the resulting triangle. Fold back the top corners and lay them back to make the claw easier to shape onto your finger. Finally, fold the bottom of the triangle to the fold line and roll the figure into a ring, inserting the protruding corners into one another.
Photo: miazar.ru
How to make false nails at home using tips
You can do this as follows:
- Trimming. Tips are produced very long, which allows you to make the length as you wish. It is better to trim using a special cutter or pliers; scissors can damage the plates.
- Now you need to give it shape. It can be created using files with different abrasiveness.
- The plate must be disinfected, and the native nail must be degreased with acetone.
- The tips are glued to the nail plate and, if necessary, processed with a small file. Particular attention should be paid to the border between the nail and the edge of the plate.
It is important to be careful in your movements to avoid injury. Without work experience, it is better to carry out this procedure in a specialized salon.
Let's watch an interesting video, a master class on nail extensions using tips at home:
Design history
For the first time, manicure with newspaper was used in France by a nail technician who wanted to bring something new to nail art. She really liked one printed publication, the circulation of which was not too large. This upset the girl. After which she came up with an idea: to get a manicure using the newspaper that she likes so much, so that everyone could appreciate the innovation in the nail industry and read the latest issue. After that, this type of design quickly burst into fashion, which is still popular today. And the Frenchwoman, by the way, not only increased the circulation of her favorite newspaper, but also became famous.
