Neat and beautiful nails are the adornment of any woman. They can be bright and short, elegant and long, but in any case, they attract attention. Unfortunately, many are faced with the fact that nails break easily and become more fragile over time, which brings many problems to their wearer.
Interesting: how to strengthen your nails at home.
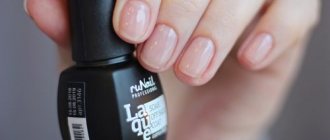
It is much easier to care for and maintain artificial nails, since a thin protective layer protects the natural nail from the harmful effects of various environmental factors. One of the best and surest ways to ensure the beauty of your nails is UV gel, which makes your nails smooth, even and shiny, without spoiling them at all. As part of the article, we will talk about UV nail gel and what it is.
What is camouflage gel
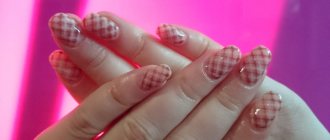
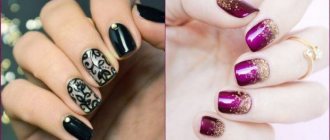
In the last few years, very bright nail art, on which all possible types of decorative decorations are stuck, has gone out of fashion. Neat nails of medium length, the appearance of which is close to natural, are becoming increasingly popular. To create just such a manicure, a camouflage gel is used.
Camouflage gel is an opaque material of varying consistency designed for modeling and extending artificial nails. The gel is laid out on the nail surface and polymerized in a lamp, which ensures high-quality adhesion of the natural plate to the polymer one.
Also, camouflage effectively hides possible imperfections in the nail plates and smoothes the surface.
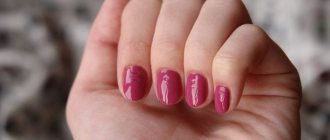
The color of the camouflage material is as close as possible to the natural color of healthy nails. Usually these are pastel shades of peach, beige, and pink.
UV gel for nails - how to use correctly
Neatly sharpened and varnished nails always attract the attention of others.
But women know how easily a manicure gets ruined due to the natural fragility of the plates and housework. UV gel or shellac will help preserve the beauty of artificial nails; gel polish is a cosmetic product that allows you to have smooth, shiny nails for 2 to 3 weeks.
Camouflage Features
The structure of the material in terms of density is very similar to the structure of a natural nail, so after the extension procedure, artificial nails are difficult to distinguish from real ones. The main advantage of camouflage material is that the polymer composition allows natural fabrics to breathe under layers of manicure. It does not cause irritating reactions and also prevents the appearance of fungal formations.
If camouflage is applied correctly and efficiently to the nails, then it grows harmoniously along with the natural plate without chips or cracks. That is why the gel is often used for weakened and damaged nails as a remedy.
The polymer fills the damaged or deformed area of the plate, creating a perfectly smooth surface and the most favorable conditions for nail restoration. You can also correct the architecture of your nails with gel.
Materials for acrylic extensions
- acrylic powder ruNail, acrylic powder (white);
- acrylic powder ruNail, acrylic powder (pink-french);
- monomer;
- container for monomer;
- brushes;
- Entity UV Top Coat;
- tips, ruNail glue, glue for tips and tip cutter Rhein Enterprises, Clipper for cutting artificial nails (Kater) No. 1275 or forms for modeling nails;
- bonder and primer;
- hand sanitizer gel;
- cuticle remover;
- orange stick;
- files;
- brush with bristles that have an antistatic effect;
- oil for gentle moisturizing of the skin around the nail (cuticle) after the modeling procedure with acrylic CND Solar Oil;
- liquid for cleaning brushes In'Garden, Brush Cleaner
Types of gel
Depending on the consistency and its purpose, camouflage is divided into three types:
Single phase
The most common and easy-to-use type of polymer.
- It is transparent, has a thick viscous consistency, does not bubble, and quickly polymerizes in the lamp.
- Provides reliable adhesion of the natural plate and subsequent layers.
- After drying, the camouflage is easy to file and create the desired shape for your nails.
Can be used as a base coat, also to create the main layer of manicure and as a top coat with a glossy effect.
The layers of single-phase gel are removed from the nail plates by filing.
Two-phase
It has a more liquid consistency, which is easier to work with.
Used for extensions, laid out on an architectural base layer when modeling nails in natural shades.
Two-phase camouflage is applied in three layers, each of which performs its own functions. The first layer provides high-quality adhesion, the second layer is used in the process of creating the architecture of the plate, the third layer works as a fixative, after application of which all flaws and irregularities disappear.
This type of gel is not particularly popular because the result of its application is not very durable and takes time, as when working with three-phase material.
Three-phase
It has the most liquid consistency, so it quickly spreads over the plate and is easily applied in a thin layer. But to achieve the desired effect, you need to make several such layers. During application, the gel may bubble, so you need to distribute it over the plate carefully.
A lot of time is spent on creating a manicure using this type of polymer, but the result is a strong manicure that is not afraid of any mechanical damage or stress.
Advantages and disadvantages
Single-phase gel has many advantages. In particular:
- Suitable for beginners, because you don’t have to deal with each stage of coating, dry all the layers and worry that something might not work out. The composition is easily applied to the nails with careful movements, and quickly dries under an LED or ultraviolet lamp.
- The work is done faster than when using two- or three-phase extension gels. This is achieved by reducing the drying time and laying out the material.
- The not too thick texture allows the gel to level out on its own, without unevenness.
- A wide range of shades of single-phase compositions allows you to create beautiful and unusual decor without using decorative varnishes.
- Extended nails for which single-phase gel is used have almost the same strength as other extension compositions.
Despite the large number of positive aspects of single-phase extension gels, they still have common disadvantages:
- The liquid texture can sometimes play a negative role if it flows under the side ridges of the nails or the cuticle. Therefore, you will have to carefully ensure that the gel spreads as expected and apply it in a single layer, not forgetting to dry it under the lamp.
- The service life of nails extended using single-phase gel is slightly lower than with other classic compositions and is approximately three weeks. On the other hand, this way you can change your manicure design more often and thereby improve your mood.
The advantages of single-phase gel for nail extensions are much greater than the disadvantages, so the main thing is to perform the manicure carefully and carefully, and then the result will exceed all expectations.
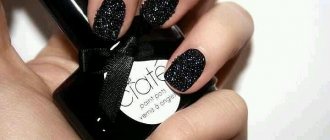
@nailwows
@nail.zvyagintseva
@salon_effekt_brest
Pros and cons of camouflage
The obvious advantages of camouflage include:
- Strengthening weakened or damaged plates;
- The composition contains special components that eliminate the possibility of fungus appearing under layers of manicure;
- The gel formula allows natural nails to breathe;
- Long-term use of manicure;
- The most natural and natural look of artificial nails;
- Natural nails do not flake;
- Ideal material for girls who prefer French.
Like any manicure product, camouflage has a number of disadvantages:
- High cost of the product, extension and correction procedures;
- Correction every 3-4 weeks;
- May cause allergies;
- If laid out incorrectly, it can harm the natural nail plates;
- If the removal of extended nails is carried out by an inexperienced, unqualified master, then there is a high probability of damaging the natural plate;
- If a chip occurs or a crack forms, then it is necessary to immediately and completely replace the extended nail.
How to use UV nail gel
You can use UV gel on your own, since it is quite easily evenly distributed over the nail bed. However, keep in mind that you must first make sure of its quality; it should not be too liquid, since then the solution will quickly spread before you have time to dry it. It is impossible to perform extensions with this gel.
Also pre-prepare consumables and tools:
- File;
- Pusher or orange stick;
- Nail scissors;
- Bafik;
- Degreaser;
- Primer;
- Brush;
- UV gel;
- Forms for extensions;
- UV lamp.
If you want to decorate your nails, prepare decorative elements and colored pigments to cover the nail plates.
Treat all instruments with an antiseptic to prevent infection from entering the body if the periungual area is damaged.
The procedure begins with basic nail treatment:
- Use a file to adjust the shape of the free edge, cut it to a length of 1-2 mm.
- Apply the remover to the cuticle. Use a pusher or an orange stick to push it away and cut it off with scissors.
- Remove the gloss from your nails with a buff.
- Cut the required length for extensions on the forms, fix them under the free edge of the nail.
- Load a brush with gel and place it in the center of the nail. Gradually level it first on the sides, then in the center, using a thin brush to decorate the cuticle area.
- Turn your finger face down so that the glass base is towards the center for 7-10 seconds. In this position, use a brush to carefully correct all existing defects and irregularities.
- Return your finger to its original position, make sure there are no defects, and dry the layer for 1.5 minutes.
- If you do not plan to apply gel polish, but want to focus the design only on the UV gel, apply another layer of the composition, but a thinner one. Repeat the manipulations described above. This will be easier to do, since a large amount of solution will not flow in any direction. Dry the layer.
- Carefully remove the form from your nails.
- If you want to apply a decorative coating, apply a base, color pigments, and top coat.
- Remove the sticky layer with a cleaner (you can use a degreaser).
If you follow the step-by-step instructions, you will get an accurate result that will remain in the same condition for up to 3-4 weeks.
Due to the fairly plastic and thick consistency of the solution, they are convenient to apply, therefore, regardless of the style of the work, even a novice in the manicure field can do it.
Absolutely any design can be made on such a coating, since the composition will provide increased density and strength of the substrate, which will withstand even a large number of rhinestones, beads or other voluminous decor.
Technique for nail extension using camouflage
The extension procedure is carried out mainly in salons, but if you wish and follow all the rules for working with materials and equipment, you can perform extensions at home.
The entire procedure for working with camouflage gel is carried out in several stages:
- We prepare and treat hands and nails, that is, we carry out a standard hygienic manicure.
- Degrease the nail plates.
- Apply primer and cure it in a lamp.
- Next, prepare the artificial form and place it on the nail plate so that the center of the nail coincides with the center of the form.
- We put a certain amount of gel on the brush and distribute it evenly over the surface of the mold, starting from the middle and moving towards the free edge. At this stage, we model the required length and desired shape of the extended free edge.
- The formed fragment is polymerized in a lamp.
- Then we cover the natural plate with base gel and dry it. This is done for better adhesion.
- Apply the base coat again to the fragment and the entire nail, but do not dry it.
- Using a brush, pick up a certain amount of camouflage and place it in the middle of the nail plate. Using even smooth movements of the brush, we distribute it over the entire plate, trying to get no closer than 1 mm to the cuticle and ridges.
- After the material has been laid out on the surface, we place it under the lamp for 15-20 seconds. Then we press the gel with a special clothespin, and again send it to polymerize until completely dry.
- We remove the mold, the sticky layer, file the free edge, and sand the surface with a buff.
- If subsequent design and decoration is not provided, then apply a finishing coat, seal the end and dry in a lamp until the top is completely dry.
You can more clearly familiarize yourself with the technique of modeling and extending nails with camouflage material by watching the video:
Initially, camouflage gels were invented and developed to create the perfect jacket. An example of such a manicure is shown in detail in the video:
With the help of camouflage material, you can carry out not only the process of building up nail plates, but also carry out the procedure for strengthening them. You can learn more about the technique by watching the video:
Errors when building up
Why do gel nails crack or peel at the edges? Due to several common mistakes made during the extension itself:
- The primer (bonder) was applied too thickly. This is the very first layer responsible for the adhesion of materials to a natural plate. If you apply too much of it, it doesn't have time to polymerize.
- The end of the nail must also be carefully covered with the bonder, otherwise delamination will begin from the free edge.
- It is necessary to carefully remove excess extension products with a dry sponge at all stages of the process.
- Nail extensions need to start with preparation. Detachment of the gel is possible if the cuticle is not removed thoroughly enough before applying extensions.
- All the dust has not been removed after filing the nail plate. The substance is best removed with a special thick brush made of natural bristles.
- Nail extension technology involves the use of properly selected tools: the entire top layer of the nail must be filed with a file with an abrasiveness of at least 180 grit so that the surface is matte and rough.
- Peeling of the gel from the nails also occurs due to an insufficiently smooth transition from the nail to the gel coating.
- In order for the gel to polymerize well, you need to regularly update the UV lamps and use a device of sufficient power
- It is necessary to carefully select and file the tips, leaving vertical grooves on it
- The gel cracks due to its too thin layer on the sides of the nail
- The extension may fail if the client is undergoing hormonal treatment. In this case, the technology ceases to be effective
The gel nail extension system is quite complex. For an ideal result, you need not only experience, but also thorough training. First, find out why the gel may not last, how to extend the life of gel nails, and why you need to use the right tools.
However, by learning how to apply gel extensions, you can have long, spectacular nails in just a few hours, as well as create a manicure that perfectly suits your look and mood. Read on the website how to correct gel nails.
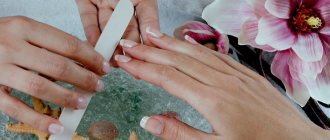
First step: preparing natural nails
Before you start covering your nails with gel without extensions, you need to properly treat the plate. To do this you will need a file of medium hardness. First, decide on the length of the nail and file the edges, making the same shape. After this, grind the top of the plate. This must be done very carefully, do not overdo it. You do not need to completely grind off the nail, but only remove the thin top layer.
When the work has been done on all the fingers, you can begin to coat the plate with primer. This product will improve the adhesion of materials and help avoid detachments in the future. Remember that after this coating you should not touch the top of your nails to other objects. Otherwise, the thinnest layer will be damaged.
Second step: base coat
Once the primer has dried (usually within one minute), you can apply the base. This needs to be done in a very thin layer. The gel should not just be laid out on the surface of the plate, but as if rubbed into it.
The base coat must be dried in a lamp for two minutes. Remember not to touch foreign objects with your nails. This may cause damage to the gel layer or the adhesion of foreign particles to it.