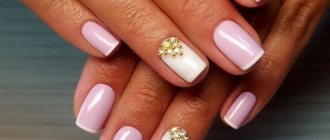
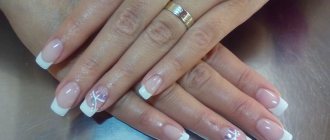
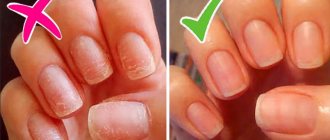
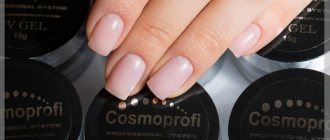
One of the fashionable modern methods of decorating nails is the use of gel polish. This material allows you to make your nails stronger, more beautiful and not brittle. It is not uncommon for girls to resort to nail plate extensions using acrylic or biogel for these purposes. Particularly advanced fashionistas, experimenting with their appearance, combine different materials, creating new images. Of course, not all experiments are successful. Often, girls have a question: is it possible to cover extended nails with gel polish? Or use a finishing gel to cover regular polish? Can pregnant women apply gel polish to their nails? As you can see, there are quite a lot of questions in the field of manicure. Experts who are professionally involved in creating beautiful manicures will help you find the answers.
Cover with gel polish
Extended nails and gel polish
If gel was used for nail extensions, they can be covered with any type of manicure varnish or shellac. But you need to remove the decorative layer only with liquids that do not contain acetone. The fact is that under the influence of acetone, the extended helium plates become rough and may completely lose their attractive appearance. Given this feature, to clean extended helium nails coated with gel polish, it is recommended to use an oil or a product without acetone. As a rule, this composition includes a vitamin complex that strengthens the nail plates without destroying the natural keratin layer.
Beautiful manicure
The same applies to acrylic nails. You can coat them with any varnish, but you need to prepare them first. The preparation process includes filing, giving the desired shape, and cleaning from dirt. Then the nail plates are covered with a base. After drying, you can apply regular varnish. At the same time, the base composition is necessary to protect the acrylic nail from the influence of the varnish coating.
Arguments in favor of application
Biogel is originally intended to strengthen natural nails. The color range of biogels is not as extensive as that of gels that are used for nail extensions. That is why many masters not only cover nails strengthened with biogel with shellac, but also recommend performing these two procedures together. Firstly, natural nails are under double protection. Biogel strengthens them and protects them from breakage. Shellac gives the manicure individuality and completeness, additionally strengthening it against breaks and chips. Secondly, Shellac applied to nails coated with biogel lasts even longer. There are cases where girls did not change their coverage for 1.5-2 months. At the same time, the appearance of the manicure remained impeccable.
Manicure regular polish and shellac
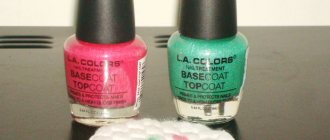
Many girls in the process of creating a manicure are faced with the question: can regular polish be coated with a gel finish? Manicurists say that this should not be done, since the varnish coating is neither stable nor practical. A few days after application, the varnish will peel off and the manicure will lose its attractiveness. At the same time, the finishing composition will not protect the varnish coating. Therefore, if you are wondering, is it possible to cover the finish with gel? The answer is simple, definitely no. The fact is that ordinary varnish does not have the properties necessary for bonding the base, gel composition and top coat. It will not adhere to the base coat and, moreover, will not be able to provide adhesion to the helium composition.
It happens that girls, wanting to experiment with different materials, do not know whether it is possible to cover gel polish with regular polish? According to experts, it is possible. But the varnish layer should be the final one, after the nail plate is covered with the base, gel polish and top coat. Often, ordinary varnish is used for decorative finishing of manicure.
Which one to use
When choosing an application product, you should pay attention to its type. Now there are quite a lot of options on store shelves that differ in composition and quality. In general, several groups of biological gel can be distinguished:
- The so-called sculptural type
is a product that is used when it is necessary to build up the natural nail plate and strengthen the required shape. Extension is possible up to 1-2 mm, and the nail will acquire a natural shade from white to light beige; - "RoyalSealer" gel.
If you are interested in the possibility of combining regular varnish and biological gel, then this option is ideal for you. It has a transparent, clean structure, so it easily hides the possible yellowness of your nails and fixes decorative layers well if applied as a base; - “S-Biogel”
, which is also often called “colored”, since this particular type is sometimes produced in a certain palette. It is an independent product that, after drying, forms a high-quality elastic manicure.
Gel polish for pregnant women
Sooner or later, in the life of any woman there comes a period of bearing a baby. Considering the special condition and hormonal changes in the body, it is impossible to predict how this or that cosmetic product will behave. When considering shellac as a potential means for creating a beautiful manicure, it should be noted that it does not contain components hazardous to human health. The only possible danger is the solvents used in the work. These substances have peculiar odors that can make a pregnant woman feel nauseous. If you do a manicure in a well-ventilated area, then unpleasant sensations can be avoided.
An alternative option for a pregnant woman may be the use of biogel. This product does not contain chemical compounds. On the contrary, biogel includes a vitamin complex that perfectly strengthens and heals the nail plates. The special formula of the composition protects the surface of the nail, prevents brittleness and delamination. Therefore, biogel is not only not harmful to a pregnant woman, but is also useful for strengthening and healing nails.
Summing up
What can you say in conclusion? Of course, you need to experiment with the appearance and use of different cosmetic materials. But this must be done wisely. If you want to cover your extended nails with shellac or regular varnish, you need to remember that this experiment is quite possible to carry out. However, when removing decorative coatings, you cannot use acetone-containing compounds. Because acetone has a detrimental effect on the surface of helium nail extensions. Not the best combination of regular polish and gel polish. Although for decorative painting, a regular coating can be used over a top coat.
How to remove biogel?
To remove biogel you need a special biogel remover
.
with a low acetone content for this purpose.
.
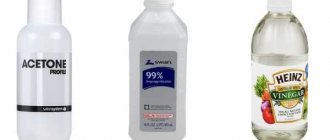
At home, you can remove biogel using any nail polish remover containing acetone.
For the procedure you will need: biogel remover, cotton pads, foil. The whole procedure will take about half an hour.
Cotton pads are soaked in biogel remover and applied to the nail, after which it must be wrapped as tightly as possible with foil and left for 20 minutes. After such a compress, the softened coating is removed with a clean swab.
Application technology
The application technique itself is not too complicated.
It is enough to follow the order of all stages and not forget about the features of gel products. The general principles of applying biogel are outlined below step by step:
- First of all, soften and remove excess cuticle.
It can also simply be moved to the edge of the nail bed; - Use a hard file to give your nails the desired shape.
Please note that the top layer does not need to be filed or polished, it is enough to clean it with the help of products and degrease it; - Instead of a base, use a primer without acidic components.
It will significantly improve the adhesion strength of the product to the nail; - The primer dries without a lamp in approximately 2-5 minutes.
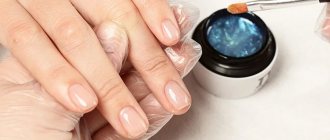
After this, you can apply the biogel itself. Usually the procedure is performed as with regular varnish: the required amount of product is first applied to the middle of the nail from bottom to top, and then distributed over the entire nail in circles or even strokes; - The product is usually applied in several layers.
Usually the first one acts as a base layer; it dries under a UV lamp for approximately 2-3 minutes, and then it can be covered with a second fixing layer; - At the end of the procedure, the nails are also dried under a UV lamp for 2 minutes.
To avoid the stickiness of the gel, you can treat the nails again with a degreaser.
In the modern nail industry, there are a lot of materials that help you create an unusual and beautiful manicure. But there are very few that would combine decorative and restorative properties. Biogel for nails allows you not only to decorate your nails, but also to strengthen them and improve their health. This is a product that combines everything necessary for natural nail plates.
How to apply correctly
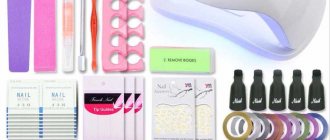
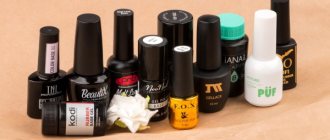
There are several rules that allow you to complete the procedure quickly and efficiently. First of all, you need to prepare all the necessary materials and tools. There are not too many of them:
- basis for biogel (base);
- the biogel itself (can be transparent or colored);
- degreaser;
- file for natural nails;
- buff grinding;
- cuticle remover;
- UV lamp or LED lamp;
- pusher or orange sticks.
In addition to the above, you also need to know technology. For the first time, the procedure may take considerable time, but with experience the speed of work increases.
Step 1: Nail Preparation
It is necessary to file the free edge, giving it the required shape, aligning the length on all fingers. The cuticle is pushed back with a pusher or orange sticks, then removed with a special product.
Using wire cutters is not advisable, since there is a risk of injury, infection, or discomfort when applying the biogel. Additionally, you can sand the surface with a soft buff, but this is not necessary.
Step 2: degreasing
It is advisable to apply biogel to oil-free nails. Firstly, this way the material will last longer. Secondly, it will be easier for the plates to “breathe”. Thirdly, this way the biogel will lie smoother and more uniformly.
Step 3: Apply Base
The base clear coat is applied exclusively in one layer. It should be as thin as possible. 1 mm is removed from the cuticle so that the material lasts longer and there are no chips or detachments. The base is dried in a lamp for about 30 seconds. The exact time can be found in the instructions for the product.
Step 4: Color Layer
Colored biogel (or transparent, if desired) is also applied in one layer, after which it is dried in a lamp for as long as the instructions require. On average it takes 60-90 seconds. After this, the procedure is repeated, if you need to enhance the color, make it brighter.
It is noteworthy that one millimeter is also removed from the cuticle so that the material does not cause chips and detachments with a 100% guarantee. The free edge is sealed. That is, while drying, the nails are held under the lamp not only with the front side, but also with the back side for 30 seconds.
Step 5: create the design
If some kind of design is intended, then it is done on a ready-made color layer. This can be: painting, rhinestones, stickers, sliders, decals, silk and other elements.
Step 6: top
The top is applied to a ready-made design or color coating, strictly in one layer, with the tip sealed.
Important points
Extended nails coated with shellac can look beautiful only if thin layers of gel are applied. Otherwise, the thickness of the nail plate will increase, which will lead to an unnatural appearance. Experts recommend covering acrylic nails with shellac. They are initially thin and additional layers of gel polish will in no way spoil their appearance.
How to remove shellac from extended nails? The technology for removing gel polish is the same in all cases. Regardless of what base is used to apply shellac, it should be removed using a special liquid, cotton swabs and clothespins that secure the lotions on each nail. The compresses last for at least 10 minutes. But to prevent the soaked layer from hardening, it is recommended to remove each cotton swab from the nails gradually. After removing one lotion, you need to carefully remove the peeling coating with a wooden stick. There is no need to press hard on the nail so as not to damage the integrity of the extended coating. If it was not possible to remove all the shellac in one go, as in the photo, the procedure must be repeated.
The video shows detailed instructions on how to properly remove shellac from extended nail plates.
When asking the question, you can apply shellac to extended nails; not every girl thinks about the advisability of this procedure. Masters claim that artificial nails coated with shellac look unpresentable. To apply high-quality gel polish to the extended surface, you need to have experience in manicure.
If this is not available, there is no point in undertaking such experiments. Moreover, regular varnish on extended plates lasts a very long time. Therefore, it is not advisable to re-decorate a finished manicure.
In conclusion, we note that you should not conduct experiments on your own appearance. If you prefer nail plate extensions, show off the results. Applying gel polish over artificial nails is not advisable from a financial and aesthetic point of view.
