The emergence of a new type of manicure
In 2022, a new original trend came from South Korea - broken glass manicure. The advantage of this design is the variety of options, approaches to implementation, and the absence of stencils. An undoubted advantage is the ability to independently create a unique manicure at home without any special practical skills.
Close your eyes and imagine how shards of glass shimmer in the sun. This is exactly what your nails will look like using the “broken glass” technique. You can wear this version of manicure at any age, the main thing is to choose the right color scheme.
Note to fashionistas
It is best to buy all materials for nail design in a specialized store. There you can find both foil and special cellophane in rolls or cut into asymmetrical pieces. The cost of such nail decoration elements is low - up to 100–150 rubles.
High-quality materials for nail art are made by Korean manufacturers. They produce not only foil, but also long-lasting varnishes and gel polishes, which are used to create “broken glass” manicures. They have a reasonable price, and the coating lasts quite a long time on the nails.
When using dark shades of varnish, you will have to apply several layers. Otherwise, the base coat will have an uneven tone. Inexpensive varnishes also need to be applied in several layers. Before painting your nails again, you need to dry the previous layer.
The “broken glass” manicure lasts on the nails for no longer than 2–3 days. If you wash dishes and floors without gloves, the coating will begin to peel off earlier - within a day. The fragility of the design will provide an opportunity to quickly develop techniques and experiment with color options and materials.
Specifics of the “broken glass” manicure
The manicure is based on broken glass - colored foil, which can be bought in special stores or ordered online. It can be monochrome, with stains or with a 3D effect. The color variations are amazing.
Foil is sold in the form:
- tapes - convenient to cut depending on the desired effect and size of the nail plate;
- in a jar in the form of small pieces - in this option, small fragments are easier to apply and do not waste time on cutting.
The advantage of this technique is the ability not to use stencils and the lack of artistic skills. Each nail will be unique. And even if a piece of foil moves, the overall picture will not deteriorate. After all, broken glass, even in the real world, cannot be the same. It's like snowflakes - they are all different, which makes them beautiful.
The foil is fixed to a sticky base - varnish. If you get a manicure using gel polish, it will last and delight you for a very long time, at least two weeks. A conventional coating without polymerization in ultraviolet radiation tends to wear off, chip and lose its appearance much faster. But you can remove it at any time and make a new one.
What options for “broken glass” are appropriate to decorate any varnish.
Shattered Glass Nails on nails come in three classic variations: as an accent (on one or several fingers) and as a mono manicure.
Manicurists can expressively present the latter in the form of a glass pattern, a scattering of unevenly sized “droplets”, filigree pieces with micro-gaps (so that any design can be quickly modernized after some time by painting the voids with a colored coating and turning the nail design into a “ Broken glass" in the stylization of medieval stained glass windows). With the help of glass shards on natural nails, it is possible to create the illusion of a crystal manicure (a technique that is most expressively embodied with the help of specially made tips), or even give a simple mono-manicure three-dimensionality (by creating stiletto nails or variations on the theme of an aquarium manicure). Photo “Broken glass” butterfly:
How to do a “broken glass” manicure at home
Before starting the design, you need to prepare the nail plate so that the coating lays down neatly and lasts a long time.
We start by processing the cuticle. We apply a special product, move it away with an orange stick, and cut it with scissors or tweezers. Next, we create the shape of the nails using a nail file. “Broken Glass” looks equally impressive on both almond-shaped and square nails. The length of the nail plate practically does not matter for this design.
After a trim manicure, do not apply oil or cream to your hands and nails, as the adhesion to the varnish will deteriorate. The next stage is decoration using varnishes and foil.
For a manicure with the “broken glass” effect you will need:
- transparent base (it is also used as a topcoat);
- colored varnish (several shades are possible to create an unusual manicure);
- colored foil;
- thin brush.
If you purchased foil in the form of a tape, then prepare it first. To do this, unwind a piece and cut it in a chaotic order with scissors. Try not to make too small fragments, but also not to leave large elements.
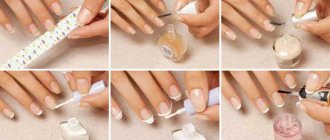
Now let's look at the design process step by step:
- Apply a transparent base and dry.
- Cover with colored varnish in one or two layers (depending on the density of the desired color).
- Place pieces of foil on the sticky surface of the varnish with a brush or stick, distribute evenly or randomly (only your imagination can tell you).
- Fix with finishing clear varnish. A top coat of clear polish is important to ensure your manicure lasts for a long time.
After drying, you can additionally draw individual fragments with a thin brush, add stamps or rhinestones.
Manicure design with gel polish
Broken glass manicure with gel polish allows you to create not only bright, but also very durable nails. There is a special technique for which you will need a UV or LED lamp. It is designed for polymerization, since gel polish cannot dry in air, unlike regular polish.
- We file off the shiny surface of the nail plate with a buff. This stage is extremely important to ensure high-quality adhesion and prevent chipping. Do it very carefully so as not to damage the nail itself.
- We apply a primer to the nails; it is designed to degrease and remove excess moisture from the surface of the plate. Try not to touch the surface of the nail with your fingertips. They contain a fatty component, which can interfere with the quality fixation of the varnish.
- Next, apply a thin layer of base.
- Place your hand in the lamp for 60 or 30 seconds. The time depends on the type of lamp.
- If necessary, repeat the base.
- Cover with colored varnish. It is advisable to make the layers thin to prevent the entry of air bubbles and improve drying.
- Dry it in a lamp.
- We do not polymerize the last color layer.
- Place pieces of foil on it in the desired order.
- Dry it in a lamp.
- Cover with finishing topcoat and dry.
- If desired, after the last layer of varnish, you can add design elements to the surface using a brush or dot.
- If the top has a sticky layer, then wipe it with an alcohol wipe.
Upon completion of work, apply cuticle oil and hand cream. Oil is very important, since in the lamp the skin dries out, without additional treatment it will become very rough and quickly lose its beautiful appearance. So you have an unusual, bright, stylish design!
“Broken glass” on nails: how to do it step by step
Looking at a photo of the “Broken Glass” manicure on nails, it can be difficult to figure out how to do it and what you will need for it. In fact, there are two main methods on how to create such nail art without putting in much effort or skill. Having an idea of the correct application of gel polish, the necessary equipment, and also having conducted one or two experiments, you can learn how to do everything quickly and efficiently.
Equipment and materials
- Tools and products for hardware or edged manicure. All this is necessary and it is not advisable to start coating without first taking steps. For example, there is already an article on our website about how to remove cuticles correctly and safely.
- Primer and bonder for preparing nail plates.
- Base coat for gel polish.
- Gel polish of the desired shade.
- Foil, mica or special polyethylene pieces that have a holographic effect to create a “Broken Glass” manicure.
- Dots and tweezers.
- Thin varnish brush.
- Top finish (glossy or matte to choose from).
Important
When starting any work with marigolds, you should follow all the rules of hygiene and sanitary protection against infection. Otherwise, you can get unpleasant consequences, for example, inflammation or irritation, even with a home manicure. How to properly disinfect instruments is worth reading in a separate article.
Method 1
Take a bath in warm water with the addition of essential oils, sea salt or a special product and remove the cuticle using a method convenient for you. If you have the appropriate equipment, this can be done in hardware. Treat your nails with a primer, and then, after it has completely dried in the open air, also with a bonder, which needs to be dried in a lamp. Apply your chosen shade of pigmented gel polish and dry. Repeat the action if necessary. Cut out triangles or other geometric sharp-angled shapes from holographic foil. Apply top coat
Grabbing each decorative element with tweezers or a moistened brush, carefully place them on the nails in a chaotic order or according to a pattern. It is important to ensure that there are approximately even spaces between the “shards”, so the overall picture will look more aesthetically pleasing. Dry the laid out drawing under the lamp. Apply the top coat again, paying special attention to the decor joints. Make sure that the product lays down in an even layer. Dry it again in the lamp and, if necessary, remove the dispersion layer.
Method 2
- Perform all the steps as in the first method described above to make a trimmed or hardware type manicure.
- Apply primer, and after it is completely dry, apply bonder, which is dried with ultraviolet light.
- Carefully paint your nails with your chosen gel polish with a mirror or holographic effect, for example, “Cat Eye”. The action can be repeated if you need to make the color more saturated. Dry under the rays of a lamp.
- Using a thin brush and black paint, draw a grid of “shards”. Repeat if necessary, drying each layer well.
- Apply top coat and dry again.
The first option is suitable if you have suitable material, for example, foil or ready-made pieces of factory-made film. The second is good because you don’t need to purchase anything special, and among the arsenal of almost any beauty there will definitely be at least one “Chameleon” or “Hologram”.
For regular varnish
Despite the fact that gel polish has already proven its worth, not everyone knows how to work with it and has the opportunity. Therefore, it makes sense to also consider the method of making “Broken Glass” using conventional acetone compounds.
- Do a manicure according to all the rules and file your nails according to the chosen shape.
- Apply the base, and after it dries, apply the pigmented coating.
- Immediately, without waiting for the composition to dry, carefully place the pieces of holographic foil in the desired order.
- Wait until it dries completely, then apply a final coat of glossy topcoat. If necessary, to thoroughly level the surface, you can repeat the application of the glossy top twice.
Do not forget that it is best to dry acetone compounds outdoors, where there is good ventilation but no draft. Usually, depending on the varnish, the coating dries in about 15-30 minutes, so it’s better not to rush. The varnish finally dries and completely polymerizes only after 12 hours. Therefore, it is better to handle it carefully and carefully, avoiding mechanical damage, sudden temperature changes and contact with abrasives.
Variations of glass nail designs
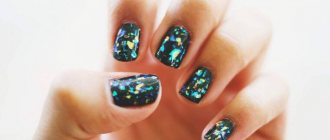
Various variations of the “broken glass” design are possible depending on the main color scheme, the number of foil fragments used and the use of parallel techniques (French, moon manicure, marble). The manicure looks especially unusual and fantastic if the base is dark varnish and the foil is golden, silver or holographic. By using film, a three-dimensional image is created, which certainly attracts the eye. You won’t get tired of this manicure; you can look at it endlessly.
If you prefer strict colors, then shades of dark blue, cherry, marsala, and dark fuchsia are suitable as the main color. And in this case, the foil can be placed not on all the nails, but only on two fingers, for example, the little finger and the ring finger. Cover the rest with monochrome color. Matte finishes are now becoming fashionable. But it should not be combined with foil, because a dusty effect may occur.
You can leave the nails with foil shiny and the rest matte. This combination will look very beautiful and stylish.
The uniqueness of foil is that it can be laid out on absolutely any color. If you prefer nude shades, the result will be very delicate and romantic nails.
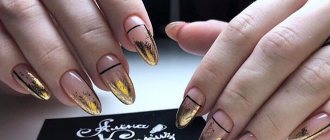
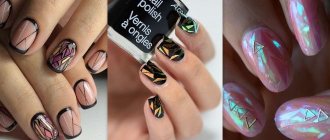
The effect of stained glass looks unusual and interesting. To do this, we create a base from neutral tones; upon completion it will not be visible. We lay out the foil elements close enough to each other. After the top coat, take a brush with black varnish and draw the boundaries of each fragment. The result is a unique design, very similar to stained glass.
You can combine it not only with a plain coat, but also with a French manicure or moon manicure. The main thing is to choose an effective and harmonious color scheme.
Options
There are many variations of this design. Let's look at two others that you might like better.
You can take shiny foil to match the base gel polish. Arrange the pieces from large to small: on the nameless one, arrange large pieces, on the neighboring ones they will gradually decrease. Don't forget to smooth out each piece of glass. It is advisable to apply two layers of topcoat after this so that the material does not peel off.
Or you can perform a manicure in light colors using a special thin film, which will create the desired effect. This method is not much different from the previous one. It’s just easier to work with film than with foil. You can paint each piece of glass with a thin brush and white varnish, creating a mosaic pattern.
It is worth noting that when working with mica, it must be matched to the tone of the varnish. For example, you took emerald-colored mica, then choose a green shade of varnish. Broken glass looks gentle on a light background, but on black or dark blue it looks very expressive, attracting attention.
Always slightly recess the pieces of film in the base layer - it should not protrude above the surface of the plate, otherwise the manicure will not last long. A prerequisite: smooth and even legs. Therefore, use a thick leveling top.
If you love bright design, then use burgundy, rich pink, dark blue and red tones. By showing your imagination, you can use them to create a very unusual manicure that will definitely not go unnoticed.
Manicure options
For different occasions
If you are planning a date, then choose a combination of red and black . The broken fragments will definitely enhance the image of the fatal beauty. This way you will show your partner your energy potential.
For parties, you can choose glass pieces to match the varnish . They look very beautiful on a base of dark green or chocolate color. And pale options should be considered by girls with moderate temperament. You can paint your nails with spots of different tones, mixing them with snow-white inserts. Leave small gaps between the foil triangles.
Using geometric shapes of stickers, it is very easy to create a stained glass effect . With this manicure you can complement your mysterious and enigmatic look.
Successful combinations
“Broken glass” has many different variations. The glass pieces themselves come in different shades and can be cut in different ways. This alone guarantees a unique design. But the best solution is to place transparent holographic pieces on a black base .
Deep rich shades go well with light materials. Here are what these combinations can be:
- chocolate with nut-gold;
- dark blue with bright blue;
- Marsala color with pink wood.
Often, only the middle and ring fingers are decorated in this way. This technique is very common lately. And with the help of contrasting glows you will create an incredible effect. Use gold, bright yellow, fiery red and emerald tones on a dark background.
Try to play up not only the color, but also the shape itself. The pieces may be irregular in shape and vary in size. They don’t have to be laid out in a chaotic order; you can think through a certain sequence in advance to get an interesting ornament.
“Broken glass” and moon manicure
The lunar manicure is based on emphasizing the root zone with transparent or white varnish. Pairs perfectly with glass nail art trends.
There are several variations of this joint application:
- Option one . Place foil on two nails, and perform the rest using the moon manicure technique.
- Option two . Cover the entire volume of the nail with a single-color varnish. Cut the foil so that it can be placed in the root zone of the nail plate.
- Option three . Cover the area at the base of the nail with clear varnish, and start placing the foil from the top third. This manicure will allow you to wear it for a very long time, since the growing parts will be practically invisible.
These are the most commonly used options, but you can come up with a completely different variation.
For what age is this manicure suitable?
Every year, the permanent leaders of the top lists of popular designs are the French and moon manicure - universal, ageless designs. They too succumbed to the onslaught of Shattered Glass. The French classic began to play in a new way when the smile line began to shimmer with holographic “glass” particles or creatively alternating nails with a smile and marigolds completely strewn with broken particles. The Hollywood nail hit gained special expressiveness when the root hole visually made the fingers longer and more fragile (being decorated with holographic “glass” crumbs).
An inverted moon (an unpainted hole and the main part of the nail completely strewn with “broken glass”) began to appear especially often in shellac finishes. This option allowed not only to ensure maximum strength to the design (and eliminated foil particles from sticking out through the coating layer), but also to slightly delay the design correction time due to the transparency of the hole (visually hiding the growing part of the nail).
Such versatility in every sense of the word allowed the “broken glass” manicure to conquer all ages, finding an appropriate and interesting embodiment in the images of both young ladies and already established ladies, fitting into everyday looks, and also finding its most expressive embodiment for going out. “for the occasion” and images for the holiday. How could such a seemingly simple manicure (and seemingly so complex in execution) succeed? The secret lies in the design creation technology itself. As we noted above, the most viable embodiment of stained glass manicure is gel polish manicure. Moreover, the technique itself is so light, fast and simple that even a beginner who is just mastering durable coatings can create “broken glass” at home.
