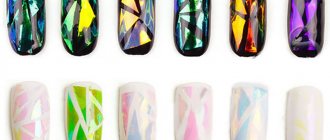
Nail art designers amaze us with their ideas every season. Some of them disappear into oblivion within a year, while others remain at the top of the TOP for a long time, as beloved and in demand among modern fashionistas. One of these popular manicure options is the “broken glass” design.
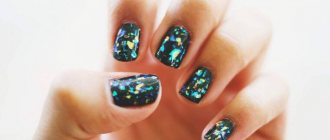
For a manicure known as “broken glass,” a special holographic foil is used, pieces of which are applied to the nail plate. The light falling on these pieces is refracted, creating a spectacular shimmer and play of color on the nails that simply cannot leave you unnoticed.
Outwardly, it resembles the shimmer of diamond facets. In addition, each design created from pieces of foil is unique, so you will never meet someone with exactly the same pattern as yours.
Features of broken glass manicure
Broken glass consists of finely chopped pieces of foil (or other shiny material), which is applied to the surface of the nail and then secured with polish or gel polish.
Features of manicure include:
- ease of implementation, despite the apparent complexity;
- the variety of materials used to perform manicures and their low prices;
- the ability to perform at home on nails of any shape and length;
- Suitable for women of any age.
Among the various design variations, every fashionista can easily choose her ideal option.
Don't miss the most popular article in the section: How to draw monograms on nails step by step for beginners. Instructions with photos.
What is the design feature
To create this effect, a special holographic foil is used. It is divided into pieces of irregular (or regular) shape and applied to the nail. When light hits these shiny fragments, refraction occurs and a very spectacular shimmer appears.
Often, such shine resembles the play of light on the facets of a diamond, which is why it is impossible to go unnoticed with such a design. Another advantage of this nail art is its uniqueness. It is impossible to find two absolutely identical nails.
In addition, “broken glass” is a universal design, suitable for nails of any length and shape. And the variety of colors allows you to choose the perfect manicure for every day and for special occasions.
Broken glass manicure is suitable for any nail shape.
Using this technique, you can decorate all the nails or just one, add rhinestones or leave only the effect of broken glass, decorate the nail plate in the form of a crystal or apply a line of “shards” only along the edge.
Particularly interesting are the pieces of foil “playing” based on deep, saturated color. In the new season, varnishes in dark blue, cherry or purple shades are popular. And it is better to give preference to matte colors.
Current colors for broken glass design
The “broken glass” design first appeared in South Korea, where its journey through nail art studios began through social networks. Fashionistas around the world, inspired by the ideas, hastened to repeat the new product. To stay on trend in 2022, you need to do your manicure depending on the season.
In the warm season it is:
- yellow;
- pink;
- lavender;
- peach;
- blue.
During the cold season, manicure colors become more muted:
- wine;
- dark green;
- deep blue;
- plum;
- violet;
- brown.
Manicure remains relevant at all times in:
- black;
- white;
- red flowers.
Various shades with glitter are in fashion and they are appropriate not only for evening manicure.
This:
- gold;
- silver;
- various chrome shades.
To prevent your nails from being too shiny, you can perform a New York-style manicure, in which one nail, usually the ring finger, is painted a different color.
As for the shape of the nails, it can be oval or square, depending on individual preferences. Long, pointed nails are back in fashion, but only those who suit this shape should grow and extend them. Otherwise, it is better to leave your nails short, because this length is not going to lose its position in the next few years.
TOP 10 new nail design “broken glass” 2021-2022
Nude style
This is a current manicure with fragments for the spring-summer 2021-2022 season. For those who appreciate naturalness and grace. For this design, foil of pale colors is chosen, and often “splinters” can only be noticed when rays of light hit the nails.
Nail design in nude style.
French with “shards”
It seems that the new trends of 2021-2022 are going by the motto: “the new is the well-forgotten old.”
And in this regard, French was no exception. Only fashionable nail art involves decorating the free edge with iridescent fragments. The same design is chosen for the design of the lunula.
French manicure in black.
Gradient and "broken glass"
Broken glass manicure 2021-2022 is brightness and restraint, shine and dullness, and, of course, monochrome and multicolor. Ombre, complemented with holographic particles, will sparkle with new colors. A smooth transition from color to color not only within one nail, but across all five fingers makes the hand especially graceful and feminine.
Gradient manicure broken glass.
"Shards" on radical black
Perhaps the dark base is another fashion trend for 2021-2022. On a radical black color, the “broken glass” effect is especially beautiful. The main thing is not to overdo it. Professional nail art experts recommend applying “shards” to one or two nails, and simply covering the rest with a black base.
Manicure broken glass on a black base.
Drawings and fragments
This is the case when two techniques get along well with each other. The main thing is not to mix them up, but to place them at a diplomatic distance. If pieces of film are applied to the nail, then you should not supplement it with the same design. It is better to make a laconic sketch on the adjacent nail.
Video: MK Broken glass, Paris Nail
Geometry and “broken glass”
Geometry is an ever-popular nail art trend. Straight lines on the nail plate, creating abstract figures, effectively complement different techniques. And the “splinter” manicure did not stand aside.
Manicure broken glass with geometric patterns.
The lines can either follow the outlines of the “shards” or be applied according to their own pattern. Broken glass on a small area of the nail, clearly outlined by a contrasting line, looks interesting. The color palette of this nail art is varied: from delicate pastels to aggressive colors.
Lunar "shards"
Lunar manicure is perhaps the most susceptible to new trends. It goes well with gradient, rhinestones, and ombre. It's time to make friends with the broken glass effect.
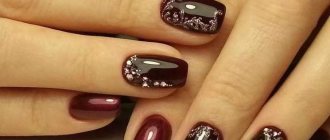
Burgundy moon manicure.
Since fashionable manicure 2021-2022 involves bright colors, the trend is a classic lunar design with a rich base, a natural-colored lunula and “shards” on the nail plate.
This option is ideal for nails of any length and shape. And the color scheme is chosen depending on personal preferences.
Matte
“Gloss is no longer in trend,” say stylists, and offer current design options on a matte basis. “Splintered” nail art looks beautiful on dark matte nails. Don’t be afraid to experiment, even if you’ve never “woven” a dark manicure before, the 2021-2022 season is the time to try.
Matte nail design.
Holographic foil
In order not to waste time visiting a salon, you can purchase holographic foil and try to make a “fragmented” design at home.
Manicure broken glass with foil.
It's not difficult, but it will require perseverance and patience. It is this kind of foil that will create the effect of splinters on your nails and will shimmer in different colors when hit by light.
Bright nail art “broken glass”
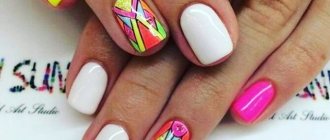
The motto of fashion trends 2021-2022 is: “It can’t be too bright.” Therefore, do not hesitate to choose the color and arrangement of the “shards”. Experiment with all shades of red, neon colors, as well as dark ones (black, dark blue).
Manicure in bright shades.
Complete the “shards” with rhinestones and sparkles. Don’t be afraid of abstract figures; the super-fashionable “broken glass” manicure of 2021-2022 allows you to do it all.
Spring and summer are the times when everything around becomes bright and interesting. Color your everyday life with additional colors and experiment with the “broken glass” nail design.
How to prepare your nails for the “Broken Glass” manicure
“Broken glass” on nails, despite photos and video instructions, can be ruined if the nails are not prepared for design, no matter how skillful the manicurist is.
To prepare for a manicure, you must adhere to the following tips:
- Remove old varnish. If this is a regular product, then you can use a liquid without acetone so as not to damage the surface of the nail with aggressive substances. If it is gel polish, then, in this case, you can use a device to remove the gel surface from the nail. Not everyone has a special device or time to visit a manicurist. Therefore, you can stock up on regular foil, cotton pads, nail polish remover and patience. First, apply liquid to cotton pads, wrap each nail with a disc and then with foil and wait 3-5 minutes. During this time, the gel polish will soften and can be easily removed. If it doesn’t work the first time, then the procedure must be repeated until the nails are completely clean.
- Hand care. A beautiful manicure looks great on hands with delicate skin. Therefore, manicure is not only about giving your nails a beautiful shape, but also about various baths and masks for your hands. For the bath, pour a couple of tablespoons of warm water into a small bowl. l. regular or sea salt, olive (or sesame) oil and a couple drops of lemon essential oil. The last ingredient will whiten the surface of yellowed nails. You need to keep your hands in the bath for 10-15 minutes.
- Treat the cuticle. Oil and an orange stick are useful for this. First you need to lubricate your nails and cuticles with oil, and then push it to the edge of the nail with a stick. Manicurists strongly advise against cutting off excess skin. If you don’t have a stick, then a glass or cardboard file with a rounded edge will do the job. Experts are sure that metal files should not be used when doing manicure, as they damage the nail and it begins to peel. Therefore, these options are the best.
- Shape the nail. For this purpose, you need a glass (or cardboard with a fine abrasive) file, tongs (or nail scissors) and a buff (a soft sponge-shaped file for treating the surface of the nail). First you need to shorten the length of the nail if it is too long. The next step is to shape it using a file. For short nails, oval or square shapes are always relevant, depending on individual preferences. The buff needs to be used to level the surface of the nail. In no case should you skip the last step, as the varnish will lie better on a flat plate. After all manipulations, you need to wash your hands with mild soap and wipe dry.
A broken glass manicure can be easily done at home by first preparing the nail plate. - Lubricate your hands with hand cream and after 30-40 minutes start painting your nails. All steps can be completed the day before, and only apply the varnish in the morning.
“Broken glass” on nails: how to do it step by step
Looking at a photo of the “Broken Glass” manicure on nails, it can be difficult to figure out how to do it and what you will need for it. In fact, there are two main methods on how to create such nail art without putting in much effort or skill. Having an idea of the correct application of gel polish, the necessary equipment, and also having conducted one or two experiments, you can learn how to do everything quickly and efficiently.
Equipment and materials
- Tools and products for hardware or edged manicure. All this is necessary and it is not advisable to start coating without first taking steps. For example, there is already an article on our website about how to remove cuticles correctly and safely.
- Primer and bonder for preparing nail plates.
- Base coat for gel polish.
- Gel polish of the desired shade.
- Foil, mica or special polyethylene pieces that have a holographic effect to create a “Broken Glass” manicure.
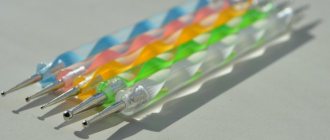
- Dots and tweezers.
- Thin varnish brush.
- Top finish (glossy or matte to choose from).
Important
When starting any work with marigolds, you should follow all the rules of hygiene and sanitary protection against infection. Otherwise, you can get unpleasant consequences, for example, inflammation or irritation, even with a home manicure. How to properly disinfect instruments is worth reading in a separate article.
Method 1
- Take a bath in warm water with the addition of essential oils, sea salt or a special product and remove the cuticle using a method convenient for you. If you have the appropriate equipment, this can be done in hardware.
- Treat your nails with a primer, and then, after it has completely dried in the open air, also with a bonder, which needs to be dried in a lamp.
- Apply your chosen shade of pigmented gel polish and dry. Repeat the action if necessary.
- Cut triangles or other geometric sharp-angled shapes from holographic foil.
- Apply top coat. Grabbing each decorative element with tweezers or a dampened brush, carefully place them on the nails in a chaotic order or according to a pattern. It is important to ensure that there are approximately even gaps between the “shards”, so the overall picture will look more aesthetically pleasing.
- Dry the laid out drawing under the lamp.
- Apply the top coat again, paying special attention to the decor joints. Make sure that the product lays down in an even layer.
- Dry it again in the lamp and, if necessary, remove the dispersion layer.
Method 2
- Perform all the steps as in the first method described above to make a trimmed or hardware type manicure.
- Apply primer, and after it is completely dry, apply bonder, which is dried with ultraviolet light.
- Carefully paint your nails with your chosen gel polish with a mirror or holographic effect, for example, “Cat Eye”. The action can be repeated if you need to make the color more saturated. Dry under the rays of a lamp.
- Using a thin brush and black paint, draw a grid of “shards”. Repeat if necessary, drying each layer well.
- Apply top coat and dry again.
The first option is suitable if you have suitable material, for example, foil or ready-made pieces of factory-made film. The second is good because you don’t need to purchase anything special, and among the arsenal of almost any beauty there will definitely be at least one “Chameleon” or “Hologram”.
For regular varnish
Despite the fact that gel polish has already proven its worth, not everyone knows how to work with it and has the opportunity. Therefore, it makes sense to also consider the method of making “Broken Glass” using conventional acetone compounds.
- Do a manicure according to all the rules and file your nails according to the chosen shape.
- Apply the base, and after it dries, apply the pigmented coating.
- Immediately, without waiting for the composition to dry, carefully place the pieces of holographic foil in the desired order.
- Wait until it dries completely, then apply a final coat of glossy topcoat. If necessary, to thoroughly level the surface, you can repeat the application of the glossy top twice.
Do not forget that it is best to dry acetone compounds outdoors, where there is good ventilation but no draft. Usually, depending on the varnish, the coating dries in about 15-30 minutes, so it’s better not to rush. The varnish finally dries and completely polymerizes only after 12 hours. Therefore, it is better to handle it carefully and carefully, avoiding mechanical damage, sudden temperature changes and contact with abrasives.
How to do a “Broken Glass” manicure
“Broken glass” on nails (photo instructions below) can be done in 2 ways - regular and gel polish.
- A manicure with regular varnish can be done with a base, colored, clear varnish and tweezers.
In order for the result to be successful, you should definitely use the following step-by-step instructions:
- Prepare material for broken glass. (Types of materials and methods of use are discussed below).
- Apply base.
- After the base has dried, apply varnish of the desired color.
- Apply a third layer of varnish - transparent. At this stage, the speed of the reaction is important - before the final layer has dried, you need to attach the material for the “broken glass” effect. For example, if it is foil, then stick it on with tweezers. This must be done very carefully, since the final layer is very soft and it is important not to make unnecessary movements when fixing the material. Otherwise, the transparent varnish will be smeared and unevenness will appear on the surface of the nail. Because of this, the manicure will look sloppy.
- Reapply the final clear coat.
This method of manicure does not require much time or special skills, and tools and varnishes can be purchased at any cosmetic store for a budget price.
But it also has a drawback - this design will not last longer than 6-8 days.
- A gel polish manicure requires a UV lamp, gel polish, base and top coats, material for “broken glass,” a pencil and tweezers.
Step-by-step instructions will help you perform a manicure without problems.
- Prepare materials for “broken glass” and set aside.
- Cover your nails with a base coat, apply colored gel polish of the desired color and a top coat. After application, dry all layers in a UV lamp for 2 minutes.
- Reapply the base. Using tweezers or a pencil, place pieces of “broken glass” on the nail (or nails). Apply top coat and dry in a lamp. If necessary, remove the sticky layer.
The advantage of this method is that such a manicure will last at least 3 weeks without problems. But it is worth mentioning the disadvantages - after gel polish, nails definitely need rest, since a dense layer of the product can ruin the structure of the nail. In addition, a UV lamp and other tools are needed to perform it.
Don't miss the most popular article in the section: How to extend nails with gel polish. Nail extension instructions for beginners. Photo.
Colored manicure using foil
This is the main trend of the new season - the use of different colors of foil in manicure. The nail design turns out bright and spectacular, reminiscent of a real rainbow, shimmering in various shades.
Foil of different colors
The French look looks stylish and sophisticated when the edge of the nail is highlighted not with white varnish, as in the classic version, but with foil. You can use foil in a wide variety of colors, both to cover a small part of the nail and the entire surface. There are no strict rules or restrictions here, the main thing is that the color of the foil and varnish are harmoniously combined.
- Manicure with gold foil
- Manicure with silver foil
- Manicure with colored foil
Combination of foil and gel polish shades
Every day, nail design with gel polish in combination with foil is becoming more and more popular. This material is highly valued for its shine and ductility. With the help of foil, a unique and inimitable design is created that looks stylish and luxurious.
A wide variety of options can be used:
- black manicure with foil;
- pink gel polish and foil;
- red manicure with foil;
- white manicure with silver foil;
- burgundy nails and foil;
- light shade of gel polish and foil;
- gray gel polish and foil.
Is it possible to do a broken glass manicure at home?
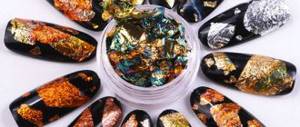
The “broken glass” effect is achieved through the use of special foil for manicure.
In addition to it, you can also take special stickers, film and mica.
- Foil comes in many different types. For “broken glass” you need regular thin non-transferable manicure foil without glue on the back. It can be sold whole or already cut. If the piece is solid, then it is better to cut it over a sheet of paper. This tactic will make it easy to glue future “shards” onto the nail, and pour the remains into some container without any problems. For example, in a matchbox.
- Film (or cellophane) . This is not an ordinary plastic bag, but a special thick film that can be cut into pieces. You can buy it in flower shops and various departments for creativity.
- Stickers are thin sheets with an adhesive backing on the back and “broken glass” designs on the front. Unlike other materials, they are glued to a completely dry nail after applying regular or gel polish. To do this, you need to randomly cut the sticker into pieces, peel off the protective layer and stick it in the desired order. If the material is glued to gel polish, then apply a top coat, then dry it in a lamp and remove the sticky layer.
- Artificial mica is a material that imitates natural, that is, it has a pearlescent, iridescent structure. For manicure, it is available in liquid and dry (loose) form. The liquid material comes in the form of varnish and is applied with a brush over the painted nail. To apply dry mica you will need a small container of water, a dots (or toothpick), an orange stick and mica of the desired shade. Dip a dots or toothpick into water, pick up a piece of mica and place it on the nail, using an orange stick to form an arrangement of mica. The stick must also be dipped in water before use.
It doesn't matter what material will be used in the design. To really make it look like shards, you need to leave gaps between the pieces rather than glue them end to end.
In addition to the indicated places, you can choose materials in online stores. The quality is not inferior to the goods in the store, and the prices, on the contrary, are much lower.
We will need
To make a manicure with the effect of broken glass, we need the following equipment:
- Cuticle oil.
- Degreaser (medicinal alcohol).
- Base coat (Bonder) for nails, which will provide excellent durability to manicure for up to two weeks.
- Colored varnish.
- Foil (holographic film). It can be found and purchased in online stores (the price is low, the consumption is economical).
- Scissors.
- Clear nail polish.
- Orange stick or toothpick.
- Top Coat (gel or regular).
If desired, it is possible to use several types of mother-of-pearl film of contrasting color. As a result, the manicure will be more festive and bright.
French and broken glass
“Broken glass ” on the nails, the photo of which is presented below, in combination with a French coat - this is a tandem of classics and trend, which allows both types of designs to sparkle with new colors.
There are several ways to decorate your nails with splinters.
- “broken glass” is glued to the regrown part instead of the white edge;
- the fragments are attached to one or two nails (ring and index).
The base color is classic pastel. But experts say that this is a rule that can be safely broken depending on the circumstances and paint the nail with “broken glass” (or all) red, white, black, silver and gold.
To perform the French you need:
- Prepare the “shards” and think through the design - their location.
- Paint your nails in the desired color with regular or gel polish.
- Lay out pieces of material according to a thoughtful design.
- Secure the design with clear varnish for regular and top coat for gel polish. Dry and remove the sticky layer from the last one.
This manicure, due to its versatility, is suitable for girls of all ages. The restriction may be lifestyle, for example, a strict dress code in the office.
Negative space and the “broken glass” effect
It would seem that it is no longer possible to surprise with such decor, but nail service professionals manage to do so. A transparent background or close to the natural color of a natural nail goes well with glass shards. And sparkles and powdery tones only enhance the nail design.
Lunar manicure with broken glass design
As in a French manicure, in a moon manicure, “broken glass” can decorate a hole or 1-2 nails. Since this type of design is called anti-french, you can safely deviate from the usual range of colors and paint your nails in any of the current colors. When choosing a color, you should take into account age and lifestyle.
Bright colors are suitable for young and free girls who are not burdened by a strict dress code. Older women should opt for calm (for example, lavender) or deep dark tones (for example, wine). Also, when choosing a color, you should pay attention to your color type.
To perform a lunar manicure you need:
- Cover the nails with a base and varnish with a color selected for the hole. If it is a regular varnish, then you need to wait until it dries completely. If gel = varnish, then dry each layer for 2 minutes in a UV lamp. The ideal proven color combinations are red-white, red-black, white-beige, blue-violet. But you can take another combination.
- Glue the French stencil down onto the hole so that the polish for the rest of the nail does not accidentally get on it. Paint the nail a second color. Wait until completely dry.
- Glue the cut pieces of glass according to the desired design. Cover with clear varnish or top coat (if the manicure is done with gel polish).
Combination with other techniques
The “broken glass” manicure itself looks quite harmonious. It will look special, but no less attractive, in combination with other nail art techniques. Most often it is combined with a French jacket. At the same time, it can be applied to 1-2 nails or decorated with fragments of a smile. Or you can combine both of these options in one manicure.
It goes well with a moon manicure. Similar to French, broken glass can be used to decorate the hole. A manicure looks attractive in which the hole is not painted over at all or is covered with colorless varnish, while the nail plate is covered with fragments of different sizes and shapes. This design is distinguished by its practicality, since the growth of the nail will be completely unnoticeable.
With pieces of shiny foil you can create various designs, complementing them with pebbles, rhinestones and other decor.
The shards will look attractive on a gradient manicure. In this case, it is recommended to apply pieces of foil to the darker area. Moreover, the deeper the shade, the more highlights it will require.
You can create a geometric manicure, which is popular today, with pieces of glass.
Abstract manicure with broken glass
If there is no special film or foil for “broken glass,” then ordinary tape and varnish with a “metallic” effect would be the ideal solution.
This manicure will fit perfectly into any look - both everyday and evening.
- Get a manicure - apply a base and the desired color. If it is gel polish, then dry it under a UV lamp.
- Cut wide tape into thin strips (the thinner the better) and stick them on your nails in random order. This design will look great on all nails, and not separately.
- Paint your nails with a different color of polish. Dry as necessary and cover with topcoat.
Current trends in manicure with foil
Fashion trends of 2022 suggest girls to opt for elongated almond-shaped or oval-shaped nails, because this is the most feminine and sophisticated option.
Square nails should also have rounded tips. Nail designs with foil occupy the first position among fashion trends. Foil can be used to accent fingers or as a base coat. With its help, stylish abstract or three-dimensional drawings are created, evening or everyday designs are performed. Combining foil and designs
An interesting and stylish manicure is obtained if you use several techniques at the same time. Fashionable manicure with foil in combination with drawings looks original and modern. You can apply painting and foil to the gel polish, add graphic motifs or slider stickers. Together, this allows you to get an unrivaled design with foil at home.
Transparent design with minimalist graphics
At first glance, it seems that manicure with foil 2022 and minimalism are simply incompatible. But that's not true! A great example would be using designs, foil and clear coat. If the question arises of how to do a manicure with foil yourself, you can choose the next option - using transfer foil. Strokes and straight lines perfectly complement laconic foil patterns.
Geometry and foil
Many girls have seen photos of a design called “broken glass” manicure. It can be complemented with geometric patterns. A great option would be to cut out different geometric shapes from foil. A manicure with foil stripes looks stylish and fashionable. This option is ideal for an evening event, a business meeting or office work where you need to adhere to a strict dress code.
Broken glass in volumetric manicure technique
Volumetric manicure is one of the trends in nail art. By itself, it looks complete and it seems that nothing can be added to it.
But using “broken glass” will give it a “second wind.”
- Cut a fragment from the film in the shape of a nail. Cut into as thin strips as possible.
- Apply base. Apply blue polish to the thumb, index and middle fingers, and pale pink to the rest. Dry. Repeat step.
- Cover your nails with top coat. Place half of the cut strips on the wet top on the middle and ring fingers, leaving a gap between them. Dry your nails.
- Re-coat with topcoat and dry.
- Using a thin brush and a transparent topcoat, cover each strip individually with a layer of topcoat. Dry and repeat the process and dry again.
Any other design can be made using this technique. For example, geometric shapes.
Drawings and broken glass in manicure
“Broken glass” can not only be a chaotic play, but also act as a basis for a drawing. In this case, the composition will look good on two adjacent nails. Usually these are the middle and ring fingers. This design is suitable for any age. As for events, it all depends on the color - bright colors with glitter are appropriate for celebrations, and calm colors are appropriate for every day.
Here are step-by-step instructions with a butterfly drawing:
- Draw a small (1-2 cm depending on the length of the nail) butterfly on a sheet of paper folded in half.
- Draw a butterfly on the back layer of the “broken glass” sticker.
- Cut out the butterfly and cut it in half.
- Cover your nails with a base coat and the desired color. If it is gel polish, then dry it.
- Glue the neatly cut parts of the butterflies onto the adjacent nails. Cover with top. Dry if it is gel polish.
The sticker method is the simplest, accessible to beginners. If you have experience, you can create drawings from elements of “broken glass”.
Features of using this type of manicure with clothes and accessories
- As you probably guessed, a manicure with a “broken glass” effect in dark colors looks good with evening dresses. The combination of red and black is provocative, so it is suitable for a date, to a restaurant or to the theater.
- Light and nude shards do not attract such attention, but they fascinate - light fabrics are perfect here.
- Thick fabrics such as jeans are not suitable for this type of manicure, even if the color of the nails is adjusted to the color of the jeans, they are not entirely compatible.
- If you wear gold jewelry, then the color of the sparkles should not be silver, and if silver, then gold.
- Bright fragments are suitable even for everyday life, if you stylishly match the color of your nail art with clothes (or fragments on it) of the same color. Imagine geometric patterns on a dress and the same on your nails - this, of course, will be very harmonious.
- And in general, try to find common details in manicure and clothing.
Gradient in broken glass design
The gradient or ombre effect looks very unusual. Pastel colors are suitable for romantic occasions and the office, while bright and rich colors are suitable for evening events.
In order to make it, you need to stock up on at least 2 colors of varnishes that are similar in color and a gradient brush (it’s wide) or any other available brush.
If the manicure is done with ordinary varnishes, then you can use a sponge.
- Apply base and gel polish of the main color. Dry both layers under the lamp.
- Apply polish near the base of the nail, without touching the cuticle. Using a brush, “stretch” the drops of varnish. Cover with top coat after drying and apply “shards” to it. Cover with top coat again and dry. Remove sticky layer.
When manicure with regular varnish you need:
- Apply three strips of similar colored varnishes to a small piece of sponge.
- Apply the sponge to the nail on which the base has previously been applied.
- Dry the layer and apply a transparent sealer. Glue the “shards”. Repeat the layer with clear varnish.
The “shards” should be in harmony with the main color of the gradient. For “glass” in this case, mica or film is suitable.
Broken glass in matte manicure
“Broken glass” on nails (photo with a matte manicure below) looks very stylish in a matte manicure. Here, as in the French manicure, you can cover a single nail or all of them - the matte background will ideally highlight the “fragments.”
This design will look good with an office dress code (if you decorate one nail).
- Prepare the glass pieces.
- Cover your nails with base and color using a matte polish. Some fashionistas, if there is no such varnish, use a regular glossy one and dry their nails over steam.
- Attach the “shards” in the required way. If it is gel polish or matte manicure, then do it without waiting for it to dry. If the nails are dried over steam, then apply a transparent layer and attach “glasses” to it.
- Apply a top coat - transparent for regular manicure and a topcoat with gel polish. In the latter case, dry each layer in a UV lamp.
“Broken glass” with holographic effect
In this nail design, the main character is holographic glass crumbs. They can be placed on one nail plate or even on several. As an option, make a gel polish to match, mix several shades, creating a multi-colored mosaic or geometric nail design. The choice is yours.
How is broken glass different from kamifubuki?
Kamifubuki is another way to decorate your nails. Although manicurists often compare kamifubuki designs to “broken glass,” they still have differences.
It is worth noting that the design technology of both types of manicure is no different.
- Kamifubuki are ready-made elements for manicure. These can be circles, stars, flowers and other shapes.
- The elements of “broken glass” differ from each other in shape and size, but have the same color, since they are randomly cut from the same material. The same cannot be said about kamifubuki - the shape and size are the same, but the colors can be very different. The only rule is that they must be combined with each other and with the colored coating, if any.
“Broken glass” on nails is a design that has deservedly won the hearts of fashionistas. Thanks to photos and video instructions from nail art masters, it will not leave the list of trends for a long time, as they amaze the imagination, and you want to immediately repeat each design.
Article design: Mila Friedan
“Stained glass French” technique
Broken glass manicure on nails, made in a classic theme, is considered a current trend at the moment. You can use shiny details not only on a single-color coating, but also use them to decorate a beautiful jacket. Fashionistas of different age groups choose this decor. However, for women, it is preferable to choose a calmer foil shade.
The foil is glued onto gel varnish, creating the effect of glass chips. You can place glitter on one of the fingers, highlighting it from the others, or fix it along the edges of the nail.
When creating a classic design, a combination of shades is most often selected. For example, if the nail plates are covered with a single-color varnish in a light green shade, then the color of the broken glass will be a tone lighter or contain contrasting colors on its surface.
Professional craftsmen claim that this effect helps create a complex three-dimensional design. Thanks to him, the manicure looks attractive and unusual. It is chosen to create an evening look. A fashionista with such a manicure will not go unnoticed among the people around her.
