Every girl should take care of herself. Only proper care can preserve youth and attractiveness. It is worth saying that this applies to all parts of the body. We must not forget about something.
Most often, girls neglect their hands, devoting too little time to them. This is a huge mistake, because it is the skin on the hands that ages the fastest, dries out and gets injured more often. In addition, women at any age should take good care of their nails. Yes, teenagers may not wear colored polish, but timely manicure and cleanliness of the subungual area are mandatory. Today we will talk about the process of creating a manicure, we will get acquainted with two options for materials. After all, manicure with gel polish is incredibly popular now. So, let's answer the main question: what is better - gel or gel polish? Reviews, properties and rules are given below.
How to create the perfect coating? All stages of applying gel polish
So, to create the perfect coating, you need to correctly apply all the materials and prepare the nail. This is exactly what we will talk about now. How to make correction with gel polish?
- Preparatory stage. First of all, you need to get your nails done. There are only 3 types: classic, combined and hardware. Each of them has its own special rules and techniques. If you want to make the coating yourself, it is better to choose the first type. To begin, you need to immerse your hands in warm water for a couple of minutes to make the skin softer. Afterwards, using a pusher or an orange stick, you need to lift the cuticle and remove small particles of skin. Next, you need to cut off the excess cuticle using sharp scissors. After completing the manicure process, you need to shape the nail and remove the top layer using a soft file.
- Applying the base. The most important step, which creates a hard coating, ensuring good wear. The base is applied in two layers. First we apply a small amount of material, then we need to take a drop and place it in the center, then carefully distribute it to the sides. To create the perfect highlight, you need to turn the nail over and level the material.
- The final stage. At the last stage of correction with gel polish, we apply colors, designs and fix the entire manicure with a top coat that gives excellent shine.
How to create the perfect coating? All stages of applying the gel
You will never be able to get a perfect finish the first time. To achieve each stage perfectly, you need to train a lot and for a long time. So, how to cover your nails with gel yourself? Now let's find out:
- Preparatory stage. Here you need to do the same steps: manicure, sawdust, polishing.
- Application of material. If you do not have enough length, then we substitute special forms, pressing them tightly to the edge of the nail. The first layer should be thin, it must be dried well in a lamp. Next, you need to put a large drop of gel, which must be carefully distributed over the nail, forming the correct shape and architecture. Afterwards you need to send your hand into the lamp. Remember that we do not dry it completely, then apply a second layer and use a clothespin, which will help simulate the natural curve of the nail. As soon as the material has dried, we file the nail, removing bumps and uneven shapes. How to use gel to strengthen nails? Everything is simple, the movements are the same, but a paper form is not used.
- The final stage. Here you can use both colored gels and gel polishes.
Acrylic or gel?
Alisa Patrakeeva, manicurist: “Nowadays in the nail service it is customary to talk not only about nail extensions, but about nail modeling. Using acrylic and gel, defects in the client’s nail plate are corrected. Nails can be different: downward growing, springboard-shaped (the tip “looks” up), it happens that the nails grow slightly to the side, and not straight. Modeling corrects defects in natural nails.”
Acrylic technology
Acrylic is a material that is obtained by the reaction of two components: powder (polymer) and liquid (monomer). The brush is dipped first in the liquid and then in the powder, and a material is obtained that hardens in air within a few seconds. In these few seconds, the master must have time to even out the material on the nail. The wearing time for acrylic nails is 3-4 weeks.
Pros of acrylic:
• acrylic nails are more durable than gel nails, since the density of acrylic is higher than that of gel;
• you can remove acrylic nails, unlike gel nails, using a special solution without filing them;
• acrylic French looks more natural than gel;
• it is best to correct nail defects with acrylic, since it is possible to “sculpt” the nail, but the gel only spreads.
Cons of acrylic:
• unpleasant, pungent odor of monomer during the extension procedure;
• some types of acrylic acquire a yellowish tint when removing brightly colored nail polish (by the way, you can only use liquid without acetone for acrylic nails);
• acrylic nails are more difficult to do from a professional point of view, so it is difficult to find a good nail technician.
Gel technology
Gel is a material that hardens under the influence of ultraviolet rays. Gel is much easier to apply than acrylic: rather, it “blurs” on its own on the nail, acquiring the desired shape. The wearing time for gel nails is 3-4 weeks.
Pros of the gel:
• since the gel is more like glass, some types of designs look more interesting under it, for example dried flowers;
• easier to find a master.
Cons of the gel:
• the gel cannot withstand temperature changes - it breaks and cracks;
• gel nails can only be removed by filing;
• a burning sensation when drying in a lamp - quite painful, although only for a second.
It is important to remember that none of these materials are worse or better. They're just different. And you need to determine what is right for you.
You also need to know that none of these types of extensions are more harmful to your health than the other. For example, the idea that gel nails “breathe” or the assumption that ultraviolet radiation in a lamp protects against fungal diseases are misconceptions. As well as the myth that the strong smell of acrylic monomer is toxic. No, he's just unpleasant. The most harmful to health in these procedures is nail dust (both artificial and biological) that occurs during filing. It can settle on the walls of the larynx, in the respiratory tract.
Some tips for wearing artificial nails:
• If you have never had long nails, grow your nails a little longer first so that you gradually get used to them.
• In winter, it is recommended to wear mittens indoors and only then go outside. This rule applies to all artificial nail coverings. For acrylic - especially during the first 2 days, since at this time the material is still polymerizing (it is already solid, but the molecules are still connecting).
• On the buttons of the telephone, remote control, etc. It is better to press only with pads, not to knock on the table, keyboard keys, etc. Many people, believing that artificial nails are more durable than natural ones, begin to put more stress on them, which leads to disastrous consequences.
• To keep your nails healthy, you need to nourish not the nail plate itself, but the root of the nail, which is located just below the cuticle. This is where the nail is formed. If you nourish this place with oils and creams, the nail plate will grow healthier.
• If you decide to remove artificial nails, then after this you can take several paraffin baths in a beauty salon to restore the nail plates. We can talk about complete restoration of the nail plate after extensions only after the nail has completely grown back, that is, after a couple of months. But, as a rule, if artificial nails are removed correctly, no dangerous consequences should be expected, but just remember that your nails are now thinner and need to be handled with care.
By the way, extended or strengthened nails save you from bad habits (squeezing pimples, picking cuticles - this is simply impossible to do with thick nails). Extensions help you get rid of the habit of biting your nails and restore your nail bed. On the other hand, with artificial nails it will be difficult for you to do some useful small work (fasten an earring, chain, etc.)
The main differences between gel polish and gel
So, what is the difference between gel nail polish and gel?
- Density. The second version of the material is much tougher and stronger, so it must be used in extensions. If you are thinking whether or not to apply gel on short nails, then definitely yes. It will provide support for growth.
- Plastic. Modern biogels are incredibly flexible, they help cope with imperfections in the shape of the nail. Gel polish is much softer and is a viscous liquid.
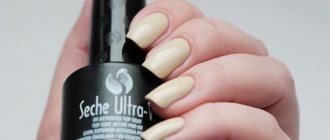
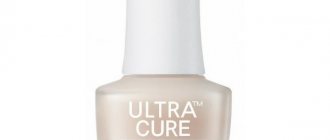
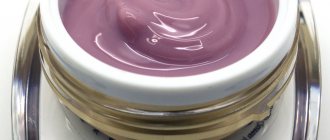
- Release form. Typically, gel polishes are sold in elongated bottles with brushes. Gels in packaging resemble jars of cream. You definitely need to buy a brush for them.
- Different ways to remove the coating.
- Wearing times.
- Purpose. Gels are more versatile; they can be used to do both extensions and strengthening.
Features of materials
We found out the difference between gel nails and gel polish. Let's talk now about the features of the materials.
Gel polishes are applied in thin layers and do not thicken the nail. Moreover, with their help you can create the perfect manicure much faster. By the way, a good polish can be easily removed without damaging the nail plate.
What is the difference between gel and gel polish coating? Firstly, in the consistency of the applied product. The first material is dense, viscous, does not run away and does not spread across the nail. Secondly, the gel provides greater protection, saving nails from brittleness and cracks. Reviews say: if you want to wear a manicure for a very long time, then this material will cope with this task better. True, girls who are just starting to get acquainted with the coating process will find it difficult to use the gel, reviews warn.
Shellac
SHELLAC. Shellac is a product for manicure and pedicure that combines the properties of modeling gel and nail polish. It's almost as long lasting as gel but doesn't damage your nails as much as it does.
WHAT IS SHELLAC MANICURE
The name “shellac” comes from the Shellac product produced by the CND/Creative brand. Other brands, in fact, do not produce shellac, but gel polishes with similar properties.
SHELLAC, GEL AND VARNISH: WHAT IS THE DIFFERENCE
The varnish does not last too long, it deteriorates easily, chips, and becomes dull. The gel requires filing, which injures the nail plate, and is inconvenient to remove at home.
Why is shellac better?
- Before applying shellac, you do not need to file the nail plate, as before applying gel. It is enough to degrease and polish it. The nail does not deteriorate;
- to remove shellac, you don’t need to cut it down either;
- shellac can be applied and removed at home - just buy an ultraviolet or LED lamp, gel polishes and a remover;
- unlike ordinary varnishes, shellac does not fade over time and does not deteriorate from household chemicals;
- the condition of shellac is not affected by temperature changes
- shellac lasts 2-3 weeks. The only reason why it is removed earlier is aesthetic: the nail has grown over the cuticle;
- shellac is considered a hypoallergenic coating because it does not contain toluene, dibutylphthalan, formaldehyde and its resins;
- shellac does not smear like regular varnish and requires drying. Immediately after applying it, you can go about your business.
HOW TO DO A SHELLAC MANICURE
Having understood what shellac is, we move on to the application process itself. Each layer of shellac is polymerized in a UV or LED lamp. Shellac can be single-phase (nails are covered with one layer of colored varnish and dried), two-phase (first the base is applied, and then the colored varnish) and three-phase (the base coat is applied, then the colored varnish, and then the top coat).
The procedure for applying shellac is as follows:
1. Preparation of nails. They are filed and shaped. 2. Degreasing. If you don't do this carefully enough, the shellac will stick worse. 3. Sanding. Optional step. The nails are sanded so that villi appear on their surface and the shellac adheres to the nail plate more tightly. But often degreasing is sufficient for this purpose. 4. Applying base/color/top or all three, in turn. Each layer is fixed in a lamp. The fastening time varies from 25 to 120 seconds for each hand. Some masters attach each layer separately to each finger for 10-15 seconds. During the final coat, the edges of the nail are sealed (that is, the polish is applied along the edge) so that the manicure lasts longer. 5. Removing the sticky (dispersion) layer. It is removed using a cotton pad. Some types of gel polishes do not have a sticky layer, so this step is optional. 6. Applying oil to the cuticle and cream to the skin of the hands. What many people think is just part of the ritual is actually a necessity: the skin dries out in the lamp, it needs additional hydration.
The procedure for removing shellac goes like this: apply a special liquid containing acetone to the nails, wrap each finger in foil for 10-15 minutes, and then remove the exfoliated shellac mechanically using an orange stick or manicure tools.
IS IT HARMFUL TO DO SHELLAC?
Manufacturers of gel polishes unanimously assure that shellac and its analogues themselves do not spoil nails: they do not contain toluene, dibutylphthalan, formaldehyde or its resins. On the contrary, shellac is an opportunity to grow your nails; under the coating they do not flake or crack.
However, removing nail polish using aggressive means and then mechanically removing the residue does not bring any benefit to your nails. And under dark and bright shades, the nail may turn yellow.
In addition, the process of drying varnish, which occurs under a lamp, is of concern to scientists: they warn that drying devices can cause a carcinogenic effect. However, the connection between them and skin cancer has not yet been confirmed.
DO YOU NEED TO TAKE BREAKS?
When people didn’t know what shellac was and when it first appeared, it was positioned as a coating that could be worn constantly, without any interruptions. But in practice, many shellac users have become convinced of their necessity: polishing and removing the coating can greatly thin the nail. This is especially true for those with thin and brittle nails.
SHELLAC: CONTRAINDICATIONS
There is only one direct contraindication for shellac: fungal nail diseases. Pregnancy is not a contraindication for shellac.
IS IT POSSIBLE TO MAKE SHELLAC AT HOME
Yes. To do this, you will need a UV lamp with a power of at least 36 W or an LED lamp, a manicure kit (cuticle tweezers or an orange stick to move it away, a file to shape it, a buff for polishing), means for degreasing the nail and removing shellac and the coating itself – alone or in a set with a base and top.
WHAT COMPANIES PRODUCE SHELLAC
Shellac is just one brand of Shellac produced by Creative/CND. Analogues are produced by Hand&NailHarmony (Gellish composition), Jessica (GELeration), OPI (GelColor), Essie (Gel Nail Color), LAQ (Easy Gel), Orchid by LL.
Next: Hair Lamination
What to choose - gel polish or gel?
We figured out how to apply gel to your nails. Now let’s find out when you can use this or that material:
- Short and thin nails. Both products are equally suitable for this case. If you want to be sure of protection, then it is better to give preference to gel.
- Pecking nails. One of the most common disorders of the nail plate, in which the nail grows downward, resembling a beak in shape. Only a gel will help solve this problem.
- Long nails. If you constantly apply coating, then choose gel polish. After all, your nails are already quite strong, so you don’t need extra layers of material.
- Injury. What is better - gel or gel polish? Reviews say that if the nail is injured or has undergone treatment for a fungus, then it is better to use the gel. It will protect against mechanical damage, create support for the nail and prevent microorganisms from penetrating inside.
Reviews
Gel polishes are talked about as an opportunity to forget about taking care of your nails for 2 weeks. This coating is ideal for women leading an active lifestyle, when there is no time to renew their “hand makeup” every 5 days. However, women are careful about regularly using gel polish and give time to rest their nails, which after a series of procedures become brittle, damaged, and stop actively growing.
Nail salon experts say that the gel composition is safe for nails and does not affect their normal functioning; The main mistake women make is incorrectly removing the coating by “picking” or soaking the nails in acetone. Professionals recommend removing long-term coating using hardware equipment, which will prevent nails from peeling and drying out.
The main tricks and features of ideal coverage
To create the perfect coating, no matter - gel or gel polish, you need to know some secrets that will help in creating a beautiful manicure:
- Be sure to seal the ends of the nail with a top and base. This way you can avoid chips and cracks.
- We make corrections in a timely manner. This will keep your nails healthy.
- We use only certified products. Gel polishes and gels are artificially created materials that can cause allergies.
- Be sure to do the alignment, modeling the architecture of the nail. When all the nails are even, with regular arches, the manicure looks much more beautiful.
What is the difference between gel polish and shellac, are they the same thing or not?
Gel polish and shellac are not the same thing, although these materials have many of the same characteristics. To understand the essence of each material, it is enough to know the following nuances:
- For the first time, durable varnishes were created by CND. They received the common name Shellac.
- Other manufacturers created varnishes with similar effects that were resistant to abrasion/washing out for up to 14 days. They began to be called gel polishes.
- These two materials cannot be called similar, because they have significant differences.
| Gel polish | Shellac |
| Before application, you need to do a manicure and remove the top layer of the nail, apply a primer (base), colored varnish to the plate, and use a fixative (top). | The nail is not filed (this preserves the integrity of the plate), a primer for the decorative coating is not required, the fixative is applied as desired. |
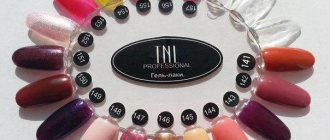
| The color palette of gel polishes is very large (up to 90 shades for some manufacturers), you can use various effects such as “cat’s eye”, glitter, mother-of-pearl. | The choice of colors is limited to 30-50 shades; many decorative techniques for decorating nails are not available. |
Shellac can cause significant damage to the nail plate - in most cases, the nail becomes too dry and thin, and becomes more brittle. But this can be avoided if you contact specialists to apply the material and strictly follow their recommendations for the care and wearing of decorative coating.
By the way, in different sources there are different spellings of the name of the material for sustainable manicure - shilak, shellac, sherlac, schelak. But it is actually correct to write strictly according to the transcription of the original word - shellac.
How long should a good manicure last?
So, let's find out how long does a gel polish manicure last on your nails? If applied correctly and all requirements are met, the coating can last about 2 months. However, it is worth remembering that going around with one manicure is contraindicated. Firstly, this is a huge load on the nail, given the incorrect architecture. Secondly, in such cases the risk of serious injury to the plate increases. Thirdly, an old manicure looks ugly and unkempt. Moreover, men really don’t like him. They believe that with such a manicure a girl looks vulgar, especially if the nails are too long.
The ideal wearing time is 3-4 weeks; in such a short period the nail does not have time to grow too much.
Gel polish at home
If you decide to perform the procedure for applying gel polish yourself, study several video tutorials in advance, and also prepare everything you need. We will consider the technology of applying a three-phase composition.
What you will need Prepare everything you need for a regular manicure, be it an edged, European or hardware manicure, buy color, base and top coats, lint-free napkins, files and buffers in advance. Make sure you have an ultraviolet or LED lamp - without it the coating will not dry. It's also good to have cuticle oil.
How the coating is performed
- If necessary, remove the old coating, completely cleaning the nail.
- File the free edge of the nail, giving it the desired shape. Avoid using metal files. File only on dry nails; try not to soak them before the procedure. This will avoid delamination.
- Remove the cuticle. It is better to use special products for this, regular use of which will greatly facilitate manicure. Apply the product to the cuticle, wait a couple of minutes, carefully move the skin away and carefully remove any remaining product.
- Grind the nail, especially carefully treat the areas near the cuticle. Try not to damage the nail, avoid pressing. The task of this stage is to remove shine for better adhesion of the material to the natural nail. After sanding, carefully remove dust with a brush.
- Degrease the nail with a professional product; in extreme cases, you can use alcohol for this purpose.
- Apply a thin layer of base coat to each nail. Be careful not to let the base come into contact with the skin around the nail. When applying, be sure to work around the loose edges, sealing them. Dry the nail under the lamp.
- Start coating with color. Do not shake the bottle before applying as this may cause bubbles and uneven coverage. Apply a thin layer and let it dry in the lamp. Reapply coat. Each layer should dry for two minutes if you are using a UV lamp, and thirty seconds if you are using an LED lamp.
- Finally, apply a top coat to your nails, carefully treating the free edge, and dry in a lamp. If the top coat has a sticky layer, carefully remove it with a lint-free cloth moistened with a degreaser.
- The final stage is treating the cuticle with moisturizing oil, this will give the manicure a well-groomed look. Rub in the oil and remove any remaining residue with a napkin.
How to remove the coating correctly so as not to injure the nail?
So, let's take a look at the coating removal options:
- Maceration. A chemical method of removing material that is only suitable for gel polishes. It is worth saying that this is one of the most harmful removal options, which is contraindicated for people prone to allergic reactions. The main advantage of soaking is that it is budget-friendly. For craftsmen, this removal option is too long. Soaking occurs in 3 stages. First, the coating is slightly filed off with a file so that the product penetrates better into the material. Then small pieces of napkins are taken, dipped in liquid, applied to the nail and wrapped tightly in foil, which prevents the product from evaporating. As soon as 10-20 minutes have passed (depending on the company), the soaked coating is removed with a pusher.
- Sawing. Some people cut the material with a regular file with high abrasiveness. This option is ideal for home use. It does not cause allergies or side effects.
- Hardware method. This method of removing material is used by manicurists. First of all, it's fast. Secondly, a lot of consumables are not spent. Thirdly, allergies and irritation do not appear.
Peculiarities
Despite its popularity, gel polish has a certain percentage of opponents of such a coating. It implies a three-stage coating procedure: the base is applied first, the pigment is applied as the second layer, and the final layer is the finish or top coat. Advantages and some features of the salon procedure:
- Gel polish stays on the nails for 2-3 weeks with a uniform glossy or matte finish and does not require additional care while wearing;
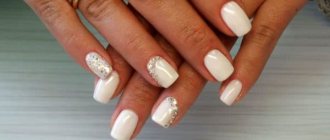
- The coating allows you to create a variety of color combinations and original designs;
- Removal occurs using the most advanced method of filing or “soaking” the nails in nail polish remover.
Among the features women note:
- Before applying gel polish, it is not recommended to use greasy (or any other) hand cream and soak your nails, so manicure before coating is performed with a machine;
- On the day of application, it is not recommended to contact the nails with water;
- Gel polish + manicure takes an average of 2 hours .
Gel polish allows you to create a long-lasting coating for 2 weeks or more.
At the same time, you can create unique designs and a stylish image literally to your fingertips. The composition of modern professional coatings is absolutely safe and practically does not cause allergies; wearing it protects nails from chips, scratches, and breakages.
Not every woman knows that gel polish and gel (biogel) are not the same thing. Biogel is a completely synthetic fiber without pigments, that is, transparent or with a slight natural tint, which is applied to the nail plate with a brush. This product is used for:
- Nail extensions due to its dense, durable texture and the use of additional material - tips;
- Strengthening is one of the popular and safe nail procedures;
- Formation of the natural correct shape of the plate , if it is flat or anatomically incorrect (damaged).
Biogel allows you to create a natural natural shape of the nails and, unlike gel polish, has a positive effect on the health of the plate.
This material has a porous structure and does not “block” the supply of oxygen to the keratinized layer of cells - the nail plate.
You will learn more about the difference in the following video.
Types of gel polishes and gels
To understand what is better - gel or gel polish (reviews of these materials are given in the article), you need to get acquainted with their options. Let's start with the second material:
- Classic base. The first product to be used for coating. It is usually a clear, semi-viscous liquid.
- Rubber base. A denser, more stretchy material that is great for beginners.
- Colored gel polish. A regular polish with a pigment that gives the nail color.
- Top. Strengthens the coating and adds shine.
Gel options:
- Souffle. A dense, sticky liquid resembling tar. It is applied in a thick layer, gradually leveling.
- Biogel. This material is similar to plasticine, which, when a special liquid is added, becomes soft and plastic.
- Colored gel. Usually gel-based polishes are made with glitter to make the color more saturated.
The most popular types of gels. Description and reviews
So, in the end, you need to familiarize yourself with the best brands for the production of gels:
- RuNail. A Russian company whose product range includes many different material options. There are both colored and transparent representatives. What is better - gel or gel polish? Reviews say that RuNail products combine high quality and reasonable prices.
- Global. Their gels are ideal for both beginners and professionals. According to reviews, the products are easy to apply and last great.
The most popular types of gel polishes
Let's talk about the best companies that produce gel polishes:
- Uno. Their bases and tops have driven many modern nail technicians crazy. The products have ideal wearability and excellent consistency.
- Grattol. There are thousands of comments on the Internet with positive ratings about the Grattol company. Manicurists say that her colored materials are incredibly pigmented and apply wonderfully. In addition, they have a large color palette and reasonable prices. Many girls especially loved polishes with glitter.
