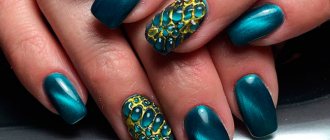
Relatively recently, regular clients of beauty salons tried out a new development - long-lasting varnish, also known as gel polish or Shellac.
Its distinctive features, such as long-lasting wear and the ability to quickly grow your own nails under the coating, instantly made it popular among women.
Gel polish has become fashionable, as have various versions of its design . One of the most popular is a matte manicure - when the nail coating is devoid of the characteristic velvet shine. You will learn about what matte Shellac is, how to make it at home and how to decorate it further in this article.
Gel polish: benefits
Gel polish, unlike regular polish, lasts on nails for 2-4 weeks without damage.
It has a number of advantages:
- does not wear off at the ends;
- retains shine during wear;
- strengthens the nail plate;
- no unpleasant odor;
- the composition does not contain the harmful component formaldehyde;
- You can create volume effects and decorate your nails with rhinestones and bouillons.
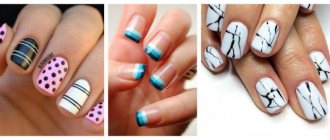
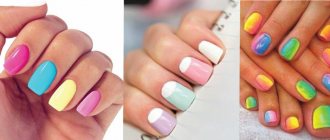
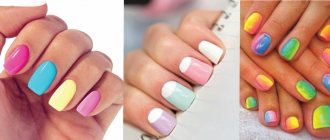
Manicure trends are moving toward nail motifs such as rainbow, amber, lace, geometric and floral patterns, and gradients.
Modern shape of short nails
The main trend in manicure shapes for 2022 remains short nails up to 3 mm, sometimes up to 5 mm from the edge. Oval, almond and soft square shapes are preferred.
Matte gel polish for short nails (the photos clearly show and perfectly confirm this) visually lengthens the fingers by manipulating contrasting colors.
Fashionable shades of matte manicure
Deep, rich tones are in fashion. Black and white colors serve as both the main tone on the nail plates and an additional design.
The fashionable color of manicure 2022 will be blue and all its shades:
- ultramarine;
- sea wave;
- cobalt;
- cornflower;
- sapphire;
- turquoise;
- azure.
Red tones - burgundy, cherry, chocolate and marsala - are also at the forefront of the fashionable color path. Matte gel polish for short nails (the photo shows such options) in muted colors is very popular in 2018. In spring and summer 2022, sunny and diamond shades will be in demand.
Don't miss the most popular article in the section: How to draw monograms on nails step by step for beginners. Instructions with photos.
Methods for matting the surface of the nail
There are several ways to obtain a matte surface on gel polishes:
- Top with matte effect. A thin layer of matte top is applied to nails coated with gel polish technology (base + 2 layers of colored varnish after polymerization + top layer) and ends. Polymerize in a UV lamp. Removes stickiness.
- Nail grinder. Surfaces covered with gel polish, as in the first method, are wiped with a liquid to remove stickiness. Using a sander, lightly sand the entire coating, including the end, removing only the shine. Disinfect and dry.
- Matte gel top. Prepared as in the first two cases, the nails are covered with a matte top coat of varnish. Dry it.
Matte gel polish for short nails can be made using acrylic powder. - Acrylic Powder. Gel polish is applied to nails coated with gel polish technology and to the ends. Acrylic powder is sprinkled on top. Polymerize in a UV lamp. Remove excess powder with a fan brush.
Ways to make glossy gel polish matte
Don’t despair if you want to make a fashionable matte nail design, but you don’t have the necessary velvet top coat at hand. There are several options that will allow you to make glossy shellac matte:
- Applying a buff. After the glossy coating has dried, it can be treated with a polishing file. Experts recommend using a buffer with an abrasiveness of 400x400 for this.
- Application of transparent acrylic powder. While the glossy shellac is not completely dry, you can apply acrylic powder to it. Excess product is removed with a brush.
Jaay - Mobile - Content - 250*360 - 2
Despite the fact that satin manicure appeared relatively recently, it quickly gained popularity among fashionistas. The original design will make the handles well-groomed and will highlight their attractive appearance.
How to make a matte manicure at home
Those who prefer to save time and money on visiting a salon can do a matte manicure at home.
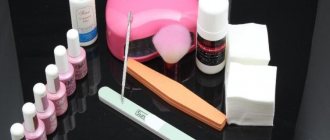
Tools and materials needed:
- UV lamp;
- pusher (scraper), for moving the cuticle and removing the pterygium;
- file;
- gel polish;
- base;
- antiseptic or primer;
- acrylic Powder;
- cuticle softening oil.
To soften the cuticle, soak your fingers in warm water with a few drops of oil. Wipe with a napkin.
Then the process is as follows:
- give the selected shape to the nails, move or remove the cuticle with a scraper;
- use a coarse file (bafa) to remove the keratin layer;
- clean the surface and degrease it, cover it with primer;
- Apply a thin layer of base using rubbing movements and dry;
- apply 2-3 thin layers of gel polish, each layer is dried in a UV lamp;
- perform a top coat (gel polish), dry in a UV lamp;
- apply gel polish and seal the ends;
- Apply acrylic powder and dry it with a lamp, remove excess powder.
Method number two: pick up a grinder
There is another non-standard way to make a matte manicure with gel polish - using a grinder. To apply it, you need some skill, but over time this option becomes automatic.
The technology for performing the operations is as follows: base-color-color-top, removing stickiness and carefully polishing the surface of the nail.
There is no need to be overzealous with the sander; it is enough to just remove the gloss without touching the top layer.
If you are using this method for the first time and are not confident in your skill, you can apply two top coats to be on the safe side. Then it will be quite difficult to damage it.
Lace design
Lace design is done using different methods. It is applied to one, two or all fingers.
Brush drawing:
- Nails are coated with gel polish in 2 layers and topcoat in 1, dried in a lamp. Removes stickiness. A little gel paint of a contrasting color to the main one or close to it is dripped onto the palette.
- Using a thin brush (no. 5.0 is possible), grab a drop and successively create a lace pattern. Dry and remove stickiness.
- A layer of primer and base are applied to degreased surfaces and dried in a lamp.
- Cover with 2 layers of gel polish, successively dry in a lamp.
- A lace sticker or openwork ribbon is placed on the nail and pressed.
- Trim off the excess and cover with a layer of transparent varnish.
- Dry and remove stickiness.
When using simple lace without impregnation, the nail is pre-treated with a layer of glue.
Stencil:
- A stencil is applied to the prepared nails (1 layer of primer + base + drying in a lamp + 2 layers of gel polish, dried in a lamp).
- Apply gel polish or acrylic paint and dry it in a lamp. Remove the stencil and cover with a layer of transparent varnish.
- Sliders:
- The slider with an openwork pattern is placed on a damp cloth to soften.
- Prepare the nails as in the first case.
- Remove the slider from the base and apply it to the nail with a slight deviation from the cuticle.
- Any bulges that arise are trimmed.
- Grind off the excess and cover with top coat 2 times.
- Removes stickiness.
Video on how to make a beautiful matte manicure
The video describes in detail how you can quickly and easily create velvety marigolds. There are three methods to choose from, so every girl can choose the most suitable one for herself.
If you skillfully combine velvet nails with other elements, you can achieve a spectacular and perfect look. Experiment with designs, add new elements, don't stop there and create. Be beautiful and share your velvet finish nail ideas in the comments!
Author of the publication
Patterns and ornament
Monograms and patterns are made with thin brushes. There are other techniques: stamping (using stamps) and dotting (with a dot, needle or any sharp objects).
For stamping you need a stamp, a metal plate with patterns, a stamp with a rubber surface, and a scraper for cleaning the disc.
Process of creation:
- Shape the nails with a file, degrease the surface and cover with a base.
- Apply gel polish of the main color and dry.
- A stencil on a metal plate is coated with varnish of a contrasting color.
- Remove excess from the stencil with a scraper, without touching the varnish in the recesses.
- Capture the image with the rubber surface of the stamp, pressing it tightly against the stencil.
- Using the stamp, the image is applied to the nail, pressing them tightly against each other.
- Dry and cover with topcoat.
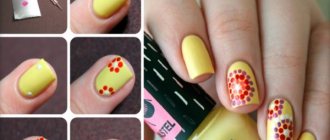
In the dot pattern technique, the basic tool is dots. They also use improvised materials: needles, hairpins, sharp wooden sticks.
Creations:
- Nails are shaped, degreased with a primer, a base is applied, and dried.
- Cover the gel with varnish of the main color, dry for 2 minutes in a lamp.
- Using a dotz or other tool, a dotted pattern is made with gel polish in contrasting colors. Dry with a lamp.
- Apply topcoat, dry, remove stickiness.
Don't miss the most popular article in the section: How to extend nails with gel polish. Nail extension instructions for beginners. Photo.
Matte French
Matte French is done with matte gel polish. But you can do it with regular varnish, using matting methods and using a different range of colors.
It is done like this:
- Shape the nails with a file and remove the cuticle.
- Buff No. 240 removes gloss, degreases and applies ultrabond.
- Cover the nail and edge with a thin layer of base and dry.
- Apply gel polish and dry.
- Using a brush, paint a French (smile) pattern along the edges of the nails with varnish of a contrasting or white shade and dry.
- Apply the top coat and cure it with a lamp, removing the stickiness.
Lunar manicure
On short nails, a special decoration of matte gel polish are the holes at the root. Example in the photo:
The holes are designed in a semicircle, arc or triangle. Lunaring is performed with a brush, stencil, or foil.
For the moon design with a brush:
- On prepared nails (decoration with a file + removal of cuticles with a scraper + disinfection + base + UV lamp + 2 layers of gel polish + drying for 2 minutes in a UV lamp), a contrasting shade is drawn with a brush at the root of the nail, and dried.
- A fixative is applied and dried in a UV lamp.
Stenciled holes:
- A stencil is attached to the prepared nails as in the first case and a contrasting color is applied to the hole.
- Remove the adhesive components, dry it, secure everything with topcoat and dry it.
Wells with foil:
- On prepared nails (1 layer of primer + base + drying in a lamp + 2 layers of gel polish, dried in a lamp).
- Use a brush to draw holes with special glue and place foil on top of it.
- When the glue dries, remove excess foil.
- Fix with finish and dry in a UV lamp.
Sometimes the hole at the base of the nail is not painted over with a contrasting varnish or a colorless gel polish is used.
Matte nail design
Plain coating
A classic manicure that will suit any look. For short nails, it is better to choose dark, rich colors of varnish; light colors look better on long nails
Focus on one or more nails
Once the freshest trend, now moving into the category of classic varieties of manicure. A manicure with an accent is a great way to refresh and diversify a plain finish.
Gradient
A luxurious manicure with a smooth transition from one color to another looks great not only in a glossy version, but also in a matte one.
Rhinestones
A manicure with rhinestones or stones emphasizes the play of light, creating an impressive effect.
French manicure
Matte French manicure can be done in both a combination of colors and a combination of textures.
Water effect
If you add a few drops of glossy varnish to the matte finish, you get the effect of rain. The most convenient way to perform this manicure is with a dot – a metal stick with a ball at the end.
Patterns on nails
The combination of matte and glossy allows you to create incredibly spectacular patterns on your nails. You can use stencils or paint with a brush, toothpick or dots. This type of design looks especially beautiful with dark varnish colors.
Geometric patterns in a matte design look impressive on nails. Choose rich contrasting tones for your manicure.
Watch the video master class on creating a matte manicure with glossy patterns:
A manicure with matte varnish can be easily done at home. If you don't have a matte varnish on hand, there are several ways to turn a glossy finish into a matte one. And fashionable nail design ideas can turn any manicure into a small masterpiece.
More interesting articles:
Geometry
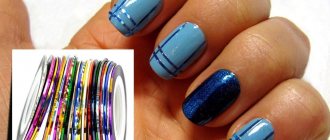
There are several options for this nail art using tape, shiny stripes, stencils, and brushes.
Geometry using tape:
- After standard nail design, base coating and drying in a UV lamp, the adhesive tape is applied to the nails.
- Paint over the tape with a layer of gel polish, remove the tape, and dry in a lamp.
- Cover with topcoat, dry and degrease.
Technique with shiny stripes:
- After standard nail design, base coating and drying in a UV lamp, shiny strips are glued on. Apply several layers of colorless gel polish on top, drying each layer in a UV lamp.
- Apply a closing topcoat, dry and degrease.
Geometry stencils are tape, paper with adhesive backing and manicure tape.
You can make a pattern with construction tape in the form of “shreds”:
- Nails are decorated, a base is applied, and dried.
- After coating with gel polish and drying, apply tape at different angles to the surface, painting open areas with gel polish of different colors.
- Finish with top coat and dry.
The geometric manicure brush is a classic.
Technique for creating a gradient in contrasting shades for one of the nails:
- Nails are shaped, covered with base, and dried.
- White gel polish is applied and polymerized in a lamp.
- Apply 2 drops of white and burgundy varnish on the foil.
- Add a burgundy shade to a drop of white and mix with a brush.
- Draw diamonds at the base, making a jagged fence in a mixed tone, and dry it.
- Enhance the burgundy color in a mixed drop on the foil and make a second row of diamonds with a brush, dry.
- Make the color darker from row to row, drying each one in a lamp.
- Cover with finish and dry.
The top new products of matte gel polish for short nails include its combination with a glossy finish. The photo shows some versions of combining different techniques.
Matte manicure with gel polish: how to make your nails matte
More precisely, it came into fashion last year and, it seems, is not going to go out. The secret of its popularity is its simplicity of execution and the ability to combine it with a wide variety of textures. Matte nails are usually used in knitted manicures, and they themselves look very unusual. However, matte manicure also has its drawbacks. Who is a matte manicure suitable for ? It suits everyone without exception, the only thing is how you apply it: you can just do matte monochromatic nails, or you can complement the manicure with a glossy texture, make stripes or drops of alternating textures, use different shades of gel polishes, patterns, glitter and rhinestones. But this depends on the occasion for which you are doing this manicure.
This time I wasn’t going to any events, so I chose discreet colors of gel polishes and a simple design, which, firstly, would suit any clothes and any situation, and secondly, should last at least three weeks, and so that it was not visible that it had grown, got dirty or worn out. Therefore, my choice is a manicure with holes, taupe matte, complemented by a dark burgundy gloss on the ring fingers.
IMPORTANT - about choosing the color of a matte manicure . The main thing to keep in mind is that matte manicure gets dirty! This is not gloss, from which everything that falls on it is immediately erased. Matte manicure has a rough surface on which dirt remains, like scuff marks on suede. The lighter your manicure, the more noticeable it will be. Therefore, it is best to choose dark colors - from coral and darker (although coral can fade). Ideal - black, brown, maroon, etc.
Advice: if you really want pink, white, etc., then stock up on nail polish remover or alcohol, which you will have to carry with you. If you see that your matte nails are dirty, wipe them with a cotton pad or handkerchief soaked in one of these products. Yes, the smell will give you away, but your nails will look decent.
What you need for a matte manicure:
- Base coat (whatever you usually use)
- Colored gel polishes (also any you like)
- Matte finish coating (it’s better not to skimp here, since this coating should give a high-quality velvety matte finish, and not a slight shabby look, and should adhere well). The following finish was used in my manicure:
- Liquid for degreasing and removing sticky layers
- Glossy topcoat (if a glossy texture is added to your manicure)
- UV lamp 36W for drying manicure
How to do a matte manicure with gel polish.
- We degrease the nails, clean the cuticles and slightly file the surface of the nail plate.
- Apply the base coat and dry it under the lamp for 2 minutes.
- Apply colored gel polishes and dry under a lamp. If the color is not intense enough, apply them in several layers.
- After drying, we apply finishing coats to the nails - matte and glossy, depending on the design. Dry under the lamp for 2 minutes.
- Remove the sticky layer from the matte coating with liquid. This isn't always necessary, but my manicure used a matte finish with a tacky layer.
The photo below shows how matte nails are made: coating with colored gel polish, finishing, finishing after drying in a lamp for 2 minutes and finishing after removing the sticky layer (that is, the final result)
I invite you to the VegWorld YouTube channel. On it you will find vegetarian recipes, lectures on proper nutrition, cleansing the body, health and a healthy lifestyle. Be sure to subscribe!
