Nail modeling is a complex and meticulous procedure that requires special preparation of the nail plate. To work with nails, several types of products are used, which serve as the foundation for applying acrylic and gel coatings. One such coating is a primer. Everyone who decides to paint their nails should know what it is and why it is needed.
Nail primer: what is it?
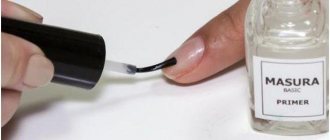
A novice manicurist needs to know what a nail primer is. Any material is needed for something, serves certain purposes. Translated, the name of this product means “initial”, “first”. It is used to remove the greasy layer, clean and dry the plate area, which helps to evenly distribute subsequent layers of cosmetics.
Primer composition
The consistency of the primer is similar to ordinary water or gel. Sometimes it has a smell similar to vinegar, but sometimes it is odorless.
Primers are divided into two classes:
- acid;
- acid free.
The product is sold in glass or plastic bottles with a cap on which a brush is attached. The composition of ingredients does not contain unnecessary colors and flavors to reduce the likelihood of allergies.
Acid based primer contains methacrylic acid (30% to 100%). It promotes adhesion of the nail structure to the applied materials. This product is often used when applying acrylic to the nail. In addition, the composition contains chemical components such as ethyl acetate and 2-hydroxyethyl methacrylate.
Ethyl acetate has a pleasant fruity aroma, softens the skin and serves as a solvent. These substances affect the quality and effectiveness of the composition. Acid is very drying, so it is recommended to use a product based on it on oily and upward-growing nails.
A distinctive property of the primer is quick drying. It leaves a pale gray residue once it has appeared, which means the next coat is ready to be applied. When interacting with the skin, it can cause an allergic reaction, expressed in hyperemia and irritation.
A primer that does not include acid is safer, but is inferior in terms of adhesion. Professionals recommend choosing it if you are performing a manicure with gel polish.
How long to dry the gel polish base?
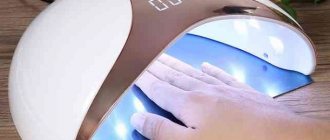
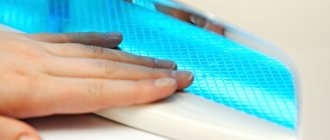
The gel polish base should be dried for the same amount of time as a flower bed, that is, from 30 seconds in an LED or hybrid lamp and from 2 minutes in an ultraviolet lamp. This is provided that the device is powerful enough - 36-48 W.
Transparent bases with a liquid consistency may polymerize faster, but not much. Camouflage ones can be as dense as flower beds. Therefore, in any case, you should not save on polymerization time. After all, bases are often applied in a fairly thick layer to even out the nail plate. And if you don’t dry it well, the coating won’t last long. Sometimes the bottle with the product indicates the recommended polymerization time.
The correct way to dry a gel polish base is as follows:
- Apply a thin rubbing layer.
- Use a drop for leveling, distribute, respecting the architecture of the nail.
- Place your finger in the lamp so that the plate is evenly exposed to radiation and the product does not flow from it.
- Maintain the allotted time.
- Repeat steps 1-4 for each nail plate.
Experienced masters immediately apply the base to the nails of 4 fingers, then dry. Separately, they deal with the larger ones and place them in the lamp in the same way as the rest. That is, the finger should be parallel to the surface of the table on which the device is located.
Do I need to dry the primer?
The primer must be dried before applying the base, but not in a lamp, but in air. This watery product does not polymerize. Its liquid component evaporates, leaving a white coating on the nail, a slight stickiness and drying out the surface of the plate. If you also use a lamp, the effect will be too aggressive. Fragile nails can be damaged, so do not speed up the evaporation period of the primer. It will dry out in a minute.
Is a procedure necessary for the top?
The top, which is applied over the flower bed for gloss or matte, must be polymerized in a lamp. This product hardens only when exposed to radiation. If you leave the topcoat liquid, it will not dry out on its own, but will simply be erased. And the top is needed not only for the external completeness of the manicure, but also to protect the color from fading and mechanical damage.
How does a bonder differ from a primer?
It is not enough to know what a nail primer is to perform a manicure at a professional level. For proper extension you will also need a bonder. It is used to treat the nail before applying a coating with decorative properties.
The bonder determines the strength of the connection between the nail and this coating. It helps to create a solid base and make the work high-quality and durable. The primer prepares the work surface for uniform application - that's what it's for.
Bonder guarantees high-quality grip. It does not contribute to degreasing, disinfection and dehydration, but creates a protective film on the surface.
The bonder has a sticky texture and, after application, dries under a lamp for about 3 minutes. Used after the primer.
What is a nail primer for?
Nail primer is an important element that must be used to create a perfectly smooth and grippy finish. It helps to quickly dry the nail plate, removes unnecessary fat from its surface, which prevents the perfectly even and smooth application of gel polishes or extension gels.
The primer is used at the very beginning of the procedure, after finishing the manicure. It is characterized by a liquid consistency, dries in a matter of seconds, creating a light light shade on the surface of the nail plate. Its use is considered mandatory to create a strong and durable manicure.
Types of primers
Pre-primer is a delicate product with protective functions. Some call it bond. It does not contain coloring or flavoring components, it is gentle on the nail and does not penetrate into the inner layer. Prep degreases well.
When doing extensions, it is often applied before acidic products in order to remove the fatty layer well. With prolonged use, it does not dry out or make nails brittle.
Prep cannot be used for extensions, because it gives weak adhesion.
Application:
- as a base for traditional varnish;
- as a protective agent for damaged nails;
- a product that promotes additional adhesion of the nail to the upper artificial layers (especially important for people suffering from hyperhidrosis);
- with intolerance to artificial materials.
Acid primer is intended for procedures with healthy nails. It softens the nail, which improves adhesion. It is forbidden to apply it to weak, diseased and brittle nails, as it is toxic. It is not recommended to apply the product liberally or several times in one procedure. Often used for extensions using acrylic-based materials.
An acid-free primer (ultrabond) has a neutral and gentle effect on the natural structure, but performs the same tasks. The product is more suitable for removing fat and dehydration. It is used both under gel and for pedicure and manicure with bio-varnish.
Is it necessary to use a primer?
You can find nail technicians who do not use primer. According to them, such a remedy is ineffective, the result of its action is invisible, and the cost is too high. But, as they say, you don’t skimp on your health. In medicine, there have been cases of the development of fungal diseases that were formed precisely as a result of the fact that no primer was used during nail extensions. After all, the moist environment that forms on the surface of the nail plate under a layer of artificial “non-breathable” material is beneficial for the development of various kinds of pathogenic microorganisms. In addition, under extended nails it is quite difficult to suspect the development of the disease in the early stages. More often, girls seek medical help only when the artificial material has been removed and obvious symptoms of a fungal infection are detected: discoloration of the nail plate, unpleasant odor, soreness, redness, and others. To eliminate such problems, long-term, expensive treatment will be required.
We also note that without a primer it is impossible to achieve strong adhesion of the artificial material to the nail plate. This means that the acrylic or gel coating will peel off much faster than when using such a product.
Thus, we can give a definite answer: such accompanying material for extension is recommended to be used when carrying out the procedure of modeling nails with artificial material. In this case, it is important to follow the technology for applying such a substance, and it is also necessary to first clarify in the instructions how to dry the primer of the purchased brand.
The best companies
What is a nail primer and why it is needed is now clear, all that remains is to review popular products.
Lady Victory acid-free primers perfectly degrease, provide reliable adhesion and prevent peeling of the coating. Ideal for beginner manicurists due to the absence of acidic substances in the composition. Price range from 80 rub. up to 350r. Manufacturer – China.
Le Vole Ultra Bond is ideal for working with gel and acrylic. The compositions of this brand disinfect and clean the nail well, while maintaining the natural pH level. Price range from 250 rub. up to 400 rub. Manufacturer – USA.
Kodi Professional Ultrabond has a gentle composition, without methacrylic acid. Used when working with gel and for acrylic extensions. Average price – 450 rub. Manufacturer – USA.
EZ Flow produces products without dyes or fragrances. The brand's primer dries quickly, leaving a white residue. The brand produces all types of materials for working with different nail coatings. Production - USA. Price range from 500 rub. up to 1100 rub.
IBD has been known on the market for over 30 years. The brand produces products suitable for people with hyperhidrosis and very brittle nails. IBD stick contains methacrylic acid, which prevents peeling of materials. Product cost from 300 rub. up to 900 rub. Manufacturer – USA.
Runail Professional Primer Acrylic System produces a product for acrylic extensions. Has excellent adhesive ability. Manufacturer – Russia. Price from 200 rub.
Yoko APR-15 is suitable for both gel and acrylic. This primer is acid based and its adhesive properties are significant. Price 150 rub. Manufacturer – Russia.
TNL Professional is also used for strong adhesion of nail and extension materials. The brand produces both primers with and without acid. Cost - from 180 rub. up to 240 rub. Production - South Korea.
Bluesky reduces the likelihood of coating peeling and increases adhesion. It is combined with both gel and acrylic, and is also used when coating with gel polish. There is no methacrylic acid among the ingredients. Price range from 140 rub. up to 250 rub. Production is located in China.
Irisk is a professional gel-free primer. Produces products for acrylic and gel.
Price range from 150 rub. up to 440 rub. Made in the USA. Available in bottles with volumes from 10 ml to 15 ml. The brush is usually included.
The types and types of primers determine the application technology
The primer for nail services has several special properties, which allow us to talk about its mandatory use for extensions, both gel and acrylic, on tips and forms, shellac coatings and even when painting with regular varnish. The answer to the question whether the primer needs to be dried in a UV lamp will depend on the basic composition of the substance, and information about this is often available in the instructions for use of the product.
Acid primers for nail art
Most often, all acid primers that can now be found on the market are made based on methacrylic acid. It is quite caustic and aggressive, so it must be used with extreme caution. Manufacturers claim that the elements contained in the composition improve the nail itself, increasing its quality, while softening it, causing the scales of the nail plate to rise. The primer degreases and dries the nail extremely well, which ensures maximum adhesion to the coating.
Photo from the site: handmadereviews.net
Whether it is necessary to dry the primer in a lamp or not is an ambiguous question, since there are varieties that require exposure to ultraviolet radiation, and there are those that do not need this at all and dry well in the open air. Acidic primers are recommended for use with acrylic extensions, as well as when working with gel, but in the second case you can get by with more gentle substances that do not contain caustic acids.
Acid-free primer: should it be dried in a UV lamp?
A cheaper and more accessible primer option, and at the same time more gentle, is an acid-free composition. This substance is slightly inferior to the previous option in terms of adhesion to the surface, therefore it is not customary to use it with acrylic extensions, it does not give the desired effect. Such a primer needs to be dried in a lamp much more often than an acid primer, but even here you need to look at the manufacturer’s special instructions. A fairly common brand of this composition is BLUESKY. But is it necessary to dry the Bluesky primer in a lamp?
Photo from the site: bestshellac.ru
An acid-free primer is used for gel coating or extensions, and such a coating would also be quite appropriate under regular varnish. This composition does not penetrate particularly deeply into the nail, but rather creates a rough film on its surface, to which the main coating already clings. Moreover, acid-free primers give nails additional strength and resistance to damage.
To the question of whether Bluesky primer needs to be dried in a lamp, there is a very specific answer given by its manufacturer and it is negative. This composition dries perfectly in the air and in just a couple of minutes the surface becomes matte in appearance and slightly sticky to the touch. This stickiness should never be removed, and it is not recommended to touch it with your hands, just apply a coating over the product and enjoy a wonderful manicure for a week, or even two.
Bonder or pre-primer for nails: should it be dried in a lamp or not?
Photo from the site: womane.ru
Another common type of composition used to pre-coat nails is called a bonder or pre-primer. However, it still cannot be considered a full-fledged primer, since of all its properties it only has degreasing properties. However, this is also important for a long-lasting manicure. Such compositions are definitely not suitable for acrylic extensions, since the coating will simply peel off soon, but for applying regular gel polish it will be just right.
In addition, such a primer is often used before applying an acid composition to rid the nail of excess oil. It must be dried in a lamp, but this is not at all necessary, since it itself dries perfectly in the open air in just a few seconds or minutes.
Primer for gel polish and shellac
What a nail primer is and why it is needed has already been explained, and from this it becomes clear that its use is mandatory.
The product disinfects and removes excess moisture from the nail plate, which saves from various fungal diseases, because if a humid environment forms under the material, this will promote the development of pathogenic bacteria. The primer also increases the service life of the decorative coating.
Experts recommend using an acid-free product under shellac, so your nails will remain healthy after the manicure is removed.
Before using gel polish, the primer can be neglected if the client has dry and non-greasy nails. If a client suffers from hyperhidrosis, applying primer is a necessary ritual. It is also recommended to additionally protect nails that are brittle.
How long does it take for primer to dry?
After applying the primer, many wait for a second effect and immediately proceed to apply gel polish or gel for nail extensions. It is not right! The primer dries on the nails from 20 to 60 seconds, everything is individual. To ensure the full effect of the primer, you must wait this time, make sure that the nail plate is thoroughly dry and ready to apply the main products.
You only need to check the dryness level of the primer visually; touching the nail plate with your fingers or objects is prohibited!
It is impossible to say exactly how long it takes for the primer to dry on your nails; you just need to focus on the time of 60 seconds, and only after that proceed to applying gel polish. If the nails are not dry enough and a base is applied on top, the effect of the primer will be completely canceled.
Primer for regular varnish
This product can also be applied under regular varnish. It will serve as a primer layer, level the working surface of the nail and protect it from the penetration of chemicals. For those whose hands sweat a lot, the primer is a godsend. Under regular varnish, you can use a primer that does not contain acid.
Some manufacturing companies purposefully produce primers not only for gel and acrylic, but also for traditional varnish. For example, this is Yang nails with its acid-free product – Protein Bond. In tandem with varnish, you can also use a base coat.
Primer for gel nail extensions
The gel has large molecules, and they cannot adhere well to the nail scales. The primer fills in the unevenness of the keratin fibers. For gel modeling, you can purchase an acid-free product. Experts advise applying it in two layers when applying extensions to tips or forms.
The tips must be handled carefully; it is important that the product does not get on them, otherwise they will crack. The primer can be used for correction, but it can only be applied to a regrown nail. Contact with skin or artificial turf must be avoided.
How to use nail primer - step by step instructions
What a nail primer is and what it is needed for, a true professional knows very well and actively uses it in his work. But even a beginner, after studying the instructions, can master the correct application technique, and then it will bring the desired results.
- First, a regular manicure is done and the cuticle is pushed back. A warm bath is pre-prepared. Next, you need to remove the glossy shine with a buff. Do not remove too much, otherwise you may damage and weaken the plate. Dust is removed with a brush. Now apply the primer.
- A small amount of product is collected; excess liquid can be removed with a napkin or brushed from the brush into the bottle.
- The brush is placed in the center of the nail plate, you need to let the primer spread. A thin layer is applied, and the nail should be touched pointwise. Areas should not be left untreated. But an abundant layer will lead to the opposite effect, the nail scales will close.
- If the primer gets on the skin, you must carefully and carefully remove the product with a napkin or rinse the area under running water.
- The drying stage remains. There are several options: naturally, in a UV or LED lamp. Information on use can be found on the bottle or in the instructions. An acidic primer, when dried, gives a pale gray coating; an acid-free primer should dry well and not leave wet marks. The surface becomes rough to the touch.
- Now you can distribute the decorative coating.
- When applying gel extensions, the primer is applied before applying the base coat. If the system consists of three phases, then this will be the first layer. If this is a single-phase system, then the first layer is applied differently.
- The brush should be half dry, apply the product using rubbing movements. Then the gel is distributed and the hand is placed in the lamp.
- If tips are used, then a primer is also applied before the bonder.
- The system is as follows: first, degreasing is done with ultrabond, then a thin layer of acid-free product is applied and glue is applied.
- After application, the primer retains its active properties for 40 minutes, so it is recommended to apply it to 2-3 nails in stages.
How to dry gel polish
Gel polish should be dried following several rules:
- Each layer is polymerized. First, the base is applied by rubbing in, then with leveling, after which the hand is sent into the lamp for the first time. Next they apply a flower bed and also dry it. Then, for brightness, they paint with another layer and it is polymerized. A finishing coat is applied to the dry gel polish and dried.
- It is important to position your hand correctly for the polymerization process. To properly dry gel polish, the brush should lie flat, parallel to the table surface. If it is turned on its side, the material will flow. The fingers should not be pressed together; the hand should be relaxed.
- The brush cannot be removed from the “oven” during the entire polymerization time. Otherwise, the process will be disrupted, the coating will dry unevenly, which is why detachments will appear later.
- You should dry your thumbnails with gel polish separately in a lamp. The hand is placed inside so that the plate is parallel to the table top. You should not put your thumb on its side, this is also fraught with the appearance of streaks and poor-quality polymerization.
All layers of gel polish must be dried until completely cured, maintaining the required time. When the material has cooled slightly, it is necessary to remove residual stickiness. Almost all flower beds have it, but this does not mean that the coating has not dried out.
Which lamp is better
Gel polish should be dried with a lamp suitable for this product, this can be understood from the information on the bottle. It is marked with:
- UV – ultraviolet device only;
- LED – an LED lamp should be used;
- UV/LED – the product dries under both types of radiation.
If there is no such marking on the bottle, it means that it can be polymerized in any device, including a hybrid type.
A lamp with new lamps with a power of 36-48 W dries gel polish better, regardless of the type. In this case, its real indicator corresponds to the nominal one, and it is impossible to make a mistake with the duration of the process and leave the layer of material wet. Such devices have several light sources, so the nails are evenly exposed. And their different parts dry out equally well.
Problems arise with 9 and 18 W devices. They require long-term polymerization, but even if the curing time is observed, the product may not dry out in deep layers. This is caused not only by insufficient power, but also by a small number of radiation sources.
Gel polish dries quickly with an LED or hybrid lamp with a power of 36-48 W. In addition, this type of lamp lasts longer during active use. The LEDs have the same qualities, working together for 50 thousand hours. And ultraviolet lamps can maintain the brightness as at the beginning of operation, but their power decreases after 2-3 months of active use.
If without a lamp at home
It is possible to polymerize gel polish without a lamp at home using improvised means, but you should not count on a good quality manicure:
- Use ice baths. Dip your fingertips into a bowl with water and pieces of ice and hold for up to 10-15 minutes. The cold will harden the coating, but your hands will also get very cold.
- First place the bottle with the product in the refrigerator. After this, it is applied to the nails. Gel polish thickens significantly, which is why it dries faster. But it can lie on the plates in lumps.
- Special catalysts are used. This is an ointment, spray or gel that is applied over the flower bed. Catalysts are produced by different companies.
- With the help of the sun's rays. You can dry gel polishes by going outside, but not in the shade. After all, the sun's rays are also ultraviolet. But the procedure will take much longer, and you cannot vouch for the longevity of the manicure.
- Using a medical lamp with blue radiation (Minin reflector). It emits infrared rays, not ultraviolet, so the polymerization procedure will also be long. And the quality of drying will leave much to be desired.
Some people recommend using a hairdryer or fan to harden the coating. But these are the least reliable methods. The flow of warm air will cause gel polish to ripple rather than dry.
Should I dry the primer in a lamp?
There are self-curing and light-curing primers.
Self-curing nail primers dry quickly. Everything is individual, depending on the manufacturer and the intensity of the product - on average from 5 to 60 seconds. There is no need to dry them in a lamp.
Some manufacturers produce products that are dried in a UV lamp. This is usually indicated in the accompanying information. Such primers have a thick and viscous texture, while others are liquid, like water.
It is important to follow the duration of exposure in the lamp indicated on the product, otherwise you can harm your nails. Some primers take a long time to dry.
The main thing is not to apply the next layer until the primer has dried.
Don't miss the most popular article in the section: How to extend nails with gel polish. Nail extension instructions for beginners. Photo.
Acid primer
An acid primer is a product that contains special acids that quickly block the process of the appearance of oily shine on the nail. Does the acid primer need to be dried in a UV lamp? The answer is clear - no! It dries on its own in a matter of seconds, quickly preparing the nail plate for application of gel polish, providing a grippy surface.
If the nail surface is dry, no acid primer is used.
When is it used?
Acid primer is not uncommon in the field of manicure procedures; it is used almost always, mainly for those clients whose nail plate is characterized by excessive oiliness. Experts do not recommend applying it before regular nail polish, because the effect will be minimal. The main purpose of the acid primer is to apply it before applying nail extensions and coating them with gel polish. The product ensures maximum strength of the nail plate and also helps to extend the life of the manicure.
How to apply?
The product is characterized by a relatively liquid consistency, therefore it is applied to the nail plate in a minimal amount. It is applied to the tip of the brush and placed in the middle of the nail, carefully spreading it over all corners of the surface.
Excessive amount of primer will only spread beyond the nail area, creating a burning effect in damaged areas of the skin during manicure.
It is necessary to approach the application of the product carefully so as not to aggravate the situation or provoke a negative skin reaction. Do I need to dry the primer in UV? No, it does not require additional ultraviolet exposure, and dries quickly and easily at room temperature.
Professional recommendations for working with primer
What is a nail primer and why it is needed should now be clear.
But it remains to learn a few more tips from the masters of the manicure industry:
- If the master has injured the cuticle and started bleeding, and there is no hemostatic agent on hand, you can use a primer, but there will be a strong burning sensation.
- If too much product is applied, the client may experience 3rd degree burns.
- Before applying the finishing layer, you can lightly walk the cuticle with the product. This will get rid of microcracks and detachments, and your nails will look good until the next extension.
- When using an acid primer, the periungual skin can be lubricated with a rich cream. This will protect against possible irritation and burning.
- You should avoid getting the primer on the tips during extensions.
- The product should be applied with a brush.
- If the nails are too elastic, apply an acid-based product along the end part and the free edge, and the rest with ultrabond.
Answers to questions from a manicurist
Primer is a common tool for creating a long-lasting manicure, so there may be some questions when using it. Instead of searching the Internet for a set of questions for complete information about its action, just read the answers to the most frequently asked questions, find the information you need and be comprehensively savvy in this area. All answers are given by professionals who have enormous experience in the field of manicure and have encountered any of its features.
Which primer is better to choose for gel polish?
Gel polish is a tool for creating a flawless and dense manicure, which also requires the use of additional strengthening products. This is a primer, which can be acidic or acid-free. At this stage, girls have many questions regarding which option is more effective, and which one to give preference to when applying gel polish.
For gel polish, it is recommended to use an acid-free primer, the properties and components of which are sufficient to dry the nail plate well and prepare it for applying the base coat. If the acid-free primer does not cope with its duties, the manicure becomes deformed after just a few days, which means that there is an increased fat content of the nail plate, and here it is necessary to choose only an acid primer. It will 100% cope with oiliness and provide a tenacious surface.
What lamps are needed for drying?
Sometimes experts may hear questions about whether it is necessary to dry the primer in 36-watt lamps, and how long the whole process takes. In fact, the primer dries quickly enough without this and does not require additional drying. Many people may mistakenly dry the primer in a lamp, but as a result they will experience an unpleasant burning sensation in their nails that does not disappear for a long time.
Do I need to use a degreaser when using an acid primer?
No, the acid primer fully copes with its functions, quickly degreases the surface of the nail plate, and prepares it for the application procedure. If for some reason an acid-free primer does not provide the desired tenacity and strength of the nail, you need to make sure that there is no dust, cuticle particles or other contaminants on the surface caused by the creation of a manicure.
Is Bluesky primer dried in a lamp?
Bluesky primer dries quickly even without exposure to ultraviolet rays, but sometimes there are cases in which you can dry it with a lamp by lowering your nails for 20-30 seconds. The instructions for using the product provide complete information on how to use the primer and what secrets there are for using it. To make your work more favorable and productive, you must become familiar with their features.
Bluesky should be applied only in a thin layer, without going beyond the surface of the nail plate. Thanks to its liquid consistency, it quickly spreads over the nail, is absorbed and dries in a matter of seconds.
You can also find out additional information about the selection and use of manicure primer in the following video:
How can I replace primer for gel polish?
If you know what a nail primer is, you can find a replacement for it. However, not many people know why it is needed. Homemade options can only dry and disinfect the surface being treated; adhesive properties cannot be achieved.
Vinegar (9%) removes remaining grease and promotes the evaporation of excess moisture, but it does not lift the nail scales and therefore does not increase the tenacity of the materials. Boric acid (3%) has antiseptic properties and slightly increases tenacity, but only a gel will do.
Nail polish remover, if it does not contain acetone, will dry your nails and increase their adhesive properties. You can work with it instead of a primer only if the composition does not contain oils.
Nail primer can be replaced with nail polish remover.
In addition, you can wash your hands thoroughly with laundry soap. This will help remove the oily layer, but the skin on your hands will suffer. 96% pure alcohol or lemon juice will do. All of the above options are applicable, but will not give a significant effect, such as that provided by a special product.
The primer protects your nails from diseases and allows you to prolong the joy of a first-class manicure. Nail art beginners need to learn in detail what a nail primer is, how to choose it according to the task, what it is for and how to use it.
Primer manufacturers
Let's consider the advantages of primers from the most popular manufacturers in our country:
- The Ezflow brand offers its customers a wide range of nail extension materials, including acidic and acid-free primers. The products of this brand are manufactured on the basis of modern scientific developments and are distinguished by high quality and safety. The company produces both primers designed exclusively for one type of extension (acrylic or gel), as well as universal ones, which can be used for both the first and the second material.
- Products of the Kodi brand are in demand not only for their decent quality, but also for their low cost compared to other brands.
- Domestic materials for nail extensions are in demand not only in Russia, but also in European countries. This brand is one of the few that produces UV primers, that is, those that need to be dried in a lamp.
Thus, we talked about what the described nail extension material is, examined the advantages and disadvantages of various types of this product, and also answered the question of whether the primer needs to be dried in a lamp. Now you can safely go for the procedure of extensions or gel polish coating without fear for the health of your nails.
Useful videos on choosing and using nail primer
Which primer should beginners choose: acidic or acid-free:
Subtleties of using nail primer:
It is impossible to imagine beautiful well-groomed nails without a stylish original manicure. Every girl or woman strives to give herself a chic image with the help of a bright coating of nail plates. In most cases, nails have to be extended. Artificial nails require special care, but rarely does anyone know what products are needed for this and how to use them. One of these drugs is a primer, without which it is impossible to imagine proper care.
Primer action
First you need to understand what a primer is. This is a colorless liquid and is indispensable for nail extensions. Before applying it, the nail plates must be processed using a sanding file and given the desired shape.
The primer strengthens the gel after application and prevents it from peeling off. Artificial turf lasts longer and lasts longer. Many girls use a simple nail polish remover to degrease. A primer will also come to the rescue here; it perfectly disinfects and degreases the nail plates.
After washing your hands or special baths before a manicure, you should also use a primer; it will do a good job of removing dirt and preparing your nails for application. It can be either gel polish or simple polish.
There are three types of primers:
- acid-free (excellently cleanses, dries, an indispensable assistant for gel extensions);
- acidic (in most cases used for acrylic extensions);
- pre-primer (the most popular preparation, after it you can use other types of primers).
You need to apply a small amount, being careful not to get the product on the skin near the nail. This may cause a painful burn. It is better to use a small brush and apply a thin layer to your nails. You cannot apply several layers, the product will not only take a long time to dry, but can also ruin the entire manicure.
Be prepared for the fact that the drug has an unpleasant, pungent odor. It is better not to bring your nails covered with it close to your face and try not to inhale the fumes until everything has evaporated well. If you are allergic to odors, you may forever lose the desire to use this wonderful product.
Acid-free primer
Another primer option is acid-free. It got this name for a reason, because it contains no acid at all. This version of the product is used most often because it is universal, suitable for different structures and surfaces of nails, and does not dry out the nail plate.
Sometimes some girls, in the process of creating a beautiful manicure, may wonder whether it is necessary to remove the sticky layer from the nail after applying the primer. No! After applying it, you immediately need to start using the base, then the colored gel polish itself, and the top. The sticky layer is removed only after the top coat at the final phase of creating a manicure. Do I need to dry it in a lamp? The answer is also no! 20 seconds is enough for the primer to dry and take effect.
An acid-free primer does not leave a white mark behind, so you only need to focus on the moisture level of the nail.
When is it used?
The use of acid-free primer is quite extensive, because it is used both during nail extensions and at the time of coating them with gel polish. Sometimes experts allow an acid-free primer to be used for regular manicure with varnish, which does not require drying in a lamp.
It is worth noting that even if the nail plate is too oily, an acid-free primer will be appropriate and effective. The main thing is to dose the amount of its application, not to abuse its properties, allowing it to disappear from the nail plate in a matter of seconds.
How to apply?
Apply the product to the nail in the standard way; just take a small amount of product on the edge of the brush and apply it to the nail, smoothly distributing it over the entire surface. It is important to learn how to apply the product evenly so that there is an even amount of liquid over the entire area. This will allow the primer to quickly absorb into the nail and dry it completely, ensuring a good result when applying gel polish. There is no need to dry the product in a lamp; just leave it for 30-40 seconds, avoiding any contact with the nails. The primer dries perfectly on its own, allowing you to create a beautiful and even manicure.
