French manicure is a universal design option , suitable for both short and long nails. It adds elegance and well-groomedness to women's nails and suits any appearance. With this manicure technique, the main attention is paid to the tip of the nail plate. In the classic version it is coated with white, in the colored version it is coated with any desired varnish color. In this case, a base of flesh or another natural color is applied to the entire nail.
How to do a French manicure with gel polish
Many women dream of their nails remaining beautiful for a long time. But ordinary varnish quickly cracks, chips off the ends, and it often happens that there is no time to update your manicure every day. To make the French look last a long time, you can do it using gel polish. By following the instructions described below, you can easily perform this French manicure.
A high-quality French manicure is done in a salon, but you can do it yourself, you just need to be patient. You may not get a satisfactory result right away, but the second or third time you will definitely succeed.
So, let's figure out how to do a French manicure with gel polish.
Interesting: see photos of short nails with a French manicure.
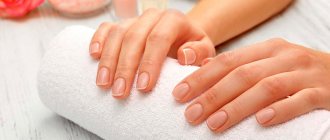
Preparation
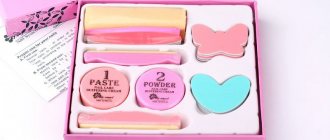
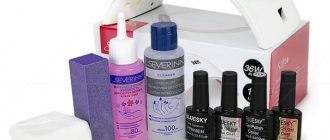
To perform a manicure you will need:
- File.
- Orange sticks.
- Lint-free wipes.
- Degreaser.
- Buff for polishing the nail plate.
- Primer.
- Base and top coats.
- Gel varnishes (flesh and white for a classic design or any color of varnish for a colored one).
- Stencils for French manicure or a brush for painting nails.
- UV or LED lamp.
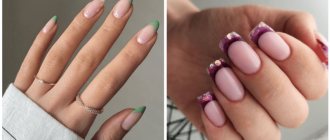
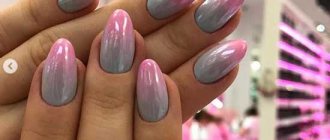
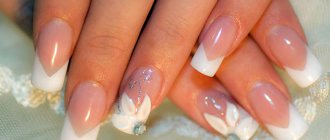
Photo of French manicure with gel polish
Step-by-step instructions on how to do a French manicure with gel polish
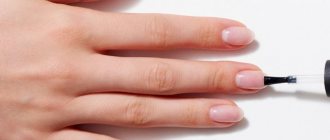
Before you do a French manicure with gel polish, you need to prepare the nail plate. Carefully remove cuticles using an orange stick. Then degrease the surface of the nails using lint-free wipes and give them the desired shape.
- Next, buff the surface in the direction of nail growth.
- Apply a primer that improves the adhesion of the base layer to the nail plate. There is no need to dry it under a lamp.
- Apply a thin base coat and cure it in a lamp for 2 minutes.
- Apply the main color to the entire surface and also dry in a lamp.
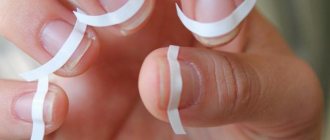
- Draw a smile line (crescent) on the tip of the nail using a stencil or by hand with a brush, and after drying in a lamp, you can reapply another layer if necessary.
- Apply top coat and dry.
- Remove the sticky layer with a lint-free cloth using degreaser or nail polish remover.
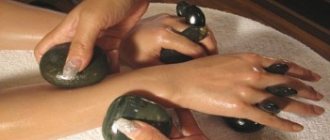
- Apply nourishing cuticle oil and rub it thoroughly around the entire nail.
Detailed instructions with recommendations on how to cover your nails with gel polish can be found here .
How to do a French manicure with gel polish
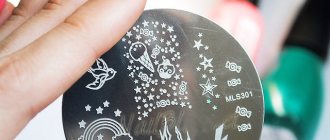
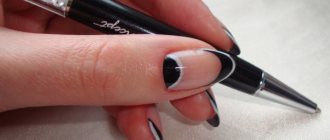
You can combine rhinestones, lunar nail designs, monogram painting or mirror rubbing with the French coat.
Recently, the opinion that one can judge her by the appearance of a woman’s hands has become very popular. It’s quite difficult to disagree with this, because if your hands are dirty and unkempt, then the desire to interact with a person disappears.
One of the most popular and popular types of manicure is the “French manicure” or as it is otherwise called “French”.
This type of manicure involves covering the nail with white or colored varnish or gel from the middle or grown part of the nail and covering it with a second translucent layer of varnish. There is a wide variety of types of French manicure: classic, colored, millennium, non-standard with the use of additional materials. The undoubted advantage of the French coat is that it is suitable for almost any nail shape. French manicure looks very original and stylish, fashion for it doesn’t even think about passing, and it’s suitable for absolutely any event. Most often, French manicure is performed using white and translucent varnish, which is applied as a fixative. Few people know which brush to paint French hair with correctly. More on this later.
To perform a neat French manicure yourself, you cannot do without a special brush, which is used to apply the so-called “smile” to the nail plate. There is a huge selection of manicure brushes, to choose the right one, you need to know some rules. All manicure brushes can be divided into several types, depending on the material from which they are made and the thickness of the brush itself. Nowadays there are French brushes on sale, both made from natural and artificial materials. Natural tassels for French coats are mainly made from sable or kolinsky fur. Artificial brushes are made from polymers such as nylon.
By size, brushes are divided into numbers from 0 to 8. For a French manicure, the most suitable would be a thin brush with a thickness number of 0, having a width of no more than 1 mm, it is desirable that it be made of natural material, since such a brush is softer and will last much longer than artificial. Using a thin brush, you can perfectly draw a “smile” on your nail. You can also use a brush with a flat edge. It will allow you to draw a thin, even line, and remove the excess with a thin brush dipped in nail polish remover. It is better to flatten the flat brush on both sides to get rid of the excess after the flat brush is saturated with varnish. But you may not be able to achieve the desired result the first time. But with experience, only perfect drawings will definitely come out and the French manicure will turn out perfect.
You can also use a brush with a beveled edge. This brush is suitable for both short and long nails. This brush has wide and fairly dense bristles, and the tip is beveled. Such a brush is soaked in varnish, then two stripes are drawn perpendicular to the nail: from the edges of the nail to the middle. To give clarity and evenness to the resulting pattern, you need to draw a dividing line with the long part of the brush. A French beveled brush looks great on long nails. If you want to make a very deep French coat, then a brush with a beveled tip will be most suitable for this, since a thin tip can correct some imperfections when applying varnish or gel.
Of course, for different types of French it is better to use different brushes. A thin brush is perfect if your nails are short. With it you can easily draw thin and neat lines. On long nails, it is better to use a flat brush with not very long bristles, drawing a stripe without lifting the brush from the nail. The angled brush can be used for both long and short nails.
The main thing when applying a French manicure is accuracy. It’s better to try applying varnish with all types of brushes, and only then decide which brush is more convenient for painting French. Only by trial and error can you make the right choice of the right tool for work in the salon or at home, which will serve for years. .
For the first works, it is better to purchase brushes made from artificial materials, because they are inexpensive, and you have the opportunity to choose the most suitable option for yourself. And don’t forget that the perfect French jacket is a matter of experience.
Which gel polish is suitable for a French manicure?
The main requirement is that the color must be dense and rich . Otherwise, the French coat will turn out dull, and it is possible that gaps and bald spots will appear in the smile area. Gel polish with poor pigmentation will have to be applied in 3-4 layers to obtain the color of the smile line with the desired intensity. As a result, you can get a bump on the free edge of the nail and rapid detachment of the coating.
Ideally, a smile should be done in 1-2 layers. Instead of white gel polish, you can use gel paint to paint your smile. There will definitely be no leaks or gaps with it. And it will fit well in one or several layers.
Nail design with French polish
For the base, use any natural shade of gel polish that best suits your skin.
Gel brushes
This category of brushes is very different from all others and most often it is labeled as such. They are intended for modeling the nail, giving it a bend, forming an arch, as well as the final coating. These are flat brushes in shape, which can be either square or rectangular, sometimes curved, which simplifies the process of operation.
The pile should be natural or artificial, but quite hard. The gel is liquid and viscous, and therefore it will simply pull with a soft brush. But even if the brush is very stiff, it should still be flexible enough to keep the nail lines smooth and the material placed evenly.
Which brush to use for French gel polish
Everything is clear with the instructions. On the one hand, it seems that doing a French manicure with gel polish is as easy as shelling pears. But that's not true. Stencils are suitable for beginners; with their help, you get the same type of jacket with an almost straight smile - not the best option. Therefore, you need to learn to work with a brush , and this requires time and patience. But the result is worth it. It is with this that you can create a unique, deep and beautiful smile that will become the highlight of your jacket.
Ideal brush for French manicure
To draw a French manicure, I use a thin brush with long bristles . It allows you to achieve clear and even lines while easily smoothing corners. You can draw straight lines with it. Before learning how to do a French manicure with gel polish, I bought several brushes and compared the results. In my opinion, thin with long pile is ideal for a French jacket. Such a brush does not leave bald spots, like, for example, a square flat or beveled one.
I make French with a thin brush according to this scheme:
- I draw a horizontal line along the free edge of the nail.
- I make lines on the sides of the nail, crossing them horizontally. This is how I set the depth of the smile.
- I round off the intersections of lines.
- I fill my smile with white gel polish.
How to make French gel polish - step by step diagram
Choosing a manicure brush
When choosing, we pay attention to the main details:
1. Pile. Kolonok, silicone, nylon are suitable for all types of paints. Many masters like to use them in manicure. Beginners should not buy natural brushes. It’s better to learn to work with nylon or, if the price doesn’t bother you, with silicone shapers. They do not absorb paints and do not allow them to spread, which will allow you to quickly master the technique of painting on your nails.
For regular varnishes, it is also better to use brushes with an artificial tuft. Make sure that the bristles are securely fixed, hold their shape well, and do not fluff up. Run your finger through the bun. If there is even one hair left on it, the product is of low quality. During work, the pile will quickly fall off.
2. The clip should not wobble, fly off or spin. The fastening seam and crimp are tight.
3. Handle. The main requirement is lightness and convenience. It should not weigh down your hand and interfere with making precise movements.
To work in a nail salon, it is more profitable to buy sets of 6-12 pieces of different shapes and sizes, separately for design with acrylic and gel paints.
For home use, it is worth considering that some brushes can cope with many manicure tasks. For example, for painting, small drawings, drawing lines, instead of a flat beveled liner, you can use a “petal”. It is also suitable for covering nails. One dots will replace a liner and a dotting brush for ornamentation and painting details. And instead of dots, you can just as successfully use improvised means - an ordinary pencil, a safety pin or an invisible pin.
Smile options
Depending on preferences and the shape of the nail, the smile line may be different. The deeper it is, the more elegant the design looks . For myself, I choose a French manicure with a medium-depth smile. In the figure below it is designated as elegant.
Smile line options for French manicure
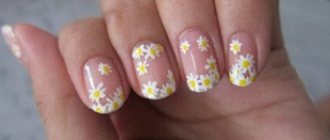
Photo of French manicure with gel polish
I suggest you look at a photo of a French manicure with gel polish. Here are some beautiful nails you can make.
Tips for extending the durability of a French coat with gel polish
This nail design lasts very well. If everything is done correctly, the coating will remain strong and durable. For at least 2-3 weeks you can forget about your nails . The main thing is to pay special attention to the tips of your nails and apply gel polish correctly.
You can find out why gel polish does not stick well to nails and peels off quickly here .
Here are some tips for a long-lasting manicure:
- Seal ends with top coat.
- Do not apply too thick layers so that the material does not begin to peel off.
- For greater durability, you can reapply the base coat and varnish to the ends.
- It is good to treat your nails with a degreaser.
French manicure with gel polish is universal and never goes out of style. It can be worn for any occasion. Both for special events and in everyday life. A classic French jacket is perfect for a wedding or anniversary, and a colored one can be made for an evening out. It goes with absolutely any style of clothing. And it hasn’t lost popularity for a long time.
Main criteria
To ensure that the brush for applying gel polish in the photo does not disappoint during use, you need to choose a tool with sharp bristles. The pile can be of either natural or artificial origin. The first option is considered more durable and of higher quality. But it also costs much more than artificial analogues. When choosing a brush for gel polish, we also pay attention to the handle of the product. Wooden ones are ergonomic and environmentally friendly, but plastic handles make the device cheaper. In order for the gradient of gel polishes with a brush to turn out flawless, the tool must have a strong clip - the part that connects the bristles and the handle of the brush. Thanks to the high-quality clip, the pile does not fall out or fluff up more than necessary.