Characteristics of manicure with stickers
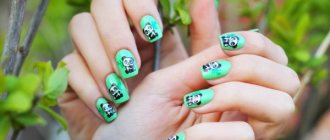
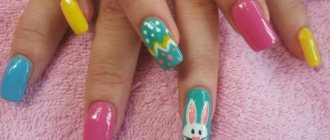
Using stickers is the best solution for those who want to quickly and accurately create a beautiful design on their nails . With the help of stickers you can create an image for any age and occasion, make a laconic design or realize a funny idea.
Flower stickers are the most popular
The most common patterns are floral. Decorated in pastel colors, they are ideal for creating a romantic look.
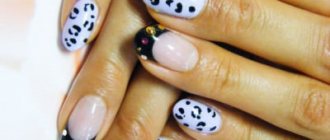
The bride's manicure will be complemented by decorations in the form of stickers with doves, hearts or angels. On the nails of adult ladies, 3D images of flowers covering the entire plate, or leopard and snake prints look good.
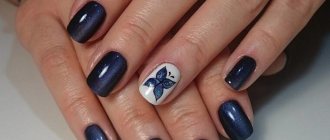
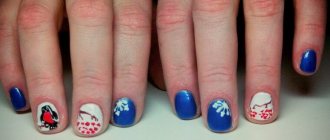
In winter, stickers with images of snowflakes are popular. And for summer, combinations of images of flowers, butterflies, ladybugs or fruits are great. Interspersed with gold and silver decor in the stickers will make the manicure luxurious, worthy of an evening out.
To keep your manicure stylish, it is important to choose stickers that match the color of your outfit. If the prints are bright, for a casual look it is better to decorate 1-2 fingers on each hand with them.
How to stick sliders on your nails using glue
To stick sliders on nails using a special fixing agent, the following procedure is necessary:
- Apply colored gel polish to the base and dry.
- Cover parts of the plate or its entire surface with special glue.
- Leave for a few seconds until the white fixative becomes transparent.
- Apply stickers to the nail and smooth it out.
- Use topcoat and polymerization.
How to stick sliders on your nails using glue
1 of 4
1.
2.
3.
4.
To fix the decor more firmly, after the 1st stage you can treat the surfaces with a polishing buffer and then degrease. But if the sticker is small and does not cover the entire nail, this is not necessary.
Types of nail stickers
Stickers vary in design and application method. Some are complete images, while others can be cut out into individual pieces.
Water
These stickers need to be dipped in water and then applied to the nail. The principle is the same as the transfer tattoos that everyone glued in childhood.
3D stickers
These are voluminous stickers made of silicate gel, thanks to which they become soft and flexible. Available in the form of small flowers, stars and other figures.
Adhesive based
The stickers are very easy to use: you just need to apply them to your nails, removing the protective film. This manicure takes minimal time, but it allows you to create a unique design on your nails.
Minx Stickers
Ultra-modern nail decor, which gained popularity among show business stars and beauty bloggers, and then migrated to the nails of fashionistas. This is a very thin coating that replaces varnish. It is evenly distributed over the entire nail plate, does not injure it and lasts about 2 weeks.
Fimo
These stickers are made in the form of polymer clay sticks, the cut of which creates a pattern. Usually these are fruits, butterflies or flowers. The elements are cut using a blade.
How to use nail transfer stickers
There are two ways to use transfer stickers for nails, the first is as follows:
- The selected shade of gel polish is applied to the base and dried.
- Next, use a special glue, which is applied in a thin layer and evenly.
- Then you need to wait a few seconds for it to become transparent.
- The wrong side of the sticker is pressed against the nail and smoothed.
- Then it is sharply removed from the surface, and the design is imprinted on the gel polish.
- All that remains is to coat the nails with the finish and dry for the required time.
The second method is similar to the first; almost all actions are repeated. But it is not the glue that acts as a fixative, but the sticky layer of the base. It is applied to polymerized gel polish, dried, but the surface is not wiped with a cleaner. Thanks to the sticky layer, the decal is clearly imprinted on the nail. It is secured on top with a finishing agent.
Manicure tools with stickers
Making a manicure with stickers at home is not difficult if you follow the technology. It will be different for different types of stickers.
Before the procedure, you should prepare the stickers themselves , a bowl of water , paper napkins to remove excess moisture, tweezers with which you can grab small pieces of stickers and the finishing coating .
First, perform a regular manicure by removing cuticles, filing and degreasing your nails. For this you will need scissors, a nail file, and an orange stick. Then apply the varnish and start gluing the stickers.
Technique for applying stickers to manicure
Features of using transfer stickers
After the varnish has dried, cut out the desired element from the sticker, grab it with tweezers and lower it into a bowl of water for 5 seconds. Blot the sticker with a napkin to remove excess water, apply it to the nail, then carefully peel off the paper backing.
The sticker should move 1.5 mm away from the cuticle and side ridges, otherwise it will wear out quickly. The top of the sticker must be coated with 1-2 layers of transparent varnish to secure it securely.
If you still doubt your abilities, then this video tutorial will help you perform a manicure by decorating it with water stickers:
Adhesive stickers
These stickers are even easier to use, making them ideal for beginners and those who only have a few minutes to do a manicure. Cut out the pattern along the contour and simply apply it to the dried layer of varnish. File off the excess with a soft file and apply a finishing coat on top.
Minx Stickers
Heat the stickers with a hairdryer or under a UV lamp until they become sticky. Apply them to your nails, smoothing them over the surface and folding in any excess. Dry your nails and file off any excess. Apply finishing coat on top.
You can learn all the tricks of applying Minx stickers on nails from the master class:
Features of manicure with gel polish stickers
Water-based or photo stickers work well under gel polish. You need to do a manicure, dry the coating in a lamp, and then follow the instructions:
Gel polish stickers
- Hold the water sticker in water, press it to the nail, then remove the protective layer with tweezers.
- When applying the photo sticker, which should completely cover the nail plate, use an orange stick to push back the cuticle and side ridges by at least 1 mm. They will soon return to their original places, but the sticker will have time to stick well.
- Apply topcoat over top. It is for this that a gap is needed on the sides of the sticker.
To secure the sticker well, apply 2 layers of topcoat, drying each one in a UV lamp. Make sure the edges are sealed well.
To ensure that gel polish manicure stickers last a long time, you need to follow the following recommendations:
- apply stickers only to a well-dried layer of gel polish
- do not apply the design to the entire nail plate, you must leave room for the top to adhere to the gel polish
- choose quality stickers
- do housework wearing gloves
How to transfer self-adhesive stickers with a backing onto your nails
Transferring stickers with a backing and sticky base to nails should follow the required steps:
- Apply a color coating to the base in 2 layers, dry both times.
- The picture is removed from the backing, which should come off easily.
- Then it is applied to the nail, straightened, and fixed.
- All that remains is to cover the nails, not forgetting the end sides, with two layers of top (or first the base and then the finish), polymerize each one in turn. 1. 2. 3. 4.
This is how they work with expensive stickers and material from Aliexpress. But if the decor doesn’t stick well, after fixing it, you should coat it with a thin layer of base, dry it, and only then apply the top coat. For the same purpose, a primer is used as an intermediate. Take very little liquid and barely touch the nail with a brush moistened with it. Otherwise, the decor may get wet.
Manicure tricks with stickers
Stickers will allow any girl to quickly and effortlessly create a chic manicure with interesting designs. To make it look no worse than a salon one, use these little tricks:
Beautiful manicure with stickers
- Do not press the sticker too hard onto your nail.
- If you fail to stick the sticker evenly, mask the inaccuracies with rhinestones or glitter varnish.
- Make sure that the colors of the varnish and the pictures are in harmony with each other.
- Do not use voluminous acrylic stickers on short nails - they will shorten your fingers.
Shellac nail stickers: how to apply?
Beginning manicurists have questions about how to use shellac nail stickers. The basic principles of operation are often unclear, especially with accessories purchased on Aliexpress with instructions in the form of hieroglyphs.
Therefore, before gluing stickers onto shellac, familiarize yourself with the step-by-step operation algorithm:
- Preparing your nails. We remove the remnants of the old varnish, do a neat manicure, sharpening the nail plates with a file to the desired shape.
- Apply the first base polish to the nail plates. Dry under an ultraviolet lamp for one minute.
- We paint our nails with colored varnish, which will contrast in shade with the color of the sticker.
- We prepare the sticker for application by removing the protective layer of paper from it.
- When using tweezers, place the film on the nail plate. Smooth out the material with a toothpick, cotton swab or pointed tweezers.
- The edges of the shellac nail sticker should curl neatly under the nail.
- We carefully work on the nail with a manicure file, after which we apply a fairly large layer of top fixative to it.
- Dry the manicure under an ultraviolet lamp for several minutes.
note
Particular attention should be paid to the topcoat. The durability of the sticker directly depends on it after water gets on it.
If there are no photographic stickers on your nails, then use water-based or transfer stickers. In this case, they will act as original decorative elements.
The principle of applying such stickers remains unchanged. But before you fix the film, you will need to carefully moisten it with warm water.
To make your finished manicure truly satisfying, try to prepare your work area from the beginning. All necessary equipment should be conveniently located at hand so that there is no need to be distracted, thereby risking damage to newly painted nails.
Nail design ideas with stickers
Using stickers you can create any nail design. You just need to use your imagination or use existing ideas.
Foil
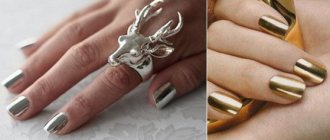
Scotch foil is easy to use and great for both holiday and everyday manicures. It comes in gold, silver, and mother-of-pearl. Glue the strips straight and at an angle, achieving fancy shapes. It is better to take a contrasting varnish as a basis. And bright and confident girls cover all their nails with foil.
Rhinestones
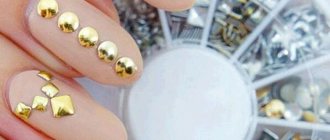
Rhinestones will be an effective addition to a manicure with stickers. For an everyday look, decorate only your ring fingers with them; for a party, you can apply more crystals, laying them out in different patterns.
Ornaments and figures
Lace, circles, flowers and other shapes are always relevant, and with the help of stickers it’s very easy to create them on your nails. Ornaments and figures look especially elegant as elements of French manicure.
Stickers are a quick and easy way to create a beautiful manicure without visiting a beauty salon. Stickers can cover the entire nail plate, replace polish, or complement the manicure with small ornaments. It all depends on personal preferences, the upcoming occasion and the girl’s general style.
More interesting articles:
