Many girls are now accustomed to visiting a salon every month for competent and careful nail treatment, but not everyone first verifies the quality of the master’s work, which can lead to premature removal of the decorative coating.
Despite the fact that one of the important ingredients in manicure is acrylic nail powder, not everyone knows how to use it. And this, especially during extension, greatly affects the long-term preservation of the work result and its integrity.
What to consider?
Acrylic powder is not a universal powder that is used for all types of applications. In fact, there is a different powder for each function. It differs in production volume, particle size and often quality, which is noted by highly qualified nail service professionals. The product that is used for sprinkling and extension may not be suitable for decorating nails, especially if you want to create a small pattern. In addition, the powder can have different textures. If one variety can be coated on top with a sealing agent, then the other does not need it. The same can be said about polishing: this phase is not needed if a relief pattern is created with acrylic powder.
As for the file material, you cannot use a metal product in your work. When purchasing the desired product, you need to carefully study its characteristics on the label. When the monomer and powder come into contact, the acrylic substance compacts and dries quickly. You will have to work quickly and minimally rubbing the layer over the same place. It is worth noting the price issue, since often among cheap materials there are products that are harmful to the skin and nails themselves
It is also important not to forget about resting the nail plates, because from constant extension and strengthening they can weaken
What is rubbing
The nail rub is a polyester powder, very fine, it can be compared to dust, powder, or loose eye shadow. Simply put, it is a free-flowing pigment. Usually the material is sold in jars with a screw cap. When touched and rubbed in, the powder imparts a mirror, holographic or other similar effect to the plate. In terms of quality and appearance, it outperforms foil or metallic varnishes, which are difficult to apply in an even layer.
The coating is durable, not afraid of moisture, and not susceptible to ultraviolet rays. It does not harm the skin and cuticle, does not cause irritation or redness, and no cases of allergies have been encountered. One of the significant advantages over other methods of creating such a manicure is ease of use. To be convinced of this (and love it for life), you only need to use it once.
Disadvantages of powder
Of course, in addition to its positive qualities, acrylic powder also has disadvantages that need to be mentioned:
- Acrylic powder has a specific smell; after working with it, some people feel unwell (nowadays there are odorless powders, but they cost an order of magnitude more);
- Poor quality material can cause allergies (and not only on the hands: both the eyes and lungs can be affected);
- When air gets between the nail and the acrylic coating, an environment favorable for the growth of bacteria is created. There is a risk of developing a fungal or any other infection;
- If the strengthening technology is not followed, the nail may be damaged;
- The natural shine of the nail is lost;
- It is not recommended to remove acrylic coating with regular nail polish remover (containing acetone) - this has a bad effect on the condition of the nail;
- You can’t walk around with acrylic on your nails for a long time, it will ruin them;
- Using acrylic powder requires some skill because it hardens quickly when exposed to liquid. If you hesitate or apply the material unevenly, you will have to do it all over again.
Certified experts give some important advice:
Experts advise using nourishing varnishes and consuming more calcium to strengthen nails, because acrylic powder itself does not nourish, but fixes the nail under gel polish, that is, it simply helps to wear it longer. Vitamins A and B and iodine are also needed to strengthen nails and improve their growth. Silicon and iron are required for elasticity, hardness and correct shape, and sulfur promotes tissue regeneration
Therefore, it is important to eat red meat, liver, butter and lots of vegetables (especially cabbage, carrots, tomatoes and onions), which contain all these microelements. Despite the strength of the acrylic coating, to preserve the appearance of your nails, it is recommended to wear gloves when performing various household chores (hand washing, washing dishes, washing floors). It's good for your nails to have a gentle massage. This improves blood circulation. Drinking plenty of fluids and moisturizing your hands are a must to avoid dehydration of your skin and nails. It is not advisable to frequently do manicures using acrylic and gel polish; you need to give your nails a rest
Otherwise they will weaken. When strengthening nails with acrylic without extensions, you still need to build up about 2 mm, otherwise the free edge will chip or peel off.
It is important to remove the coating correctly so as not to damage the natural nail. To do this, the nails are wrapped in cotton wool soaked in a special product and foil for 10 minutes, then using a pusher, the coating is carefully moved to the edge of the nail (if necessary, you can wrap it again), the remnants are removed with a soft buff. Do not soak your hands in the solution to avoid painful irritation of the skin around the nail.
An interesting video about how to easily and quickly make French hair with acrylic powder:
Useful video on how to strengthen your nails with acrylic powder:
Find out how to work with acrylic powder and gel polishes, detailed instructions:
Today, in the pursuit of perfection, the beauty industry has gone so far that it is ready to offer women to correct and improve almost any part of the body. But beautiful ones were the very first to come into fashion. First, girls tried to hide brittle and peeling nails under false tips. Now you don’t have to scoff at your hands. It is enough to contact a skilled manicurist in a good beauty salon. There you can strengthen your nails with gel polish. Reviews about this procedure are usually positive. Girls say that this is a great way to make your nails not only beautiful, but also healthy!
If you have never had to undergo this manipulation before and have concerns about the quality of the cosmetic product, then first you need to understand what strengthening your nails with acrylic powder for gel polish is and what they consist of.
Applying powder
Now you can proceed directly to applying powder to your nails; then we will talk about how to rub in powder to create the perfect manicure.
- To apply the powder, you will need a sponge applicator, a brush, or you can apply the powder using your fingertip - whichever is more convenient for you.
The powder is applied with smooth rubbing movements, without strong and sharp pressure, otherwise the attached shiny particles will fall off.
- After the nail acquires an even mirror shine, excess powder must be removed with a large soft brush. Treat the edges of the nail with a nail file or a thin brush - this will help remove excess particles that can ruin the manicure.
IMPORTANT TO KNOW: Pink manicure with drawings: the best photo ideas for nail design
Tip: It is more convenient to rub the powder into the area near the cuticle and along the edges of the nail using a thin brush - this will help avoid excess particles getting on the skin, and on the main part of the nail plate - with a finger or sponge.
How to use acrylic nail powder: step by step and accessible
The video that can be found below will tell you best about how to use acrylic powder for nails, but nevertheless, it wouldn’t hurt to give step-by-step instructions that will help you not get lost among the many tips and recommendations and do everything correctly and reliably. Let us remind you once again that after mixing the powder with the monomer, you will need to act extremely quickly, otherwise the substance will simply harden and the flaws can only be corrected by sanding or completely removing the unsuccessful coating option.
Important
Please note and be prepared for the fact that the entire extension procedure using acrylic powder may take from 1.5 to 2 hours. If you started artistic modeling with decorative complex elements, then the time may drag on even more, especially if you have little experience.
Nail extension with acrylic powder: simple about the complex
All nails must be pre-prepared, remove or move the cuticle, remove the top glossy layer using a buff file and treat with a primer, which will protect yourself from fungus and other unpleasant phenomena, and will also ensure maximum adhesion of the powder to the nail.
- Forms or tips are put on each nail.
- Trying to act smoothly and evenly, apply acrylic powder diluted with monomers, starting from the cuticle and moving to the tip of the nail.
- You can remove tips or forms only after the acrylic has completely hardened. Usually this does not require much time at all, about 45-60 seconds, no more.
- On top, on top of the extended nail, you also need to apply a layer of activator, which will allow the acrylic to “take on” hardness and strength.
- The final stage will be the final treatment of the nails using files and sandpaper. Nails not only need to be shaped, but also polished.
In general terms, it becomes absolutely clear how to use nail powder, and the video will make the process even more transparent, so that no one will have any more questions.
https://youtube.com/watch?v=XGC-1Yz1jX4
Using acrylic powder with gel polish: decoration and strengthening
It’s great that acrylic powder can not only be used in its pure form, but also combined with gel polish, which will give even greater opportunities to show your own imagination, creating an unusual design. Also, using this combination, you can strengthen weak nails without even turning to specialists, especially since there is nothing complicated about it, and you don’t need any special equipment other than the powder itself, shellac and a UV lamp. Don't forget that all nails should be prepped, filed, and primed to reduce the risk of peeling and fungal infection.
- Apply a base specially designed for this purpose to your nails. It can dry both in the open air and under a lamp; here you need to read the instructions for using the product you have chosen. Most often, the process takes about 1-5 seconds with a lamp, but in air it can take up to a minute.
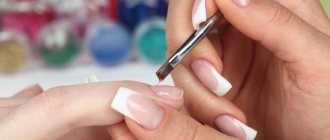
- On the surface of the nail, which has already dried after the primer and base, you need to apply a layer of shellac over the entire surface, as well as on the end side.
- Unscrew the jar of acrylic powder, colorless or of the selected shade, and dip the edge of the nail into it, as if sealing it. After this, use a spatula to sprinkle all the fresh varnish with acrylic powder without touching it.
- Place the nail under the rays of a UV lamp and dry it thoroughly, after which the remaining powder, unevenness and imperfections can be corrected with a fairly stiff brush.
- Repeat the procedure with each nail.
Likewise, it is not at all difficult to understand how to use velvet powder for nails, creating unimaginable sand patterns. If you want the surface to regain its gloss, simply cover the dried powder with a layer of a special top-fixer, which will need to be dried again under the lamp.
If you wish, you can not apply shellac over the entire surface, but draw some kind of design, ornament or pattern, and it is also quite acceptable to use acrylic powder in a wide variety of colors to create a unique manicure. But the best way to illustrate how to use nail powder is in the video below, where all the subtleties and nuances of the process are described simply and clearly. The main thing in this matter is to show persistence, patience, endurance and accuracy, as well as strictly follow the instructions, then the result will definitely please you.
How to use pigment correctly?
Before you start applying mirror nail polish to gel polish, you should familiarize yourself with some nuances:
- To get a rich tone, you should choose a dark gel polish. Pastel shades will help create a delicate design; you can also use a backing;
- The nail plate must be sanded well, otherwise the powder will rub in unevenly and all imperfections will become more noticeable;
- In the interval between applying gel polish, rubbing, base and top coat, it is important not to overexpose your nails to the lamp. If you “linger” for a few seconds longer than the allotted time, the pigment will not rub in;
- The powder is applied immediately after removing the nails from under the lamp, otherwise it will not adhere well to the nail plate;
- If after the first application there are gaps or imperfections in the nails, the pigment can be applied again;
- Want to increase the mirror effect? Apply a glossy top coat over the rub.
Important! Before rubbing the mirror pigment into your nails, cover them with a non-sticky topcoat, otherwise you will not achieve a “metallic” effect.
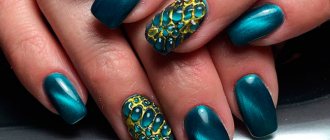
In the photo you can see how the “mirror shine” rub looks on the nails.
Applying nail polish
Required tools and materials
Preparing nails for painting with gel polish may require different tools. For example, it could be a Fraser or a regular basic set for home (manual) manicure. The simplest version will require a cutter (special tweezers), nail scissors, a pusher with a spatula and an orange stick. In addition, you will need a file and a soft polisher.
Since the work cannot be done without dust, you will need a brush to remove sawdust. In addition, you will need to prepare napkins for manicure, dehydrator, primer and hardener (if necessary). One cannot ignore the need for a finger bath; it is also worth preparing a cuticle remover and a special oil.
Why apply acrylic powder to gel polish?
Previously, acrylic was used only in nail extensions, because it is plastic, and when hardened it becomes very durable. Thanks to these qualities, after a while it began to be used to repair and strengthen nails.
To strengthen, choose transparent powder. For extensions you will need camouflage colors in nude pink shades. They overlap the nail plate, but match its color, so this powder will be invisible. And for design they use a wide range of colors, shades and structures of acrylic powder.
After strengthening with acrylic powder, the life of the manicure is significantly extended. Also, with its help, nail art masters create various patterns, including voluminous ones, which look impressive on well-groomed nails. The powder has a porous structure, so it is safe for the nail plate and non-toxic.
Acrylic powder has many other advantages:
- Nails look well-groomed and healthier.
- The powder eliminates most possible defects of the nail plate (chips, delamination, breaks, etc.).
- Nails strengthen and become denser.
- The surface of the nails is smoothed by filling microcracks with powder.
- Protects the nail plate from temperature changes, household chemicals and other aggressive influences.
- If part of the coating is damaged, there is no need to redo the entire manicure. It is enough to perform the correction on a specific nail.
- This manicure does not require special care.
- Simply removed using a special solution.
https://youtube.com/watch?v=https%3A
https://youtube.com/watch?v=https%3A
Product types
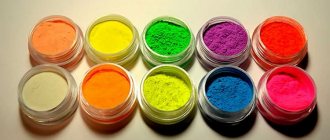
Acrylic powder is sold in powder form. It comes in a huge number of types. Some varieties are used only for extensions, others for sculpting. This material is also made in different colors. We will tell you about this and help you choose the right option.
Transparent and matte powder
It consists of very finely ground particles. When applied, the material is no different from ordinary nails. That is why it is used to create a base layer during extensions.
This acrylic powder hides nail imperfections well. She visually aligns them. This is often used to shape the tip of the nail. It is also used for volumetric modeling.
This material is also used to create aquarium design, as well as jackets.
Color options
This acrylic powder is used to create designs. It adheres well to the nail without a fixer, so it can not be used in this case. This allows you to make a manicure that is not heavy.
Camouflage powder
This variety has a denser structure. This powder is close in color to its natural shade. At the same time, it is not transparent.
The product is used to correct natural nails. With its help you can hide yellowness and unevenness. Also, camouflage acrylic powder is used to lengthen the nail bed.
Neon powder
It is distinguished by bright, rich shades. At the same time, the powder is quite dense. It is used for sculptural modeling. Usually, with its help you get an excellent youth manicure.
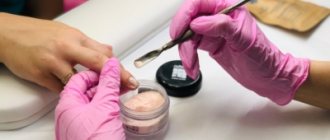
Acrylic nail strengthening procedure
First of all, the master tidies up the nails. Next, he prepares a mixture to strengthen the nails. It consists of a mixture of powder and liquid, which is called “liquid”. The finished mass hardens very quickly, so you should trust the strengthening of nails to an experienced specialist. The acrylic should be applied to the nails within a few minutes. All irregularities formed during the application process are filed down and polished. The procedure takes no more than 15 minutes.
This service is in demand among those who, for a number of reasons, cannot grow their natural nails to the desired length, as well as among those who prefer a natural manicure. The nail strengthening procedure allows you to correct defects in the nail plate on one or more fingers.
After strengthening, the nails grow naturally, reliably protected by a layer of acrylic. The thickness of the nail plate remains virtually unchanged. The varnish on strengthened nails lasts quite a long time. The nail shape can be any - soft square, oval, square, etc. The length of the nail does not change.
Strengthened nails require regular correction, that is, applying acrylic to the overgrown part of the nail near the cuticle. The nail plate after the strengthening procedure is not as rigid as after extensions, but is still significantly stronger than the natural one.
You can change the length of strengthened nails yourself using a soft non-metallic file.
Strengthening nails with synthetic materials, including acrylic
, saved many women from worrying about problems with manicure. Lovely ladies have beautiful well-groomed hands and original nail designs. And most importantly, a feeling of self-confidence and attractiveness. Is it worth denying yourself such pleasant things?
To ensure that nails do not break and the manicure lasts longer, they are strengthened with acrylic powder especially for gel polish. This procedure is especially necessary for naturally thin nails, because gel polish will not adhere well to them, and it will not look aesthetically pleasing enough.
Rub on regular nail polish
The rub is actively used in the design of nails coated with gel polish, but it also looks chic on a regular manicure. The only caveat is that you need to apply it on time. If the pigment will be worn not on one or two fingers, but on the entire hand, then you need to do it one by one.
How to rub on regular nail polish:
- Prepare the plate and shape the tip of the nail. If you have recently applied cream to your hands, it is better to degrease it.
- Paint the nail with regular polish in one, but not very thin layer.
- Wait until the varnish dries; it should not harden completely. The rub is applied to a sticky and weak surface.
- Dip the nail into a jar of powder or place it over it and sprinkle it with a brush, spatula or sponge. Apply a generous layer.
- Using the tip of the finger of your other hand or a sponge, rub in the applied coating until the nail is completely even and smooth.
- Brush off any remaining polymer dust with a clean and dry brush.
To increase the durability of the manicure, you can use nail polish fixers. Apply them after rubbing and dry well. It is advisable not to wet your nails for the first 2-3 hours or apply a greasy cream, but you can use cuticle oil, which does not look very neat after the procedures.
Rational choice
To choose acrylic powder, ask yourself why you need it:
- To ensure a smooth surface of the nail, take and use a camouflage compound. Just try to match it to the color of your nail.
- If you need to strengthen or correct the shape of the tips, then use transparent acrylic powder for gel polishes, even for French manicures.
- For bright nail art, glitter or colored products are suitable. You can fantasize with the types of manicures in these cases as much as you want. Options can be seen in the photo.
Neil - glitter art
What you need to know about the pros and cons of this product
The tasks set for acrylic powder are to extend nails. She also works on strengthening nail plates. Just remember to adjust the length of the nails.
There are many different shades here. The texture can also be varied. You can make a three-dimensional pattern, with a knitting structure, French. And for this you only need this powder.
Such salon procedures do not take much time. Polymerization plays a role here. If the product hardens quickly, then further actions occur very quickly. You can ask the master for acrylic called high speed.
Pink acrylic powder
As for the minuses, nothing can be said. It’s just that in the reviews, fans say that it is necessary to use it correctly, strictly according to the instructions.
Do you want to strengthen your nails at home without visiting a salon? Strengthening nails should be step-by-step, in accordance with the instructions. Ah, so anything is possible.
How to use acrylic powder
To get started, watch the master class video. Even for beginners this will not be difficult to do.
If you have thin nails and gel polish does not last long, the following procedures are necessary. Our website has step-by-step lessons for beginners, too.
Gel polish
Here is one of the master classes:
- To begin with, the nails are cleaned of varnish, the edges are smoothed with a nail file, and the cuticle is removed. Each nail should feel the touch of a soft buff.
- Having arranged such preparation, then add degreasing or dehydration, not forgetting about the ends.
- After drying, you need to apply ultrabond or primer to your nails. Use the entire area and length. Please note that such products do not affect the internal structures of the nail plate. They only contribute to the mechanical strength and stability of the nails. That is, natural nails adhere better to coatings.
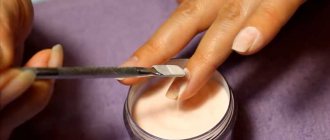
- Next you need to cover the surface with a base. Without drying the base under the lamp, we begin to strengthen it. Generously sprinkle your nails with acrylic powder using a brush or manicure spatula. Try to do this over the bowl where the powder is. So that the excess is poured there. At the same time, be sure to turn the nails so that the product covers the entire base.
- We crush off the excess acrylic powder and send it for polymerization. After drying, carefully treat the nails with a manicure brush. To ensure that excess unhardened acrylic powder is removed from the plates. You won't achieve this effect with a brush. Even in the instructions this point is present. If the nail plates are severely weakened, this procedure must be repeated.
The color of acrylic powder does not at all affect, after strengthening, the completion of a manicure using gel polishes. If you have transparent powder, then you can apply a layer of base and top. As a result, you will get neat and strengthened nails.
Different colors of acrylic varnish
With the second hand, everything is repeated in the same order, without changing anything. As you can see, the master class did not offer you anything complicated. If you did everything correctly after listening to the lesson, then you will have a fairly even coating after gel polish.
Only use high-quality materials for strengthening.
If necessary, trim your nails with a sander.
There are two options for completing the procedure
- The nails are covered with base again.
- Gel polishes are applied to the fixed powder.
Experts advise using the second option. After all, thanks to the rough surface, gel polishes will not spread or shrink.
Application of acrylic powder
How are such coatings removed?
- First, you need to remove the gel polish. Take a cotton pad and apply gel polish remover to it.
- The fingers are wrapped in foil.
- After 10 minutes, remove the foil using scrolling movements.
- What remains of the nail strengthener can be easily removed with an orange stick.
This is how the procedures for strengthening nails with acrylic powder for gel polish are carried out step by step.
What types of rubs are there?
In appearance, all rubs are powder in a container. If you look closely, you can see a slight difference: grinding, shine or lack thereof. But the real difference is on the nails. Before purchasing, you need to have an idea of what this or that material does.
Common types:
- Mirror powders (metallic). One of the trending trends of recent seasons. The finished coating looks like foil, but comes in different shades. In appearance and touch, the material itself resembles crumbly shadows, has different sizes, but 0.1 and 0.2 mm are more often used.
- Holographic. These are dry glitters. The technology for applying such glitter and mirror powder is no different; they can also be rubbed in. Glitters cannot be used on regular nail polish; they are only suitable for gel polish coating. You can apply several layers, securing with topcoat.
- Multi-colored powders (melange, marmalade). Fine loose coating without shine. This material allows you to get matte velvet nails and create delicate and discreet designs. Such powders are applied to gel polish.
By the way! The same type of metallic powder can be used to apply “sand” and create a mirror finish. This is very convenient, helps you save money, you don’t have to buy extra pigments, and you don’t need to select similar shades. When creating a manicure, they often make one mirrored nail and a matte one next to it, sprinkled with powder.
Features of nail care
Important! Failure to follow the rules for wearing acrylic nails sometimes leads to disastrous consequences. If the coating begins to peel off, fungus or bacteria may get underneath it.
To prevent this from happening, you need to follow the rules of care:
- After a shower, swimming pool or any water procedures, excess moisture should be removed with napkins or a towel. If your hands sweat, you should periodically use baby powder;
- Carry out hygiene procedures with antibacterial soap;
- If after extensions part of the coating breaks off, you should immediately contact a specialist. Removing a small chip is cheaper and safer than redoing the work;
- Correction of acrylic coating should be done 2 times a month in the salon. In between procedures, you can cover your nails with clear varnish at home. This will make the manicure look neater;
- If you want to remove nail polish, you need to take a product without acetone; it does not spoil acrylic or damage the cuticle;
- Acrylic can cause dermatitis. The skin around the nail peels, dries, and turns red. You can try to relieve dryness with nourishing creams. If the symptoms do not go away, then the acrylic coating must be removed;
- Without care, nails become hard and can break. To keep the plate flexible, you need to lubricate it every day with oil, for example, peach oil.
Strengthening nails
Important! It is imperative to avoid hitting your nails hard on hard surfaces, as there is a high risk of damaging the coating. In difficult cases, the nail under the acrylic layer may crack.
The benefits of acrylic for nails
Acrylic powder is made from acrylic acid and is highly heat resistant. This material protects the nail from any impact. Acrylic coating is similar to cement: acrylic, penetrating into microcracks of the plates, polymerizes under the influence of ultraviolet radiation.
The benefits of using this powder are as follows:
- strengthening the plates;
- creating a protective layer without excess volume;
- eliminating cracks and damage.
It is worth noting that the procedure takes little time and is simple to perform; the coating itself can subsequently be easily corrected.
How to use at home?
How to strengthen your nails with acrylic powder at home? Of course, it’s easier to go to the salon and see a specialist so that he can carry out all the proper procedures. However, if you do not have time for such events, you can carry out this procedure at home. Thus, you will be able to save not only time, but also money.
However, it is worth being patient because this procedure requires perseverance. Let's look at the step-by-step process of strengthening nails with acrylic powder:
- We do a manicure.
- Degrease the nail plate. There are special means for this.
- Apply a special base in a thin layer to the entire surface of the nail plate. There is no need to dry this layer under a lamp.
- Sprinkle the nail with acrylic powder. This can be done with a brush over a jar of powder, so that all excess falls back into the container.
- Dry your nails under an ultraviolet lamp.
- Remove excess powder with a special brush.
- Cover your nails with gel polish or regular nail polish.
Detailed lessons can be viewed here:
Mixing acrylic with gel polish
You can also make the gel coating more durable by pre-mixing it with acrylic powder. Just as with the method described above, the nails are first filed, polished and degreased.
Next, you need to drop a drop of shellac into a small lid, add powder to it, mix the solution with a separate brush and apply it to your nails, using it like regular gel polish. This coating is dried under the rays of an ultraviolet lamp and then secured with a finishing varnish.
You can make the gel coating more durable by pre-mixing it with acrylic powder
Nail Design Ideas
Now let's move on to the most interesting part - nail design. And now we will talk about the best and most popular ideas in this segment of nail art.
Plain manicure and glitter acrylic powder. Perhaps this is the simplest and most versatile design that can be used for all occasions. Here you can cover most of the nails with gel polish of your favorite color, and one or two fingers on each hand with shiny acrylic powder to match. This manicure will look very cute, despite the simplicity of its execution.
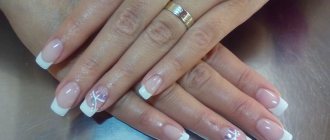
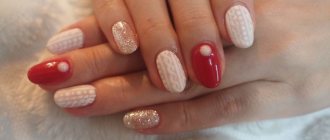
French acrylic. A French manicure decorated with acrylic powder also looks very stylish. In addition, this is a great opportunity to reveal a design that has already become familiar from a new side. However, the color schemes here, most often, remain quite classic. That is, for a velvet jacket you should choose a matte white or nude powder. So, after you give your nails the desired shape, apply two layers of gel polish and without drying the last one, dip the tips into a pre-prepared jar of powder. When the coating on your nails is dry, simply shake off the excess sand from your nails. And that’s it, your winter jacket is ready.
Important! If you want the surface of your nail not only to look velvety, but also to feel like that, then do not apply a finishing sealer over the powder.
Interesting: Mother of pearl manicure with design
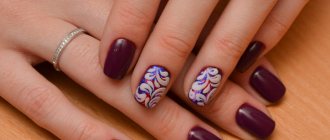
Knitted design. Perhaps today, a manicure with acrylic powder laid on the nail in the form of a knitted pattern is the most current winter trend. And to do it yourself, just look at step-by-step photos or video instructions, of which there are a lot on the Internet. This nail art looks really cozy. After all, it seems that your nails are wrapped in a warm sweater and reliably protected from the winter cold. But when it comes to application, it’s not so simple. You need to create patterns with a thin brush, and dry them immediately after you place them on the nail. The main thing is not to let the substance spread. It is generally better to apply more voluminous and complex knitting gradually.
Creating a manicure with a braid step by step
Matte manicure
Matte nail art with acrylic is a very interesting solution that will definitely attract the attention of others to your manicure. And here's why: firstly, velvet patterns literally enrich the matte finish of your nails, and secondly, by creating such a design, you decorate your hands with two fashion trends at once
Nail sculpting or 3D design. I must say that this manicure is not suitable for everyday wear. Rather, fashionistas resort to it on special occasions, such as weddings or big holidays. Moreover, it is quite difficult to recreate this nail art yourself and you will have to look for a good nail technician for this case. However, it’s hard to deny that volumetric modeling looks simply amazing. And the final result will directly depend on your imagination and skill of the specialist.
Important! It is necessary to remove volumetric modeling with a special strong liquid. Moreover, this must be done extremely carefully to prevent it from coming into contact with the skin on your hands.
Interesting: Stamping on nails
Drawings and patterns. An excellent start for beginners working with acrylic powder would be to create velvet patterns and designs on their nails. This does not require any additional skills, and the result can be really very nice. Patterns and designs can be absolutely anything that comes to your mind. And we have already described the technology for their production in our article just above. Therefore, use your imagination and go ahead to stylish nails!
This concludes our review of manicure with acrylic powder. We hope you now know exactly what this powder is and how you can use it to create some really interesting designs.
How to work with acrylic powder and how to apply it correctly on nails (with video)
Many fashionistas want to learn how to properly apply acrylic powder, because this method of nail extension has many advantages. Acrylic nails do not flake, do not break, have high plasticity and at the same time look quite attractive. It is easy for nail technicians to work with this material, because it allows them to use a wide variety of colors and paints, since the polymer powder can be easily painted in a wide color palette during production. In addition, polymer powder in the field of nail art can be used not only for extensions, but also for strengthening and for nail design.
This technique also has its drawbacks: applying the product to your nails correctly and beautifully without certain skills and knowledge is quite difficult. That is why you should learn in advance how to work with acrylic powder and strictly follow all the recommendations of specialists.
Professional nail artists give useful tips and reveal some secrets on how to properly apply acrylic powder on nails to avoid many mistakes:
- Acrylic should be worked very quickly as it tends to take on a thick form in a short time.
- Acrylic has a strong unpleasant odor, so you should wear a protective mask before coming into contact with this substance.
- Nail artists also recommend working with acrylic at a fast pace for the reason that many people, after inhaling this smell for 2-3 hours, complain about a deterioration in their own well-being.
Other useful tips from nail professionals on how to apply powder to your nails in this video:
What other products can a novice master use?
Today, the following means are used to strengthen the nail plate:
- construction gel;
- biogel;
- acrylic;
- thick base for gel polish.
For all these materials, it is necessary to purchase accompanying products: degreaser, dehydrator, gel polish with a sticky layer.
Reference. You need to choose the material for strengthening individually and it will not always be possible the first time.
It is necessary to observe how the strengthener is worn and conduct a comparative analysis. For some, the product is selected the first time, while others have to experiment for several months.
Polygel is one of the latest developments in the field of nail services
But in order to keep your nails healthy and beautiful, it is important to choose the right material and use it. It's better to leave it to the professionals
What is needed to create a manicure?
In order to create a mirror manicure on your nails, in addition to the powder itself, you will need some more tools and coatings:
- UV lamp;
- Base coat;
- Varnish, gel or gel polish (the shade can be any, but in a classic manicure a black coating color is used - on it the pigment appears with the correct shade);
- Buff and degreaser (to prepare nails for manicure);
- A product for removing the sticky layer (if a gel with a sticky effect is used);
- Brush or sponge (needed to apply powder);
- Top coat (with glossy effect);
Strengthening nails with biogel under gel polish in stages. Strengthening nails with gel. Instructions
Strengthening nails under gel polish using gel can be done with a single-phase or three-phase agent. If the product is single-phase, then only this gel is applied to the prepared nail plates; if it is three-phase, then three different products are used: base, constructor and finish.
Experts also pay attention to other necessary conditions:
- In order for the gel coating to last longer, it is not recommended to use any moisturizer on the skin of the hands before the procedure;
- if a bath was made before processing the plates, then it is better to carry out the strengthening procedure the next day;
- An additional product – a rubber base – will help achieve a perfectly flat surface;
- To avoid chips and cracks, at each stage of strengthening it is necessary to carefully seal the end of the marigold.
The most important thing is that for the result to be pleasing to the eye, and for the manicure to last at least 3 weeks, you should complete the following three mandatory steps.
Step 1: base
Base is a transparent material from which the strengthening procedure begins. Apply the product with a thick synthetic brush in a thin layer. Dry the base in a lamp, the exposure time is from 30 s to 1 min (this depends on the quality of the lamps used and the manufacturer of the material).
If a single-phase product is used, then the gel is also applied in a thin layer and dried in a lamp.
Step 2: Base Layer
When the base has dried, they begin to work with the main layer, it is also called construction or sculpture. Since strengthening does not involve the process of changing the shape and length of the nail, the product is applied quite densely, but not in a greasy layer.
Instructions for strengthening nails with gel under gel polish in photo
In this case, the gel should not be attached to the cuticle and side ridges, which can subsequently lead to peeling and chipping of the material. If the product does get on areas close to the nail, it should be removed with a cotton swab dipped in a degreaser. Drying the sculpture layer in a lamp.
Step 3: Finish
Top Coat is the last, final layer. Before applying it, you need to make sure that the previous layers lay flat; if this is not the case, then you should make a sawdust of the unevenly distributed material with a soft buffer. The finish is applied with the same dense synthetic brush and polymerized in a lamp. The final touch is to remove the sticky layer (if there is one) with a special napkin.
The procedure is completed by applying gel polish or other coating. When choosing gel polish, do not forget about the top coat, which will allow the product to last much longer.
Manicure design options
Using mirror rubbing you can create a wide variety of designs and patterns, it all depends only on your imagination! For example, on a finished coating, using gel paste, you can create patterns or a three-dimensional design, into which you can then rub mirror powder. It will turn out very impressive and unusual.
Also, a mirror surface can be created only on half of the nail, and the rest can be made completely matte. Using mirror powder, you can even create a kind of French manicure by rubbing the pigment into a line on the free edge of the nail plate.
Nail design is a great space for creativity. Using mirror pigments, you can create unusual beauty on your nails.
Have you already tried using mirror rub on your nails? Share in the comments!
Advantages and disadvantages
- Persistence. This product is used for nail extensions, so provided that the correction is carried out on time, beautiful long nails can please you for as long as you like.
- Save time. The procedure itself, especially if carried out in a salon by an experienced professional, does not take much time, and the results last a long time. Much depends on the degree of polymerization of the product. The better and faster the powder hardens, the higher the degree.
- Diversity. The advantages of powder also include a rich color palette and a wide selection of textures. With its help, you can create both a classic manicure and various three-dimensional patterns on the nails.
- Can be used as a base for classic manicure, as well as shellac. Powder will not only protect your nails from the negative effects of various substances, but will also increase the lifespan of such a manicure.
Popular powder colors
The most popular shades of mirror powder are gold, silver, pink, bronze, blue, red and chameleon. Other less popular shades are also available for sale.
IMPORTANT TO KNOW: Slider nail design is the new “water” trend of the season
But it is worth noting that the final mirror effect may turn out to be a completely different color - it all depends on the color of the base coat.
What it is?
Acrylic, now used in cosmetology, once came here from the dental field - doctors used it to create fillings and removable dentures. It turned out that this unique material can also be used in nail art. Thanks to its plasticity and lightness, it can fill all microcracks and unevenness of the nail plate, as well as solve the following problems:
- Restore the structure after prolonged “wearing” of extended “claws”;
- Strengthen and give additional strength;
- Slightly change or adjust the shape;
- Create breathtaking three-dimensional figures (stucco moldings) on the surface.
In our case, the so-called acrylic powder deserves special attention, which, when mixed with glue or monomer, creates a porous coating that can allow air to pass through it. In addition, there is no need to turn on a UV lamp to dry the composition - hardening can occur under natural conditions.
What is mirror powder and where can I buy it?
Mirror powder is small particles of shiny chrome pigment designed to create a fashionable mirror manicure by rubbing the pigment into a pre-painted nail plate.
The rub is sold in specialized stores with professional cosmetics and in online stores of manufacturers. The powder is packaged in small jars and is sold complete with a sponge applicator, which is necessary for accurately applying the powder to the nails.
How to remove acrylic coating?
Many girls refrain from applying acrylic coating, fearing that they will have difficulties removing it later. However, this is a misconception. The process of removing the acrylic coating is much simpler than the process of applying it.
The first step is to remove the top shiny layer; this can be done carefully using a special nail file. Next, apply a special coating remover to a small piece of cotton wool, apply it to the nail plate, and tightly wrap each finger in foil. Next, you need to wait about 10 minutes and remove the remaining coating using an orange stick. If you can’t clean everything properly with a stick, you can either keep the nail in foil for a little longer with the remover, or use a soft nail file.
Interesting videos on the topic of the article:
How to remove the coating
You can remove old house coverings in several stages:
- First, use a 100-180 grit file on the surface of the nail to damage the finishing layer.
- A piece of cotton pad is moistened in a liquid that dissolves acrylic.
- It is placed on the nail and secured with foil or a silicone cap.
- You need to wait 10-15 minutes.
- The soaked coating is removed from the surface with an orange stick.
- The remains are cut down with a 240 grit grinder.
- Dust is brushed off to see if any material remains on the plate.
- Then you can shape your nails, treat cuticles, etc.
- Finally, apply oil to the skin.
You should work with files, especially at the 6th stage, carefully so as not to damage the nail. A remover that dissolves acrylic should be applied generously to the cotton wool.
But it is important to control that it does not flow and does not get on the skin or is there in a minimal amount. Still, this is a rather aggressive remedy for her.
Acrylic strengthening is used by many nail artists; the method has proven itself to improve the “wearability” of a manicure. It is also available at home
But when performing it, it is important to follow all the steps so that “pockets” favorable for the development of infection do not form under the coating.