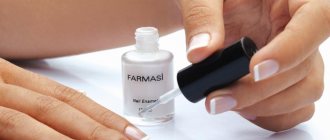
At the moment, there are a large number of products that allow you to create a durable and beautiful manicure. To make it last as long as possible, you should use a gel polish finish. It is a tool that should be used to complete the creation of a manicure. For strong adhesion between the polish and the nail, ultraviolet rays should be used. A special lamp is sold for these purposes.
What is finishing gel?
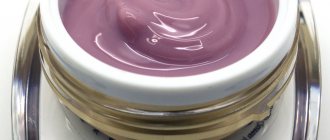
As already mentioned, a similar gel is used to complete the nail extension procedure. It is necessary in order to secure the nails as much as possible. The main advantage of this product is to increase the service life of the created nail and fix the design on it. In addition, the gel adds shine.
The finishing varnish is used for both acrylic and gel extensions. When using it, there is no need to polish the nail, and there is also no need to apply a fixer. It is often used as a base.
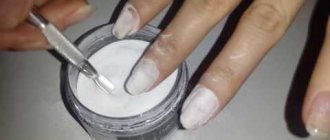
Gel extensions can be two-phase, three-phase and single-phase. At the first stage, the material adheres to the nail. On the second it is given shape. At the third stage, the nail is fixed, and it will have shine. Finish gel takes an active part in all phases.
To choose the right varnish, you should make your choice responsibly. If the gel is of poor quality, it will only ruin the work of the mater. The nails will glow yellow and will not look neat. Also, low-quality gel can lead to nails cracking and breaking off. It is important to use only varnishes from trusted brands.
What types of gels are there?
Gels may or may not have a sticky layer. Some models give a glossy glow, others - a matte one. As a rule, masters prefer to use gels that do not have a sticky layer. They are easy to use and liquid. The applied layer hardens in 2-3 minutes. You also won't have to remove the sticky layer. There is no need to degrease the nail before applying it. Over time, a yellow tint will not appear.
It is necessary to take into account the nuance that if 30% of the nail or more is occupied by the design, then it will not be possible to use a finishing gel without a sticky layer. To secure the design, it is better to use a clear varnish. Some experts recommend using a finish with a sticky surface. If you skip this stage, the drawing will quickly become covered with cracks.
If the mater uses a gel with a sticky layer, then you can remove it only after the nail has cooled. Then the drawing will shine. In addition, this approach provides resistance to mechanical damage. To avoid stains on the coating, you need to buy only high-quality gels.
Gels also have varieties. If the sticky layer is thick, then the varnish has a viscous consistency. The drying process in the lamp will take less than two minutes. This gel is often used to correct nail defects.
The matte finish gel must be applied in two layers. Each one is dried for at least 2-3 minutes. It is used when working with both acrylic and gel, gel polish. The mother-of-pearl version has inclusions of various colors (gold, silver, blue, and so on). Separate topcoats are available for gel polishes. They have a sticky layer. Gives special strength.
Useful tips
When applying gel polish or shellac, do not forget that the main role here is played not only by the top coat, but also by the base coat. The manicure will last much longer; these two products will help you apply the base color beautifully and evenly.
- It is not recommended to apply anything over the top coat. An exception can be made for large rhinestones. Since the regular finish has a sticky property, after which large decorations will stick easily. There is no need to cover them on top - it will look rather untidy.
- Apply the top in one layer, but even this is enough to make the nail sticky. You can deal with such a nuisance using a regular nail polish remover - apply a little of it to a cotton pad and rub it over sticky nails. There is no need to dry it in a lamp after this. It is advisable to apply moisturizing oil or cream.
- A couple of minutes is enough to dry the finish. If you keep your nails under the lamp for less than this time, there is a danger that the coating, which is shiny before being sent to dry, will become duller. Do not risk your work, wait for the time specified in the instructions for the drug.
- You can save a lot by purchasing the base and transparent finish in one jar. This will help you remember about two processes that are so important during manicure: sealing and base coat. When purchasing, carefully study the composition of the varnish - it is better if it contains protein and vitamins. They have an excellent effect on manicure and will have a beneficial effect on the condition of the nails.
- It is better to choose a product with a thick consistency. If you are not experienced with it, it will help to apply the finish smoothly and easily in an even layer. A thinner product will spread on and around the nail, making application more difficult.
- It is better to use a transparent brush. This will help to monitor the amount of liquid; excess can always be removed using a lint-free napkin, as well as its condition - is it clean, is there any dirt or varnish residue from a previous manicure.
- You need to dry the finish first on your thumb, then on the other four. This way you can achieve a more uniform coating and there will be no risk that the coating will move to the edge of the nail.
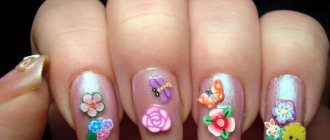
- You can combine top gel with glitter, it looks very beautiful on the nails and gives a special shine. Your manicure will look amazing in daylight and in dim evening light.
Be sure to take advantage of the simple guide and practical tips. A top coat will always help you do a manicure easily and quickly; your nails will certainly be chic and beautiful, just like after visiting an expensive beauty salon.
What are top gels used for?
Top finish for gel polish is used quite often. It allows you not only to make the nail more durable, but also adds gloss. The top is applied in a thick layer, unlike the base coat or regular gel polish. To dry your nail in a UV lamp, you should spend about 3 minutes. In an LED lamp, 30 seconds is enough. If the finish is not dried correctly, then over time the nail will lose its shine and spots will appear. After drying, you need to remove the sticky layer.
Features of use
It has been proven in practice more than once that gel polish without a finish will not last more than 10 days. Therefore, its use is mandatory for fixing the helium layer. But, sometimes during the application of the top, the composition may bubble or not polymerize properly. To avoid problems, you need to know some nuances:
- A top with a sticky top layer usually dries well in a UV or LED lamp. After drying, it is recommended to wait a few minutes and remove the top layer with a special liquid. The manicure will turn out shiny and beautiful.
- If there are cracks on the surface of the nails after mechanical treatment, you can use a corrector or a thick top coat. This composition dries quickly, and after removing the sticky layer, you can continue creating a manicure using gel polish.
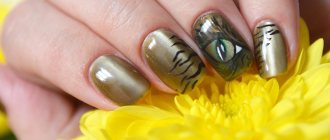
- When making a stylish French coat, be sure to use a matte finish. It will not only secure the decorative layer, but also give the jacket a special zest.
- If you need to make an original manicure, gel polish can be covered with a top coat with silver, gold or colored splashes.
The best gels
Now there are a huge number of coatings. Many masters get confused and cannot choose good options for finishing gel for nails.
Among the inexpensive coatings, Irisk should be noted. This top has no sticky layer. It protects well from cracks and chipping. Gels from Kodi receive excellent reviews. They are used for both acrylic and gel nails. Gel from EzFlow provides shine and long-lasting nail wear. It can be used not only when working with gel and acrylic, but also with fiber glass technology. The stability of the coating can be achieved using a top coat from Lightbox. It gives shine and does not leave a sticky layer. Gels from Planet Nails are popular due to the fact that they do not turn yellow, perfectly seal the material, create shine and provide excellent adhesion to the material.
Separately, we need to highlight the finishing gel from Avon. This coating can be used without a base or sealer. You can dry it without an ultraviolet lamp. The manufacturer assures that the varnish will last a long time and will help if the girl has brittle and thinning nails.
Experts advise purchasing products only from trusted companies, especially since you should not buy gels “on tap”. Thanks to the glossy and matte finish gel, you can increase the durability of your nails for up to 2 weeks.
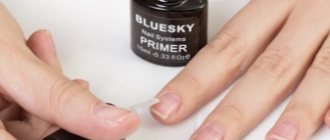
Popular samples
Today you can find top formulations from different manufacturers on sale. The products of Kodi, Bluesky, and Shellac are very popular. But these companies have long established themselves as proven and best manufacturers of manicure products. Given the popularity of gel polishes, many cosmetic brands are happy to invite consumers to test their products to create a flawless manicure. For example, Avon gel polish finish.
This composition cannot be called a classic shellac topcoat. Essentially, this is a gel polish that combines the properties of a base, shellac and finish. According to the manufacturer Avon, this composition does not require special preparation of the nail plates or the use of drying lamps. All that is required to obtain a high-quality and durable manicure is to apply the finishing gel polish to your nails, like regular polish, and wait a few minutes until the decorative layer polymerizes on its own. Reviews about finish gel polish from the Avon company claim that it is an innovative new generation gel polish that deserves the attention of consumers.
The finishing gel is cracking: why?
This problem is not uncommon; even competent and professional craftsmen encounter it. Cracks may appear if the coating is not dried properly. You should check that the lamp is working properly. Sometimes the cause of this effect can be applying too thick a layer of gel. You should try using a thinner coating.
Many cheap gels crack and turn yellow. This spoils the appearance of the manicure. If the bottle is open, dust or any foreign particles could have gotten into it. After drying, they give a negative effect and violate the integrity. It is best not to use the damaged gel again, but to purchase a new one.
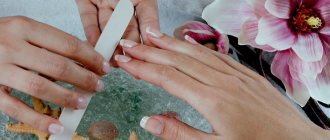
Application technique
When applying the finishing coat, you must carefully cover the entire painted surface. Don't forget about the ends. If they are not treated, then after a while the gel in these places will begin to peel off. The finishing varnish must be completely sealed.
If the gel has a sticky layer, it must be removed, otherwise your nails will become covered with dust. Wash with either a lint-free cloth soaked in a special liquid or a degreaser. Some of the produced options are also designed for removing the dispersion layer.
Decoupage: which finishing varnish to choose?
Details Category: Master classes Author: Evgenia Bazhenova Part from the video course “Decoupage from 2 to 1”
To protect decoupage products, special (finishing) varnishes for decoupage (or decorative arts) are used. These are water-based acrylic varnishes, i.e. water soluble. They are, as a rule, practically odorless, small packaged, and sold in departments for creativity.
Yacht and parquet varnishes, so-called construction varnishes, are also used to protect decoupage. originally intended for outdoor use. These are varnishes based on synthetic resins and with a strong odor (there are exceptions; more on that below). “Construction” varnishes are packaged in tin cans of 400 - 1000 g. Also available in spray packaging. This is if - briefly.
So which varnish and for which decoupage products is best to choose? After my own experiments with various varnishes, I present those that I like to use the most. What do you mean like? This means:
• without unnecessary energy consumption, they are immediately applied evenly to the surface; • dry quickly on the surface, • correctly express my original idea for the product (if there is a matte varnish, it is absolutely invisible on the surface, and a glossy varnish has a beautiful shine); There is no talk at all about stripes or brush marks: these varnishes “lay down” evenly without “shamanic dances” around the product.
• things are beautiful and reliable to use without losing their original appearance (with proper care).
Let's look at the varnishes separately and possible options for their use.
Decoupage finishing varnishes or for decorative creativity.
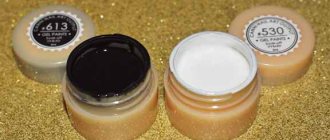
These are water-based acrylic varnishes. They are usually found in specialized departments for creativity and in small bubble containers. I really enjoy using the polishes below. On the left is a glossy varnish (an even coating with a beautiful gloss-shine), and on the right is a matte varnish (absolutely invisible on the surface, as if the decoupage was not covered with anything at all). Without smell. Manufacturer: GEDEO, 75 ml, economical to use.
Glossy and matte acrylic water-based varnishes GEDEO
Any of these two compositions can be characterized as follows: they are applied smoothly, dry quickly, perfectly protect decoupage over time, behave well when working with printouts, are well stored, and are economical to use. In general, they meet all my criteria for the positive characteristics of a suitable finishing varnish.
Where to use water-based acrylic varnishes for decorative work?
Photo frames, boxes, watches, interior decorations, panels... In a word, those products that will not be used in everyday life. However, the surface of one of my cell phones and the lid of my netbook are covered with exactly these varnishes: glossy and matte. After 3 years of daily use of these items, they are in excellent condition. For example: a netbook panel (glossy varnish) and a cell phone panel (matte varnish): photo below.
GEDEO glossy and matte varnish coating
How is water-based acrylic varnish applied?
The varnish is applied with a wide, soft, flat synthetic brush No. 16. If the surface to be coated with the finishing varnish is miniature, then I suggest taking a thinner brush No. 4. Technology for applying acrylic finishing varnish with a brush: quickly, spread a thin layer well over the surface and let dry. You shouldn’t put too much varnish on your brush: this can soak the glued napkin, and it will begin to wrinkle and bubble. I repeat: quickly, in a thin layer, rubbing the varnish into the surface. This especially applies to applying the first layer of varnish to decoupage.
How many coats of varnish should I apply? 2 maximum 3 layers of this varnish are enough. If you only need to protect the surface (a photo frame, for example), then 1 thin layer of matte varnish is enough. Immediately after using water-based acrylic varnish, the brush can be easily washed with warm water and soap.
I suggest watching a video about the technology of applying the finishing coat of acrylic varnish with a brush and spray so that the motif after that remains even, smooth and beautiful (does not stretch, liquefy or wrinkle.
Yacht varnishes. The purpose of using these varnishes is maximum protection of products from mechanical and thermal damage. There are also glossy and matte. I prefer matte yacht varnish and use it to cover trays, tables, chairs, and kitchen boards.
Which varnish should I choose? First of all, I focus on the samples presented in the palette offered by the seller. The main criterion for me personally when choosing a yacht varnish is the matte finish and reasonable price. Matte varnish from the Yaroslavl manufacturer of varnishes and paints has proven itself well in my practice. The photo here is a polish from PARAD.
Yacht varnish
The yacht varnish turns yellow, and this can be seen in the photo (glass jar above). This property of “yellowness” can be used perfectly when making things in a vintage style. Here its amber hue will only emphasize the “patina of time”
Breakfast tray covered with yacht varnish
The “natural” yellow of yacht varnish goes well with the lemon-yellow “2 in 1” composition (more about “2 in 1” here).
On white decorated surfaces, unless such an effect is intended, it is better not to use yacht varnish. It will turn yellow and even “lie” in stripes. This is his peculiarity.
How to apply yacht varnish? The varnish is very smelly. Therefore, it is better to choose a maximally ventilated room. If you are varnishing outside, it is better to choose a day so that the weather is calm and there are no midges, poplar fluff, etc. flying around. They all seem to strive to stick to this varnish. And peeling off and masking this place later is not very convenient.
It is best to apply the varnish with a foam sponge, for example, for washing dishes (can be cut so that it is convenient to work), protecting your hands with rubber gloves. Apply yacht varnish according to the instructions, allowing complete drying between each coat. Usually 2-3 layers are enough for a decoupage surface. Dispose of gloves and sponge after use.
Parquet varnish POLY-R
If you don’t want yellowness on the surface of something that will be actively used in everyday life, then pay attention to POLY-R parquet aqua varnish.
Parquet varnish POLY-R
The varnish is applied in the same way as yacht varnish: with a sponge or a wide brush. However, it is almost odorless, dries much faster and has a beautiful silky-matte finish.
I offer you a video about applying POLY-R finishing varnish to a decoupage surface (box with printout), where the secret is revealed on how to apply this product without brush marks
Varnish in spray
These compositions (matte and glossy) are the ones I use most, because they are convenient and versatile.
For example: spray varnish from RUST-OLEUM (matte; glossy also available)
Suitable for absolutely all surfaces (except fabric), compatible with crackling compositions from almost all well-known manufacturers. Varnish for exterior use, with scent. Dries quickly and covers the surface evenly. The products serve well in everyday life and look great. Apply this varnish according to the instructions in a ventilated area.
All this and much more for you in the video course “Decoupage with 2 in 1”
Order!