For an ideal manicure, it is not enough to apply the polish beautifully or design it - it is equally important to be able to prolong its original appearance as much as possible. For this purpose, at the final stage, a finishing coating is used, which is responsible for the durability of the manicure.
Nail top is a fixative varnish that performs several important functions:
- protects the colored layer from chips, cracks, fading, exposure to aggressive external environments (detergents, sunlight, chlorinated water, mechanical damage, etc.),
- bonds previous layers of varnish and ensures the durability of the manicure, gives strength to the composition,
- gives a visual effect (glossy, matte, neon),
- protects against yellowing,
- used to secure decorative and design elements.
What it is
This layer is called sticky or dispersive. The name "variance" is also common. At its core, this is residual stickiness on the base, top or gel polish itself, which remains after the layer has polymerized in the lamp. Those who are especially curious can touch the nail plate after drying and see from their own experience that there is still stickiness. But it's better to take our word for it
Sticky layer functions:
- increase the adhesion of layers (base and main coating, coating and finish);
- give elasticity to the coating (especially important for flexible nails).
Application technology
Despite the fact that the coating is applied in one step, special knowledge and skills are required. In addition to accuracy, a professional approach is also important here, which can be mastered by adopting a step-by-step application technology:
Manicure tools
- Before starting the procedure , arm yourself with a nail degreaser, gel polish itself, a manicure set, an ultraviolet or LED lamp , depending on the labeling of the varnish.
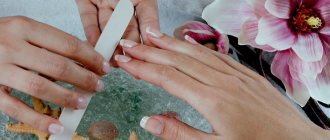
- First, tidy up your natural nails : you need to give them the same shape, length, file them, remove the cuticles, and polish them.
- Before applying, degrease your nails with a special liquid.
- Sometimes, for better adhesion of the gel polish to the nail plate, a special primer . This step is advisory in nature and can be skipped.
- Cover the nail with a layer of gel polish.
- Dry the coating in an ultraviolet lamp for one and a half to two minutes. If you use an LED lamp, drying will take less time. You can apply two layers if the gel polish is too transparent. At the same time , do not forget to seal the sections of the nail plates using the same gel polish.
- At the end, you need to treat the cuticle with oil specially designed for this.
There is often advice: at the end of the manicure, apply a protective coating as a finish so that the single-phase gel polish sticks well. In reality, these are just tricks of the manufacturers. Single-phase coating lasts well for about two to three weeks without any protection.
Removing single-phase gel polish is very easy: just remove the gloss with a buff and soak the coating in remover .
You can learn how to apply and remove single-phase gel polishes by watching this video:
Subtleties of using products with and without a sticky layer
Three-in-one gel polishes and single-phase products are manufactured without a sticky layer. In other cases, bases and gel polishes almost always come with a sticky layer. Without it, there is a high probability that the color will quickly chip, and only the base will remain on the nail plate. But there are different tops: with and without a sticky layer. The first is recommended for use with flexible nails, as well as when using various types of designs (for example, with stencils or when imprinting foil on a sticky layer). The second is used for rubbing (otherwise it will roll into lumps) and for designs with small accessories (beads, rhinestones, etc.), since in such cases it is difficult to remove the sticky layer.
It turns out that to perform different types of designs, it is advisable to have both types of top available: with and without a sticky layer.
Applying single-phase varnish: useful tips
Correct application of single-phase gel polish requires not only compliance with the sequence of actions, but also knowledge of some subtleties:
- A layer that is too thick will cause “waves” to appear and the coating will peel off quickly. It is better to make two layers, drying each of them.
- Gel polish should be dried in accordance with the manufacturer's recommendations. If your hands are in the lamp 2-3 times longer than indicated in the instructions, then such an intense coating, on the contrary, can ruin the coating rather than fix it.
- Minor imperfections made when applying the first layer can be easily corrected with a second layer, especially if a dark or rich shade is chosen.
Applying single-phase gel polish at home, even by an inexperienced master, will take less than half an hour, so taking care of your manicure will not require a lot of time. In addition, such products are also very profitable, because there is no need to purchase accompanying consumables: top coat, base, means for removing the sticky layer and others.
Why remove the sticky layer?
The sticky layer must be removed only from the top coat when the gel polish coating has already been completed. This is done with a special dispersion remover. Sometimes it works like 2 in 1 - both for degreasing and removing stickiness. This should be done in order to give the nails a gloss and to prevent small fibers from clinging to them.
It is most convenient to remove the dispersion with lint-free wipes or cotton pads (here the liquid consumption will be high). The top should be well dried, then it will have a good gloss and there will be no cloudy stains left on it. By the way, if you try to remove the stickiness from colored gel polish, the napkin will turn the color of the gel polish, and the gel polish itself may no longer look so uniformly dense.
Application Features
There is a step-by-step application technology developed by scientists at beauty centers. An important one among them is the period of drying the marigolds in a lamp. The polymerization time of the varnish varies, it all depends on the power of the UV lamp. There are models that work with a half-minute timer, and those that dry for 2 minutes.
The nails must be filed, even if we do not adjust the length, so that cracks do not appear on the gel polish.
The colored layer needs to be dried in a lamp for two minutes, while one is enough for the base and top coat. It is better to wipe off the sticky layer on the surface of the top after drying with a special product. To prevent the varnish from peeling off, the free edge must be sealed.
Manicure stages and possible mistakes
Today there are 3 main types of manicure:
Combined and hardware manicure must be done using a special manicure apparatus, but before using it, it is better to undergo training, since improper operation of the apparatus can lead to damage to the nail plate, for example, cuts. For beginners, it is better to do a classic manicure at home.
Stage 1. Shape filing, cuticle processing
Before applying gel polish, you need to put your nails in order: treat the cuticle, file the shape.
What do we do at this stage?
Stage 2. Preparing the nail plate for coating
What do we do at this stage?
Mistakes at the nail plate preparation stage
Mistake #1:
Typically, people with oily skin or those prone to excessive sweating have a moist and oily nail structure. When preparing such nails for coating, it is necessary to use a dehydrator (nail prep) to deeply dry the nail plate, remove excess moisture from it and improve the adhesion of the natural nail to the artificial coating.
Mistake #2:
The free edge of the nail is one of the most vulnerable places: if you do not pay proper attention to it, chips and detachments may appear. To improve the adhesion between the nail plate and the artificial material, it is necessary to use a primer. Primer is translated as “primer”. There are acid-free and acidic primers.
The acid-free primer acts as double-sided tape and ensures strong adhesion of the natural nail to the artificial nail.
The acid primer lifts the keratin scales of the nail plate for better adhesion to the artificial material. Since the acid primer contains aggressive components, you must be careful not to get it on the skin and cause a burn. It is recommended to use it before extensions for girls with wet or oily nail texture.
Stage 3. Covering the nail plate
What do we do at this stage?
Errors at the stage of covering the nail plate
Mistake #1:
You used the wrong base for your nails.
The condition of the nail plate is different for everyone: for some it is strong, while for others it is thin, soft and plastic. You cannot use the same base for all nails. It is necessary to analyze the condition of the nail plate and pay special attention to the choice of base coat.
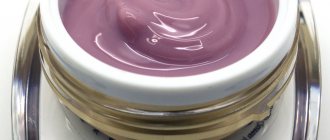
Today there are 3 main types of base coatings: hard, elastic and camouflage. What are their fundamental differences? Which one to choose? Let's figure it out.
Hard bases
Elastic bases
Elastic bases are great for beginners: they are easy to work with, as they do not spread, and the alignment is perfect. Using elastic bases you can extend your nails. Elastic bases are great for soft, highly flexible nails. But on long nails they sag over time, that is, after a while a “dip” appears across the nail.
Why is this happening?
Bases are soft gels, and they, in turn, as we said above, can be elastic or not.
Elastic bases perfectly strengthen the nail plate when leveling, because they are flexible, tenacious, and when the free edge moves, they, like an elastic band, move with it. But this is precisely why shrinkage occurs.
There are bases that contain solid plasticizers. Solid materials do not move with the nail and, accordingly, do not shrink. But keep in mind, UNDER HEAVY LOAD, almost any base will give minimal shrinkage.
What to do?
Strengthening with acrylic or hard gel, but this is a completely different procedure. In addition, the harder the material, the worse it soaks and the more difficult it is to cut.
ADVICE! Sometimes it is not very clear from the name of the base whether it is hard or elastic. To determine the type of base, you can do the following: apply a small drop or strip of base to the surface of a transparent plastic bag and put it in a lamp to polymerize. If after polymerization the drop (strip) bends, it means you have an elastic base in your hands. If you can’t bend the drop and it cracks, then the base is solid.
Mistake #2:
You held your hand in the lamp incorrectly and the coating did not dry well.
How to hold your hand in the lamp correctly?
Mistake #3:
You stored and transported the gel polish incorrectly, it has thickened or air bubbles have formed in it, which is why the coating does not adhere well and is difficult to work with.
How should you store and transport gel polish?
NOTE! The application of color coating most often occurs in close proximity to the polymerization lamp. Place the bottle of gel polish so that the light from the lamp does not fall on it, otherwise the gel polish may thicken.
ADVICE! If bubbles still appear in your gel polish, you need to do the following. Open the bottle, but do not remove the brush. Let the material stand in this state in a dark place so that it is not exposed to daylight for a couple of hours. After this, mix the composition with a brush, close the bottle and twirl it between your hands.
Mistake #4:
During polymerization in the lamp, the gel polish shrunk.
One of the reasons may be the insufficient power of the lamp you are using. Perhaps your gel polish is well pigmented and the lamp power is simply not enough to dry it. It is advisable to use a lamp with a power of at least 48 W. For information on how to choose a lamp, read the article “How to choose a lamp for drying gel polish?”.
Also, the gel polish could shrink due to the fact that you applied it in too thick a layer.
Mistake #5:
The brush turned out to be defective, making it inconvenient to work with or making it impossible to make a coating at all.
Sometimes the brush hairs may stick out in different directions or be completely absent, so before purchasing gel polish, ALWAYS check the brush for defects!
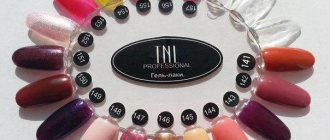
TIP: in order not to buy a “pig in a poke,” buy gel polishes in professional stores that are official representatives of brands and give you the opportunity to test gel polish for free before purchasing. In such stores you can apply gel polish to the tip and see if you like its thickness, density, and brush shape.
You can take advantage of this opportunity in our “ParisNail” stores!