Every girl's dream is a beautiful manicure that will last for a long time. Manufacturers of gel polishes allow you to make this dream come true. The product helps to keep nails attractive, well-groomed, and without cracking for a long time. In addition, gel polish helps strengthen nails, does not have an unpleasant odor and does not contain harmful components. But exactly how long should the coating last on natural and artificial nails? The answer to this question will help evaluate the professionalism of individual manicurists.
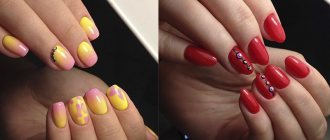
Beautiful manicure
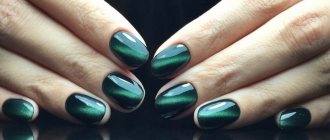
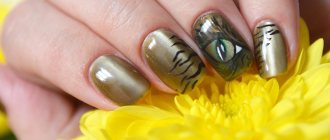
How long does gel polish last on natural nails?
Every woman who takes care of her nails is interested not only in the cost of a manicure in a salon, but also in its durability. Regular polish can last on nails for an average of 3 to 5 days. How long does a manicure last? In accordance with the manufacturer's instructions, which comes with the product, the gel polish can stay on the nails for about 2 weeks. During this period, cracks will not appear on the coating, it will not change color or deform.
Elegant and long-lasting manicure
According to numerous reviews, gel polish coating on natural nails lasts for 14 days or even more, as stated by the manufacturer. Supplies and the process of creating a long-lasting manicure are not cheap. Many women, in an attempt to save money, wear manicures for 3-4 weeks. The main problem in this case arises in the growth of nails and the appearance in the cuticle area of strips of the nail plate that are not painted with varnish.
High-quality manicure in the salon
Advice! One way to extend the life of a beautiful manicure is to buy polish in the same color as your painted nails. As the nail plate grows, you need to tint the area near the cuticle.
According to experts, wearing gel polish on natural nails for a long time (more than 2 weeks) can negatively affect the condition of the nails. The longer the gel polish is on the nails, the stronger it adheres. As a result, at the time of removing the coating, you will have to resort to the use of aggressive means.
After 3-4 procedures of applying gel polish, it is recommended to rest your nails for several weeks. During this period, the nail plates need to be strengthened using special means.
Giving your nails a break from gel polish
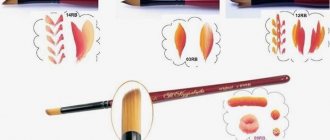
Technique for applying Gelish gel polish in pictures
The procedure was carried out by teacher Galina Starenko. The diagram below shows that a nail that is not covered with anything runs the risk of infection from the outside. Not only through microcracks on the main surface, but also through the end... Conclusion - the end must be closed.
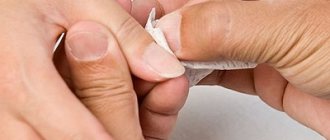
The pusher very gently and without pressing pushes back the cuticle. Pressure in the area of the nail bed leads to the bumps along the nail.
The pterygium is also gently and without pressure removed so that the coating adheres tightly to the entire surface of the nail.
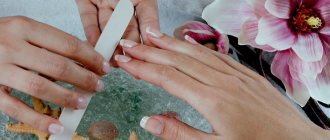
Hand & Nail Harmony file we correct the shape (by the way, files from this company are my favorite).
And here I learned something amazing. You know that often the nail breaks on the side. Why? There is the weakest point, because... The load is distributed and there is more pressure on the sides. I know that some people recommend not cutting the sides of the nail, they say, then it will break less. But what if you need to cut it down? For example, my nails grow trapezoidally and I don’t think it’s beautiful. I try to form a uniform shape, a rectangle. So, in order to reduce the risk of nail breakage, you need to make the last movement of the file from the bottom up (for reference: the bottom is the nail bed, the top is the free edge). There, in this way we seal the layers of the nail that grow in this direction. This is such a small nuance that improves the quality of the manicure. Amazing!
Next, use a 220/280 grinder to remove the gloss from the nail. And that means a fatty layer. First we work on the rougher side, then on the less rough side.
Since we have removed the oily layer from the nails, what would be logical? That's right, don't touch your nails with your fingers. Otherwise, the lipids will again be on the surface and the technique will be broken (read - the gel polish will stick worse). For additional reliability, apply degreaser Gelish – Nail Surface Cleanse . It evaporates very quickly and there are definitely no lipids on the nail. There is also no dust after sanding.
Next, Gelish – pH Bond – dehydrator is applied in a very thin layer.
Next comes the base - Gelish - Foundation .
We put the dots, and then using a modeling brush we achieve a perfectly thin layer. This trick cannot be achieved with a native brush. And the thinner the coating, the better. First of all, it won't feel like cake. Secondly – savings. Thirdly, there will be no films on the nail after removing the gel polish. And remember about the end - seal it!
We put our hands in the Gelish LED lamp for literally 5 seconds so that the base sets.
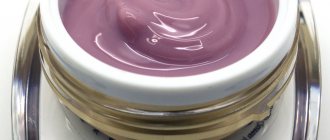
And then you need to figure out what color...
After deliberation, we chose dark gray Gelish – Fashionably Slate and light gray Let's Hit The Bunny Slopes .
The picture below clearly shows why you need to seal the end. The arrow is all sorts of bad things that live on the handles in the subway and buses. Our coating is a polymer, that is, plastic, it is flexible and at the same time protects the nails.
Applying color. Layers as thin as possible. The master's hand not only holds my finger, but also pulls back the skin, allowing the brush to come closer to the cuticle.
Sealing the end!