Choosing varnishes to create a design
The design of the mittens can be done with regular varnish or gel polish. In the first case, the beauty of your nails will be short-lived. Gel polish coatings last a long time on nails, but removing them at home is quite difficult. You can create a simple design of mittens using both types of coverings.
In order to draw mittens, in general you will need:
- background color;
- black varnish;
- one or two colors to choose from for mittens;
- white varnish.
Important! Shellac coatings have become very popular lately. They last a long time, are easy to remove, and improve the nail structure. However, the price of shellac is quite high.
How to draw braids
The question of how to make a three-dimensional design on nails worries many novice nail technicians. There is nothing difficult in creating a convex ornament, so if you don’t succeed the first time, then it’s only a matter of time. In order for the client to get what he wants, it is necessary to perform simple steps: after processing and drying the main layer of gel polish, you need to draw the selected pattern with a thin brush, then dry it and apply several more layers on top. Each new layer should clearly follow the lines of the previous one.
Color combination rules
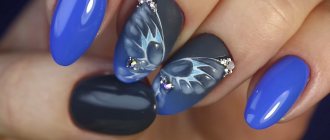
The winter palette is usually represented by all sorts of shades of cold blue and white, characteristic of the landscape of this time of year. Therefore, the most “winter” design is created by various combinations of white and blue. Metallic colors – silver and gold – fit perfectly into the theme of the season.
Blue varnish is most often used. It harmonizes well with bright blue, white, pink, silver, gold, and black. Deep blue varnish is also combined with these same colors, as well as yellow.
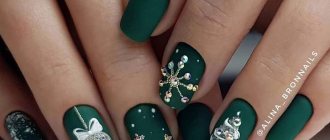
You can dilute the palette with juicy berries, green and emerald tones that are popular this season. Don't forget about the elegance and sobriety of pastel shades, which can be a wonderful backdrop for bright, cheerful mittens.
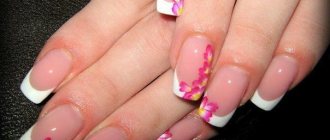
Important! When applying a white or beige coating, all minor imperfections and imperfections become visible.
Therefore, before using them, you need to get your nails in perfect shape - shape them, trim cuticles, polish the nail surface, remove burrs. The slightest errors will be evident.
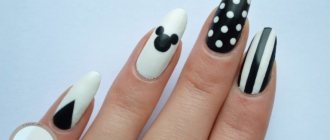
Knitted manicure ideas
Among the proposed patterns, every girl will be able to find a suitable option for herself. Knitting on nails looks not only beautiful, but also very gentle, winter-style. Decide whether you want to take existing photos as a reference and just look at your favorite knitted item in your wardrobe. Try repeating a pattern from your sweater on your nails. Original diamonds, braids, bumps, spikelets, chains or vertical lines will be a great idea for nail design in the winter.
Sweater design on nails
Creating a beautiful three-dimensional pattern involves the use of special equipment (for example, a UV lamp) and gel polishes in pastel shades. The design of the sweater is zigzags, stripes with intertwining strokes, diamonds, and bumps. All kinds of patterns for a sweater can be found in examples of finished works, or you can take your favorite clothes and try to reproduce the knitting using a thin brush.
Winter knitted manicure
This design has been at the peak of popularity for more than one season. It looks very gentle and warm, because knitting on nails in the form of voluminous patterns of pastel colors, covered with velvet sand, cannot but warm you up in the winter cold. You can see ideas for creating a manicure in the photos presented or repeat the lines on your knitted sweater, dress or cardigan.
New Year's knitted manicure
If you want to choose a nail design for the New Year, but can’t decide among all the different options, then do “knitted” nails with an ombre effect, which are fashionable this year. To get a chic New Year's manicure, in addition to the basic tools and a special lamp for drying, you will need 3 more colors of gel polishes, pastel powder and a sponge. Do the following:
- Prepare the nail plates, cover them with a base layer of base, dry them, cover them with one layer of the main color, and put them under the lamp again.
- Apply a different color (lighter) polish to the sponge and press it onto each nail to create a beautiful transition. Dry and wipe with alcohol.
- Draw a braid (make parallel stripes with intertwining strokes between them), and cover the last undried layer with powder or sand. Dry in an ultraviolet lamp, then brush off any remaining powder with a soft brush.
How to draw mittens on nails
The design of mittens is considered one of the simplest, so even with a bare hand you can draw beautiful mittens on your nails. The detailed instructions presented below will help you correctly and accurately depict beautiful mittens and decorate them.
To create a “mitten” design you will need:
- top and base;
- bright blue and light blue gel polish;
- white and black gel polish;
- decorative elements: rhinestones, sparkles;
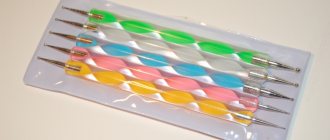
- thin brush;
- lamp.
Drawing technology
- Blue gel polish is applied to the nail plate as a background coating. If one layer is not enough, apply another one, each of them is dried in a lamp.
- The mitten itself is painted with a thin brush using bright varnish. First, outline the outline of the drawing: draw a short horizontal line from the top, a long vertical line from its center, at the end of which a semicircle is drawn. The ends of the semicircle are connected to the ends of the horizontal line, then the thumb is drawn. The entire space inside the outlined outline is painted over with the appropriate color.
- To make the mitten look more realistic, it is shaded in the lower rounded part with a top mixed with black varnish. The upper part, on the contrary, is lightened with a mixture of top coat and white varnish. Nails are dried in a lamp.
- The next step is to outline the outline of the mitten with black varnish. The nail plates with the pattern are dried in a lamp.
- The last step is the fur at the top of the mitten. To do this, draw a small rectangle with rounded corners at the top of the mitten using white varnish. Then, methodically using a thin brush, the fibers are pulled out of it.
- In principle, the simple design of the mitten has already been made, but it can be diversified with additional decorative elements. In order for the fur to become fluffy, it can be coated with white acrylic powder or melange. After this, a top coat is applied. The mitten itself in the lower part is decorated with rhinestones or sparkles. The remaining space on the nail can be filled with small patterns, such as snowflakes, if desired. All actions are secured with a topcoat and finished with drying in a lamp.
Master class on creating nail designs “Mittens”
If you don’t want to draw mittens on the nail plates yourself, you can use stickers glued to the background covering.
To do this, the selected design is cut out along the contour, grabbed with tweezers, lowered into water for 10 seconds and applied to the nail. Finally, it is covered with topcoat and dried in a lamp.
Photo gallery of nail art with mittens
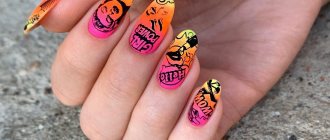
A manicure with mittens can look different. The design can be done with a brush, applied using stamping or using nail stickers. In any case, it will look interesting and beautiful. The background can be blue, blue, white - these colors are invariably associated with winter. But at your discretion, you can make it red or use any other color that you like.
Get creative, decorate the mittens with different patterns, complement them with sparkles, and you will definitely get a colorful, stylish and completely unique design. We offer you several photos with examples of designs so that you can get fresh ideas and just enjoy viewing.
You can perform this manicure with regular varnishes, but it is better to use acrylic paint. It is much easier to work with, produces rich, beautiful colors and lasts a long time. Gel polishes are usually used as a base and top coat so that your manicure will delight you with its beauty for a long time. To complement the designs, you can decorate your nails with rhinestones, sparkles, gold and silver manicure ribbons, sequins and other decorative elements. Don't be afraid to fantasize, and you will definitely succeed .
If you have had to deal with painting on your nails before, we can offer you a more complex design with glamorous mittens. It is so gentle and magical that you will simply be enchanted by it. The technique for performing it is more complex, but the final step-by-step video will help you cope with this task brilliantly.
Nail Design Ideas
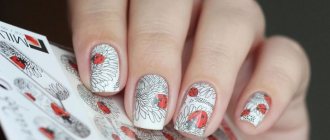
Below are many options for manicure ideas with a “mitten” element on your nails. The photographs can inspire you to create your own mitten design or become an example that you can transfer to your nails.
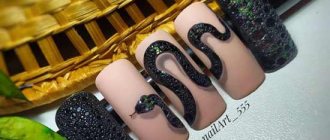
The design of mittens can be made using completely different techniques, for example, knitting.
Additional decorative elements can include small rhinestones and stones, glitter, application of acrylic powder, etc.
Let's get down to business
It's time to learn how to make a knitted manicure using acrylic powder. Carefully follow the tips below, be careful and patient, and the result of painstaking work will be a beautiful manicure in the style of a knitted sweater.
- Prepare your work area. The tabletop must be clean, because dust on the nails can ruin the manicure and everything will have to be redone. Place the necessary materials in a convenient place so that they can be easily used, even when some of the nails are already painted.
- Start by applying the base coat. The layer should be thin and even. Next, apply a degreasing agent to your nails. This will ensure a strong grip.
It's time to learn how to make a knitted manicure using acrylic powder
Carefully follow the tips below, be careful and patient, and the result of painstaking work will be a beautiful manicure in the style of a knitted sweater
Prepare your work area. The tabletop must be clean, because dust on the nails can ruin the manicure and everything will have to be redone
- The next step is to coat the nail plates with gel polish. Take your time; let the product dry well under a UV lamp.
- Surely, before starting work, you chose the options for a knitted manicure. Now apply the desired design to your nails. For ease of application, use a special brush. The drawing must be made with the same varnish as the base.
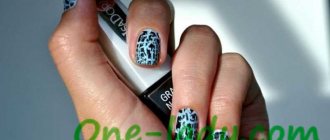
- Clean the brush from dirt and carefully pick up acrylic powder onto it. There is no need to touch the brush to your nail, just tap it lightly with your finger and the powder will fall onto the design.
Start by applying the base coat. The layer should be thin and even
Now apply the desired design to your nails. For ease of application, use a special brush
next step – coating the nail plates with gel polish
- Place your nails under the UV lamp again and rest for a few minutes.
- After making sure the ornament is dry, use a clean brush to brush off any excess powder. A fashionable manicure with a knitted pattern is ready.
New Year's manicure 2022 - 2022: fashionable and not fashionable
What is hopelessly outdated in manicure? These are overly long and bright nails, as well as water manicure, voluminous flowers, large stickers and rhinestones, cartoons on nails, neon colors.
In general, the main rule is that a manicure should be appropriate. What looks good in summer may look completely disastrous in winter. And also, what is suitable for older women is not always suitable for a young girl and vice versa.
When doing a manicure for the New Year 2022, pay attention to the following trends:
- delicate light watercolor drawing;
- minimalism;
- monochrome;
- imitation of frosty patterns;
- glitter;
- foil;
- volumetric patterns;
- velvet powder;
- matte finish.
Since the symbol of the New Year 2022 is a metal bull, the most current shades of nail art are white, silver, and metallic. Also, nails for the New Year are usually covered with: green, red, gold, black, blue, chocolate, blue. The textures used are both matte and glossy, as well as shiny, iridescent, metallic, in general, everything that glitters and sparkles.
For the New Year, it is quite possible to do a comic manicure with a cute mouse, Santa Claus or deer, but it is important to maintain moderation.
In general, fashionable winter nail design is sparkle and cold tenderness.
TOP 5 most spectacular ways to create “Knitted nails”.
- Monocolor design.
This is the simplest manicure, but not devoid of elegance and beauty. In this look, the color of the powder matches the color of the coating.
All matte nails can be decorated with knitting, or noble velvet can be framed with the soft shine of glossy nails.
Your fingers will be especially irresistible if the knitting is complemented by snowflakes, deer, Christmas trees or Christmas tree decorations. Well, if you are just starting to develop your skills, limit yourself to bends, turns, and diamonds. Even a simple pattern will add style and chic to the image if done neatly and evenly.
Knit a sweater from shades of acrylic powder or sand that smoothly flow into each other, or decorate a ready-made gradient with voluminous knitting with varnishes or gel polishes.
Both beginners and pros resort to such cute and adorable designs. Creating them requires much less time and effort, because the visual illusion is created by stamping or decorating nails using vinyl stencils (or slider design).
Of course, the variations of knitted nails are not limited to the described images, and you can combine them with each other and create your own unique designs. Whether it will be an image for everyday life or holidays is up to you to decide. However, you can be completely sure of one thing: such fingers will not remain without compliments!