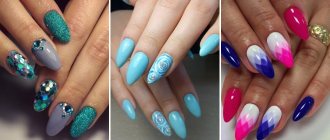
How to draw a ladybug on your nails step by step: diagram
Both a manicurist and an amateur girl can draw a ladybug, an insect symbolizing summer and the sun, on her nails. It is only important to think through the nail design correctly and not to rush when creating it, so that the design comes out neat and not rough.
You can style the nail plate as the back of a ladybug, draw little sun bugs on your nails, or combine these two designs.
Think carefully about what your ladybugs will be like and where exactly on your nails you will place them. You can decorate the entire nail plate on all ten fingers or only on some of them as an insect body. For this manicure you will need:
- base coat
- coatings of red, black and white (if desired, you can replace the red varnish with pink or yellow)
- thin brush for painting on nails
- dots
- final strengthening coating
- set of tools and products for hygienic manicure
Ladybug on the entire nail step by step.
- Before drawing ladybugs along the entire length of the nail, you need to take care of the handles. Remove the old coating, file your nails to the shape you want, and do a hygienic manicure at your discretion.
- Before applying colored polish, red, pink or yellow, in this case, strengthen your nails with a base.
- Cover your nails with red polish. Do this slowly, from the middle of the plate to the edges, so that the coating lies evenly.
- Along the free edge of the nail or slightly below if you have short nails, draw a thin horizontal line with black polish. Then cover the entire part of the nail plate that is above this line with black.
- From the center of the black horizontal line along the entire length of the nail, draw a vertical line, also black.
- Using a brush or dots, draw spots on the back of the ladybug - place black dots to the right and left of the vertical line. There may be the same or different numbers on both sides. Make sure that the varnish does not spread and the spots do not turn out too large and sloppy.
- Using white polish, paint ladybug eyes on the black tips of your nails.
- To make your manicure last longer, use a topcoat that strengthens it.
Ladybugs on all nails.
A very beautiful, delicate manicure - nails covered with a single-color varnish, with miniature ladybugs painted on them as if you were looking at them from above.
Little ladybugs on nails.
To make one, prepare:
- base coat
- coatings of red, black and white (if desired, you can replace the red varnish with pink or yellow)
- thin brush for painting on nails
- final strengthening coating
- set of tools and products for hygienic manicure
Little ladybugs on nails step by step.
- Get your nails and hands in order - get a hygienic manicure.
- Gently coat your nails with white polish.
- When the varnish dries, draw small red ovals on it - these will be insect bodies.
- Using a very, very thin brush, outline the ovals with black color so that the outlines of the ladybugs are clear. Make a thickening on one side - insect heads. Draw antennae to them.
- Divide the bodies of the ladybugs with a very thin black line to create wings.
- Draw dots on the wings.
- Strengthen your manicure with a topcoat.
IMPORTANT: If you are a novice nail designer and are afraid that your hand will tremble when drawing miniature ladybugs, first just style your nails to match the wings of these bright insects. Paint them red and add some black dots!
General execution scheme
To do this manicure, you will need the following tools and materials:
- a file with an abrasiveness of 180-220 grit to shape the free edge of the nail and remove gloss;
- auxiliary liquids: dehydrator, primer or ultrabond, degreasing, de-sticking and dehydrating agent (3 in 1);
- base coating, preferably with the inscription rubber (translated as rubber), it is more durable compared to the usual one;
- colored gel polishes;
- top coating;
- auxiliary materials: lint-free wipes, orange stick, brushes, dots.
After everything is prepared, proceed to the manicure:
- first you need to carry out a hygienic manicure (edged, European, hardware or combined);
- then use a nail file to shape the nails and remove the gloss from their surface;
- We remove the remnants of sawed-off particles with a napkin soaked in a 3-in-1 solution. Try not to touch the plates again;
- Apply degreaser and primer sequentially to all nails (dries in 1-2 minutes);
- cover with base. If the nail plate has defects, we perform alignment in compliance with the correct architecture. Paint one finger at a time, this way you will be able to avoid streaking and the formation of too thick a layer of varnish;
- Apply the color coating in the first thin layer. Dry in the lamp for a minute;
- We make the second layer denser, we try to paint as close to the cuticle as possible (you can additionally use a thin brush);
- we carry out design;
- We fix the result with a top.
Take note: a non-sticky top retains its original shine longer, while a matte top in light shades quickly gets dirty and rubbed off.
Methods of drawing
The most common and classic option is the image of a ladybug on the ring finger. This manicure will create a highlight and will not look too tacky. This season it is especially fashionable to do different manicures, that is, to depict an insect on only one hand, although perhaps on several nails.
You can apply a design to your nails in the following ways:
- using the stamping method or application using a stencil;
- draw a ladybug with your own hands using a brush;
- an image of an insect using rhinestones, and draw some points with a brush.
If a girl decides to decorate her manicure with a ladybug, then she will need to decide what she wants it to look like. In this matter, there are several options for depicting an insect.
- ladybug - top view;
- side view of the insect;
- ladybug in flight.
Drawing a design using a brush or dots (a manicure tool for creating patterns) is certainly painstaking work. This will require a lot of patience, perseverance, and, of course, talent. Not all people have these qualities. To make it easier to apply insects to your nails, you can use ready-made stickers.
Nowadays you can find many different stickers in stores, including ones with a ladybug. All you need to apply to your nails is to adjust the size of the stickers, moisten them a little in water, glue and secure with one layer of varnish. Manicure with ladybug on nails is ready!
Using gel polish
To make a ladybug manicure, you only need two colored gel polishes and a thin brush. When you have completed the step-by-step coating, after the second dried layer, take a brush and paint a ball in red - the body of a bug.
After drying, we draw in black the head, legs, if desired, and put dots on its body, then dry it. Cover with topcoat and the design is ready.
Creating a three-dimensional drawing
If you want to stand out and add volume to your drawing, you can do this in several ways.
Modeling
To do this, you will need red gel plasticine and black gel material (varnish or paint). This manicure will look better on long nails than on short ones.
Technique:
- Using an orange stick, take a small amount of gel plasticine and form a ball out of it;
- We attach it to the top-coated nails and press lightly, creating a semicircle shape;
- Draw the paws, dots and head in black;
- dry everything in a lamp;
- Carefully apply top coat on top without a sticky layer.
Gel or rubber base
In this case, you will need a single-phase gel for modeling plates or a thick rubber base for gel polish.
In this case, the ladybug on the nails is created as follows:
- to begin with, we simply create a pattern with gel polish and cover it with a top coat;
- dry in the lamp for the prescribed time;
- take a drop of gel or rubber base with a thin brush and lower it onto the drawing;
- turn your hand over so that the material is leveled;
- After 10-15 seconds we send it to dry in a lamp.
If you used a single-phase gel, you do not need to cover it with a top coat, but apply a thin layer to the base, otherwise your volumetric drawing will not shine.
Location, styles and techniques
A classic ladybug manicure is the placement of the insect on the ring (fourth) fingers. This manicure is ideal for anyone who wants to show their optimism to the world, but does not want to turn into an avant-garde model.
Drawing techniques can be very different:
- Stamping, that is, application using a stamp stencil;
- Stickers, laconic ready-made designs on well-designed nails;
- Hand painting with a brush. Here you need to use gel polish or acrylic paints and a base that allows you to paint;
- “Sculpture” or 3D ladybugs. They are made using mixed media - a pattern plus rhinestones, and they look three-dimensional.
Experiment, consider new designs, and your nails will be unique.
Preparing your hands
Let's prepare our hands for a manicure:
- If your nails are covered with old polish, you can remove it with a cotton pad and nail polish remover.
- Long nails are shortened using clippers. To correct the tips of your nails, you should use a nail file.
- Prepare an antibacterial solution from soap and water, at room temperature. Lower your nails for 5-10 minutes.
- Using a flat stick, gently push the cuticle back. If it doesn’t move well, you can use another sharp end. We trim off the excess cuticle with scissors.
Materials for nail art
An original ladybug manicure can be done not only in a salon, but also at home. Of course, the design will require some tools, which include the following:
- scissors;
- wire cutters;
- double-sided spatula;
- baths;
- nail files of varying hardness;
- base;
- black, white and red varnishes;
- fixative;
- thin brush;
- dots (if necessary, can be replaced with a toothpick);
- antibacterial agents.
Almost every representative of the fair sex has a simple set of tools, and accordingly, she knows how to use them. After reading several articles or watching a small number of video tutorials, a girl can easily perform this simple version of a ladybug manicure.
Manicure with ladybug photo you can see the most interesting and daring options:
French nails with ladybug: photo
Don’t think that French nails are only for natural nails, with a white free edge. Look at the photo to understand how varied this type of manicure with ladybugs can be.
Black and pink jacket with ladybugs.
Bright French manicure with ladybugs.
Idea for a beautiful manicure: paint the free edges of your nails in the colors of ladybirds - red and black.
If you still want to spice up your classic French manicure with ladybugs, prepare:
- set of products and tools for hygienic manicure
- base coat
- nail polishes in nude, white, black and red colors
- thin brush
- stickers for French jacket as needed
- final strengthening coating
French with ladybugs step by step.
- File your nails into an oval or soft square.
- Do a hygienic manicure in your usual way.
- Cover the nail plates with flesh-colored polish in 1 or 2 layers, wait until it dries.
- Using a thin brush or stencil along the smile line, paint the free edges of the nails with white. Let the white varnish dry.
- Draw small red ovals on it - these will be insect bodies.
- Using a very, very thin brush, outline the ovals with black color so that the outlines of the ladybugs are clear. Make a thickening on one side - insect heads. Draw antennae to them.
- Divide the bodies of the ladybugs with a very thin black line to create wings.
- Draw dots on the wings.
- Strengthen your manicure with a topcoat.
French manicure: ladybugs on the tips of the nails.
What is needed for a manicure?
If you have already precisely decided on the design, then little remains to be done. You just need to study the technology of processing the nail plate, as well as purchase the necessary materials for the procedure.
There are many options for creating a drawing. But the basis is always the same. Various shades can be selected, depending on the size of the planned pattern.
The main components for creating a composition are the following:
- The main layer that is applied to the nail plate.
- Lucky. The most commonly chosen colors are white, green, red and black.
- Dots. This is a tool that allows you to create designs on the surface of your nails.
- Top coating. These can be various substances for fixing and drying the created composition. Typically used to give nails an aesthetic and finished look.
Nail design gel polish and shellac with ladybug: photo
The ladybug design looks very beautiful on extended or gel polished nails. Drawing insects will not be difficult for you if you have mastered these technologies at least a little:
- After you have given your nails the desired shape and cared for them and your hands, apply a degreaser.
- Apply a base coat to your nails and dry it in a lamp.
- Think about what ladybugs will be like. Draw them as you wish. Remember that each layer of gel polish is dried in a lamp separately.
- When ladybugs are already showing off on your nails, cover them with a finishing coat, dry it and remove the sticky layer.
- If there are streaks of varnish left somewhere, carefully remove them with a router.
Ladybugs with gel polish.
And this is how black ladybugs look interesting on a white background.
Bright manicure with gel polish with ladybugs.
Black and red summer manicure.
Flowers and ladybugs - colorful nail design.
Ladybug on a sunflower.
Stickers and sliders in design
Having chosen the idea of decorating with stickers and sliders, you need to know their distinctive features.
The stickers are brighter, have a white backing and an adhesive backing. They are placed on a dried top without a sticky layer and covered with another layer of top. Another option is to remove the tack from the color layer, attach the sticker and apply topcoat. They look equally bright against any background.
Sliders (water stickers) are drawings on a transparent film that are held on a special cardboard. This film is peeled off with water and transferred to the plate. They look beautiful on a light background, ideally white. To attach them, leave the sticky layer, straighten the sticker on the nail, cover it with topcoat and dry it in a lamp.
Both options are easy to use and suitable for both long and short nails.
Ladybug on short nails: photo
If you have short nails, styling them entirely as ladybird backs will be a bit rude. It’s better to draw these bugs small, perhaps not even on all nails.
Multi-colored ladybugs on short nails are a manicure idea for a girl.
IMPORTANT: Ladybugs are an interesting nail design idea for a teenage girl.
A little history
Ladybug is a cute and pleasant insect
At all times, owners of a beautiful manicure were owners of good taste. This art form dates back three thousand years. In ancient Egypt, the coloring of nails determined which class a person belonged to.
The Chinese used a mixture of egg whites, wax and gelatin. This composition strengthened the nails. The Chinese endowed all owners of long nails with wisdom.
It is believed that the King of France Louis Philippe in 1830 became the first European who originated the basics of manicure. The king suddenly developed a severely inflamed hangnail on his hand. During the treatment, the royal doctor came up with a method to make nails beautiful.
The beginning of the twentieth century gave rise to an entire industry developing manicure products and items. This type of hand care has become relevant not only for women, but also for many men. The presence of a manicure indicated the owner’s wealth. Since 1925, red varnish appeared on store windows. A decade later, the color range of varnishes became much more diverse.
Nails began to be decorated in the 20th century with velvet, glass, and rhinestones. Gradually, this trend gained a strong position and became known as nail art.
Modern nail art technology allows you to create works of art on your nails.
Ladybug on square nails: photo
Long and medium-length nails can be filed under a square. This means you can make any design with ladybugs.
Ladybugs on long square nails.
Ladybugs on medium length square nails.
Manicure on the ring finger
This option is universal and suitable for any age category. Here everything depends only on the professionalism of the master himself.
The manicure will look good both in the summer heat and in winter, and also goes well with long or short nails. You can find any design online or create your own.
Ladybug is a neat and elegant pattern for manicure. It is quite simple to perform, so it can be done even at home.
Volumetric ladybug on nails: photo
The design with a three-dimensional ladybug is very interesting. It feels like a live insect is sitting on your nail. To achieve this, you should master the technique of creating 3-D drops.
Volumetric ladybugs: 3D drop technique.
And in the video below, learn how to make a ladybug look voluminous using gel polishes.
Step-by-step design implementation
- Substrate. Any light background is suitable for the ladybug - white, blue, green, as well as the entire palette of pastel shades. The task is to create a substrate on which the drawing will stand out as much as possible.
- When the background is dry, start drawing . In the right place on the nail plate, outline the body of the future ladybug. Don't try to make the circle perfectly even - any imperfections can be corrected. Traditionally, the ladybug is painted with a bright red color, but theoretically any other bright shade can be used.
Dry the resulting underpainting in the lamp for 30-120 seconds, depending on the type of device:
- To add volume to the insect, mix a drop of top coat with black gel polish on the palette. The goal is to get a translucent black color, like for a manicure with a veil effect.
- In the part of the body where the bottom of the ladybug will be, carefully apply a mixture of gel polish and top coat with a thin brush. The border between red and black should be gradient so that the transition is not noticeable.
- On the palette, mix a drop of white gel polish with a drop of top coat or take milky gel polish and draw a spot in the center of the back. This will visually “raise” the drawing and make the ladybug look realistic and voluminous.
- Take a black gel paste, or in my case black gel polish, and with a thin brush draw the head, the line of the back and make a stroke along the edge of the body. Please note that the line from the head to the bottom is not straight, but slightly curved - this adds realism to the drawing. The main difference between gel paste and gel polish in the painting process is color saturation. I had to apply the black gel polish twice, but the paste would have done it in one coat.
- Now the paws and antennae. All with the same black gel paste. It is better to draw the paws in one line, without strokes, by placing a dot and extending it to the place where the paws and whiskers are attached. The lines here should not be straight - add bends and thickening to make the drawing more alive. Don't forget about the dots - three on each wing. Dry it in a lamp.
- Next are the glares. Using white gel polish and a thin brush, add strokes near the head, on the head and at the junction of the wings at the bottom.
Overall, the design is complete. Cover it with a finish - matte, glossy, corduroy, dry it in a lamp and admire the result. But Victoria @vivi_nail_mastep shared with us a life hack on how to make a 3D effect:
- Cover the ladybug with a matte topcoat and dry it in a lamp;
- Place a drop of glossy topcoat on the insect’s body and carefully spread it to the edges of the design, dry it in a lamp as usual. Thus, the drawing “comes to life” and looks like the real thing.
Do you have questions about creating a design or creative ideas for painting your nails? Victoria will be happy to answer on her Instagram page. Do you like this article format? Share your opinion in the comments!
While Anapa tourists are fleeing the invasion of ladybugs, we are inspired by their beauty and do a themed manicure. And don’t worry about vacationers - these insects pose no danger to humans.
As a child, seeing a ladybug was considered great luck. Some even planted an insect on their finger, made a wish, and released it into the sky. Now that the wonders of the nail industry know no bounds, your manicure itself can become a talisman.
Masters offer many nail design ideas with a ladybug. You can decorate just one nail with its image, or you can completely paint the plate with a themed print.
Perhaps the most unusual option is a French jacket with a ladybug and matching daisies. If painting your nails is too difficult a task, you can find small stickers with ladybugs to create a stylish, minimalist manicure.
A little sparkle in your makeup will help create a festive feeling at any time of the year. And a French manicure with a slight shimmer even claims to be universal: after all, you want to shine not only when the chimes strike.
It seems that French manicure never goes out of style. Over time, new versions of the “ageless” trend appear. A fresh idea from nail artists - a classic French manicure decorated with glitter.
There is not much that distinguishes it from a regular French manicure: instead of a white arch, there is a bright shimmering coating on the tips of the nails. As you can see, this design goes well with jewelry and jewelry.
However, a glitter jacket cannot be called exclusively festive - it is, rather, an excellent option for every day for those who want to bring a little chic and sparkle to drab everyday life.
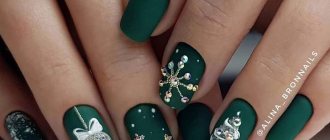
Precious stones continue to inspire nail artists. The design imitating rose quartz was replaced by emerald manicure. Ideas that can be shown to the master are traditionally in our selection.
It is believed that emerald symbolizes happiness, good luck and a certain balance that each of us strives for. The soft shade of green polish combined with white blurred lines creates the effect that your nails themselves have turned into precious stones.
Manicurists offer many interpretations of this trend. You can, for example, make a plain “emerald” coating or decorate a classic French jacket with a stone pattern.
There is still a whole month of summer ahead, which means there are at least 31 chances to still go on a long-awaited vacation or at least just enjoy the good weather. In both cases, you simply need a summer nail design with images of tropical plants.
The inspiration for the fashionable “tropical” manicure came from plants growing in the southern regions. In the last month of summer, masters offer to paint images of palm trees, oleanders, and even the exotic bird of paradise flower on nails.
Strelitzia has long been the floral emblem of Los Angeles. Using its unusual texture as a basis, local nail artist Brittney Boyce created a vibrant design in neon colors that sparked a boom in “tropical” patterns.
You can interpret the trend in your own way by painting a small green twig or orange leaves on your nails. No one limits you in the color palette either: the more colorful colors there are, the better.
While sports stars compete for first place, fans from all over the world get themed manicures with the emblem of the Olympic flag. You too can support the trend by arming yourself with several nail polish colors.
The 2020-2021 Olympics, currently taking place in Tokyo, is nearing its end. This year has brought us many victories: our athletes have already won gold in shooting, artistic gymnastics, swimming and other disciplines. We are watching further competitions with bated breath and, in order to support the Russian team, we are joining the trend for “Olympic” manicure.
Most thematic nail art involves the image of five rings - those that flaunt on the Olympic flag. Ask an artist to make a classic white base with a “chain” design in red, blue, green, black and yellow.
Nail polishes from the Mindset, Kinetics collection. Shades from left to right: 501 Pathos, 502 Balanced Odds, 503 Mindset, 504 Blond Bond, 505 K-Spirit, 506 Correlation, 507 Sangria Talks, 508 Denim Gods.
There can be countless variations - just take a look at the samples from our selection. You can make even a ready-made manicure “Olympic”: just draw some sports symbols on your nails.
We believe that such a manicure brings not only joy, but also good luck.
takes 3 minutes to read
Text: Alina Kharaz
Manicure not only complements the image, but also creates the mood. Floral nail art is usually responsible for spring. But this is not the only option. A design with a ladybug, a symbol of good luck and good news, will work great. Our material will talk about what may be required for such a manicure and how to do it correctly.
Manicure - ladybug on chamomile: photo
A floral nail design with ladybugs looks very summery. Sun bugs are painted on leaves and flowers, such as daisies. The drawing below will help you draw a daisy beautifully.
Chamomile step by step.
Now look at the photo on how to arrange ladybugs on flowers.
Daisies and ladybugs in acrylic.
French design: daisies and ladybug.
Ladybugs on daisies on nails.
Summer nail design: daisies and ladybugs.
Stylish design ideas
Today, an increasing number of craftsmen are not limited to any one element of the print. Increasingly, in addition to the real summer insect, floral patterns, petals, grass and more are used. Sometimes you get whole pictures and compositions on your nails that can convey an important idea or show a story.
Using pop art is an ideal option for bright and unpredictable people. The tone of the nails is always bright - green, yellow, fuchsia. Each nail has its own picture, its own theme. Alternation is allowed, for example, a daisy is depicted on one nail, a blurry floral print on the second, and a ladybug in flight on the third. If a girl does not want to overload her design, then bright elements can be added only to a couple of nails.
Another type that masters use is natural motifs. Real flowers are painted on the nails: daisies, roses, peonies. In such a manicure, the ladybug will look like an interesting detail, adding grace to the picture.
With an abstract manicure, flowers look more like color spots. Here the bugs are drawn separately or in blurry tones.
Girls can give themselves a lunar manicure. In this case, the base of the nail is painted over in the form of a bracket, and another bright shade is applied to the body. Ladybugs can be drawn here both in flying and in static form, spread over different nails.
The design with a voluminous ladybug looks very interesting and unusual. This technique will create the appearance that the girl actually has a cute insect sitting on her nail. To create a three-dimensional bug, you can use drops, which must then be covered with a protective layer. Experienced craftsmen use acrylic in their work.
There is another option to create volume on your nails - add rhinestones. Professionals are able to depict the entire ladybug using rhinestones. If a girl does a manicure at home, then it is better to stick rhinestones on the image of an insect. Volumetric bugs, pleasant to the touch, will give the hostess a great mood and create an exclusive image.
You can also depict a ladybug upside down - you just need to paint the base of the nail or a corner black.
Below are some ladybug manicure inspiration ideas.
- ladybug with rhinestones;
- manicure with ladybug in peach color;
- manicure with ladybug and specks;
Ladybug manicure on short nails
Have you chosen a ladybug design? Make sure it will look great on your nails. The effect largely depends on their length.
- Short nails, for example, visually appear even smaller if you make a French style and highlight the ends with a too thick strip; those who decide to have a French manicure with a ladybug should take this into account.
- It is better not to decorate short nails with rhinestones (in large quantities) - the volume will visually shorten them.
Manicure on long nails
Long nails are the dream of almost every representative of the fair sex, because they open up possibilities for limitless flights of imagination. There are no restrictions here. You can use any designs, glitters, and rhinestones.
If on short nails it is better to limit yourself to a small image of a ladybug somewhere closer to the edge of the nail or its side, then on long nails you can add a flower, including a daisy, or some other element.
Ladybug made of rhinestones on nails
If you decide to make a ladybug out of rhinestones, know that it will turn out very catchy. There is no need to glue rhinestones on all nails at once; choose one finger, for example, the ring finger.
- Get a hygienic manicure before applying regular polish or gel polish to your nails.
- If you choose a manicure with simple varnishes, you will need special glue for rhinestones.
- Cover your nails with a base coat of your desired primary color and draw the red bodies of ladybugs on your ring fingers.
- Outline the outlines of insect bodies in black, draw their heads and wings.
- It's time to plant rhinestones: red ones for insect bodies, black ones for spots.
- Finally, use a topcoat - a sealer.
Ladybug made of rhinestones on the nail.
The best combinations of shades and decor
When choosing a manicure with a ladybug, many people immediately come up with an association - red nails with black “spots”. This is, one might say, a classic, but far from the only option.
Ladybug nail designs look great on both short and long nails. A variety of color shades gives a girl a chance to choose the one that suits her and her look.
If a girl prefers to appear more often in classic clothes, then a French manicure with a cute insect would be an excellent option. Don't be scared and grab your head that this is madness. With the right approach and a good choice of colors, such a manicure will not be conspicuous as a bright spot; on the contrary, it will complement the image, making it unusual. In addition, when applying a French manicure, it is not necessary to use only white color. A good master will be able to select other shades for a harmonious manicure.
Red ladybug manicure
The red background and black polka dots scattered across it are a classic. A dotter, an easy-to-use tool with a metal ball on the tip, will help you create this manicure. If you don't have a dotter handy, use a toothpick.
- Design options can be different: try decorating the entire nail plate with dots or “grouping” them on the surface of the nail so as to only hint at the image of a ladybug.
Manicure with ladybug 3D photo new designs
Complex designs on gel polish require certain artistic skills, so it is better to leave the care of your nails to specialists. But you can take a different route - use special stickers that will allow you to create such magnificent images on your nails that nature itself will envy them. Decorative elements will also come in handy.
Ladybugs are perhaps the most famous insects around the globe. A manicure featuring these bright little ones will not leave either adults or children indifferent. Volumetric and pleasant to the touch, ladybugs will create the mood of the owner of such a manicure until correction. The design option in the master class is very simple to implement.
Manicure with a ladybug on the ring finger new photos 2021
This design is universal, that is, this nail design is suitable for both very young ladies and adult women. It all depends on the imagination and skill of the nail artist. In addition, this design is appropriate for both long and short nails, both in summer and winter, both on the beach and in the office. The main thing is to draw everything correctly, otherwise your nails will look sloppy and too messy. In the photo on the Internet you can see various nail designs featuring this cute little red insect with black polka dots. Speaking of peas, or rather specks.
A “Ladybug” style manicure is very easy to create and can be made a reality even at home. Of course, a professional nail artist will offer you different nail designs. This could be an image of an insect on half a nail or on the whole, it could be a drawing of a bug or variations on the theme of a red background with black polka dots, etc.
Manicure - ladybug on chamomile: photo
Ladybug on chamomile nails
- To perform the ladybug itself, you can use one of the techniques described above.
- To draw a daisy on your nail, it is advisable to listen to the following tips:
- At the base of the nail we draw a yellow or orange oval - this will be the middle of the flower.
- Next, draw the white petals extending from the center of the chamomile.
- If desired, you can also depict green leaves framing the flower.
- Already on the finished, dried chamomile we draw a ladybug.
Nail stickers with ladybug: photo
Stick on your nails with ladybugs
- Thanks to the rapidly developing nail art industry, you can find a huge number of accessories for manicure on sale today.
- These include special sliders or stickers.
- Such devices make the work of manicurists much easier.
- With their help you can apply a complex design, a portrait or even a landscape to your nails.
- Stickers with ladybugs are considered quite popular today.
- With their help, you can create a unique, perfect composition, the main element of which will be the insect itself.
- Here are some interesting interpretations of using ladybug sliders:
Stickers with ladybugs and peas
Nail stickers with ladybug
Painting on nails is painstaking and often long work. To make ladybugs neat, you still need talent and at least minimal experience. If you don't want to take any risks, buy sliders or nail stickers. All you need to do is cut them to the length and shape of your nail, then moisten them in water according to the instructions, stick them on your nails and secure with a topcoat.
Sliders with clover and ladybugs.
Colored ladybugs: stickers for nails.
Beautiful stickers on nails with ladybugs.
Ladybugs and flowers - stickers for nails.
Sliders with ladybugs.
Stickers for manicure with ladybugs and daisies.
Manicure on long nails
In this case, there are practically no restrictions on images. You can use different designs and their combinations. You can place a flower, leaves or other elements.
Everything is limited only by your imagination and capabilities. So experiment and try new options.
Manicure with daisies on nails: stylish ideas for a cute and bright design
From a psychological point of view, daisies symbolize romance, innocence, youth and purity. Much attention is paid to these wildflowers in literature, where they are associated with compassion, kindness, resilience and modest beauty. In addition, daisies are a symbol of love, family and fidelity.
From time immemorial, daisies have been considered a symbol of Russian nature, one of the 7 sacred plants that protect their owner and her home. These features of daisies can be easily combined with manicure trends, harmoniously integrating flowers into original designs.
French manicure with daisies
French manicure is a universal solution for all girls. Many people fell in love with this design not only due to its attractive appearance and ease of execution, but also because it easily combines with floral, geometric and abstract patterns.
So the Frenchman easily “made friends” with daisies. The large empty space of the nail plate allows you to place snow-white or blue daisies, which in color scheme are combined with the “smile line” of the French manicure.