- August 7, 2018
- Nail care
- Ekaterina Kulagina
Everyone in our world knows that girls are very big lovers of everything that is beautiful. This is probably why they themselves have strived for beauty from time immemorial. However, that doesn't matter now. Today we are not talking about history, but about one of the elements of a beautiful female image. This is a manicure. You can’t go without a manicure, because sometimes the smallest details attract the most attention, are the most memorable and the most liked in a woman or girl. Today there is a terrible variety in manicure products. It's just eye-opening! I want everything at once... But that’s not possible. The choice of manicure should be approached with all seriousness. This is exactly what will be discussed later in this article. Happy reading!
Types of nail coating
Today there are two types of nail coating. The first one is varnish, and the second one is gel polish. Let's name their main differences.
Manicure varnish coating:
- This product should dry on its own.
- It is applied quite easily, the texture easily fits on the nail.
- Can be applied with or without a base.
Manicure coating with gel polish:
- It dries only in a special LED lamp.
- The entire shape of the resulting manicure directly depends on your application.
- A manicure coated with gel polish is applied only with a base, otherwise it will not stick to the nails at all.
After we have talked about the differences between these two coatings, we should separately talk about the pros and cons of each of them.
Manicure Guide: What is Gel Nail Polish?
One of the big fans of gel French is Angelina Jolie. Gel nail coating is strong and durable; it is used to strengthen natural and artificial nails. This coating is very comfortable to wear, does not lose its shine for 3-4 weeks, but requires regular correction. It can only be removed from nails mechanically - by filing off the surface, since it is not dissolved by acetone.
Elizaveta Metsikh explains: “The gel coating is applied to the nail plate using a brush. Curing of the gel requires exposure to a special light source, either ultraviolet or halogen. During the reaction process, a very durable polymer coating, reminiscent of fiberglass, is formed on the nails. Nails after wearing gel for a long time require restoration, as a rule, until the nail plate has completely fused.”
The results of nail extensions look great and last a long time: 3–4 months, subject to monthly correction, emphasizes Galina Mintich.
But regarding the widely advertised biogel, the opinions of our experts differed somewhat. “Biogel coating is a plastic coating that is classified as “soft” gels that harden on nails under the influence of ultraviolet light,” comments Elizaveta Metsikh. – Biogels include various nutritional components: natural resins, protein, calcium, vitamins. Biogel strengthens nails, allows them to grow longer and give nails a well-groomed appearance for a long time. In addition, it is used for the gradual restoration of nails after extensions. This coating is worn for 2–4 weeks and cannot be adjusted. Unlike gel, biogel can be soaked in a special solution, which makes the removal procedure quick and painless.”
Meanwhile, Galina Mintich is confident that the beneficial properties of this coating are rather a marketing move by manufacturers, which focuses on the natural origin of the new product: “However, the so-called “biogel” is essentially a gel and belongs to artificial materials.”
Pros and cons of varnishing
Doing a manicure with polish, compared to gel polish, is much easier, and you can learn it much faster. In addition, all the consumables that are required when creating a manicure with varnish are much cheaper than gel polish. You can wipe off your manicure at any time using regular nail polish remover and immediately apply another one. The downside is that a manicure created with polish lasts much less time than one created with gel polish.
Rubber base Rubber ALBI
We continue the top 2022 with ALBI.
A transparent, thick and dense rubber-based base perfectly levels the nail plate, allows you to form the correct convex shape of the nails and the perfect highlight. After polymerization, the coating forms a durable and hard, but elastic layer that protects nails from chipping, brittleness and cracks. The improved component composition of the base prevents peeling of decorative gel and gel polish, strengthens fragile, soft or brittle nails, making them mirror-like strong and smooth.
Pros and cons of gel polish coating
Now, as for the gel polish coating... It lasts much longer than varnish, if the work is done well, it does not flake and chips appear on it for a long time. The downside is that such a manicure takes much longer. Also, learning how to apply such a gel manicure coating is much more difficult than using regular varnish. Lots of expensive consumables. Each application requires a lot of attention. It is much more difficult to remove such a coating from a nail without damaging the plate... You need special solutions or an electric machine that will cut off the gel from your nail in a thin layer. Over time, as the nail grows, a gap of “Bare” nail is visible at the cuticle between its base and the gel coating. It doesn't look very aesthetically pleasing.
Below is a photo of the manicure coating after a few days of wear.
Hardware manicure
Already from the name it is clear that only a manicure apparatus is involved in the process. Using a soft cutter, the master cleans the pterygium (a thin film adjacent to the nail plate), removes the cuticle with a ball nozzle, and then cleans the lateral sinuses. The skin around the nail is polished with a large ball. True, it is not always possible to remove everything unnecessary without resorting to additional tools - scissors and wire cutters.
A manicure performed with this device is very neat and usually costs more than a trimmed one. In addition, with this method, wounds are practically eliminated. But problems are also possible, for example, an inexperienced manicurist risks sawing through the client’s nail plate by working on one area for too long, or even touching the skin. This is unpleasant and can cause a lot of trouble in the form of inflammation.
Who is it suitable for?
Almost everyone. First of all, people with sensitive skin or thin, delicate, dry cuticles.
Who is not suitable for?
For those who want to save money.
Differences in nail care
Depending on what kind of manicure you apply to your nails, the care for your nails will also differ. Firstly, if you use gel polish, then you should rest your nails much longer from the coating. The longer the manicure was worn continuously, the longer the rest of the nails should be. After all, even you take a day off and vacation from work! After wearing a gel polish manicure for a long time, your nails need more of everything. More rest, more vitamins, nourishing oils and nail baths. Because after gel polish, nails become more brittle, they dry out and lose their elasticity.
European (unedged) manicure
The undoubted advantages of this manicure are its versatility and safety. After all, reusable metal instruments are not used at all, which means that the risks of injury or infection are reduced to zero.
European manicure can be either “dry” or “wet”. In the latter case, a softening composition is first applied to the skin around the nails. Then the nails are kept in warm water (sometimes even in lotion or oil) and the cuticle is moved to the base with an orange stick. With the “dry” method, this stage is skipped and the nails are worked with a wet stick.
Who is it suitable for?
Those whose natural condition of hands and nails is close to ideal, and people with elastic and thin cuticles.
What products are needed to create a manicure coating with gel polish?
In order to create a manicure using gel polish, you will need: buff, orange stick, degreaser, primer, base, colored gel polish, finish, UV lamp or LED lamp, liquid for removing the sticky layer, lint-free wipes and cuticle oil. It is very important to carefully clean your instruments so as not to inadvertently infect yourself with any infection. In addition, all devices should be stored in a clean, not hot place.
Brazilian manicure
With this method, you first put gloves on your hands, lubricated from the inside with cream. Moreover, they are removed entirely only at the very end of the procedure. To do a manicure, the master simply cuts the tips of the gloves and works with an orange stick. And only in rare cases, when it is not possible to remove excess skin at all, does one resort to tweezers. Brazilian manicure is usually expensive, but the result and pleasant sensations from the procedure are definitely worth it.
Who is it suitable for?
For those whose natural condition of hands and nails is close to ideal and who want to maximally moisturize and nourish the skin of their hands, as well as people with elastic and thin cuticles.
Who is not suitable for:
For those who are accustomed to deep cutting out of everything unnecessary; people with active, moist, easily growing cuticle; for those who are not ready to pay a lot of money for the procedure.
Technique for creating a manicure with gel polish
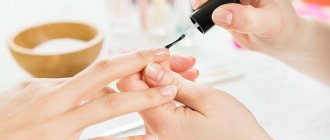
First, as with any technique, you should do a hygienic manicure. Next, degrease the nail plate and apply primer. No more than fifteen minutes should pass between applying the primer and coating. If you did not have time to start applying gel polish in time, then repeat the application of the primer again. After this, apply the base, making sure that it does not leak onto the cuticle or skin areas. Now let's apply the color. The color should be applied in two thin layers, each of them should be dried in a lamp. If you want to get a brighter and more saturated color, apply a third layer of gel polish and dry it. If you are going to use any decorative elements in your manicure, do it at this stage. Then remove the sticky layer from the nail using a degreaser and a napkin. Apply moisturizer to the cuticles of your nails. Now your manicure with gel polish is ready!
Base coat
The base coat creates a glossy effect and has a pink or white tint. It is even used independently. No subsequent application of varnish. This is called a nude manicure and it is in great demand. What other purpose is it used for:
- it protects the nail from the effects of chemicals contained in varnishes. It also prevents ingrained color spots on the nail plate.
- The base can renew and smooth the nail. As a rule, girls do not notice this during the procedure.
- Modern basic products include many useful components. They help restore and strengthen nails.
The base layer must be applied during a manicure. This will not only help you maintain the original appearance of your manicure longer, but will also protect your nails from possible diseases.
Technique for creating a manicure with varnish
Everything is much simpler here than with gel polish. From the very beginning, in the same way, you should do a hygienic manicure, and also give your nails a shape. After this, you can nourish the nail with special oil and wait until it is completely absorbed. Or you can take care of the health of your nails after you remove this manicure in a few days. Now coat the nail plate with a strengthening agent so that it becomes less brittle and the polish adheres and stays on the nail better. After complete drying, you can repeat the procedure of applying the hardener with a second layer, or you can immediately proceed to applying colored varnish. Colored varnish is best applied to the nail in two layers, waiting for each of them to dry completely. After your manicure is finished and decorated (as you wish), you can coat it again with a hardener or regular clear varnish. That's all, your manicure polish is ready!
If you are just starting to master one of the presented manicure techniques, then first perfect a regular monochromatic manicure.
Also, do not forget that the beauty of a manicure depends, first of all, on the health of your nails. Therefore, never neglect the procedures for caring for your nails. Sometimes it is better to remain without a manicure for a while, but it is good to treat your nails, otherwise you can bring their health to such a terrible level that no manicure will be able to hide their defects. In addition, you should devote enough time to caring for your hands, because any, even the simplest manicure becomes many times better and more beautiful on the well-groomed hands of a beautiful, neat girl.
We wish you good luck, as well as a beautiful manicure, healthy and well-groomed nails.
Manicure guide: what is minx nail polish?
Minx coating is the application of a special shrink film to the nails by heating in a special infrared lamp and then pressing it to the surface. What do our experts say about the favorite nail “clothes” of Rihanna, Beyoncé and many other Hollywood divas?
“This manicure is performed without the use of any preparations for adhesion to the nail plate, which makes the coating absolutely harmless to the nails, it is applied quickly and does not require drying time,” says Elizaveta Metsikh. – There are a huge number of prints, designs, metallic textures of film, the design possibilities with it are endless. The durability of this manicure is 4–7 days; to remove it, just lift the film from the end and carefully peel it off. Minx is often called a new generation coating, but it must be handled with care.”
Therapeutic manicure at home
Therapeutic manicure itself is an office procedure that cannot be performed at home without the appropriate level of education and special equipment. If you still want to carry out some of the preventive procedures yourself, you can make the simplest baths. They will need:
- disinfect hands and all objects that will come into contact with the skin;
- give the nail plates the desired shape;
- apply a softening lotion to the cuticle, then wait until it takes effect;
- push back the cuticle with a wooden stick;
- prepare a bath and soak your hands in it for 20 minutes;
- Take your hands out and apply the base cream to your skin.
Salt baths are popular at home. To make them, just add 2 tablespoons of salt, 2 tablespoons of olive oil and 3 drops of iodine to warm water. If you want to lighten the plate, instead of iodine, dissolve a little lemon juice in water.
