Tools
Before you start decorating your nails, it is important to take care of purchasing a full set of pedicure tools. There are professional kits that can be found in any specialty store, but for home care you do not have to buy such a kit.
Tools you will need:
- nail scissors or clippers;
- double-sided file (with hard and soft abrasiveness);
- cuticle spatula (can be replaced with disposable orange sticks);
- foot grater (stone for removing rough skin);
- curette (for ingrown nails);
- roller file for removing rough skin and peeling feet;
- foot bath;
- oil to add to the bath (any oil will do);
- foot cream;
- finger separator;
- milling cutter (for hardware pedicure);
- colored varnishes, clear varnishes, gel varnishes.
Required materials and tools
To ensure a positive outcome of the manipulations, you must first pay attention to the selection of tools and consumables for the job.
The composition for pedicure depends on the methods of foot treatment performed:
- File (it is recommended to choose a thick cardboard or glass file);
- Pedicure apparatus (subject to the hardware method) or tongs;
- Metal pusher, orange stick;
- Antiseptic;
- Degreaser;
- Bath;
- Towel;
- Grater (or machine);
- Pumice. It is recommended to use a set of several pumice stones with different abrasiveness in order to change them based on the work area;
- Buff for polishing the nail;
- Finger spacers for applying decorative coating;
- Compositions for decorating the nail plate (top, base, gel polish or regular polish);
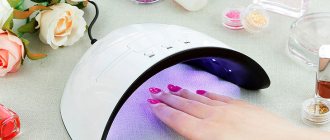
- Ultraviolet lamp (subject to applying gel polish).
Additionally, you can prepare bath salt, moisturizer, cosmetic oil, or other caring preparations that will provide nourishment to your feet during and after the pedicure, increasing the effectiveness of the manipulations.
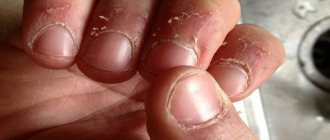
Nail and cuticle treatment
Pedicure is primarily care for the feet and nails. To do the job competently and efficiently even at home, you must follow several rules to prepare your nails and cuticles for cleaning. Before steaming your legs in the bath and cleaning your feet, it is important to get a trim pedicure.
Note! The most important rule is to never cut your nails (fingernails or toenails) after steaming.
The nail plate is slightly deformed due to heat treatment, which causes the nail not only to break, but to peel off - and this is very serious damage. Therefore, remember that if you forgot to trim your nails and shape them before steaming your legs, do this after all the procedures, about an hour later.
Next, prepare a foot bath and oil. You can also use bath salts, which don't foam too much. As a rule, such products already contain oil in the composition, and there is no need to use it additionally. The water in the bath should be hot, but moderately so as not to get burned.
It is important that you feel comfortable! Place a kettle of hot water next to the bath to occasionally dilute it if it starts to cool. Oil also needs to be added to the water. You need to keep your feet in the water for no more than 3-5 minutes.
After your feet have steamed a little (3-5 minutes is enough), begin to clean the heels and entire foot with the special product you have chosen for this. If you choose a pebble, remember that you should not rub the skin in two directions at once (rub back and forth).
Choose one direction and cleanse the skin in a slow motion, applying light pressure to the foot. Once you have cleaned the dead skin, soak your feet in hot water a little longer and begin removing the cuticles.
If you've been to a pedicure salon, you probably know how long this procedure takes. It is important to approach this process seriously and not try to do everything “in a hurry ,” because then you will not achieve the desired result. There are many different methods you can use to tidy up your cuticles, which you will learn about below.
European method
One of the simplest and most effective ways to remove cuticles is the European one. Its essence lies in the fact that you do not use scissors and wire cutters. All these tools are replaced by one special tool - a remover. This word comes from the English verb “to remove” - to remove.
The product contains special active ingredients and acids that “corrode” the cuticle and make it easy to remove without cutting or damaging the skin. It is also called liquid blade. The remover is presented in several variations, namely in the form of a gel and a solution.
The instructions for each option are approximately as follows:
- Remove nail polish and place in hot water to steam the skin.
- Dry the nail plate and the skin around it.
- Apply a small amount of remover to the cuticle and leave for a short amount of time (you will find it in the instructions for the specific product you purchase). Typically this time is 5-10 minutes.
- Gently remove the cuticle using an orange stick.
- Remove any remaining skin using a cotton pad.
This method is considered the simplest and most harmless, but it all depends on what kind of remover you purchase. You shouldn't use them often. It is enough to do a pedicure once every 3-4 weeks and at the same time use a remover once every 2 months. Give preference to an oil-based product - it is considered the most gentle.
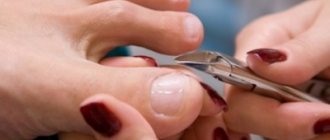
Trim method
The most standard and familiar option for most girls. It is used both in salons and at home. To remove cuticles in this classic way, you will need special cuticle scissors, an orange stick and a foot steam bath.
Do everything according to the standard scheme:
- Steam your feet, dry them and carefully push the cuticle away from the nail plate.
- Trim the skin around your nails.
- Remove residue using an orange stick and a cotton pad.
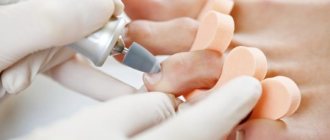
Hardware dry method
An alternative method that is often used in salons. However, every girl and woman can purchase a special set for hardware pedicure - prices vary, and, accordingly, even for home use you can find an inexpensive set. It contains a special device in the form of a pen called a milling cutter.
As a rule, the set contains several attachments of different sizes and shapes for mechanical cleaning of the skin around the nails. This device is either connected to electrical power or runs on batteries. Each kit contains instructions for use, so please read them before exploring the device yourself.
Soften your feet in the bath, everything as in the instructions above, then:
- Treat the cuticle and areas around the nail using special attachments.
- Clean the residue with a cotton pad.
- Finish with foot cream.
Nail care rules
It doesn't matter when you decide to cut your nails - before steaming and removing cuticles or after. The main thing is to follow all the rules. If your toenails are overgrown, it is best to trim them with scissors . You can file your nails and give them shape only if you have just recently had a pedicure, and there is no particular need to remove excess length.
Attention! Never cut your nails with nail clippers, starting from the middle, trying to “grab” the entire nail and cut it off at once. This way you risk breaking the nail plate.
Start cutting your nails from the corners, working them very carefully. If your nails are constantly growing, use a special tool - a curette. With it you can quickly get rid of ingrown toenails. And remember, if you feel or see your toenail starting to grow in, take immediate action to prevent it. If you miss the moment, the consequences can be dire.
After trimming all the nails, trim them with a nail file with the hard side, and then adjust the shape with the softer side. Clean off the remaining dust with a cotton pad, using your fingertips, check whether you have filed your nails well (when you touch, you should not prick or cut yourself, the nail should be smooth and without cracks).
If the nail plate itself is slightly deformed and there are irregularities, you can remove them using the soft side of the file. File until the plate is level. Then be sure to remove any remaining dust and use a clear protective varnish on top.
How to take care of your feet at home between pedicure sessions?
For regular care between pedicures, you must perform the following procedures:
- cleansing
- in addition to daily hygiene procedures using soapy water, it is necessary to use scrubs to remove keratinized and dead skin particles; - moisturizing
- performed in the evening before bed. The choice of moisturizing composition depends on the condition of the skin, the load on the legs and the season; - nutrition
– nourishing masks are recommended once a week. The procedure is performed in the evening before bedtime. To enhance the effect, use plastic wraps or silicone socks; - protection
– the most effective protection based on paraffin. The maximum effect is achieved using hot paraffin baths. The film formed on the legs retains moisture, improves blood circulation, tones and relieves fatigue. The frequency of the procedure is once every 10-12 days; - massage
is a daily procedure using moisturizer. Helps to relax and relieve fatigue.
All these procedures do not take much time, but allow you to keep your feet in perfect condition.
Steaming the skin of the feet
Above you learned how to steam the skin of your feet using hot water and oil. There are other ways in which you can use products such as soda, salt, peroxide and the like. Here are some of the simplest and most affordable options:
- Bath with soda or salt . Add 2-3 tablespoons of powder to hot water and mix well. You can also add lemon juice (1-2 pieces per large volume of water) and lavender oil for relaxation.
- Peroxide bath . For 1.5 liters of hot water, add 3 tablespoons of hydrogen peroxide. You can keep your feet in such a bath for no more than 5 minutes, and the water should be at a moderate hot temperature.
- Bath with mustard . Another great option, also suitable for those who are slightly ill and want not only to get a pedicure, but also to properly steam their feet. For 5 liters, add 2 tablespoons of dry mustard and mix well. You can keep your feet in this bath for up to 15 minutes.
Particular attention to feet and heels
How to do a pedicure at home with your own hands? The step-by-step instructions indicate that you need to pay special attention to rough areas. These are heels, calluses and corns. To remove the latter, you can use special compounds. They are sold in almost every cosmetic store or pharmacy. Depending on your preferences, you can choose the appropriate tools to clean the specified areas.
Using a metal file or pumice stone, remove plaque and rough skin. This method of work is suitable for those people who regularly carry out preventive measures. When the legs are in disrepair, you will have to try to bring them into proper shape. For this purpose, special blades, scrapers and tweezers are used. Carefully cut off the top rough skin. Try to do all movements very carefully. Upon completion of the manipulation, walk with a soft pumice stone and remove any small particles.
Foot skin care
With the advent of roller files and exfoliating pedicure socks, some girls have abandoned the use of pumice stones (foot stones). However, there are those who are faithful to this convenient and inexpensive foot skin care product, which is definitely in every home. To achieve maximum effect and perform quality foot peeling, follow these instructions.
First, prepare your foot scrub and cream. A scrub doesn't have to be expensive to be good. In any store you can find various options that will help clean the skin of your feet without damaging it.
Help: if your skin is very sensitive, choose scrubs for the face and body - you definitely won’t damage your skin with them. This also applies to foot creams - it should be greasy, but absorb well. Any cream from the “Velvet Hands” series will do this task perfectly.
Next, steam your nails for 5 minutes and start cleaning your feet with a pumice stone. Above, you learned that you shouldn’t crawl back and forth on your feet, just choose one direction and slowly cleanse your feet of dead skin cells. When you have treated the most difficult areas, rinse your feet and start using the scrub. Rub it well over the entire surface of your legs, scrub the skin for 2-3 minutes.
Then rinse, wipe the skin of your feet dry, apply the cream and give a light foot massage. You don't need to be a professional to stretch your legs yourself . Use gentle movements over the entire foot, add cream if necessary and rub it in to make the massage effect even better. And finally, put on socks to create warm and favorable conditions for your feet, steamed and warmed up from the massage.
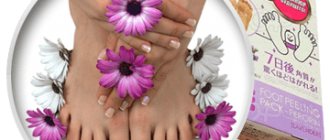
What can be done about neglected heels?
You can also use special preparations that are designed specifically for pedicures for neglected heels. As a rule, they are made on the basis of acids - lactic, glycolic, and fruit acids. They allow you to quickly, effectively, completely non-traumatically cleanse and exfoliate the skin. The effect is quite interesting and is achieved with a minimum of friction and any mechanical impact.
Cleaning heels in advanced cases is quite difficult even physically, so you can take a closer look at special devices. Take a closer look at a professional device: it will provide the most gentle grip on the skin of your heels and will do the job without microtrauma. The scraper removes dead skin cells as effectively as possible.
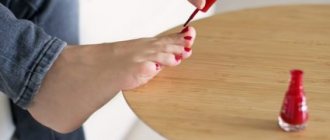
How to apply regular varnish correctly
- Prepare everything you need: cotton pads, degreaser or micellar water, finger separator, clear protective varnish, colored varnish and topcoat. Also remember that your workspace should be bright. To make it convenient to paint your toenails, you can use a table lamp and a footstool.
- Insert a separator between your fingers and degrease the nail plate well using a special product or micellar water.
- Apply protective varnish in one layer and let it dry.
- Apply colored varnish according to the scheme - first in the middle, then paint the sides with a brush from the middle. Colored varnish should be applied in one layer, let it dry (10 minutes) and apply another layer if desired.
- When two layers of colored varnish have dried (20-30 minutes), apply a protective coating on top. As a rule, you can use the same varnish as at the beginning. Or you can buy a specialized one. By the way, you can also use a drying agent to make the colored polish dry faster.
- Let your nails dry and be careful for 1-2 hours so as not to touch the nail and ruin all its beauty. Watch a movie, take a break, and when everything is dry, go about your daily routine.
Using similar instructions, you can create a beautiful pedicure at home using gel polish . You will only need to replace regular polishes with gel polishes (shelak), plus add a base and top coat on top. Also, to create a pedicure with gel polish, you will need an ultraviolet lamp to dry each layer (usually from 30 seconds to 2 minutes).
Pedicure tools
How to choose the right pedicure tool?
When choosing it, you must adhere to a number of rules:
- Tools must be neatly made, well sharpened and fit comfortably in the hand. A good tool will not tear the cuticle, but will carefully trim it.
- The blade should not interfere with the processing of the surface, but provide a good overview. High-quality blades move freely and are able to remove even the most difficult to reach burr.
- Pay attention to the steel from which the tools are made. Poor mild steel quickly becomes dull and is prone to rust and stains quickly. It is preferable to choose tools made from solid stainless steel.
To care for your heels and nails you will need the following tools:
Tweezers or scissors for trimming toenails. To shorten thin nails, both in length and width, you must use scissors with straight ends. For thick nails, use pedicure tongs. They have greater compressive strength and are more durable.
Pedicure nippers. Designed for removing hangnails and cutting cuticles.
All-metal double-sided curette. Use this tool to treat ingrown nails.
Pumice. Large and small.
Pedicure grater. Used to remove corns, calluses and keratinized rough skin on the feet. The double-sided surface of different hardness allows you to grind and polish your feet.
Files. For polishing and shaping nails. When working with hard nails, use diamond or ceramic ones. For thin nails, use a file made from sandpaper.
You can make your nails shorter with large files, and shape them with small ones. The main thing in pedicure is to file dry nails, and direct the movements of the file in one direction - from the edge of the nail to its center. This will reduce the risk of nail splitting.
Manicure sticks. Used after the use of drugs that soften the cuticles. It is best to give preference to wooden sticks or tools whose edges are made of soft rubber.
All pedicure tools must be stored in a cosmetic bag or a box specially designated for them, clean and dry. They must be thoroughly sterilized after each use.
In addition to the above tools for pedicure at home, you must have a basin or bath, liquid for removing calluses and corns, cotton pads (sponges), nail polish remover and, of course, foot cream.
Having purchased all the listed tools, you can safely begin performing a pedicure at home. Before doing a home pedicure, thoroughly disinfect all the necessary tools, and after that you can begin the procedure.
Fashion trends in manicure
15 baths for your feet
Nail patterns for beginners step by step photo
5 Instagram nail design masters: interesting works
Decorations for nail design. part 1
Tips for caring for feet and nails
For any girl, good care of her feet and nail plates is important. Here are some tips to help you avoid ingrown toenails, corns, and damage to the nail plate:
- Choose comfortable and soft shoes . Indeed, most often all problems with nails and feet appear due to the wrong shoes. If you notice that your feet are getting worn down a lot, choose shoes with a soft and comfortable insole. If you constantly struggle with ingrown toenails, it means that your narrow pumps are putting a lot of pressure on you, which causes the nail to press into the skin.
- Use rich creams and foot masks. Don't be afraid if the cream is not absorbed. Apply it to your feet, lie down and let the cream absorb.
- If you use regular varnishes, you can buy absolutely any, the main thing is to use a varnish base with medicinal properties. With such a base, not a single colored polish will spoil your nail plate.
- When choosing gel polishes, contact professionals in salons and study the market for popular products in order to purchase a truly high-quality product. It’s definitely not worth saving on gel polishes.
- Foot scrubs can be replaced with baking soda or coffee grounds . Use these products for their intended purpose, and you won't have to spend money on scrubs.
Hardware pedicure - video instructions
When at home there is a special device for creating the perfect pedicure, any girl should learn how to use it. In this video you will learn how to competently and accurately do a hardware pedicure at home.
Each girl chooses a nail care method that suits her. It is important to always remember that a beautiful and well-groomed pedicure says even more about a woman than her clothes . However, it is not at all necessary to paint your nails with colored polishes to make them look neat and impressive, right? Sometimes it’s enough just to do a French or nude pedicure to make your legs look very discreet and beautiful.