Hardware pedicure - what is it?
Hardware pedicure has gained great popularity and fame due to the fact that this type of foot treatment is more durable. If, after you have trimmed the calluses and polished off the corns, the skin begins to get rough on the second or third day, then after hardware treatment, calluses and corns begin to appear only after the second week.
This is due to the fact that a trimmed manicure always injures the skin, cutting off the rough area under the finger, you always touch the top layer of living tissue, the skin begins to regenerate and protects itself with rapid growth. It is much more effective to remove calluses and corns with pumice stones, brushes, etc. But this is long and tedious.
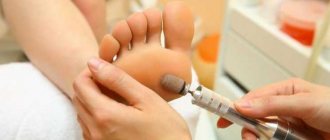
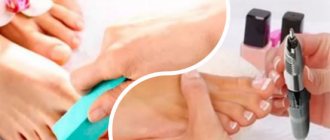
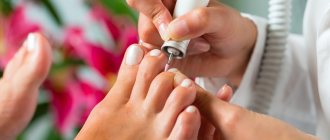
Hardware pedicure is the treatment of the skin of the feet and nails using a device and special attachments, cutters and caps. They come in different shapes and are made from different materials. Due to rapid rotation on the nozzle, the device removes rough skin, cuticles and forms the nail bed.
The device has different rotation speeds and power and is adjusted depending on the condition of the skin and the type of attachment installed. What are the features and advantages of hardware pedicure:
- removal of rough skin without steaming;
- effectiveness - removal of calluses and corns;
- therapeutic effect - removal of ingrown nails and cracks;
- you can learn to do it yourself at home;
- Suitable for any skin, even particularly sensitive ones.
Products for SMART pedicure
All necessary materials are presented in the official SMART store, in some online stores and from official representatives in some cities of Russia.
Basic discs
The price of the base depends on its diameter:
- Baby – 950 rub.;
- S – 950 rub.;
- M – 1350 rub.;
- L – 1650 rub.;
- XL – 1950 rub.
The discs are made of medical steel and are reusable. After use, they are subject to disinfection, PSO and sterilization.
Men's pedicure - guide: types, how to do it correctly
Files
- diameter S 50 pcs. Premium – 250 rubles, Standard – 200.
- M, 50 pcs. Premium – 300 rubles, Standard – 250;
- L, 50 pcs. Premium – 350 rubles, Standard – 300;
- XL, 50 pcs. Standard – 350 rub.
All files are packaged in 50 pieces. – large packages are not presented on the official website. The abrasiveness of the discs does not affect the price - the only difference is in diameters and classes.
Smart set
To get started, you can purchase a set with abrasives and discs. The kit includes 3 basic sizes - S, M, L, as well as replaceable files - 5 pieces for each abrasiveness for all 3 sizes.
The cost of the set is 5,100 rubles, but there are often promotions on the official website. At the time of writing, for example, the set could be purchased for 3,600 rubles.
Device for hardware pedicure
Removal of rough skin on the feet occurs using a special apparatus and attachments. If you go to a specialist, there is no need to study the characteristics of the device, but when choosing a device for home use, it would be a good idea to remember the main characteristics.
- power - devices above 35V are suitable for manicure, pedicure and gel polish removal, less - for home use;
- rotation speed per minute – the quality of processing itself depends on the speed, it should not be lower than 25,000 rpm;
- foot control – convenient for professional craftsmen;
- reverse – rotation of the nozzles in different directions.
Devices with greater power and size are purchased for salons, compact devices are purchased for home use.
Nozzles, caps and cutters are made of dense and soft material, come in different sizes, and are suitable for their processing speed. Nozzles vary in grain size:
- Coarse-grained - intended for treating the skin on the feet.
- Medium-grained - designed for pushing back and removing cuticles.
- Fine-grained – for polishing nails and skin ridges.
Nozzles are divided according to the material used to make them.
- Ceramic - a mixture of ceramic abrasive and glue, safer for use. They differ in the degree of grain size.
- Diamond - a mixture of glue and diamond chips, more durable. They also have different degrees of grain, which vary in color. The red ones are the toughest, for removing rough skin and removing varnish, blue, green for sanding.
- Metal - made using notches on metal tips. Designed for treating calluses and corns. Do not create dust during operation.
- Silicone - made using silicone and abrasive particles.
The cap is a replaceable part for removing keratinized epithelium and polishing the skin of the feet. The caps are made of rubber and abrasive and can have a pointed, rounded or cylindrical shape. Remember, the salon must use disposable caps, and the technician must open the packaging in front of you.
A cutter is a tip made of steel with the addition of abrasive particles. Milling cutters come in different shapes:
- cylinder - for removing calluses and old skin;
- ball - care for nail sinuses and cuticles;
- ellipse – removal of core calluses;
- cone – treatment of ingrown nails;
- disc – polishing and shaping the nail.
It is certainly necessary to understand the design of a pedicure machine if you are just planning to buy a device for yourself, but it is much more important to learn the order of what and why you need to do in a home hardware pedicure.
ORDER AND BUY NOW for 70 rubles.
Advantages and disadvantages
The main advantages include:
- hygiene and safety - subject to proper use of the device and attachments;
- efficiency – the skin remains soft and smooth for a long time;
- no need to steam your feet, which is contraindicated, for example, during pregnancy, high blood pressure, fungal infections of the feet and nails;
- there is no risk of injuring the skin - especially important for those who suffer from diabetes, when any wound or abrasion can lead to infection;
- you can even treat hard-to-reach places between the fingers, around warts, drill out subcutaneous calluses without injuring adjacent tissues;
- the procedure is completely painless;
- If you have a little practical experience, accuracy and patience, you can perform a hardware pedicure at home.
Among the shortcomings, only one can be highlighted: you need to be able to use the device with attachments correctly. If the master does not have enough experience or you are taking on the task yourself for the first time, you can easily injure the skin of your hands or feet, damage the structure of your nails, and generally cause a lot of trouble. Therefore, if you are not confident in your strength or the dexterity of your girlfriend, trust your feet to a professional master.
Useful information: many people are interested in how to choose and configure a milling machine correctly. Modern devices include up to 12 different attachments of different shapes, sizes and surface textures for treating heels, cracks, calluses, nails, cuticles, polishing and grinding. As practice shows, half is enough. What is more important is the power of the device itself. It should be at least 40 watts if you don’t want your hands to get tired after just one toe. The rotation speed of the cutter is from 10 to 20 thousand revolutions per minute. You can also use disposable cap attachments - some say they are more effective than stone cutters and more hygienic.
Hardware pedicure - step by step for beginners
Be prepared for your first pedicure to take two hours. Once you master the technique, this pleasure will last no more than an hour. What steps will you have to take.
Step-by-step hardware foot pedicure
- Before starting the procedure, the feet must be disinfected. Simply put, wash your feet first.
- Nail plates must be shortened using special clippers, if required.
- A remover is applied to the skin of the feet to soften it and removed after a few minutes.
- We set the power of the device to 10-12,000 rpm and a coarse-grained cap with 60/60 abrasive and process the foot.
- Next, you need to polish your feet using a fine-grained nozzle with 100/100 abrasive until the skin is even and smooth.
- Rub remover into your toes.
- We polish the toes using a cone-shaped ceramic nozzle.
- Lastly, you should treat the cuticle and side ridges with a special cutter - a diamond-coated ball.
- Using a felt cap, polish the nail until it shines.
- Apply a nourishing product to the skin of the feet.
- After this, we proceed to applying nail polish.
If you use gel polishes, remember that such pedicures are dried in LED lamps.
VIEW NOW
What you need to get started
The first point of preparation is choosing a workplace. Your work area should be stationary. Convenient location. You can buy a special work surface, or you can get by with a regular desk and two comfortable chairs. There must be a fluorescent lamp on the table. Since the work is painstaking, an additional light source will help to do the job efficiently and not damage your eyesight. All hygiene standards must be observed in the premises!
Basic Tools
- Lamp for drying gel polish. The best is a hybrid LED/UF one. Lamp power varies from 9 W to 36 W, with or without a timer. Models vary in price, so base it on your budget.
- Tools (cuticle nippers/scissors, pusher). When purchasing, pay attention to the material from which they are made. For long-term use, it is better to take tools made of steel.
- Files, buffs, orange sticks. The latter are only needed if you did not buy a pusher. Of course, a metal tool is more profitable, since it can be processed and used in the future. Orange sticks will have to be changed after each use, and this is an additional expense.
- Bath for hands and feet. Of course, if you have a limited budget, you can get by with bowls and basins, but it’s still better to buy special ones. They are anatomically adjusted for the arms/legs and have special stands and recesses that make work easier. To process instruments, you will need a sterilizer (this option, of course, is not cheap, so for starters, you can get by with a special tool for sterilizing instruments).
We recommend that you apply for tools at https://optomprofitable.rf/catalog/mashinki_dlya_manikyura_i_pedikyura_1/. Here you will find quality tools at an affordable price. All products are certified and guaranteed. It will serve you for a long time.
Coating materials and care products
- Degreaser and lint-free wipes. Remove the oily layer from the nail plate and disinfect it. Contains alcohol.
- Primer. A kind of primer. Serves to improve the adhesion of the coating to the nail.
- Base coat. Choose a company at your discretion, but before purchasing you should still monitor the material for quality. Experts advise base and top to choose the same company.
- Colored coating. The basic set includes a minimum of 10 colors. They must be in harmony with each other. Also consider the time of season. If you decide to start your nail business in winter, then it is better not to use acidic or provocative varnishes. Give preference to dark, New Year's and light tones. For all seasons, the best options would be French polishes, blue, pastel shades, such as mint or powder, not very bright red, burgundy. Rely on your taste and take into account fashion trends.
- Top. It can be with or without a sticky layer. Also, before purchasing, evaluate the consistency of the material. A liquid one will flow on the nail and you will have to make several layers, but a very thick one will be difficult to distribute evenly over the nail plate. But this applies to beginners in this business, choose a medium viscosity until you get the hang of it.
- Klinser. It is needed to remove the sticky layer; it is also used to remove flaws in the work. Dampen a lint-free cloth and wipe off the varnish from the side rollers, for example.
- When finished, apply a small amount of product to the skin around the nails and rub in with massage movements.
Additional materials
To complete your nail design, you will need various decorative elements: rubs, glitter, rhinestones, broths, gel paints, gel pastes, etc. There is no need to take the full list right away. Purchase as needed, but you must have a minimum number of decorative items.
Tassels, stampings, dots - not necessary, but desirable.
A milling machine for hardware manicure will significantly speed up the process of preparing nails for coating and just as quickly remove old gel polish.
But until you get the hang of it, no matter what kind of milling machine you buy, you will still have to do a little work with wire cutters to eliminate the shortcomings. Therefore, at the beginning of your manicure business, you can do without it.
