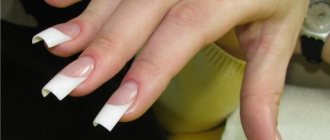
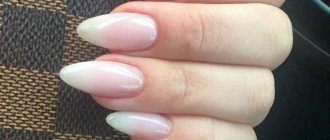
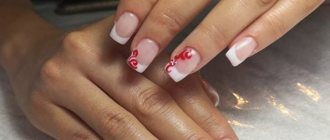
How to properly model AGE shaped nails.
Some masters, when extending nails of the AGE shape, only care about external compliance with the standards of this form, forgetting about strength and durability when worn. However, violations during AGE modeling can lead to serious damage to the nail.
When modeling the shape of a nail, it is important to control its quality at every stage.
The most important areas in modeling AGE nails are indicated in the first picture by dots:
BALANCE point
- the point of stability of the nail, located in the center of the natural nail or, depending on the shape of the nail, closer to the base of the nail;
BREAK line
(
break line
) – changed smile line;
profile
– end, V-shaped edge of the nail;
TOP I – profile top;
TOP II
– central point of the break line;
TOP III
– apex of internal fracture;
stiffener
– an invisible line indicating the strongest area of the modeled nail.
Extension procedure
Extensions are carried out using standard technology, using artificial materials: the higher quality they are, the stronger and more beautiful the manicure will be.
The technique is complex. You need to strictly follow the instructions, maintain proportions and take into account the geometry features. Otherwise, the nail may break, peel off from the base and lose its strength.
When doing extensions, we use ready-made templates – tips and paper forms. This helps with my work.
The paper ones are immediately cut along the edge in the shape of a diamond. The tip should not be much larger than the size of the nail; it should be selected according to the width of the natural plate.
Doing an Age manicure:
- We clean and file the nails, bringing them to the desired shape (the lateral longitudinal parts need to be filed). You need to work with files with varying degrees of dusting.
- (so that the varnish adheres well to the surface).
- We put on a paper plate and squeeze it in the middle, making a blade. You need to bend clearly along and in the middle of the natural nail. We form a V-shaped figure in the upper free part and put acrylic there. If you don't put enough acrylic in the center and along the edges of the plate, the top part can simply break off, so the proportion of creating a stiffener plays a key role here.
- We process it with transparent acrylic, and then use powder to lengthen it to the desired size and cover it with colored acrylic. Next, imagination comes into play - a variety of relief patterns, rhinestones, colored dust, etc. are used for design.
- Carefully remove the paper and check the symmetry again (where necessary, file and sand the edges).
- Cover with finishing gel polish and lubricate the cuticle with special oil.
Setting up a template in AGE modeling.
Correct placement of the template when extending nails of the AGE shape is one of the most important points in modeling. The templates are installed with slightly upturned ends (see Fig. 3), for the correct formation of the stiffener
(see Fig. 2.). The angle of installation of the template depends on the shape of the client's nail.
The duration of “wearing” and the appearance of artificial nails, as well as the speed of modeling, primarily depend on how accurately and correctly the templates are installed.
general information
From English the word Edge is translated as blade or point. The manicure corresponds to the name: a clear edge with a sharp end is drawn down the middle of the nail, which makes the plate itself unusually angular.
The Edge shape was invented by designer Valentina Denisenko. She also patented a special extension technology.
Advantages:
- nails look very unusual;
- visually the plate lengthens;
- nails are more durable due to their rib.
Balance point in AGE modeling.
The location of the balance point (in the classic form - apex) is important in modeling AGE-shaped nails, especially considering the prospect of nail growth.
located near the edge of the nail (see Fig. 4).
In AGE extensions, the classical rules do not apply, and the balance point
is located in the center of the nail plate or slightly closer to the base of the nail.
The thickness of the material at the balance point
ensures the strength of the nail in this area, ensuring that the artificial nail does not break or crack, and the natural nail does not suffer from injury.
When the nail grows, the balance point
and
apex
shift (see Fig. 6).
By moving, apex
point extends beyond the edge of the nail plate (see Fig. 6.a), making the tip of the nail heavier and weakening the stress zone.
The balance point
remains within the nail plate (see Fig. 6.b and 6.c), and continues to protect the nail from breakage.
Important nuances
Thanks to the blade-shaped shape of Age, the nails are very durable, but you need to take into account some nuances:
- acrylic must be distributed evenly , starting from the center and carefully moving towards the edges of the template (acrylic should not flow to the edges, as this spoils the wedge-shaped appearance);
- to avoid wicking , you need to firmly attach the paper templates to the edges of the plate;
- It is not recommended to make templates yourself, it is better to buy ready-made ones, they are all cut equally evenly;
- When manicure with extensions, it is advisable to use materials (base, fixer, varnish, powder) from the same manufacturer to avoid incompatibility of components.
Profile angles and break lines.
It is necessary to remember that, regardless of the shape of the nails AGE,
break line
(
BREAK
) always follows the angle
profile
. You can see this using the example of the classic AGE in Fig. 8.a, the “Seagull” AGE in fig. 8.b and pointed AGE in Fig. 8.c. When extending nails of short length, it is preferable to use the classic form.
The central edge should always be mirrored on the inside of the nail (see Fig. 9.a). The angles of the side faces can be different in different forms of AGE (see Fig. 10).
With proper modeling, the central, side edges and stiffening rib create a durable artificial nail structure and look impressive on the hands.
Based on materials from the magazine HAND & nails + Nail service 3(42) 2014
The history of the origin of age nail extensions and what it means
Exclusive manicure design
This direction appeared in Ukraine in 2007. A girl from Dnepropetrovsk, Valentina Denisenko, created an exclusive design. She herself is a manicurist who came up with something new in nail art – the wedge shape. The nails resemble the English letter V. There is an edge in the center. Despite its bulky appearance, the design is quite lightweight and durable. This type of manicure has become a modern “classic”.
The name “age” is translated as blade, edge, blade. The manicure is unique and not standard. It is chosen by extravagant girls, lovers of everything new and extraordinary.
The design is completely thought out and well designed, so these nails are strong and durable. To make such a manicure, use ready-made angular tips or paper templates. In the second case, it is a little more problematic to grow such nails.
A clear fracture line is obtained in the central part of the plate. When viewed from the side, the face is visible in mirror image on the free edge and is shaped like a swoosh, with a two-plane design.
Hidden stiffening ribs and symmetrical apexes are a distinctive feature of this design. With this shape, the nails seem to be balanced, the structure is durable, so it lasts a long time. Also, with this shape, the edges and bed are protected from injury and breakage. It is preferable to use acrylic for making the structure, since the gel spreads.
Extension specialists have the ability to change the length, lines, shape, and decor of the nail, thanks to which new designs are obtained every time. You need to follow the rules and technology when creating a manicure, and know the important nuances.
How to choose a polish color to match your nail shape
It is important not only to choose the correct shape and length of the nails, but also the correct coating. After all, the color or design of a manicure for short nails can either emphasize the shape or spoil it.
Short, square nails
You need to be able to paint this shape of nails to make the manicure seem more elegant.
You should not choose too dark shades - green, black, brown, blue.
To soften your nails, choose metallic shades or nudes, ranging from dark beige to pink.
And most importantly, do not paint the plate completely, leave the very corners unpainted! With this technique, the marigolds will appear narrower.
Short, widening from base to edge
Owners of this nail shape can afford rich shades, but not bright ones: muted green or red, soft violet, dusty pink.
When applying varnish, try to paint the central part well and leave the outer corners unpainted.
Short, oval nails
Those with short, oval nails can do anything except natural, nude shades, as they will simply blend in.
Long, narrow nails
This form of nails is quite sophisticated, so the owners of this type will suit the classics - nude, French, classic red.
But dark and too bright shades - black, blue, green, cyan, yellow, neon colors, it is better to avoid - you will get claws.
Long, wide nails
But here it’s the other way around - dark shades will look great - lilac, blue, black, burgundy.
You should avoid shades that are too light and pearly, as they will visually expand the nail plate.
Which nail shape to choose and how to do it without making mistakes? Now you know the answers to all the questions, and photos of your current manicure will help you create beautiful nails.
Share in the comments what nail shape do you think is the most relevant?
Techniques of creation
For individual and independent construction of edge nails, diamond-shaped paper samples are used, which will be the basis of the edges of the base of the nail. This pattern helps give the appropriate raised angle. This is the so-called rigidity plate. Next comes the nail preparation stage, and it consists of grinding down the axes of the side edges, which gives the nails a complete, finished look.
To give this shape you need to be as concentrated and attentive as possible.
Stylish manicure design 2022 for square nail shapes
Square nails are a classic style that never goes out of style. They are sure to draw attention to your hands and are suitable for women with medium-length or short nails. Square nails have sharper edges, so they break more easily - this is their only drawback.
The square shape of the nails allows you to play with images, emphasizing either softness and femininity, or determination and strength. For example, subtle colors will make your look more subtle, while bright dark shades and shiny textures will highlight your strength of character. The square shape of nails is considered an ideal option for a classic French manicure.
Design ideas
What kind of coating should I use for nails in an age-style? It is the French that reveals all the beauty of this nail shape. You can try a vintage French manicure, where the base will be transparent and the tip of the nail will resemble old vintage glass.
Keep in mind that if you often do housework, a French manicure will not work. Otherwise, the shade of the varnish will fade. In this case, it is better to paint your nails with your favorite color without using glitter. The same applies to manicure for business ladies. You just need to choose a calmer shade.
If you want to do sculpting, then it should not visually weigh down the manicure. Age with painting looks very impressive. The painting should be applied to the modeled nail plate before using the top coat.
Usually nails of this kind are made very long, but this is most suitable for exhibitions. For everyday life, you should extend your nails one or three centimeters shorter, then doing your usual things will be much better.
Edge manicure at home
The gradual formation and creation of such nails should be considered. To do this, it is based on the classic method of imitating nails with acrylic and helium:
- your nails go through the preparation stage - they are disinfected, filed, cuticles and hangnails are removed;
- stringing the template and lightly clamping it in the middle;
- with the help of the base, an adherent is made using acrylic;
- using the overlay technique, using camouflage powder, the length is formed;
- using the desired color, borders lined with acrylic are created;
- using colorless acrylic, the configuration is overlapped;
- the resulting form is removed from the nail plate;
- using a nail file, give the desired shape;
- using tools, the resulting manicure is polished and modeled;
- any design you like is applied;
- with the help of helium, the final protective layer is formed;
- cuticles are treated with oil.
With the help of this technology, all the fingernails are formed, and beautiful hands are ready.
You can achieve the correct shape of edge nails using certain criteria and step-by-step implementation of all relationships, taking into account the geometric features of the desired shapes.
The imitation process has distinctive features from the standard method of nail extension:
- The gel is applied from the middle to the borders of the sketch. Thanks to this technology, nails are given strength and rigidity.
- Helium leakage should be avoided for neatness and perfect shape. Proper use of a template creates the conditions for the largest clear edges. The desired density and appearance are achieved by filing.
Features of the Edge nail shape
The innovative Edge nail shape is characterized by the following features:
- In the center of the free edge of the extended nail there is a rib, which according to Edge technology is called a “stiffening rib”.
- This stiffening rib divides the free edge of the nail into two edges.
- The free edge of the nail has V shape
- A curved smile line, i.e. the line separating the free edge of the nail and the body of the nail.
Template creation technique
To create edge nails yourself, you will need a paper template that has already been cut in advance in the shape of a diamond, so that the element that subsequently lies on the edge of its nail forms a slightly raised angle upward with it. It will serve as a kind of stiffening rib for the plate. Next comes the stage of preparing the marigold - filing its longitudinal side edges, which gives the marigold a finished design. Age nails, namely their design, require a lot of concentration.
Creating an edge manicure at home
How to create an age nail shape step by step? In the process of forming nails like a thin sword blade, you should use standard gel modeling methods:
- preparing a natural nail, that is, performing a hygienic manicure;
- putting a mold on the nail, lightly squeezing it in the middle;
- making a transparent acrylic backing;
- lengthening the nail bed with camouflage powder;
- laying out acrylic of a suitable color on the free edge;
- overlap using transparent acrylic mold;
- removing the mold from the nail plate;
- giving the required shape to the plate;
- polishing the resulting manicure;
- If you wish, you can make a drawing for yourself;
- covering the nail with finishing gel and applying oil to the cuticles.
Only one nail has been made, now you need to make nine more using the same instructions and your beautiful fashionable nails are ready.
You can get the perfect age nail design only if you follow each proportion step by step and take into account the geometric features of the shape in question. The modeling scheme differs from standard nail extension.
- The gel must be distributed to the edges of the template from the center of the nail plate. As a result, a clear break will appear, which ensures maximum strength of the nails.
- When doing age nail extensions, try to adhere to the general rule, which is relevant for gel modeling of any shape. The template should be installed along the contour of your original smile, aligning more closely with the edges. This eliminates the risk of streaks. Proper installation ensures the clearest lines of the side “razor”. Upon completion of the main work, you can saw it to the required thickness and shape.
Age nail design
Ready-made age nails can be decorated as you please, creating decor that best suits the style and mood of its owner. Thanks to the original rib, an interesting refraction of light is observed, creating a stunning effect. You can find many photos with unique designs and styles online.
- To decorate a “xiphoid” manicure, contrasting designs with neat sculpting look good. Such decor will make the shape of the plates even more attractive, emphasizing the sophisticated evening look of every girl.
- Business ladies are used to decorating their older nails with strict lines or geometric shapes. The shades are warm, not very bright.
- For everyday wear, an age manicure can be painted with a varnish of an acceptable color using glitter on the nail plates.
Age manicure is both a complex and simple manicure option, allowing every fashionista to find her own individual look, the best one that can fit into her unique style.
Features of modeling nails of the EDGE shape
The EDGE form is the calling card of the Denisenko Academy, which today has gained well-deserved popularity among craftsmen and clients. One of its main features is the increased strength of nails. Let us consider in detail the process of modeling this form.At first glance, EDGE modeling may seem uncomplicated. But when creating nails that are visually similar to the EDGE shape , masters often forget about internal quality criteria. They make their changes without understanding what it might lead to.
Creating an EDGE shape is a complex process, consisting of several stages, where each nail requires a special approach. Continuous quality control is required at all stages of modeling.
Main characteristics of the EDGE form
In Fig. 1 shows the points that need to be paid attention to during modeling. Let's look at them.
The Balance point is the center of stability. It is located in the center of the natural plate or above.
The Break line is a transformed smile line, the central line of a break (translated from English, break means “break”).
Profile - the inner end line of the L-break together with the outer end line form a profile. The profile angle is measured in degrees; the number of profile degrees may vary.
Top I is the top of the central fracture.
Top II - the highest point of the external profile.
Top III - internal profile point.
The stiffener is a hidden zone of increased strength of the artificial plate. Connects the Balance and Top II points.
The central face is the visible line connecting Top I and Top II.
The side edges are two parallel lines, an artificial continuation of the natural nail plate. The side edges can expand or contract in the profile area, forming various types of EDGE.
Modeling Rules
EDGE is style. EDGE modeling is fun. There are certain rules that should be followed in order to get maximum pleasure from the entire modeling process and the final result. A distinctive feature of EDGE modeling is the competent arrangement of templates with an upward fit (visually the impression of “upturned” templates is created). The main thing at this stage is not to overdo it, because the angle of the templates depends on the shape of the natural nails (Fig. 2).
The process of planting templates should be treated very carefully, since the speed of modeling, the quality of extended nails, their appearance from the inside and outside, as well as the duration of operation depend on it. The main criterion in EDGE modeling is the hidden stiffener (not to be confused with the central face). The hidden stiffening rib (visually invisible) is the internal volume of the material, thanks to which the nails do not break. In Fig. Figure 3 clearly demonstrates a comparison of the classic shape (a) and the EDGE shape (b, c) in a longitudinal section along the central axis and a top view.
This way you can see how balanced all the lines of the EDGE shape are relative to each other. Sophistication combined with laconic lines represent the standard of comfort and wearability. The volume of material is located inside the artificial plates in such a way as to protect natural and artificial nails from breakage. The angle of setting the templates does not affect the length of the nails. When modeling long artificial nails, the hidden stiffener increases (Fig. 4).
One of the important aspects of EDGE modeling is the Balance point (in classical modeling - Apex), which can change its location on the surface of artificial nails depending on the shape of natural ones (Fig. 5-6). In classic modeling, the Apex point is located at the end of the nail plate (Fig. 5a). It is not recommended to apply classical canons to the EDGE form. The Balance point should be located in the center of the natural plate, visually dividing the nail into two parts (Fig. 56) or slightly higher to the cuticle, visually dividing the nail into three parts (Fig. 5c).
The Balance point regulates the strength characteristics and eliminates breakages and cracks in this area.
As nails grow, the Balance and Apex points shift (Fig. 7). But at the same time, after three weeks, the Apex point extends beyond the natural nail plate, the nails become heavy and not protected from breakage, cracks and peeling (Fig. 7a). And the Balance point still protects the stress zone and is located within the natural nail plate (Fig. 76, c). When EDGE modeling, special attention should be paid to the central face. It complements the shape with strength characteristics and is an A-shaped two-plane structure. Due to its appearance, the EDGE shape is protected from damage in the profile area (free edge). Moreover, the profile angle can be changed at your discretion, depending on the shape and length of the nails (Fig. 9).
The central face is a visible line connecting the points Top I and Top II, which is located along the central axis of the profile (Fig. 8a). Errors in modeling the central face are shown in Fig. 8b.
Remember that the profile angle and the Break line have a mirror angle relative to each other. If the Break line changes, the profile angle changes accordingly, and vice versa, by changing the profile, we adjust the Break line to it in advance.
In Fig. 9 you can see the classic EDGE (Fig. 9a), the EDGE “Seagull” shape (Fig. 96), which is recommended for use when modeling short nails, and the pointed EDGE (Fig. 9c), which should be used when modeling long nails. When modeling the EDGE shape of medium length, it is recommended to use the classic version.
When modeling and filing artificial material, it is very important to monitor the correspondence of the Top II and Top III points (Fig. 10a), as well as the uniform thickness of the profile edge line (Fig. 10b).
The central face of the outer profile is mirrored on the inside. The side edges may vary depending on the profile angle (Fig. 11).
Together, the Balance point, the hidden stiffening rib, the central edge, and the profile angle create the most durable structure, so these nails do not break.
Simple and elegant EDGE will be the final element in the image of a modern woman and will make its owner unique!
Valentina Denisenko, author of the EDGE form
Similar articles:
- Modern manicure is not just nail care, it is a whole science of beauty. Not everyone has a beautiful nail shape and therefore it can be corrected using several tools. There are several types for correcting the shape of nails,…
">How to make an almond nail shape: tips for beginners
- The “Modern Oval” shape has already won recognition and has become one of the most sought-after, comfortable, stylish, popular and beloved nail shapes. To understand the reasons, you should consider the features of this form.
“>Nail shape “Modern oval”
- New forms of nails are not uncommon in the nail industry today - being in constant creative search, masters boldly experiment with form and “content”. Nevertheless, both masters and “advanced” clients are interested in new forms. IN…
">New nail shape - Sumer
- How to correctly correct modeled arched nails, what to do if the free edge “falls”, and also what designs can be offered to the client after the correction is completed - further in the article.
">Correction of arched nails
- Today, nail technicians are unlikely to be surprised by a new nail shape. However, the Monroe form, created taking into account the laws of geometry and architecture, will undoubtedly interest you with its wearability and original appearance.
">Monroe nail shape"
