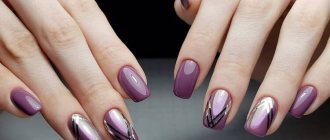
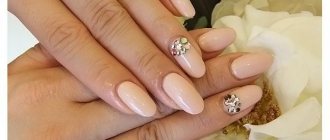
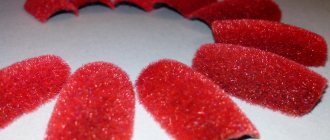
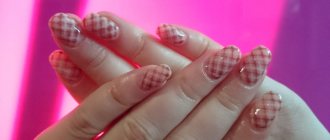
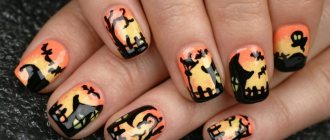
Hello, dear readers! Agree, it’s hard to come up with something more original than fluffy nails. Such an unusual design not only attracts attention - it is difficult to take your eyes off it! Making such a coating is not at all difficult, you just need to have a special material on hand - flock for nails. What it is and how to use it to create a velvety manicure, we will tell you in detail in this article.
What is flock
Every year more and more professional materials and tools for creating nail designs appear on the cosmetics market. One of the latest to appear is flock, a material that allows you to create a manicure with the effect of natural velvet. So what is he like?
Flock for manicure is tiny fibers of various natural or synthetic fabrics. That is, this material is crushed fine fibers of wool, viscose or cotton. The length of the villi does not exceed 1 mm. Other names are often used for flock, for example: velor for nails, velvet for nails, lint powder.
Do not confuse flock with velvet sand or acrylic powder. These are completely different materials!
In specialized stores you can buy flock in a wide variety of colors. Sometimes small sparkles (glitter) are added to it. Sold in jars with a capacity of 1 to 10 grams. The approximate flock consumption is 1 gram per 10 nails. That is, one small jar will not be enough for a second manicure, so it is better to buy with a reserve.
Note: flock can be used not only for manicure - it can be used to decorate postcards, photo albums, artificial flowers, souvenirs, etc.
Pipe form
This shape is simulated artificially; it cannot be obtained from natural nails. The cost of such nails will be significantly more expensive than a regular salon extension. It will also take more time - from four hours. The ability of a manicurist to build the correct architecture of the “Pipe” shape is a kind of sign of quality.
This form has many advantages: perfect lines, the ability to perform on any nails, even the shortest ones. Due to the durable stiffening ribs, it is practical and comfortable. In translation pipe means “tube”. Fingers with long nails of this shape look perfect: graceful, thin, with narrow nail plates. But after the allotted time, you will have to re-grow your nails, since correction of this shape is not done.
The transverse bend of the nail is 50 percent or more, the free edge looks like a tube. When inserting the auxiliary paper form, make sure that it lifts up a little. This way, after laying out the material, the edges of the nail will become parallel, otherwise they may bend down. The free edge is filed into the shape of an oval, square or stiletto.
To complete the form you will need acrylic or a suitable new generation gel. You can’t make this shape on tips. The sides of the artificial nail are pressed with pliers during the polymerization process, achieving a beautiful C-curve.
Features of use
How to use flock for nail design? There is a special tool for working with this material - a flocider (details in another section of the article). But it’s quite possible to do without it! You can apply flock to your nails in a variety of ways. For clarity, some manufacturers even depict them schematically on the packaging itself. We recommend using a regular disposable medical syringe without a needle.
Why is it advisable to spray flock with a syringe, and not apply it with tweezers, a brush, or simply sprinkle your nails, like with acrylic powder or velvet sand? Because when working with a syringe (as when using a flocider), the fibers of the material are, as it were, “driven” into the coating by an air flow and stick perpendicular to the nail surface. As a result, your manicure will last longer and your nails will be fluffier! And with other application options, the flock simply falls on the nails in a chaotic manner and the design is no longer so voluminous and durable.
Nail extension methods
When talking about materials for nail extensions, one cannot fail to mention the methods. The most common of them are extensions onto forms and tips.
@tvoya_kosmetichka_kazan
On forms
There are two types of forms:
- Disposable paper-foil or reusable plastic substrates, which have a special hole for the nail. As a rule, such forms have special markings for easy distribution of the nail extension composition. The size is adjusted individually before applying the base composition.
- Reusable top molds for nail extensions made of plastic. The range of sizes is wide and easy to use. They can be easily removed if the composition under the mold has completely hardened.
Thanks to the lower templates, you can create very long and sharp nails, but the upper shapes are mainly intended for extending square, almond or oval nails.
@kosmetic_nailsopt
What you will need
The most important thing is that the gel polish and flock must be the same color.
Otherwise, even the tiniest bald spots (and they will inevitably appear) will ruin the entire manicure. It is not worth making a flock design over regular varnish, since this coating is not durable.
So, in addition to the usual set of materials and tools for manicure with gel polish, we will definitely need, and the following will also simply come in handy:
- first of all, the flock itself;
- gel polish of the same color;
- regular top;
- top without sticky layer;
- medical syringe without needle;
- fan brush;
- brush;
- sheet of paper or foil.
Flock nail design step by step
Let's look at creating fluffy flock nails step by step using a syringe:
- First, we carry out all the standard preliminary operations: if necessary, remove the old coating, work with the cuticle, shape it, degrease it, cover it with a base, and dry it.
- We prepare the syringe for use - pour flock into it.
- Apply gel polish (matching the color of the flock) in two layers, drying each layer: as a rule, in a regular lamp for a minute, in an LED lamp for 30 seconds. Be sure to check the instructions: some compositions need to dry twice as long.
- We apply a topcoat with a sticky layer, not forgetting to seal the ends.
- Why use a regular topcoat as an intermediate layer? For reliability, many compounds without residual stickiness are not highly elastic and may even crack. In any case, this layer will not be superfluous.
- After drying, apply the top without residual stickiness in a layer of medium thickness. If you make this coating too thin, the flock will have nothing to stick to. We don't dry it! Why is it necessary to use a finish without a sticky layer for this design? Because this way the coating turns out to be more even and there will be no bald spots. As an alternative, you can try using gel paint or gel polish without residual stickiness instead of a non-drug topcoat.
- We spray the flock using a syringe, moving the plunger back and forth. We blow the nail from all sides, sparing no material! Make sure that the fibers lie evenly and there are no bald spots left. This operation is best carried out over a sheet of paper, so that later it will be convenient to collect the excess flock back into the jar.
- Important! In order not to press down the flock, during the application process it is necessary to periodically shake the syringe and do not lower the piston all the way.
- We wait about 30 seconds for the flock to “grab” a little on the coating. Then we remove excess material from the fingers with a light fan brush.
- Dry it in a lamp. This design needs to be dried 2-3 times longer than usual: in a UV lamp - about 5 minutes; in an LED lamp - at least 2 minutes.
- After drying, brush off the excess with a brush and you’re done. We admire the result!
How long will furry nails last? Judging by the reviews, from a few days to 2-3 weeks. In order for the design with flock to remain in its original form longer, you need to protect your nails from all kinds of mechanical influences. It is advisable to wear rubber gloves when washing dishes and doing other housework.
Forms of extended nails: names and photos
The names of the shape of nails during extensions, which are understandable and familiar to masters, often confuse their clients. Moreover, not all young ladies are well acquainted with their names, and this sometimes leads to the fact that instead of the desired option, the client gets a completely different result, and all because she could not correctly name the desired result. Especially to help all women, as well as beginners and those young ladies who practice nail extensions at home, an educational program from “Ideal Manicure” about what types of nails there are when doing extensions, their names and photo examples.
Traditional types of nail shapes for extensions
Let's start our review with the most popular and familiar forms for extended nails. They are usually used to model natural ends, which is why they belong to the so-called category of “traditional” shapes. They are clear, technically simple, and have a natural appearance.
Oval shape.
Characteristic features of the oval shape are parallel lateral lines, equal in width along the entire length of the free edge of the nail and rounded tips.
The most traditional and simplest form in execution technique. It suits nails with any shape of the nail bed - oval, trapezoidal, straight, etc. Oval, in addition, helps to visually lengthen a short nail bed and make excessively wide plates more miniature. Looks best on long and medium length nails.
Photo from the site: vashi-nogti.ru
Photo from the site: obovsemki.com
Photo from the site: kosmetista.ru
Square.
The characteristic features of a square are parallel side lines of the same width along the entire length of the nail and a straight tip with sharp corners at the edges. The ideal solution for French manicure.
The most popular form, both for nail extensions and for the formation of a natural tip. However, this form is more stable in the case of extended nails, because natural plates often break off in the corners. This shape is more suitable for those with a long nail bed. But in the case of extended nails, the problem is easily solved by visually lengthening the nail bed. But those with wide nail plates would be better off with this shape, as the nails will look overly massive. Looks best on medium length nails.
Photo from the site: nogti-nvr.ru
Photo from the site: studio-chereshnya.ru
Photo from the site: sergeybryukhno.ru
Soft square.
Characteristic features of the shape are parallel side lines of the same width along the entire length of the nail and a straight tip with rounded corners. This form can be done with equal success on natural plates and artificial nails.
A soft square, like an oval, suits absolutely everyone. Looks best in a short version and on medium-length nails.
Photo from the site: moda-mir.ru
Photo from the site: cdt-tristar.ru
Photo from the site: mirror-venus.ru
Almond shaped nails.
Characteristic features are a cone-shaped shape, the side lines of the nail from the line of the beginning of the free edge gradually tend to the center and are rounded at the tip of the nail.
Despite the naturalness and simplicity of the form, it is a rather complex and fragile structure. It will look best on extended nails, because it requires good length and the correct cone-shaped outline of the nail arch. Suitable only for ladies with long nail beds, narrow plates and thin “musical” fingers.
Photo from the site: womanadvice.ru
Photo from the site: ss.kak-nay4utc9.ru
Photo from the site: foto-nogti.ru
"Pointe shoes."
Characteristic features are a trapezoidal shape, the side lines of the nail gradually tend to the center. The tip of the nail has a straight line with sharp corners. This is a kind of mix of “square” and almond-shaped. Outwardly, it resembles a ballerina's pointe shoes, which is why this form is sometimes called "ballerina". Another name is “coffin,” again because of its characteristic shape.
The most popular nail shape in the 2022 season. Suitable for almost any shape of the nail bed. It is quite difficult to perform on natural nails; it looks best and is more “vital” when done artificially. Any length is suitable.
Photo from the site: moneyclone.ru
Photo from the site: favim.ru
Photo from the site: salon-lime.ru
Important
Before choosing one or another fashionable nail shape, critically evaluate the shape of your fingers and nail bed. An unsuitable shape can negate the entire effect of extended nails.
Exotic forms of extended nails: names and photos
The good thing about artificial material is that it allows you to create on its base various, sometimes very extravagant, shapes that are simply impossible to create on natural nails. This is because such forms require a certain design, which is impossible when working with a natural plate. In addition, such variations of forms, as a rule, are only dared by very brave girls who are not afraid to shock the public. Let's look at the most popular nail shapes for extensions from this group and photos for them.
"Stilettos".
Characteristic features are very long cone-shaped nails with straight, full-face edges, tending towards the center, and forming an acute angle at the top. They also have a straight outline in profile. Outwardly they resemble daggers, hence their name.
The most recognizable form in the group of exotic variations. Suitable for extravagant young ladies who love to attract attention to themselves. They look quite bold, defiant, but, nevertheless, not vulgar. These nails just need a spectacular design and bright colors. Look great on nails with any shape of nail bed. Suitable length - the longer the better.
Photo from the site: thenailshop.ru
Photo from the site: vidpovidi.net.ua
Photo from the site: salonguru.ru
“Pipe”, tube.
Characteristic features are the same outlines as stilettos, but unlike the first, “pipe” marigolds have a less pronounced angle of inclination of the side edges of the free tip, and the tip itself is almond-shaped. In cross section they resemble a tube, hence their name.
This form looks very elegant, despite its “belonging” to the group of exotic marigolds. Suitable for any nail bed shape. They look preferable in longer lengths.
Photo from the site: boginja.all-gorod.ru
Photo from the site: boginja.all-gorod.ru
Photo from the site: liferules.com.ua
"Edge."
Characteristic features are straight parallel side edges, which sharply narrow in the middle of the length of the free edge, forming an acute angle at the central apex. They are a mix of square and stiletto.
This form is very complex to execute and requires a certain amount of finesse in execution. The design is required, but it should be light - aqua motifs, 2 - 3 colors, so as not to visually overload the already complex form. Suitable for absolutely everyone. The optimal length is only long.
Photo from the site: mara-af.ru
Photo from the site: term-home.com
Photo from the site: otvet.mail.ru
Slanted nails.
Characteristic features are straight parallel side edges, identical along the entire length of the free edge. The tip has a straight beveled edge, forming two angles - acute and obtuse.
Quite an eccentric shape, suitable for very girls. Looks good on any nail bed shape, but requires long, graceful fingers. The appropriate size is medium to long tip.
Photo from the site: nailclub.ru
Photo from the site: lor-rb.ru
Photo from the site: womenworld.com.ua
Blade shape or butterfly wings.
Characteristic features - the free edge has the shape of a triangle in cross-section. Straight edges that may widen slightly closer to the tip, and then sharply tend to the center, forming a fancy cut in the form of a butterfly wing.
The most difficult form to perform. It looks incredibly beautiful and gentle. Not very suitable for everyday life; it is best to create such a form to coincide with some kind of festive event. Suitable for all fingers and nail bed shapes. Looks best on long and medium length nails. Requires bright decor and designer content. Sequins and rhinestones are welcome.
Photo from the site: flyfix.ru
Photo from the site: nanogte.ru
Photo from the site: flyfix.ru
Naturally, the given names of the shape of extended nails are not exhausted by the list given here. We have only given descriptions of the most common forms. There are other options, but they differ little from those given here and, as a rule, represent a symbiosis of two or three forms, or unusual variations in the design of the arch or side faces.
Working with a flocider
To work with flock, some craftsmen use a special tool - a flocker (also known as a flocker).
The principle of its operation is based on the creation of an electromagnetic field between the device itself and a special metal mesh, on which the fingers for applying flock are located. As a result of exposure to static electric current, the fibers of the material stick vertically to the nail surface, which gives the entire design more volume.
It must be said that craftsmen have very different attitudes towards this instrument. Some people like to work with it, while others consider it simply unnecessary. To be fair, it is worth noting that when spraying flock with a syringe, the effect is approximately the same as when flocking with electricity, and the manicure will be no less durable - of course, if everything is done correctly.
Learn more about how to work with a flocider in the next video.
Flock nail design options
Working with flock is quite simple, and the effect will attract the attention of even the most experienced. The result is a velvety, soft and fluffy manicure that is pleasant to the touch.
Such nails look very unusual and solemn.
Of course, it is not at all necessary to cover the entire nail with flock. Try to decorate only certain design details with it. Don't be afraid to imagine and experiment. The flock design can be combined with anything: use rhinestones, stamps, piercings.
Options with negative space look very impressive. For example, for the New Year holidays, you can make furry Christmas trees or mittens on your nails, or draw a fluffy penguin or a snowman. And even though this design won’t last even three days, you will certainly be able to surprise everyone at the New Year’s celebration!
