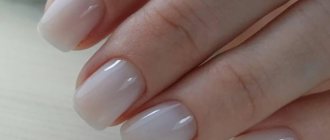
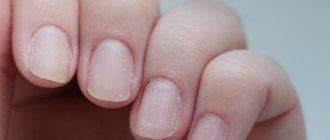
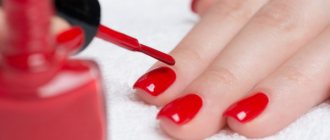
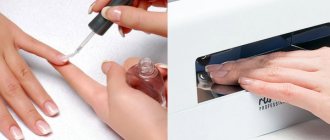
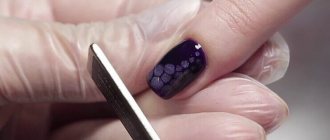
The appearance of camouflage gel nail polish took place quite recently. Before this, extensions were performed with gel or acrylic. Thanks to the fashion for naturalness, a new product in nail art quickly gained popularity and is actively used to lengthen and strengthen nails. Natural shades are always relevant and will suit any event or outfit.
A rubber base is an ideal way to strengthen flaking and thin nails. The fashion and beauty industry is developing, and the same is happening in nail art. Manufacturers offer a selection of camouflage bases for different purposes and types. All that remains is to decide which tool will help you achieve your goal and learn how to use it.
Camouflage nail base
The composition serves as a base layer for applying the finishing coat.
Camouflage comes in different consistencies and shade palettes. Pastel colors are often used because they best match the natural color of human skin. Thanks to this, the modeled nail plate looks as naturalistic as possible. Natural tones:
- universal;
- always relevant;
- fit perfectly into any dress code;
- fit well with various outfits.
This is the best option for girls with thin and flaky nails. With its structure and density, the camouflage cosmetic composition resembles a natural nail plate. This manicure looks as naturalistic as possible.
The camouflage is polymerized under the influence of an ultraviolet lamp or LED radiation. The nail extension procedure does not take much time and does not require special skills.
The naturalness of a nude manicure based on a camouflage base allows you to successfully combine it with fashionable wardrobe items and accessories, and the variety of body colors allows you to choose a shade to match the color of the skin of your hands and face.
The composition forms a thin and durable polymer film with increased adhesive properties on the nail plate. It is great for doing your own extensions and creating a flawless manicure at home.
The viscous material makes the nail plate absolutely smooth. It provides air access to tissues, preventing the development of fungal microflora and the occurrence of an inflammatory process in the most sensitive area of women's hands.
Manicure with colored camouflage base and sliders
If floral manicure has already become a common idea for spring-summer looks, not everyone will decide to use sliders/stickers with hieroglyphs or images of cartoon characters. But they could well become part of a fashionable youth manicure for long and short nails. There are more versatile models that look great on nails. These are abstract patterns, foil elements, imitation of watercolor strokes, butterflies. Manicure is best done with stickers on polish, gel polish, and colored bases.
What is it for?
Here are a few cases in which using a camouflage base for gel polish is preferable to applying a regular transparent base:
- Creating a French manicure or French manicure, including baby boomer. In this case, the base can be used not only as a base, but also applied as another leveling layer instead of colored gel polish.
- Nude manicure with or without design. The camouflage base can be used as a stand-alone coating for manicure in natural colors. The palette of base shades will allow you to choose the color exactly for your hands and nails. The camouflage base is also convenient here because as the nail grows, the boundary between the coating and the natural plate is practically invisible. Thanks to this, you can extend the wearing period until the next correction.
- As a base for thin, pale and unevenly applied gel polish colors. A camouflage base will make the coating using these colors more vibrant, applying fewer layers.
- To disguise the color of problem nails. If there are spots or any pigmentation on the surface of the nails, this can be easily masked by applying such a base.
Due to the light shade, the camouflage base does not distort the bright and dark colors of the gel polish, but on the contrary makes the light ones more saturated.
Those who, due to their line of work, are forced to adhere to a dress code or an official style of clothing, with which a bright manicure does not fit in any way, will also like this purchase.
Features of applying the composition
To create a flawless manicure based on camouflage, a special coating technology is used. Gel polish applied in this way lasts a long time, without chipping, peeling, or scratching. In salons, masters pre-prepare the nail plate for the procedure.
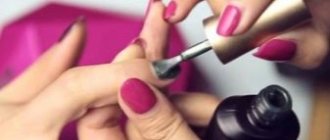
The camouflage base (what it is and the sequence of actions for application are described in the instructions that come with the manicure composition) is applied only to a cleaned and degreased surface. Professional training is carried out using a special apparatus.
With its help, they eliminate impurities, remove the cuticle, and remove dead fragments of the epidermis surrounding the nail plate. At home, you can use the accessories of a manicure set - tongs, a regular nail file, and a sanding buffer.
A primer is applied to the treated surface. When decorating the nail plate with a camouflage polymer, you can use a composition of a dark shade to create. expressive boundary between the bed and the edge contours.
In the fashion trends of French manicure, a polymer base of a three-layer design is used in conjunction with gel polish of a delicate milky shade. In case of severe destruction of the nail plate, it is advisable to use camouflage of the most dense consistency with a high viscosity index.
There are three types of camouflage varnishes available today:
- single-phase;
- two-phase;
- three-phase.
Each of these types has its own characteristics and indications for use. The choice depends on what problem you need to solve. If the original nail is strong and without defects, then a more liquid varnish is needed. If there are unevenness and other flaws on the nail plate, a very thick and dense coating is used. The choice of varnish type also depends on whether there will be some kind of design on the nail.
Single phase
This composition is especially popular in the fashion world. Single-phase varnish is a three-in-one coating: at the same time it is a base, color and finishing layer. Instead of several compounds, only this gel is applied to the nail. Nail technicians often choose this type of camouflage polish because it is very easy to apply and makes touch-ups easy. It has a dense texture, but at the same time it is flexible. Using this polymer you can make nails of any shape and length. The single-phase composition dries very quickly, so the procedure itself does not take much time. The palette of tones of this type of varnish is varied, so you can easily choose a coating for any skin tone.
Application technology
You can get a manicure using gel both in a beauty salon and at home if you have the necessary materials. This procedure is absolutely simple if you follow all the steps and listen to the advice of professionals. Necessary tools include a UV lamp for drying, camouflage gel, brushes, a form (for the first extension), nail files, base coat, degreaser and topcoat. But before you start applying, you need to do a hygienic manicure, disinfect all tools and remove the cuticle.
The gel application procedure consists of several stages:
- prepare the plate, treat it with a degreaser, apply a base coat, which should be dried in a lamp for 1 minute;
- if you use a form to build a nail, then you need to remove the adhesive part and attach it to each finger;
- if the extension procedure is not happening for the first time, then its use is absolutely not necessary;
- apply a small amount of gel to the brush and distribute evenly over the entire plate, it is recommended to start from the center and move to the edges;
- put your hand in an ultraviolet lamp for 1-2 minutes;
- after drying, proceed to the next nail until all the plates of one hand are covered;
- once all fingers are covered with gel, put them in the lamp for one minute for a more durable result;
- after this you can proceed to the next hand;
- Once all fingers are covered with camouflage nail gel, the molds can be removed to build the plate;
- then a top coat is applied, which must be dried in a lamp, and then you can do a French manicure or leave your nails natural.
Gel color tones
Owners of dark skin are recommended to use beige, pink and peach tones of camouflage bases. For fair-skinned people, translucent tones in a pink palette are better suited, for example, the Laque base would be an excellent option. The palette of gels allows you to get different shades from ivory to dark beige due to the thickness and consistency of the material.
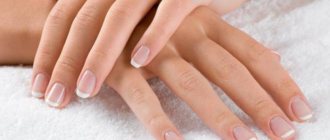
The most popular method of using camouflage gel is to create a classic jacket. Today, a “smile” is painted using colored gels or made several shades darker than the base, creating a light ombre effect.
Camouflage bases are presented in a wide range of neutral colors, so choosing something to suit your taste will not be difficult.
Plain coating with colored camouflage bases
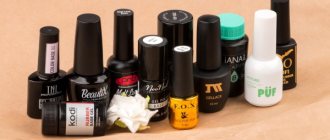
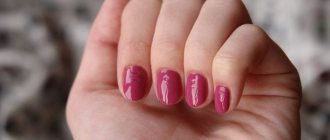
New collections of colored bases in the most delicate shades of pink, lilac, blue, mint, beige - the most popular colors for decorating a translucent monochromatic manicure. Classic and neon tones are also trending. Get inspired by TopShopNails, Base by Nail Republic, Louis Philippe, Pole Nude Dream, Grattol, Cozy, luxio and others.
Advantages and disadvantages
The camouflage base gives the nail plate anatomical perfection, high strength, and absolute smoothness. The list of advantages of the polymer base is not limited to this.
Some of the important advantages of such a multi-layer manicure include:
- strengthening weakened and damaged nails;
- the content of special biologically active components that prevent fungal infection and the development of the inflammatory process;
- a unique polymer coating formula that ensures free penetration of the atmospheric mixture into fabrics;
- long service life of the cosmetic coating;
- natural look;
The camouflage base (what it is and what its features are described in the article) does not allow the multilayer coating to delaminate. It is ideal for fans of fashionable French manicure - French. Polymer material is not without a number of disadvantages.
The most significant of them:
- the high price of a camouflage base, extension procedures and aesthetic correction of nail plates;
- the need to re-manicure monthly;
- some components of such compositions can cause allergic reactions;
- If the application technology is not followed, you can damage your nails;
Improper use of a UV lamp results in microscopic burns to the skin. One of the disadvantages of this manicure is the duration of the nail extension process.
Main types of gel
Single-phase is a “3 in 1” manicure. This type works independently as a base, color and topcoat. It is the simplest way to correct nails and is easy to perform. This base is as close as possible to the natural appearance of nails. The gel dries faster than regular varnish. It has a dense texture and is flexible in creating any shape on the nails. It is popular in nude manicure.
There is also a two-phase gel. This manicure takes longer to complete than a single-phase manicure. The consistency is medium in density, which requires applying two or three layers to achieve the desired result. With such a gel, the master takes more time. The main feature is that each layer must be applied thinly, otherwise the gel will not be able to fully polymerize in the lamp, which will lead to chipping and separation of the material from the nail.
Three-phase is the application of the base in several layers. This technique is presented in the form of a base, sculpting and finishing gel. The structure of camouflage is liquid, making it easy to layer. Particular attention should be paid to bubbles while using the base - there should not be any. Finally, the three-phase base is secured with a thin layer of single-phase gel.
Using gels for other purposes and violating the technique will lead to a short-lived coating.
Types of materials
The table below shows the types of camouflage materials:
| Characteristic | Type of material | ||
| Bases | Gels | Polygels | |
| Consistency |
|
|
|
| Purpose |
|
|
|
| Application technique | Apply with a brush from the bottle and distribute the material over the surface of the natural nail. | The first step is to create a thin backing on the mold. After drying, the main layer of material is spread with a brush, forming the architecture. | When modeling on lower forms, the application scheme is similar to the gel one. The use of upper forms involves laying out the material on a plastic tip and its subsequent attachment to the nail plate. |
Design ideas for camouflage manicure and combination with color
The demand and popularity of this style among the younger generation force designers to constantly find new solutions and surprise their clients.
The basic basis of this image is traditional camouflage, the motifs of which are not distinguished by the intricacy of the design and the complexity of execution.
One of the latest popular ideas has been to apply a speckled color scheme to only a few fingers , and cover the rest with a plain varnish, which can be decorated with unusual military designs, inscriptions or military insignia.
Experienced craftsmen use in their work not only classic military shades, but also a huge number of other color solutions.
Popular color combinations:
- green, yellow and brown;
- blue, white and gray;
- green, black and gray;
- blue, white and blue;
- white, pink and black;
- lilac, violet and gray.
The main condition when choosing colors is their harmonious combination with each other.
Only military tones can bring nail design as close as possible to reproducing a real army theme.
With white color
The combination of muted green and white looks attractive in everyday looks. The design can be made in the form of alternating shades, highlighting the ring finger with white and then decorating it.
The design in marble technique, with foil stripes and rhinestones looks original. Khaki color should be the main color in the design; white only complements and refreshes muted shades.
With geometry
Khaki color looks strict and laconic, so the design should be appropriate. The best complement to a muted green color will be thin stripes, randomly located on 1-2 nails. Drawing such a design will not be difficult even for an untrained master, so start your acquaintance with khaki design with these patterns.
Another interesting option for nail design is mehendi design. Making a drawing yourself is more difficult, but it looks much more interesting. Stamping or sliders will come to the aid of the master, with the help of which you can create an original and stylish pattern in a couple of minutes.
With floristry
How not to complement a green manicure with miniature twigs and leaves? They themselves ask for such a design and look quite original and laconic in them. As a pattern, use thin branches with black leaves, images of monstera leaves, reeds and other floristry.
The drawing should be placed on a light background, so it will look brighter and more expressive. If light colors are not used at all in nail art, then use black gel polish, acrylic and dark rhinestones to draw the picture.
The best ideas for camouflage manicure
Camouflage coatings are great as a base for manicures with a wide variety of designs:
- Korean minimalism.
- Negative space.
- Elegant manicure with opals and rhinestones.
- The basis for sliders, stickers, painting.
- Background for geometric design.
As you can see, many of the most current trends, to one degree or another, involve the application of a camouflage background. Special materials make it easy to cope with the task and get a good result - a smooth, uniform surface of a natural shade.
Criteria for choosing camouflage
There are a large number of shades. It is understood that every woman will be able to choose the option that best suits her skin tone. Along with shades of medium pigmentation such as peach, pink and beige, there are also more rare tones suitable for very fair or, conversely, tanned skin.
But, according to experts, even the most strict and demanding fashionista will not have to sort through the palettes of different manufacturers in search of the very camouflage that is right for her. Materials for this purpose have a translucent texture, due to which they adapt to the skin of different shades. The same material suits women with different skin tones. Here you should focus on your tastes, and not on physiological nuances.
Modeling on paper forms: step-by-step diagram
Step-by-step scheme for performing modeling with camouflage gel on paper forms:
- By analogy with the previously described technology, it is necessary to disinfect hands, manicure, and prepare the nail plate. Then apply a thin layer of base using rubbing movements and dry in a lamp.
- Before installing the paper form, it must be trimmed in the area of the smile and side ridges to repeat the anatomical shape of the nail. Thanks to this, the form will fit snugly to the free edge. The recesses in the area of the side bolsters will allow you to form a correct transverse arch.
- The form must be glued, placed under the free edge, observing the central axis, and the adhesive base pressed against the finger. Particular attention must be paid to the end. The form should stand clearly under the nail, without touching the hyponychia. Otherwise, a step will form.
- A small amount of gel is applied to the form to form a thin base for the future nail. The material is distributed over its surface, connecting the free edge with the natural nail. It is important to thoroughly work out the growth points and side walls. The markings applied to the forms are a hint and guide for the master. The result must be dried a full cycle.
- After polymerization, the substrate is coated with a layer of gel to moisturize and improve the distribution of the material. A small drop is placed on the brush and placed in the center of the nail bed. Slightly recessing the brush into the material, move it towards the cuticle, after which, with a superficial touch, the remainder of the gel is brought to the free edge. The thickness of the material at the end should not exceed the thickness of a credit card. The result must be dried a full cycle.
- After modeling all ten fingers, the sticky layer is removed from the surface of the gel and the architecture is finalized with a file (if necessary), giving clarity to the selected shape.
- The dust remaining as a result of sawdust is brushed off with a stiff brush and the nails are thoroughly wiped with a lint-free cloth soaked in a degreaser.
- Glitter is applied to the surface using the chosen technique or another design and polymerized in a lamp.
- A finishing coating is applied to prolong the wearability of the design, polymerized and removed if necessary.
To apply camouflage gel, you need to choose a brush that is convenient in shape and size. Nail technicians do not recommend using brushes that are too wide and fluffy. It is more convenient to use a flat, rounded or square brush, the size of which does not exceed ½ the width of the nail plate.
What is a gel polish base?
Base - Base coat - the same as the base for gel polish - this is the first phase of a three-phase gel polish system. It is applied as the first layer to a clean nail plate and polymerized in an ultraviolet or LED lamp. This is the first and most important stage of gel polish coating, the quality of which determines the durability, duration of wear and safety of growing nails. The quality of the base coating is determined not so much by the cost of the material, but by its correct selection according to certain characteristics, in accordance with the individual characteristics of the nails of a particular person.
Camouflage master class with sparkles
Camouflage manicure with glitter using the base leveling technique is carried out according to the following sequential scheme:
- Hand treatment with disinfectant. Removal of pterygium, keratinized skin, overgrown cuticle using hardware or combined techniques, sawdust.
- Removing the glossy layer of the natural nail with a soft file (180/240 abrasive), lifting the upper scales.
- Applying a dehydrator to remove excess moisture from the surface. After complete drying in the open air, a primer must be applied. As the liquid evaporates, it leaves a sticky layer that serves as double-sided tape.
- Using a rubbing motion, apply a thin layer of base coat and dry for a full cycle in a lamp.
- Before leveling, the nail plate is covered with a layer of camouflage base; this will moisturize the surface and facilitate distribution. A drop of base is placed in the center of the nail and distributed, pushing it towards the cuticle, and then brushed onto the free edge. The result must be polymerized in a lamp.
- If the camouflage base does not contain shimmer, it is necessary to apply glitter by first mixing dry glitter and a transparent base. Otherwise, you can add them to the bottle.
- The result is fixed with topcoat and dried in a lamp. When using a top coat with a sticky layer after polymerization, you must remove it using lint-free wipes and a special liquid.
Colored camouflage bases with shimmer
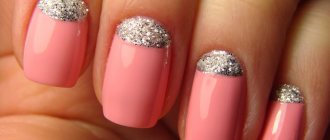
Another key visual effect of foundation is shine. And adherents of minimalism and bright nails will appreciate this. Since the glitter base can be adapted to everyday life and special occasions. If you don't have a shimmer base, just use camo and a sequin/foil top. It also looks beautiful on nails, especially in the version as in photo 1.
