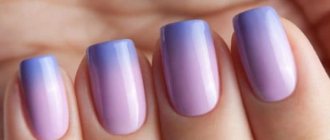
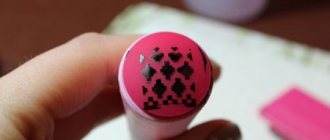
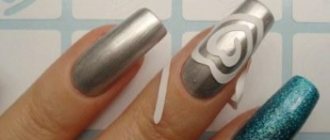
This lesson is designed for beginner nail artists who learn different nail design techniques at home. The topic of the master class is how to do nail stamping correctly. I will tell you a few nuances that will help you print a quality design on gel polish. Let's look at two techniques at once: stamping with a special varnish and stamping with gel paint. Let's start with the classic technique.
What is stamping
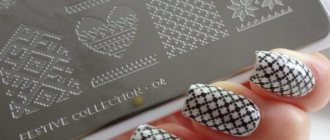
Stamping, from English. Stamping is a technique of applying a design to nails through a stencil using a special stamp. The whole point of the technique is to fill the pattern engraved on the plate with paint and then imprint it on the nail plate.
In order to transfer a design to a nail, you need:
- Apply paint to the desired pattern;
- Print it on a stamp;
- Transfer from the stamp to the nail.
To create a design you need:
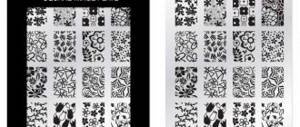
- A stencil is a plate with a pattern extruded on its surface, which is filled with paint and transferred to the nail;
- Stamp – a silicone or rubber pad with a handle for imprinting a pattern from a stencil;
- A scraper or scraper is a plastic tool for removing excess paint from the surface of a stencil plate.
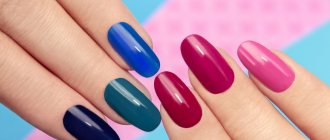
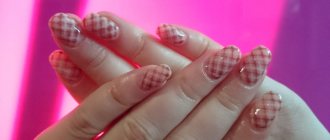
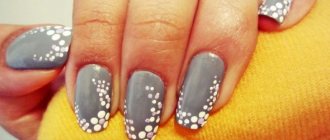
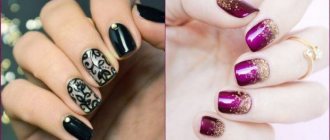
Stamping manicure ideas in different designs
Stamping translated from English means “stamping”. And the translation fully reflects the essence - the designs are applied to the nails with small stamps. What's cool is that you can print even the smallest details that would be impossible to draw by hand.
The manicure itself is not difficult to do. First, a special coating is applied to the disc with the designs, and then the pattern is transferred to the nail plate using a stamp. You can also stamp with regular nail polish. You will need two contrasting coatings: for example, if the base color is light, then dark shades should be used for stamping, and if black paint is used as the base, then metallic shades - gold or silver - are best suited. We have collected popular stamping manicure trends.
Combined
The printed manicure technique, popular this season, allows you not only to make monosyllabic prints on short and long nails of different shapes, but also to combine and overlap motifs to achieve extraordinary beauty of nail art on your nails. In this case, you can use not only different designs, but also different shades, which will only make the manicure more beautiful.
Multicolored
Paint shades do not have to be bright and provocative; choose calmer colors, for example, pastel or beige variations. In this case, color stretching, decorated with different types of embossing patterns, works great.
Geometric
The easiest way to get strict geometry, simple lines and fancy shapes on your nails is to resort to stamping, using plates and a stamp with different printing options. And in such nail art, gradient transitions, “negative space”, and metallic effect varnishes look great.
Minimalistic
If you are bored with colorful and bright prints on your nails, you can always resort to simple and easy minimalist manicure designs. Small patterns, fine lines and basic shades are the perfect solution for you. This design will not let you get bored and is suitable for any occasion.
Nude
A reverse manicure that can be worn both in everyday life and on holidays is a manicure with nude embossing, complemented by patterns. Artisans offer both matte and glossy nude nails, adorned with sophisticated shimmering prints in gold, silver or neutral white.
Stencil
A stencil is a flat plate with patterns placed on it. Based on the material, there are two types of stencils:
- Plastic. It is used when working with thick paints, as it has wide and deep embossing, where liquid products spread. They are cheap, but not durable;
- Metal. Suitable for working with stamping paints of different densities. It lasts quite a long time, but has a significant drawback - over time, small scratches appear on the surface of the stencil, where paint flows and spoils the result.
Most often, craftsmen use metal stencils because of their practicality, so we will discuss them in a little more detail.
Stencils from different manufacturers differ not only in metal density, but also in shape. There are three of them:
- Plate – rectangular plate;
- Disk – round stencil;
- Figured stencil – in the shape of a heart, rhombus, bow or hexagon.
From a functional point of view, stencils of different shapes do not differ from each other.
What else you need to know about stencils:
- Stencils made from the same material differ from each other in the depth of embossing . The deeper the design is extruded, the better quality it will be imprinted and transferred to the nail. The depth can only be checked experimentally. The deepest among the metal plates are considered to be stencils from the MoYou London brand;
- The stencil has a protective film on the working surface, which can only be visible upon closer inspection.. When using for the first time, lightly scratch the empty part of the plate with a sharp tool - scissors or a pusher. If there is a film, it will come off and can be removed;
- Different designs are applied to the stencils, and not only in size . But also in terms of coverage area. They can be continuous or partial. To work with clients, it is better to have both.
What to look for when purchasing a stencil plate:
- Working surface . Make sure that a protective film is applied to the plate to prevent minor scratches during transportation. If there is no film, the patterns will most likely be transferred in stripes;
- Image size . This applies to solid patterns - lace, stripes. For short nails, choose designs of small size, for long nails - almost twice as large. Get both templates. If you decide to use short designs for long nails, there will be an area on the nail without a design - the stencil will not be of sufficient size;
- Drawings. Up to 30 different designs are applied to the plate. Don't buy a plate if you only like one - it's a waste of money. Ideally, there are 2-3 patterns on the plate that will be used. Attractive designs are often found on Irisk slabs.
Stamping kits: everything you need is always at hand.
It is much cheaper to purchase ready-made selections of the necessary products for stamping, regardless of whether you decide on a small set or a stylish gift set. All components of such a set are only branded products from well-known, popular and reputable brands. Each set is designed in such a way that the products in it ideally complement each other in quality (both in the quality of materials and in the safety of the compositions of liquid products and preparations). Another advantage of ready-made kits is the presence of recommendations from the manufacturer. If you forgot something or are in doubt, a hint is always at hand, and you don’t need to waste time searching for information.
In the “Starter Kits” section on our website you will find a large selection of stamping kits from both the most popular brands (Konad and MoYou London), as well as kits for getting started with stamping. Any such set will be a good gift for anyone who is interested in manicure and cares about the beauty of their nails. A detailed description of the complete set and photos of examples of work will ease the pain of choice and allow you to purchase that specific set, the components of which are not yet in your arsenal of manicure beauty.
At the end of today’s review, we would also like to give answers to the most frequently asked questions about stamping (all the subtleties and nuances of stamping design are disclosed in the most complete and detailed manner in the “Buyer Help” section, “Stamping” block).
Stamp
The stamp is a pad with a handle for transferring the pattern onto the nail. Based on the material of the pad, there are two types:
- Rubber – often a hard stamp that does not transfer the pattern well and is printed with “bald patches” in the area of the cuticle and side ridges;
- Silicone – the pad is always soft, sensitive to pressure. This stamp can be used to transfer any design.
In addition, the stamps differ in pad diameter and shape - round and square. The shape of the device does not matter, and the diameter is selected based on the size of the nail. For a pedicure, for example, a large size stamp is purchased, and for a manicure on short nails, a small one is purchased.
It is advisable for a manicurist to have stamps of different sizes, but for home nail design, choose the one that is the right size for you.
Some tips for choosing:
- Check the shape of the pad - it should be the correct semicircular shape. Even a slight deviation will harm the integrity of the pattern on the nail;
- Density. The softer the pad, the better the pattern will be imprinted on the nail plate;
- Cracks and breaks . Even a small tear indicates imminent damage to the stamp - the crack will increase over time and the tool will be unsuitable for work;
- Color . Stamps are available in color and transparent. Choose translucent stamps - through their cavity it is convenient to try on the pattern on the nail and accurately print in the chosen place.
- Availability of replaceable pillows . Stamps from some manufacturers allow you to replace the working surface when it wears out. Replacement pads are sold separately and are cheaper than buying a new stamping tool.
Common mistakes when applying a design using stamping technology
Design using stamping technology is becoming increasingly popular. However, unfortunately, everything does not work out the first time. Therefore, before you start creating a fashionable manicure, you need to practice and get good at it. To ensure a clear print of the design, the paint on the metal plate should fill only the recesses. It is important to carry out the entire procedure as quickly as possible, since stamping paint is not a gel polish that does not harden upon contact with air, but a very thick and quickly drying coating. It hardens in just a few seconds. When using a metal scraper rather than a plastic one, press lightly on the patterned plate, otherwise you risk getting unnecessary scratches that could ruin your fashionable stamping manicure.
Today we introduced you to a rather interesting thing called stamping. They told and showed the most modern and original photo ideas for stamping in 2022. Thanks to stamping, you really save time when working on a spectacular manicure. Lovers of manicure and beautiful nails will definitely appreciate stamping for its positive advantages. You no longer need to spend hours painstakingly drawing intricate patterns. It is enough to use a stamping stamp.
How to use a stamp correctly
When working in the stamping technique, not only high-quality materials are important, but also adherence to technique. When imprinting a design and transferring it onto your nail, there are several rules that help you create the perfect design.
It all depends on the material of the pad:
- Rubber stamp . Transferring the design to the pad from the stencil is carried out with firm, pointed pressure. When imprinted on the nail, the pad rolls from one side roller to another. Rubber products are best used when working with paints and varnishes that dry in air. Lamp inks will smudge when printed;
- Silicone . When working with a silicone pad, the design is transferred from the stencil by rolling movements from left to right, and on the nail, on the contrary, with one point press.
Treat the silicone stamp only with a degreaser - acetone spoils the working surface and it loses its properties. For intermediate cleaning, use tape or a clothes cleaning roller - press the working surface of the stamp against the sticky part of the tape or roller. The same method is used to remove small fluff after cleaning with a napkin.
How to do dry stamping
This version of nail stamping may appeal to lovers of new and unusual manicure techniques. In this case, to create the pattern, it is not stamping paint that is used, but finely ground dry pigment. Such a product can be found in the assortment of large manufacturers - CND, Additives Medium Green, etc. In addition to the pigment, you will also need a brush for working with fine powder; for example, ruNail and Finest Kolinsky NDO No. 6 brushes do a good job. You also need to prepare a new stamp, the pad of which you did not pre-treat with a buff (read about the need for such treatment later in the article).
Sequence of nail art:
- Get a hygienic manicure.
- Apply primer, base and color layers - do not forget to dry each of them under the light of a lamp. The last layer of colored gel polish should remain tacky, meaning it does not need to be dried.
- You need to apply colored powder to the design selected on the stencil. You can combine different colors to your liking.
- The stamp is pressed against the pattern with an elastic surface and intercepts the powder, after which the pattern can be printed onto a sticky layer of gel polish coating.
- Apply top coat and dry under lamp.
scrapper
A scraper is used to remove excess paint from the stencil. There are scrapers:
- With blade. On the working edge of such a tool there is a small blade designed for thoroughly cleaning the surface of the stencil. But the blade damages the plate, leaving scratches;
- No blade. This scraper removes paint just as well, and it does not harm the stencil.
Try using a regular plastic card as a scraper - it turns out no worse.
How to work as a scraper correctly:
- Wipe the working edge of the scraper with degreaser;
- After applying a vertical stripe of paint to the stencil, place the scraper against the plate at a 45-degree angle;
- In one confident motion, pull the scraper to the side, removing excess paint through the pattern;
- Repeat removing the paint one more time to make sure the design is clean.
Try to scrape no more than twice, especially when working with air-drying varnishes.
How to choose stencil plates, stamps and stamping paints:
Review of materials and tools for stamping
How to perform classic stamping on gel nail polish
In order to stamp gel polish, you must first apply the gel itself and let all layers dry thoroughly. Sequence of actions if you use three-phase systems (base, gel polish, top coat):
- Treat your nail plates with a dehydrator and degreaser. As a last resort, you can use alcohol in a concentration of 70-90%.
- Apply a primer to your nails to protect them from the negative effects of polymers.
- Apply a base or base for gel polish to your nails; it will improve the adhesive properties of the surfaces in contact with each other - the nail plates and the polymer layer.
- Apply gel polish of the desired shade to your nails, including a transparent product. Don't forget to seal your nails by running the tip of the brush along the end of the free edge of the plate. Dry this layer under the light of a special ultraviolet lamp for manicure.
- If the polymer coating is not as dense, uniform and rich as you would like, apply one or two more layers of gel polish, each of which must be thoroughly dried under a lamp.
- Apply the final product to your nails - a clear or transparent top coat with glitter, which gives the long-lasting coating a beautiful glossy effect and protects the polymer coating, providing it with additional durability.
- If the last topcoat has a sticky layer, remove it with a special product. After this, your nails with a completed manicure are completely ready for stamping. The pattern you apply can be adjusted and washed off with an acetone-based liquid.
- If the tools you are going to use for stamping nails have already been used, wipe them with acetone or a special cleaner to remove any old paint, dust or dirt. Even the slightest particles of dirt can spoil the design, make it uneven or cause unnecessary stains.
How to perform the classic stamping technique on gel polish:
- Select a plate with a pattern that you want to transfer to your nails. Apply a small amount of acrylic paint to its surface or, as a last resort, regular varnish if you have run out of paint. It is enough to drop one or two drops from the brush into the middle of a specific pattern, then distribute the paint over the entire surface of the pattern with the same brush.
- Using a scraper, distribute the paint more thoroughly over the engraving, make sure that the pigments have filled all the grooves and recesses of the pattern, and remove excess paint. The scraper should be held at an angle of 45 degrees to the surface of the stencil. The coating should be uniform, without bald spots, bubbles or other irregularities.
- Grasp the stamp by the base, holding it with the convex side down. Place it on the plate with the pattern and carefully roll the stamp so that the pattern you want is imprinted on its elastic, soft surface. The process is similar to what happens when a cylinder seal is used.
- Without waiting for the paint on the surface of the stamp to dry, apply it to the nail plate. You can lightly “roll” the design to cover the entire nail. The main thing in the process is not to smudge the pattern. However, if this happens, or if you simply don't like the way the design looks on your nails, erase the design with nail polish remover and try again.
- After the design on the surface of the nail plate has dried, which may take 2-5 minutes, apply another layer of top coat. Dry this layer under a lamp and finally treat the coating with a de-sticking agent. If a design made with acrylic paint gets on the skin around the nail plates, there is no need to worry, this happens often. Simply wipe the leather with lacquer thinner after applying and drying the resin top coat.
- This classic version of stamping nails with gel polish allows you to create ordinary patterns and ornaments - lace, snowflakes, any graphic images. But if you want to apply real mini-paintings on your nails, made in several shades, you will have to master the technique of reverse stamping on gel polish using the gel polish itself. Reverse stamping is a real work of art, and in order to learn this technique, it is recommended to practice not on your own nails, but on special plastic models that exactly imitate the size and shape of real nails.
Paints and varnishes
For stamping, paints and varnishes are used, the labels of which say “for stamping”. Such products are available from many brands, for example:
- TNL;
- Dance Legend;
- El Corazon;
- Born Pretty;
- MoYou London.
All of these products differ in the saturation of their pigment and the speed at which they dry. For example, TNL varnishes dry quickly - after 10-15 seconds the varnish stops imprinting, and Dance Legend takes a little longer to maneuver - about 20 seconds.
A few important points about paints:
- The pigmentation of the varnish can be checked by printing it on a black background . The black base makes it clear how the nail polish will behave on the nails. If the pattern is saturated, it will be so on other substrates. If the print is dull, it is better to use paint with pastel varnishes.
- The best pigmented polishes are Born Pretty and Dance Legend - almost all colors are rich and bright. But TNL inks print poorly, although there are several good shades, for example, 05 blue.
How to choose the right gel polish: we analyze all its types and top brands
Gel paint
Working with gel paint has its own characteristics, so study them carefully to make your choice regarding the dye for stamping.
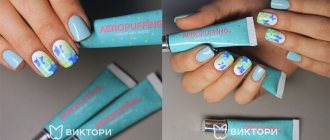
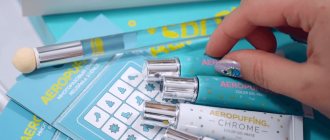
- Good paint is distinguished by a clear outline when transferring the design . Gel paints rarely meet this characteristic, which is why more and more artists are working with airpuffing paints. They are better pigmented and denser, so they do not smudge;
- Paints are less pigmented compared to stamping varnishes;
- The gel paint is dried in a lamp , so you don’t have to rush to transfer the pattern.
Choosing a hybrid lamp for manicure and our rating
There are fewer manufacturers of gel paint than manufacturers of stamping varnishes. Common brands:
- Lunail;
- Born Pretty;
- Nail Republic.
You can create a design using gel polish, but when transferred to the nail it will lose its saturation and will most likely spread.
Necessary accessories, tools, devices
To learn how to do nail stamping, you must first make sure that you have everything you need - consumables and tools. Experts recommend buying varnishes, topcoats, paints, stamps and other high-quality accessories
. How this is justified:
- It is easier to work with high-quality materials, and you are less likely to make mistakes.
- When it comes to gel polishes and other cosmetic products, high-quality products are safer for the health of your nails.
- High-quality consumables and accessories will allow you to get excellent, lasting results.
- Quality manicure tools will last longer, so by investing a little more money, you actually save.
So what do you need?
in order to do nail stamping on a durable polymer coating:
- Preparations and tools for performing hygienic manicure.
- Cosmetics for decorative manicure – nail primer, gel polish base, gel polish (or several products in different colors), topcoat. These preparations are needed in order to create a background on which the drawing will be applied.
- A special LED lamp, under the light of which the gel polish polymerizes.
- Prints with ornaments, plates on which the patterns and drawings you need are engraved.
- Varnish or specialized acrylic paint for making drawings. Choose colors and shades, the nature of the finish to your taste. Experts recommend using not ordinary varnish, but acrylic paint for stamping. Such cosmetics are distinguished by increased brightness of pigments and allow you to create a clear, even graphic design. They do not blur during nail art and do not smudge when you start applying the top coat.
- A small scraper designed to remove excess pigments from engraving.
- A special stamp for stamping, which is designed to transfer an ornament from an engraved plate to the surface of the nail plates. This accessory looks like a small plastic object shaped like a cone. Its size is 10-15 centimeters. The lower surface of the base is elastic and convex, made of rubber or silicone.
Experts draw your attention to the fact that plates with drawings, a scraper and a stamp can be purchased individually or as a set. Which of these options is better? Let's try to figure it out - the pros and cons of buying sets:
- The manufacturer included in the kit everything you might need to perform stamping on your nails, except for varnish. The accessories are made in the same style. You don't have to worry about forgetting to buy something. Most non-professional kits cost less than the individual parts if you buy the fixtures one at a time.
- The quality of stamping accessories sold as a set may be lower than the quality of products purchased separately. In addition, the set may not contain exactly the stamping patterns that you need.
It’s up to you to decide whether to buy a set or individual components of the required list of accessories, because both options have their advantages.
Step-by-step instruction
Stamping requires high speed, so prepare all the tools and equipment in advance:
- Products for standard gel polish – base, color and top;
- Stencil plate;
- Paint – gel paint or stamping varnish;
- Stamp;
- Scraper;
- Degreaser;
- Nail polish remover;
- Liquid tape;
- Tape or clothes roller to clean the stamp;
- Lint-free wipes.
If you use tape for cleaning, wrap it with the sticky side in advance. Open the bottle of paint, take out the napkins and arrange the tools conveniently so that you don’t waste time when printing.
- Apply the base to your nails and dry in a lamp - in ICE for 60 seconds, in UV - 120;
- Apply colored gel polish - if the product is not thick, then in two layers, allowing each to dry;
- Remove stickiness from a colored background using a degreaser;
- Choose a design on the stencil;
- Treat the pattern and scraper with nail polish remover;
- Shake the bottle of stamping varnish, rolling it in your hands;
- Cover the skin around the nails with liquid tape if the pattern covers the entire nail. If it is a single fragment, it is not necessary to close the skin;
- Apply paint in a vertical stripe to the side of the design and with a quick, confident movement, pull it to the right with a scraper;
- Transfer the pattern to the stamp. On rubber - by point pressing, on silicone - by rolling;
- Try on where to place the design on the nail and print it;
- Press the edges of the design onto the nail with light pressure and remove the liquid tape;
- Wait for the paint to dry, cover with topcoat and dry in a lamp.
Only after finishing the work and the design is completely ready, start cleaning the workplace - swirling the varnish, wiping the surface.
Detailed analysis of 9 stamping methods:
Stamping techniques
Preparation for nail design using stamping on gel polish
If all the necessary consumables and accessories have already been purchased, you can prepare the nail plates and begin the artistic process. It is unacceptable to apply gel polish and decorate the coating if the nails have not been pre-treated, as the result will disappoint you and you will simply waste your time and materials.
Preparation of nail plates involves performing a hygienic manicure. It is better not to do a trimmed manicure, since if you remove (cut) the cuticle, it will be possible to apply gel polish, and then the design, at least in a day. And if the cuticle is severely damaged - only after complete healing of the tissue. Therefore, it is recommended to perform a simpler and safer unedged manicure.
:
- Disinfect your tools. Especially if they are used not only by you, but also by other people, even family members.
- Prepare a bowl with tolerably hot water, a towel, files and buffs, in general, everything you might need to perform a hygienic manicure.
- Remove the decorative coating from the nails, if any. It is advisable to use preparations that do not contain acetone for this purpose.
- Give your nails the desired shape using a nail file; it is not recommended to use scissors or pieces for this purpose, since there is a high probability that you will accidentally cut off extra millimeters.
- Immerse the fingers of one hand in hot water for 5-10 minutes to soften the cuticle and become more pliable.
- Apply a special remover to the cuticle, which will dissolve the dead film. If there is no remover, simply push the cuticle to the base of the nail with a special pusher with a rounded edge or a soft orange stick.
- Remove dead skin from the sides of the nail plate, just be careful not to disturb the integrity of the living tissue.
- Treat all the nails sequentially, first on one hand, then immerse the fingers of the second hand in hot water, and then repeat all the manipulations.
- Dry your nails thoroughly with a towel or a stream of warm air from a hair dryer. After this, you can apply gel polish and stamp on it.
Why is the picture not printed?
A problem that often arises is that the pattern is not imprinted on the nail. There are several reasons for this:
- Low operating speed . Stamping varnishes dry in the open air, so the process of transferring the design from the plate to the nail should be short. After just 15 seconds, the pattern prints worse, and after 20 it dries out completely;
- The protective film has not been removed from the stencil;
- To process one of the tools - a stamp or plate, a liquid containing glycerin or oils was used and the paint could not adhere to the surface;
- Wrong stamp . Rubber stamps get the job done, but are more likely to cause problems. A pad that is too hard does not intercept the design from the stencil;
- Sticky silicone stamp . A stamp with natural stickiness is not able to absorb ink. Before first use, go over the pad with a buff or a finely ground file. Just don't press too hard and don't polish for too long - 4-5 light strokes will be enough. Always have two stamps in your arsenal - one sticky, the other not. Stickiness is used in work, for example, when working with pigments.
Rubbing: what it is, how to use it and all application methods with step-by-step instructions
Stamping helps you create an original design even without artistic skills, and a huge selection of stencils opens up endless possibilities for craftsmen.
Tell us about your experience and any difficulties you encountered in the comments! Comment
How to choose gel polish for reverse nail stamping
The gel polish that is used as a substrate or background for the stamped image can be anything. It is better, of course, to choose products from reliable brands, but in this matter you can rely on your own preferences and financial capabilities.
However, the gel polish that you plan to use to color the contours of the picture must meet several requirements, otherwise you can’t even dream of a high-quality and beautiful manicure:
Good dense texture, allowing the cosmetic product to be imprinted well on the elastic surface of the stamp.
Increased pigmentation of gel polish. The drawing should ideally be applied in one layer, and at the same time turn out clear, rich, and bright.
It is advisable that a gel that does not have a sticky layer be used for the stamping design. The less manipulation you do with the drawing, the less likely it is that it will become deformed, smudged, or otherwise deteriorate.
Quite recently, special gel paints for stamping appeared on the cosmetics market. They print perfectly on gel polish coating. Alternatively, you can try this product – Elise Braun stamping gel polish, it has many good reviews on the Internet.
