Painting nails in a variety of manicure styles, women are constantly trying to find something new and make changes to their image. Sometimes ordinary monochromatic coatings help, in other cases fancy designs seem more relevant.
Ethnic notes in manicure are always associated with hot summer days and lift your spirits. This direction of nail art is very multifaceted.
What is ethno-style?
Bright and bold nail designs have become a reflection of the traditions of different nations. Much was borrowed from distant warm Africa, but there may be elements of ethnicity from different countries.
On the ornaments you can see Russian and Ukrainian, Indian, Egyptian, Greek, Scandinavian, Oriental and other motifs. Ethnic design incorporates bright colors, flavor and the primitive spirit of creativity of our ancestors.
Manicure in this style can be very different. Another name for this is “tribal” design. Drawings can be applied in a variety of colors - the main thing is that they combine well.
Ethnic design can be classified as graphic manicure, as it uses combinations of lines, dots, circles, zigzags and other geometric shapes. The outlines are usually done in black, but you can use any other shade if you like.
Three main “surpluses”
The first and, perhaps, main danger is rhinestones. Rhinestones are beautiful, always interesting, but inappropriate in the case of Greek manicure. This element is quite possible in a design in which one nail (or two) is made in the Greek style, but if all ten fingers are given over to the power of this wonderful country, there is no need to introduce an element of modern American vulgarity into expensive ancient Greece.
The next danger is prints. Prints are a new fashion trend of the outgoing trend season, with which, however, you need to be as careful as possible. This is an excellent decoration option for a home manicure, but prints also require a special approach, so by applying them at home, you can not only ruin the intended design, but also make your nails untidy and unkempt. Also, prints carry a hidden threat of overdoing it. They need to be handled wisely. Let's talk directly about Greek manicure. Quite often, girls and women, instead of limiting themselves to Zeus and Hera, try to fit all their children, grandchildren and great-grandchildren on their nails. Naturally, there is still not enough space, but even twenty-one pairs of eyes staring intently at your interlocutor can seriously strain him. And keep in mind, only one pair is yours!
One of the most obvious, but, nevertheless, no less rare “excess” is pretentious multicolor. This is especially true for the Greek style nail design. If you want Greece on your fingers to look really expensive and chic, you should not make the traditional pattern for this style (labyrinth waves) with all the colors of the rainbow. This seems absurd, but such a danger exists! Why not make all three rows of parallel lines in different colors? But for some reason everyone forgets that in the end such a design, in addition to stealing all the mysterious charm of Greece, looks cheap and vulgar.
Combination of colors and decor in ethnic manicure
The combination of colors in ethnic nail design depends on the artistic traditions of the nation:
- African motifs combine shades of yellow, orange, brown;
- Slavic motifs are distinguished by a combination of red, white and black colors;
- English ethnographic drawings are presented in green, blue, yellow, red;
- Australian ornaments are a complex combination of many colors, embodied down to the smallest detail.
The color scheme in ethnic manicure can be any, it all depends on the group to which the intended design belongs, the imagination of the nail technician and the wishes of the client.
Ethnic, like any other ornament, does not require additional decorations.
Trying to combine a complex geometric design, full of details and meaning, with colorful elements (rhinestones, foil, ribbons, etc.) will make the manicure tasteless.
How to use feng shui secrets
Manicure is something that is before our eyes every day, and hands have a certain esoteric meaning. I don't do a manicure every day, which affects my energy, but on those occasions when I need support or help from the world, I definitely sit down and come up with the right meaning and some kind of design for a manicure that can help me.
The results always please me, firstly, Feng Shui design almost always looks original and attractive, secondly, looking at my hands, I remember what I need to focus on, and thirdly, I feel how the world responds to my wishes - always with kindness and great strength!
Try this manicure and you will understand what I mean.
*when copying material, a link to the source mirpozitiva.ru is required
Ethnic manicure. Photos of the best design ideas
Until you see ethnic patterns with your own eyes and how they look on nails, you will not be able to appreciate a manicure in this style. That's why we've put together a photo selection of the best options for you. Each design has its own characteristics and is completely different from the other.
If you like this manicure, we recommend stocking up on multi-colored varnishes so that the lack of a certain shade does not interfere with the implementation of your idea. Don't forget that black is essential - it gives the image clarity and contrast.
The model may be non-standard. Don't force yourself to paint the same patterns on all ten nails. This manicure will look a little boring. Let each of the nails have its own unique design, this is very consistent with the concept of ethnic style.
It is not necessary to design all the nails; it is enough to design only a few. This will make the design more sophisticated and not too provocative. And you will save a lot of time. The design can be applied to any background - white, soft or bright.
Slavic motifs look great on nails. Close to us in spirit, they are associated with rosy-cheeked Russian beauties and blondes. This option is perfect for a summer dress, adding a special charm to your look.
Do not limit yourself to zigzags and lines, gradually complicate the drawing. The best part is that here you can freely choose a variety of shapes - the result will still be great. Do not limit your imagination, experiment, create and your efforts will be rewarded with unique and elegant nail art!
And, of course, one cannot do without the soft lines of oriental motifs. They look not only bold, but also infinitely feminine. This manicure is best done on nails of medium length and a perfect oval shape.
An ethnic style manicure will take a lot of time. This is painstaking work that requires concentration and precision of movements. But the reward for your efforts will be a completely unique design, which is very popular now, and a bright summer atmosphere. Don't forget to cover your manicure with a top coat so that you can enjoy it for as long as possible.
<
How to draw
- First, you need to learn how to properly put material on your brush. It is convenient to use foil or something similar as a training palette. Before use, wipe the brush with a lint-free cloth soaked in de-sticking liquid. You should definitely have such a napkin on hand to wipe your brush from time to time.
- The brush must be completely soaked in gel polish or gel paint. To do this, drag the brush across the palette while scrolling it. As a result of this simple manipulation, you will do three things at once: saturate the brush, remove excess material from it and form a thin tip.
- There should be no droplets on the tip of the brush! If you watch how much material you put on the brush, then the lines without any additional effort will turn out to be approximately equally thin along the entire length. To check whether there is too much paint on the brush, you can draw several test lines on the palette.
- When working, it is advisable to have a support for your hand, especially if you have very little experience.
- Hold the brush almost perpendicular to the nail surface. This is not very convenient for beginners, but if you want to learn how to draw beautiful patterns, you need to practice holding the brush correctly.
- You should try to draw lines with the tip of the brush. And if you need a thicker line, you can press the brush a little and stretch it across the surface.
These recommendations can be fully applied not only to Indian-style manicure, but also to drawing any other subtle patterns on nails, for example, when creating a “dream catcher” manicure.
New ethnic nail designs
The main directions of ethnic manicure
Ornamental manicure can have very different geographical origins. We recommend that you familiarize yourself with the most popular ethnic models. Based on your preferences, you should choose the one you like the most.
African motives
Africa is the primary source of all new cultures. Nail art masters do not deviate from famous designers and use African flowers and other motifs in their works. Bright shades, a mixture of cultures, wild combinations, color expression, a lot of gold on a dark background, large figures from small figures - this is a great option for a summer manicure.
Scandinavian pattern
Nordic ornaments from Scandinavia are great inspiration for New Year's manicure. This is the complete opposite of African motifs. Minimalist girls who prefer pastel colors will like this design more.
Tribal nails
Graphic nail design is an angular pattern with a black outline. Geometric shapes are found throughout the nail space, each of which has a dark outline. The unique combination of triangles, diamonds, circles, straight lines and ethnic symbols is reminiscent of Polynesian tribal tattoos.
A manicure with an Udmurt ornament can be painted in multi-colored shades that are in harmony with each other. Try playing with ethnic symbols, creating a new composition on your nails each time. Any tribal print will look trendy in cold and hot seasons on both short and long nails.
You can see how to make a simple manicure with an ornament in the video below.
Greek ornament
The most famous and recognizable ornament of all. Straight lines, geometric shapes, sharp angles, letters of the alphabet, acanthus, palmettes, spirals and meanders - all this characterizes the extraordinary Greece. Here every detail must be thought out to the smallest detail. The shapes can be aligned or formed in a circle. Manicure with Greek patterns is suitable for long dresses, bouffant hairstyles and special occasions.
Ukrainian embroidery
Cute Ukrainian motifs are at the peak of popularity in the fashion industry. National embroidery is rich in various ornaments. Floral motifs in the context of Ukrainian culture also look very elegant and unobtrusive. Poppies, marigolds and sunflowers can be used as additional elements. Today, a manicure with Ukrainian ornaments is a stylish accessory.
A similar nail design can be created using thin brushes and gel polishes, or you can use stickers and stamps, adding special stones and decorations.
Egyptian style manicure
Egyptian manicure is made in the style of African designs. Soft tones of orange-brown tones and fine lines convey the mysterious nature of the ancient world. Manicure “Egypt”, contrary to the stereotypical idea, is not only and not so much an image of pyramids, mummies and camels. First of all, this is the beauty of ethnic lines.
Moroccan chic
Oriental motifs
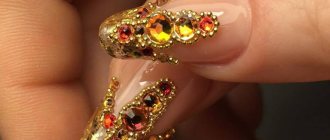
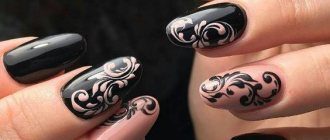
The East has always been associated with indescribable wealth and exquisite silhouettes. Rich dark shades, plays of gold, exquisite patterns, delicate curls and reflections of precious stones - such a manicure with decorative patterns can be classified as unique and expensive jewelry for every girl. The originality and uniqueness of oriental motifs is expressed in ornaments and motifs.
Floral motifs, swirls and monograms are present in Arabic nail designs. But in Indian manicure, various patterns are added to them. These can be feathers, mandalas or paisley (Indian paisley). You can decorate your manicure with beads, large crystals, gold acrylic paints, yuca flakes, broths, shells, broken glass and sequins.
The best colors for creating a manicure with an ornament:
- Burgundy;
- royal blue;
- beige;
- hot orange;
- emerald;
- scarlet;
- dark green.
In the Arabic style there are no straight lines; here one figure smoothly flows into another and gradually loses the outline of its edges. When creating, ornate decorative motifs are encouraged. Straight lines can be used if you are planning to apply a mosaic design to your nails.
Greece on nails
What is a Greek style manicure? Photos of this design literally filled the feed on social networks and various Internet sites. Often its main components are calm, pastel colors and a traditional Greek pattern: square curls, simultaneously reminiscent of labyrinths and real sea waves. It is unlikely that you will be able to follow the instructions in the “Greek manicure step by step” section on your own and do something really worthwhile on your nails. Why? It's simple: such a design will look dignified and expensive only if professionally executed. Its main components are: even angles, parallel, confident lines, and the absence of varnish smudges, which can be justified or veiled in soft designs. Greek manicure is expensive, elite and it should look five stars, no less.
DIY ethnic manicure: how to do it
- We cover the nail plate with glossy turquoise varnish.
- With scarlet paint we apply three dots of different sizes and shapes.
- Blot the red paint with white paint.
- We emphasize with black paint - right in the middle of the multi-colored spots and along their contours.
- Cover your nails with a transparent top coat.
This multi-colored and bright manicure is perfect for spring and summer outfits. The infamous geometric patterns, leaves and swirls, frayed edges and vibrant play of colors create a striking ethnic motif.
Black strokes stand out perfectly and highlight the white and red varnish and harmonize perfectly with the turquoise.
As a result, the entire manicure acquires an original and unique iridescent effect, which will look especially wonderful on tanned skin.
Originality of color
The first and main feature that needs to be remembered: no gloss, shine, gold, silver or any reflections of metal. Gilding was used only in sanctuaries and temples. You don’t want to build a tomb in your apartment and decorate a tabernacle with an altar of burnt offerings, do you?
Egyptian style is distinguished by matte natural color. All tones used should imitate the ancient natural dyes from which Egyptian colors were obtained:
- copper ore azurite – blue color;
- malachite – green;
- Isatis tinctoria (woad) – indigo color;
- limestone – white;
- charcoal – black;
- Carthamus tinctorius (saffron) and ocher – yellow and red;
- brown, orange, purple were obtained by layering available colors.
Similar dyes are used in Orthodox icon painting. Brightness is the only difference - calm, depth, tranquility, naturalness highlight the colors of the Egyptian style.
As if bleached by the sun and covered with a thin layer of sandy dust, they will fill your home with peace. The photo shows the colors of the Egyptian style recommended by designers.
Marigolds with a taste of freedom
The historical roots of the style go back to the freedom-loving and serene representatives of the hippie culture, who could only leave their mark on the formation of the design. An integral part of this manicure are images of the sun, rainbows, hearts, emoticons and peace signs.
Chamomiles, poppies and various wildflowers, as well as inscriptions in the style of “peace” on the fingers can expressively emphasize the created image and unbridled love of freedom.
Marble effect in ethnic manicure
The familiar marble design, which earlier this season featured a mix of neutrals and soothing shades, can take on a completely different direction. Blue, beige, pink and yellow notes elegantly combine with metallic accents to create a stunning marbled texture on the nails. A coating that imitates natural materials can be combined in an original manicure with simple or transparent nails, additionally decorated with drawings and decorative elements.
Textiles and lighting
Egyptian-style interiors are characterized by natural fabrics: cotton, wool, linen. Therefore, bedspreads, upholstery, curtains, and pillows should be made of these fabrics.
- Hang linen or cotton curtains in chocolate, milk or beige, decorated with gold embroidery at the edges. The pattern is floral or geometric. Install a canopy over the bed in the bedroom or nursery.
- There should be several lighting sources and they should convey and emphasize luxury and restraint. Use ceiling chandeliers, wall sconces, table lamps with colored glass shades.
- Lampshades can be textile, imitating papyrus, and decorated with scenes from life, hieroglyphs.
Oriental style manicure techniques
If you are still new to nail art, then you can use specialized stickers or stamps to create an oriental manicure. These simple tools will simplify your work and eliminate mistakes.
To make your oriental manicure more interesting and voluminous, you can create intricate patterns on your nails using small beads or rhinestones.
Due to the ease of implementation, this technique has become very popular. This fashionable manicure looks natural and elegant. To create it, peacock feathers are also used, which are glued to the nails between layers of transparent gel polish.
There are no strict design requirements. The main thing in the model is smooth lines and symmetry.
Oriental manicure: step-by-step photo instructions
You will need:
- Essie paint “On the sand of Saint-Tropez”,
- Essie "Turquoise and the Caribbean"
- Essie licorice paint,
- Essie Perfect Fit.”
It is impossible to imagine an oriental manicure without an abundance of fine lines, rhinestones and gold elements. It seems that only professionally trained people can do this. But there are some tricks available to simple nail art lovers. In this photo tutorial we will introduce you to the dot painting technique, which will allow you to create an ethnic pattern reminiscent of inlay.
1. Apply base color polish to your nails. For example, beige or black.
2. Next, choose several harmoniously combined shades. For example, it could be a bright varnish that resembles a precious stone (turquoise, emerald, ruby), a white and gold base. You will also need dots.
3. Put a big dot. Place it in the center or close to the cuticle. To avoid mistakes, adjust your hand well.
4. After inserting the first dot, there will be a small amount of paint left on it, so the diameter of the next dot will be smaller. To get the same stains, clean the dots and add more ink after each print.
5. Place the large dots at some distance from each other, maintaining symmetry.
6. Alternate colors to make the composition more interesting.
7. To make smaller dots, you will need a toothpick or dots of a smaller diameter. In this case, the paint needs to be collected a little so that it does not cover even half of the dots.
8. Place dots around the big ones.
9. To make it easier to maintain symmetry of the points, first place two points at the top and one relatively large one at the bottom.
10. Then place small dots on the left and right.
11. Place one more point among the existing ones. In this case, you will get a neat circle of small dots.
12. Small dots also look great in curved lines. This will make the design look like a necklace. In this case, you can use a portion of paint to get several dots at once, which will gradually decrease in size.
13. Apply a matte or glossy topcoat.
Shoes and accessories for an ancient look
Egyptian-style shoes are only appropriate with flat soles without heels
If everything is quite simple with clothes and their combination, then with jewelry that suits the Egyptian style, it’s better not to go wrong. A direct hit will be the choice of wide, simple metal bracelets that are worn on the wrist or above the elbow. A large pendant with Egyptian motifs in the form of the famous profile of Cleopatra or one of the sacred animals of that time is matched to a thin or massive chain around the neck. Earrings and rings should also be round and wide with thematic patterns. Gems are also welcome. Ruby, turquoise or opal fit well into a whole fashionable look.
Only flat-soled shoes without heels and unnecessary accessories are appropriate. These could be simple lace-up sandals, because the ancient Egyptians made shoes from palm leaves. Flip-flops - one-finger flip-flops or translucent knee-high boots with numerous transverse locks will perfectly reflect the theme of Egypt's bygone times. As additional accessories to complete the complete look, plain scarves or scarves are suitable to make a turban on the head. For more formal events, shiny metal tiaras are suitable. Now they are especially relevant for wedding ceremonies. The design of the handbag can be made with minimalism or with the image of Egyptian hieroglyphs and thematic patterns.
In Egyptian-style makeup, it is enough to make a wide arrow on the upper and lower eyelids using jet black eyeliner and paint the eyelashes with a thick layer
The Egyptian style of clothing also requires certain rules in applying makeup. It is enough to make a wide arrow on the upper and lower eyelids using charcoal eyeliner and paint the eyelashes with a thick layer. Light shadows with light pearlescent are applied as an additional accent, emphasizing the depth of the look. As for the hairstyle, it will be enough to lay the hair evenly if it is shoulder length, or vice versa, curl it into small curls, only the bangs are provided above the eyebrow line and laid evenly. The Egyptian style of clothing involves the use of any details and changes in appearance that are associated with the image of the great Cleopatra and the way of life of the people of Ancient Egypt.
Our WestSharm blog invites you to learn a lot of interesting things about different styles, fashion and beauty.
Show business news here.
Manicure options with oriental patterns
French with oriental motifs
Even such a traditional design as a French manicure will sparkle with new colors if you add oriental style motifs to your manicure. Decorate two nails with an ornament with smooth lines and dots. And highlight the outer edges of the rest with black paint - another trick that will make the usual approach more interesting.
You can complement your manicure with a matte top.
Golden curls
Gold on your nails will look impressive no matter what background you choose. For those who want to make their nail art a little more discreet, white or cream will do.
Cover your ring finger nail with gold foil. We talked about how to work with it in this video.
The rest of the nails are white. And we begin to create patterns in the center. It will be enough to draw interconnected semicircles.
Oriental patterns with dots
Dotted patterns are traditionally used to create mehendi, a henna body painting popular in Arab countries and India. This technique can also be used in manicure. Even on very short nails you can create a complex pattern with a brush and dots if you first practice on paper.
Don't decorate all your nails with intricate designs. It is enough to cover two motifs on each hand. The rest can be painted with a single-color varnish and, if desired, laconic spots can be applied to the nails.
Oriental style manicure with beads
An interesting contrast in oriental manicure is achieved not only through the use of black. You can also opt for soft pink tones. Nude and purple sparkles at the tips, white ornaments and pearls or beads at the base of one of the nails will create a romantic oriental manicure.
Original ornament with rhinestones
Rhinestones look quite appropriate as part of an oriental manicure. They can be symmetrically distributed on the nails, or they can be placed in the central part of the ornament. Or place a vertical path of rhinestones on the nails of your ring fingers, and decorate the base of the pattern with stones on the central one.
If you are worried that nail art with rhinestones looks overloaded, then opt for a matte top and cover your little finger with glitter for a harmonious combination of manicure.
Advice from the master
Of course, before drawing mehendi on your nails, it is best to practice on tips or on a regular sheet of paper. Only in practice can you understand how thin lines are obtained and how wider ones are obtained. During training, it is advisable to try to draw lines in different directions, including directions that are uncomfortable for you.
And most importantly, concentrate your attention on each line and do not forget about what you are drawing. If you relax and do everything automatically, there will be practically no benefit from training. In order to draw thin lines clearly and quickly in the future, you first need to learn how to carefully draw each one.
How long should you train? Nobody will tell you this. For some, a few hours will be enough, while for others it will take more than one week. It all depends on your desire to learn, and of course on your abilities. And then - there is no limit to perfection. The highest level of skill is achieved by those who understand this and continue to train daily, already being an experienced master.
