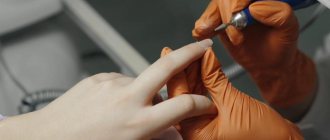
Each stage of hardware manicure has its own subtleties, knowledge of which, combined with experience, turns a novice master into a professional.
The correct choice of cutter, proper placement of the nozzle, mastery of several techniques that can be selected for the client’s skin type - all this can be mastered step by step.
Let's look at performing a hardware manicure step by step: what the master should pay attention to at each stage in order to get an impeccable result.
List of stages
Professional training in hardware manicure involves a systematic approach that can be outlined in technology and passed on to students for practical use. The classic scheme, accepted by most masters, comes down to the following steps:
- Removing old coating;
- Shape sawdust;
- Creation and opening of a pocket under the cuticle;
- Raising the “skirt”;
- Cleaning the pterygium and lateral sinuses;
- Cuticle cut.
We will analyze each stage separately with the intricacies of working in a specific area of the nail.
What is hardware manicure, features of its implementation
Removing old coating
Removing the old coating includes three stages of work: cutting off the length, removing the color coating and base, correcting unevenness and material residues.
Length removal
It is performed with a metal carbide or ceramic cutter with a blue notch. It is placed perpendicular to the free edge and by moving from one side to the other the length is removed to the desired length. From corner to corner. Left-handers work in reverse mode, and right-handers work in forward mode. A left-hander takes the length from the right to the left corner, and a right-hander takes the opposite direction.
It is necessary to work with the nose or protruding part of the cutter at a speed of 20,000 - 30,000 per minute. We do not allow the cutter to tilt so that it does not hit or bounce.
Low speeds are used in extreme cases, only when there is a burning sensation.
Possible causes of burning:
- Blunt cutter . It does not clean, but irons the material, releasing heat at high speeds;
- Bent nozzle . It is uncentered and vibrates, taps and gives additional heat. It is necessary to change it, and you can work at high speeds without slowing down;
- Vibration of the device handle, faulty handle . Solution - you can slow down;
- Sawed nail plate . The solution is to slow down and work with less pressure;
- Sensitive nail plate. The solution is to leave a small amount of base on the surface.
When removing the coating, the entire surface of the nail can be divided into three zones:
- Central part and free edge;
- Cuticle area and left side wall (right - for left-handers);
- Right side wall (left - for left-handers).
The third zone is the most inconvenient. To process it, it is necessary to rotate the client’s hand 180 degrees.
Removing color coating and base
In the central part the material is thickest, and at the cuticle and side walls it is half as much. Therefore, when removing, it is necessary to focus not only on the direction of movement of the nozzle, but also on the pressure. In the central part the pressure is stronger, and at the cuticle and side walls it is weaker. Also, if there are bumps and smudges near the side walls, the pressure in these areas will be stronger.
It is recommended to work with long arching movements in the first zone. The resistance stroke of the cutter removes a thick layer of material, and with a smoothing direction, in the direction of rotation of the cutter, a thin layer of material is removed. This technique is convenient for processing thin areas of the coating to avoid cuts and damage.
Correction of irregularities, detachments and removal of material residues
Immediately you need to pay attention to the presence of detachments. It is recommended to remove them completely. Detachments can be removed with a diamond cutter or a regular nail file.
Detachment of the coating can be located on the free edge, in the cuticle area or at the side walls.
- If it is on the free edge, remove it with light smoothing movements until the area disappears.
- If the detachment is near the side wall, then it is better to remove it with a nozzle in the direction of rotation, as if the hand is “following” the cutter. This is a safe technique that removes a very thin layer of material.
- If the detachment is on the central part or at the cuticle, then it is best to remove it with transverse smoothing movements. For right-handed people, move to the right. Left-handers - to the left, without resistance from the cutter.
Now you need to look at the profile and end of the nail, assess the condition of the arch. If there are bumps or hills, we smooth them out with a milling cutter using smooth arched movements.
Hardware manicure - answering frequently asked questions
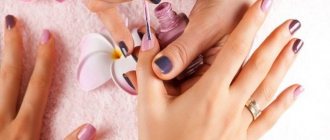
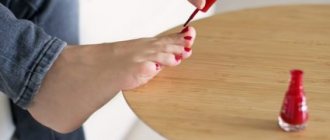
The final stage: varnishing
A classic manicure involves applying a varnish coating. Before the procedure, the plates are degreased with a special product or wiped with nail polish remover that does not contain acetone. After this, a base layer is applied to the nails. It protects the plates from yellowing, the varnish lays down in an even layer, does not crack or chip.
The choice of base depends on the type of nails. For fragile and brittle ones, a base with calcium is suitable; for very thin ones, use a product with thickening fibers. The base is applied to the layered plates in 2 layers, drying each thoroughly.
To ensure that the varnish lasts as long as possible, it is applied in 2-3 layers.
Colored varnish is applied over the base. If a French manicure is chosen, the tip is treated with white enamel, and then the entire bed is covered in a pastel cream or pale pink tone. Girls who prefer colored polishes can cover their entire nails with them. To ensure even layers, the brush is placed in the center of the nail, smoothly moves to the cuticle, and then paints the upper part. After drying, you need to apply another layer, it will eliminate streaks and streaks, the coating will be smooth and glossy.
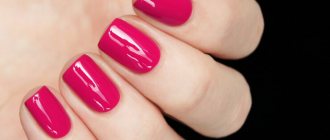
Red color is ideal for a classic manicure.
When using bright and dark varnishes, you need to paint over the end by running the very edge of the brush along it. This technique will secure a beautiful manicure, the enamel will last as long as possible. If the varnish coating is visible, you can apply another layer of enamel.
For a classic manicure, pure colors are used: red, burgundy, dark blue, beige. Pastel colors, from cream to lilac, also look impressive. Additional design is not encouraged; the manicure should look strict and a little conservative. A top coat with a shining effect or special drying will help give the varnish a mirror shine.
The top coat can be renewed every 3-4 days. This technique will help refresh your manicure, the color will gain brightness and depth. Neat layers look very neat.
Instead of regular enamel, you can use shellac. The technology for applying it is similar, but each layer requires fixing under a drying lamp. For a classic manicure, choose dark shades, avoiding avant-garde bright colors.
Cuticle separation and pocket creation
You can open the pocket under the cuticle in different ways:
- Pusher;
- Orange stick;
- Safe cutter Oney Clean;
- Other cutters with a sharp tip, for example: flame, bullet, bud, lentil.
If the cuticle does not move:
- The first reason may be that the master is not pushing it, but a dry, attached pterygium.
- The second reason is cuts in the nail plate, deep scratches. The pusher can rest against such a scratch or cut and not move. To avoid damage to the nail plate in such cases, the pusher must be placed at a minimum angle and moved with gentle sliding movements.
- Another reason is eponychium gluing, when the inner part of the cuticle grows to the nail plate, and when trying to move it away, it gives the client unpleasant sensations. In this case, it is necessary not to rest against the skin, but to go under the problem area with the sharp part of the tool, for example, a hatchet or an orange stick.
The most common problems when opening the cuticle and creating a pocket:
- Eponychium gluing;
- Skin damage and cuts when moving the cuticle;
- Hangnails in the sinus areas;
- Accumulation of debris under the cuticle.
The cause of all these problems is the incorrect positioning and movements of the pusher. It cannot be placed flat. The optimal permissible angle is 45 degrees.
If the glues cannot be separated with a pusher, you must use an orange stick, a sharp pusher or a hatchet on the other side of the double-sided pusher.
Milling cutters for the device: types, purpose, how to choose and use in manicure and pedicure
Advantages and disadvantages of classic manicure
A special technology for performing classic manicure provides many advantages:
- This type of manicure allows you to cope even with very rough, keratinized cuticles, which you cannot remove with other types of manicure.
- Thanks to a classic manicure, you will quickly get your shabby hands in order.
- The effect of such a manicure lasts for a long time. It is enough to do the procedure once a month.
- This is the only type of manicure that is suitable for the thicker skin of men's hands.
- The cost of a classic manicure procedure is quite affordable.
- This manicure can be done at home.
Like any procedure, classic manicure has its drawbacks:
- The main disadvantage is the risk of damage to the cuticle and tissue around the nail, which can lead to infection and inflammation. That is why, before performing the procedure, you need to thoroughly disinfect all instruments, and carry out the procedure itself if you have the skills or contact a salon.
- Unpleasant sensations and slight pain during the procedure.
Lifting the “skirt” from the cuticle
To lift the “skirt”, a diamond attachment with a sharp nose and a flat main part is best suited. For example, a bullet, a lentil, a cylinder with a red notch.
To raise the skirt, it is necessary to work at speeds of 5,000 and above, depending on the condition of the client’s skin. The rougher the skin, the higher the speed.
Using a cutter, using pushing and smoothing movements, the raised cuticle is turned upward with a skirt or visor, and raised at an angle of 90 degrees.
When opening the sinus, you can help yourself with your other hand, slightly pulling the skin down or to the side from the nail. You cannot pull the skin diagonally from the sinus, so as not to tear this thin transitional rectangular area.
Classic manicure: step-by-step technology
To carry out such a manicure in a salon, the masters have everything they need, but if you are going to do it at home, then you will need:
- container for steaming hands;
- salt and soap;
- special product for treating cuticles;
- orange stick;
- a set of manicure files;
- manicure scissors with rounded ends;
- manicure tweezers;
- caring oils for the cuticle area.
The classic manicure procedure takes place in the following sequence:
- We disinfect all tools and our hands. In the salon, the master’s hands are treated with antiseptic.
- First of all, you need to remove the old varnish coating, if any.
- Before performing the baths, you need to adjust the length and shape of the nails, since this cannot be done on wet plates. Wet nails may peel during filing. During nail file treatment, movements should be directed in one direction.
- Now let's start processing the cuticle. To begin with, a composition based on organic acids is applied to it. It should be absorbed into the skin.
- Now softening baths are performed. To do this, immerse your hands in warm water with added salt and soap for 10 minutes. After this time, remove your hands and dry them with a towel.
- Now, using an orange stick, we push back and lift the cuticle. Next, using tweezers, the pushed back cuticle is cut off. This can also be done with nail scissors with rounded ends. It is important to do this very accurately and carefully so as not to damage the skin around the nail. Otherwise, infection may penetrate into the resulting cuts and cause inflammation.
- The final step will be to apply a product to nourish and moisturize the cuticle.
Cleaning the pterygium and lateral sinuses
The nail can be divided into three treatment zones: central, lateral sinuses and along the lateral ridges.
- First we go through the central part with the nose of the cutter.
- Then, using smooth smoothing movements, we move from the center to the sinuses. It is important not to pull the skin on the sinus areas and make sure there are no adhesions in the pockets.
- The final stage is cleaning out the pterygium in the lateral sinuses. It is performed with the sharp part of a cutter with a narrow nose downward and slightly to the side, along the line of the side roller. Only the nose of the cutter works so that the belly does not form cuts. At this stage, it is important to remove all the pterygium without sawing through the growing points.
Top 7 models of devices for manicure and pedicure: select and evaluate