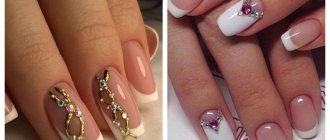
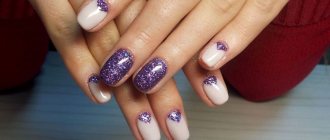
What is velvet sand for nails?
Velvet sand for nails is a powder consisting of acrylic granules. These particles are slightly larger than the acrylic powder itself. Visually, transparent velvety sand most closely resembles baking soda or semolina, only white rather than yellowish.
When applied to gel polish or any other wet coating, acrylic powder penetrates and hardens, creating a durable structure. And the soft velvet effect it creates makes the manicure voluminous, very delicate and a little mysterious.
The velvet lining is highly durable and wears out for a long time, does not crumble or change texture. If you accidentally stain your nails with something difficult to remove (for example, polish), to return them to their previous appearance, simply wipe them with nail polish remover or any other alcohol solution.
Velvety sand is easy to work with, so any girl can create the effect of sand on her nails. In addition, it is quite inexpensive, and the results from its use are simply magical and are unlikely to disappoint you.
Note: sand velvet and flock are not the same thing. Flock does not consist of acrylic particles, but of small fibers of viscose or cotton. In salons, they usually work with such material using a special tool - a flocker.
Technology of applying velvet sand to nails
Creating a manicure with powder is very simple. If you carefully study all the details, then even a beginner can do this design on your nails.
First you need to decide on the application technology. There are several types of sand nail art:
- covering all nails;
- drawing lace patterns or monograms;
- image of abstract lines and geometric shapes on the nail plate;
- velvet jacket
Important! When working with this product, you can even use regular varnish.
How to use sand for nail design
At first, there were special means for fixing velvet sand on nails. But the craftsmen have quite successfully learned to apply it to a wet layer of shellac, gel paint or regular varnish.
- Nails are pre-prepared and filed to the desired shape.
- Then apply varnish or shellac once, which is thoroughly dried.
- The next layer is immediately sprinkled with the product on top.
- Next, dry the volumetric coating thoroughly.
How to apply sand to gel polish
Velvet manicure with gel polish has increased wear resistance and a long service life. The creation of such a design is distinguished by its drying technology: an ultraviolet lamp is required for its polymerization.
- First, the nails are prepared, the cuticle is removed, the desired shape is formed, and the gloss is cut off from the surface with a buff.
- Next, apply the first layer, which is dried under a lamp for 1–2 minutes.
- Then cover the nail plate a second time, sprinkling it with velvet particles.
- Next, drying the volumetric manicure with shellac under ultraviolet rays should take 5–6 minutes.
Sand patterns on nails
It’s quite easy to create voluminous patterns on your nails using a velvet solution. You should use gel paint with a sticky layer as a basis, since it is very difficult to draw lines with shellac, especially for beginners, because it spreads.
- First, it is important to thoroughly dry the base coat.
- Then, using a brush and paint, apply the pattern.
- Afterwards they are sprinkled with the product. If desired, you can press on the surface, but then the volume will be less noticeable.
- The pattern should be dried thoroughly, only then carefully remove the excess with a brush.
Is it necessary to topcoat velvet sand?
Velvet manicure is never secured with a top coat. Firstly, this is not necessary - grains of sand and fibers stick tightly to the previous layer of varnish. Secondly, due to the finishing coating, the surface will lose its hairiness.
How to choose the right one
Acrylic sand comes in a variety of shades, from soft pastels to eye-catching bright colors, including rainbow color schemes, neon and fluorescent colors. In general, velvet sand can be found for every taste and color.
But it would be more practical to opt for white velvety sand: it is universal, as it accepts and “absorbs” the color of any coating.
Therefore, it can be successfully used in most cases. It may go better with light pastel shades, but it also looks great with bright colors.
Lovers of sparkling manicure can choose a velvety sand manicure with glitter. Glitter can harmonize with the main color of the powder or create a contrast with it. For example, red sand with gold sparkles or blue sand with silver sparkles looks very impressive.
You can also mix glitter with acrylic, choosing different sizes and colors to achieve the desired effect. In general, the variety of compositions is huge, and you can create whatever your heart desires. But do not forget about the proportions in the mixture and the contrast - the amount of sparkles and velvety sand should be in harmony.
Note: Velvety sand can be replaced with acrylic powder, which is used for nail extensions. It has an even finer structure and enhances the velvety effect. In addition, it is convenient to use it to decorate small details of a manicure, as it fits well even on the thinnest lines.
Pros and cons of this type of manicure
All types of decorative nail coatings have pros and cons, velvet sand is no exception.
Among the advantages:
- simple technology
- minimum material
- time saving
- Suitable for your own and artificial nails
- originality and solemnity
- for different age categories
- durability (salon procedure)
- interchangeability
Even a beginner can master the technique of applying velvet powder after watching the instructional video and following the sequence of actions. The procedure is quite quick if you don’t get carried away with a complex pattern and cover your nails with one color. The sand lasts for a long time if you cover not the entire nail, but part of it in the form of a pattern.
If velvet sand is not enough, it can be successfully replaced with acrylic powder with large granules, powder for scrapbooking or embossing.
Flaws:
- the pleasure is not cheap (salon procedure)
- vulnerability, instability (home manicure)
- not suitable for daily wear
- difficult to remove tea and coffee stains
Velvet manicure looks very solemn and will not always be appropriate in everyday life. The fibers are quite fragile and can wear off unevenly, leaving unsightly bald spots. Not everyone likes “hairy” nails; reality does not always correspond to expectations. This mainly concerns home manicure in the hands of an amateur. If we are talking about a master with a capital letter in a trusted salon, then believe me, the velvet nail coating cannot be compared with anything. It is truly original, luxurious and sophisticated.
Velvet, also called cashmere or velor, the coating looks most advantageous in tandem with another coating.
The combination of several types of design looks extremely beautiful and elegant, but at the same time natural. This is because sand creates a natural velvet-velor impression, and in combination with rhinestones and decorative painting it looks noble and very aesthetically pleasing.
Step-by-step instructions for creating a design with sand
There are two main options for nail designs using sand. The first is full coverage of the nails. The powder is applied with wet gel polish to the entire surface of the nail. This design is beautiful, but not very comfortable in winter, since the surface is rough and fits tightly to the gloves. The second design option is partial smoothing only where the drawing is applied. In this master class we will do the second option, because it is more interesting.
Step 1 - Take a fashionable beige shade as a basis and do a nude manicure.
Advice for Newbies
If the surface of the nail is not very smooth, it is best to smooth it with a glossy finish before applying a matte topcoat. To do this, apply a thin layer of glossy top coat to the nail, additionally apply a small drop of top coat in the center, carefully spread it over the surface with a brush and twirl the nail for 30-60 seconds. The time depends on the thickness of the material used. Then you should quickly turn your hand and dry it in a lamp. After leveling the surface of all nails, apply a matte top coat.
Step 2: Velvety sand powder can be applied to shellac, gel polish, gel. When creating drawings, it is more convenient to work with thick gel polish. For our design we will be using fine glitter gold gel paint and a medium sized comb.
When creating a design, don't be afraid to rotate your nail into a position that suits you. This will not cause any particular inconvenience to the customer, but it will be more convenient to draw. As a result, the design will be more beautiful.
Step 3 - The design must be applied “immediately”, since the powder is applied to a wet layer. Intermediate drying is inappropriate here.
Step 4: First draw the outline of the first element.
Step 5: Then fill the product with gel polish.
It should be noted that the gel polish practically does not spread over the matte top. It is very comfortable to work. If you draw very slowly and the outline fluctuates a little. Nothing bad! After all, after filling with sand it will practically not be visible. However, remember that you will still have to work quickly.
Step 6 – Next, look at the step-by-step photos on how to create a sand-colored nail design. Place the calendula on top of the container with sand, take a pusher or a convenient spatula, pick up a small amount of sand and sprinkle it on the design. We tap the finger a little without touching the nail so that the excess sand falls back into the jar. We insert our hand into the lamp.
Step 7 – Once the gel polish has dried thoroughly, you can take a brush and brush off any excess velvety sand. The material should remain only in the drawing area.
Step 8 - Next, we carry out the drawing according to the same scheme: apply the next element of the drawing, sprinkle it with sand, dry it, remove excess sand with a brush.
When the drawing is ready, there is no need to cover it with anything. The sand is firmly fixed in the gel polish and will not go anywhere.
The photo also shows how beautifully the manicure shimmers with velvety sand in the rays of light. It looks really great and doesn't take long to make. Try it yourself at home and you will appreciate all the advantages of this type of construction.
Benefits of sugar manicure
Girls and women around the world increasingly prefer this type of manicure because:
- in this design, nails look stylish and attract the attention of others;
- Using this technique, you can cover all your nails, or you can only cover individual parts of them, which will make the design even more original;
- the procedure does not take long and can be easily performed at home;
- the material used in the work is quite durable: it will stick to the nails when doing household chores and frequent contact with water;
- If you don’t do a sugar manicure yourself, but go to a professional, it can last about three weeks.
Fashionable new manicures with sand
Manicure “roses from velvet sand”
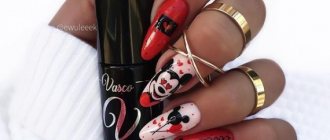
One of the most feminine and romantic design options is a sand-colored glitter manicure with images of roses. It can be made in the traditional colors characteristic of these floral motifs, which can be pink, red, burgundy, and cream. It is also possible to use any other shades, such as black, white, green, purple.
Manicure “footprints in the sand”
In the summer season, “sea and sand” manicure becomes extremely popular. It may consist of several elements, among which are:
- on the beige surface there may be an image of feet, this is considered a real trend of this season;
- marine themes may include images of shells, sea waves, the sun, and anchors. These details make up the original composition.
Marine manicure with sand
Among fashionistas, a manicure with a velvet sand shell has become extremely popular. It is often performed on a blue or light blue background, and can be supplemented by drawing seagulls, the sun, and sea waves. Seashells can be flat or voluminous; they serve as the main accent of an elegant nail design and a kind of enthusiasm. They are applied to one or more fingers.
Manicure "Sweater"
Nail art with sweaters is very popular, especially in winter.
Sand harmonizes perfectly with rich colors and goes well with almost any design and a wide variety of decorative elements.
Manicure with black sand
A sandy manicure done in black tones can make your look extremely sophisticated. You can arrange it in the following ways:
- the velvet pattern can be applied to a glossy or matte finish;
- Absolutely all nail plates can have a similar effect, and they can be covered evenly;
- Decoration with rhinestones looks organic; they can be transparent or colored.
Step-by-step photo of creating a design from black sand.
Peculiarities
It has become fashionable to decorate nails with soft sand and a matte top. The result is a gorgeous plush surface. Sand manicure looks luxurious and original. It is created using a special powder called “velvet sand”.
There are several types of flock. It can give your nails the look of velor, corduroy, cashmere, satin or suede. After final processing, a matte finish may be obtained. The color of the sand depends on the base gel, when mixed with which the powder acquires its color. Interaction with varnish does not affect the texture of sand.
Sand manicure is great for natural and artificial nails. Any type of varnish is suitable. A plush manicure looks voluminous even without applying a top coat. Any design created using gel can be decorated with velvet or acrylic powder.
Nuances of color combinations
A harmonious combination of the color of the gel polish and the sand itself is very important to create a beautiful and elegant manicure with a velvet effect. When choosing shades for your future design, consider the following:
When working with colored velvety sand, pay close attention to the harmonious combination of shades, otherwise the manicure may end up looking like spots. The safest option is to choose gel polish and sand of the same or almost the same color - in this case, the manicure will definitely look neat and elegant.
White sand is universal because it always takes on the color of the coating. However, it looks most impressive in soft pastel colors, creating a snowy effect. You can do any manicure in light colors and boldly decorate it with white velvet, in whole or in part - it definitely won’t make things worse.
Combination with red
There are also many design options with red gel polish:
- Cover all nails with the base color, but on 1-2 nails use a lighter shade for a gradient. And apply transparent velvet sand on them.
- Use purple or scarlet gel polish and the same decor. Finally, on 1 nail, place a wide strip in the center, from the base to the free edge. And on the adjacent plate, draw two triangles - a thin and a thick line.
- Cover all nails except the middle or ring finger with red. Use white or pink gel polish for this. And on the same nail, draw tongues of fire or other patterns with red sand.
Spectacular gold
Gold decor can be used in the following ways:
- Choose yellow as the main color, but cover 2 nails with white gel polish or milk base. On one of the last ones, place diamonds with velvety sand. On the second, draw a square and print a gold transfer sheet next to it so that the color of the gel polish is not hidden under the decor.
- Cover all nails with beige polish. On the ring and little fingers, draw wide, curvy lines using golden “sugar.” Cover the rest of these nails with a matte topcoat. Cover all other fingers with a glossy coating.
White manicure with sand
Nail art done in white is invariably associated with freshness, tenderness and romance. It is often used to create a bridal look, but it will also be a harmonious addition to everyday outfits. Among the design techniques used in its creation are the following:
- it can be a single-color snow-white design that is evenly applied to all nails;
- A manicure with monograms and curls with velvety sand looks incredibly elegant;
- You can use a combination with a French or lunar nail art.
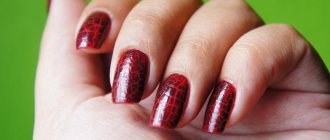
Black on red
The subtle contrast of black and red velvet sand with glitter will make it even more elegant.
Matte manicure with sand
One of the most elegant options is a manicure with matte velvety sand. Among the common variations of its design are the following:
- on the nail plates you can alternate between a matte finish and a velvety effect;
- As for the color scheme, it can be black, pastel, red manicure with sand;
- nails can be coated with matte varnish, and a variety of designs can be applied to it. These can be openwork curls, stripes, images of geometric shapes.
Sand manicure for different lengths of nails
Manicure for long nails with sand
On elongated nails you will get an unrivaled manicure with granulated sugar. It has the following features:
- When creating, stylists will be able to fully express their imagination and apply a variety of designs to the surface of the nail. It can be a marine theme, imitation lace, all kinds of geometric shapes;
- sand manicure can be generously decorated with rhinestones, which are applied in small quantities or completely cover any of the nails;
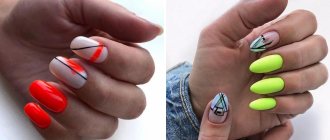
- Almost any design will look organic on long nails. It can be ombre, French, lunar nail art. Moreover, when creating them, you can use all kinds of shades, both muted and subdued, and extremely bright and saturated.
Manicure for short nails with sand
Such an elegant and original type of design as a manicure with velvety sand fits perfectly on shortened nails. Among the features of its design are the following:
- at this length almost any shade will look harmonious;
- It is advisable to give preference to solid colors. The use of prints is also allowed, but it is better if they are discreet, made in a minimalist style;
- It is better to refrain from abundant decoration with rhinestones so that the image does not turn out to be overloaded; if you use a combination of different tones, then their combination will be very organic, made in the form of a smooth transition from one shade to another. This can be done using ombre, which can be horizontal, vertical or diagonal.
Advantages
The use of acrylic powder has a number of advantages compared to other methods of nail design:
- Easy to do. This type of manicure is easy to do at home. Video lessons and creative flights of fancy will help you create an original design.
- No age restrictions. It will be important for girls to decorate all their nails with patterns, and for ladies in the older age category, a monochromatic design will suit them.
- Sand applied to nails, according to all the rules, will not come off and will maintain the integrity of the design for a long time.
- Relevant both in an official setting and at a friendly meeting.
- Availability is a significant advantage of this method. Everything you need can be purchased at a low price at any store specializing in design supplies.
Decorating with velvet sand is another way to create an original manicure that you can surprise others and show off to your friends. The execution process is simple, and the result is truly magnificent. For greater uniqueness, you can use the “liquid stones” technique in combination with velvet powder.
Sand manicure ideas
Stylists use many ideas to create a spectacular sand manicure. Among the most common and in demand are the following:
- Nail art with a matte finish looks extremely elegant. The velvet motif can be applied over or onto individual fingers;
- You can add depth and saturation to the image using a black tone;
- freshness, tenderness and romance will be given by a white tint;
- to complement evening dresses, a shiny effect will be indispensable, this can be a “golden sand” manicure or a metallic shine;
- The addition of rhinestones looks extremely organic;
- the marine theme becomes especially relevant with the beginning of the summer season;
- The image of roses will add additional femininity;
- the velvet effect can be achieved using one shade or several multi-colored tones;
- This version of nail art will fit very organically into the wedding look.
French
French with sand can be done in several ways:
- Complements classic French design. Cover 1 nail completely with transparent decor on one side, and shade the cuticle on the other.
- Choose a nude shade of gel polish as your main one. The “smile” should be made with colored velvety sand. You can take 2 different shades and apply them both to the free edge of each nail: one from the left roller, the other from the right, so that they meet in the center.
- Make a traditional French design. But on 1 nail of each hand, make a manicure completely speckled. It can be white or pink, that is, it can be combined with primary colors. Or they acquire a bright shade that stands out against the background of the classic French tones.
painting
When performing a velvet manicure on gel polish, you can decorate it with unique patterns using gel paints. It can be a beautiful design in feminine shades with velvet roses and small rhinestones, like drops of dew in delicate buds. Or create a warm and cozy knitted manicure by repeating the knitting pattern of your favorite sweater.
Velvety sand holds up better on a matte surface and is also easier to brush on and paint well. Sand sticks to gel polish more securely than to varnish, because it tends to spread.
How much does it cost to create a velvet manicure in a salon?
You can give a comprehensive answer to the question of how much it costs to create a velvet manicure in a salon only by applying for the service to the salon itself.
The cost of this type of manicure (as well as others) is influenced by several factors:
- salon reputation;
- regionality (in large cities the service is more expensive);
- professionalism of the master;
- cost of consumables;
- complexity of the pattern;
- additional services (individually).
Velvet multi-colored sand can be purchased at any specialized store, the price varies between 150 rubles for one jar of sand weighing 5 g. Despite the low price of the consumables, in the salon this procedure will cost you between 800-1000 rubles. Again, this is the average price. It is better to check the cost of a velvet manicure in the salon where you regularly go, or directly from your master.
Top 5 velvet ideas:
- motifs and monograms;
- flower buds;
- knitted manicure;
- slope;
- trituration.
Velvety sand on nails looks very neat and unusual; in the photo you can see several options for this design.
Manicure with colored sand
To create a bright and catchy look, a sand-colored summer manicure made in a variety of shades is planned. The following design options are possible:
- colors can alternate with each other on different fingers;
- alternation of shades can be done using stripes, which can be drawn vertically, horizontally, diagonally, can run parallel to each other or intersect;
- the use of all kinds of motifs is allowed, they can be floral, plant, geometric, abstract;
- Openwork patterns imitating lace look feminine.
Manicure with shiny sand
Lovers of bright and memorable looks can use a glossy sand manicure to create them. It has the following distinctive features:
- One of the most luxurious design options is the use of golden or silver shades. They will be a harmonious addition to any evening outfit;
- you can use a variety of color combinations, for example, it could be a pink manicure with sand, blue, yellow and other tones;
- An organic solution would be a combination with a glossy surface or a mirror finish.
With black powder
The following designs look impressive with black powder:
- Any light shade of gel polish was chosen as the main one. But 1 nail is completely covered with black “sugar”. And on the neighboring one, with the same decor, they draw an ornament in the form of branches with leaves.
- The nails of the thumb, index and little fingers are covered with black gel polish and a shiny top coat. For the rest, use a camouflage base. And black “sugar” is applied on top, but there remains a negative space in the form of a hole. The border between the shades is decorated with small transparent rhinestones.
- For the thumb, index and little finger nails, choose a dark blue nail polish with a sandy effect, that is, a slight shimmer, and a glossy finish. In the center, the plate is almost completely covered with black “sugar”, but the hole is highlighted with rhinestones of the main shade. The ring nail is made completely velvety.
Design with sand ombre on gel polish
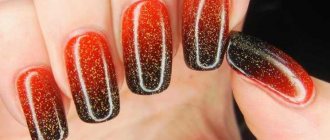
A very fashionable nail design with sand on gel polish - ombre, also known as gradient:
- With red and burgundy flower beds. They change places on each finger. For example, on the index finger from the base of the nail they cover it with burgundy, closer to the edge - with red, on average everything is done the other way around, and so on next to it - transparent sand, on the third - a glossy coating, on the fourth - a row of red rhinestones... The idea can be used with any related shade gel polish.
- Make shadows with light tones. Using clear velvet sand, draw 2 curls - from the base of the nail and the end so that they meet in the center. The model is made on 1-2 plates.
- Create gradient stripes on your nails. First, they are completely painted in any base color. Then create wide gradient stripes along the manicure plates on short, sanded nails. Or on each one to a greater length, using splashes of two colors in both cases. Geometric shapes can be made in the same way.
Drawing ideas
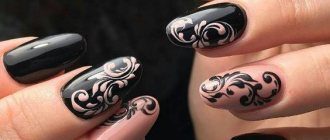
When decor first appeared, sand patterns in the form of black lace were in fashion. This is an ornament of intertwined, thin and thickened lines. It has not lost its relevance even now, but on a nude background the lace is also painted in white, just like fashionable images:
- fruits or their slices, in which some details are highlighted with “sugar”, or are used for the entire design;
- butterflies whose multi-colored wings are decorated with velvety sand of different shades and rhinestones;
- furry animals (cats, foxes, bears, dogs, goats, tigers);
- flowers that are depicted without stems, but only petals and the core;
- sockets made with sections not connected to each other;
- mittens, snowmen, snowflakes, a Christmas tree and toys on it, that is, New Year's paraphernalia.
Images don't have to be small or just thin lines. This way you can lose the consistency of “sugar”.
Sugar Gradient
Velvety sand looks great paired with shade. Of course, such an effect can only be created with the help of universal white sand, which can take on any color.
Delicate wedding manicure
A gentle manicure for the bride is:
- A combination of a classic jacket and the moon. But a transparent bandage is applied to 1-2 nails, and flowers are made on them with plasticine gel.
- Multi-colored design, when each nail is painted in its own tone, but only light ones are used - soft pink, peach, beige, milky, blue, lemon, lilac. On 2-3 fingers they are completely decorated with transparent “sugar”, and on the rest you need to rub pearls.
- Use soft lilac gel polish as a base. On the right hand, a branched ornament with white “sugar” is drawn on the middle and ring fingers. You can choose milky as the main color. Draw lace on 2 nails with lilac, pink or blue velvet sand. 2-3 transparent rhinestones are used on decorated plates.
Manicure with sand and rhinestones
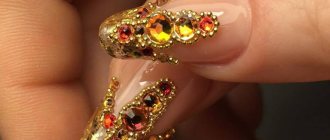
A festive manicure with specks on the nails can be decorated with rhinestones. But you shouldn’t cover them in large quantities—it’s enough to highlight the hole with arched or triangular pebbles. This option will be very harmonious.
Regular Full Coverage
The simplest but most elegant option. Of course, it’s not at all necessary to make every nail sandy.
It is also worth noting that this coating is not only beautiful, but also practical - it strengthens the nail plate, so breaking such a nail will not be so easy. This velvet design brings out the beauty of any color and the soft pastel colors make it even more subtle.
star dust
Velvet sand manicure can be done using acrylic powder, which is used for nail extensions. It has a slightly finer texture than sand and creates a slightly different textured surface on the nails. With it the effect is more velvety. He also adheres to the finest lines and strokes.
To achieve a sparkling effect, it is recommended to mix the powder with any small glitters of different densities. With colored powder the design may get a little dirty, but with transparent powder it won't.
When using translucent gels, you need to apply gel polish as a base to match the glitter or light. If the design contains dark shades, the base color can be anything.
Manicure with golden sand
To add luxury, craftsmen use volumetric gilding. To prevent glitter from being too noticeable to others, sand for nails is combined with calm shades. But for a festive manicure, you can completely fill your nails with gold. This simple solution will suit any evening outfit.
New Year
White velvet sand resembles snow, so it is not surprising that it is often used to create New Year's nail designs.
Advantages and disadvantages
The main advantage of this nail art is its beauty and unusualness. Sandy nail polish looks very stylish and gives the look a light festive touch.
In addition, sand manicure will delight you:
Ease of execution. Even beginners can create such a picturesque design.- Versatility. A manicure with a sugar effect is suitable for girls of all ages and will look appropriate with any outfit.
- Availability. You can purchase sand or ready-made varnish both online and in specialized stores. A box of powder with a volume of 10 g will cost you about 50-100 rubles.
The disadvantages of sugar nail art include:
- Fragility. In truth, the issue is controversial - with good quality materials and proper preparation of the nail plate, the coating is unlikely to begin to chip almost immediately after application. Of course, you shouldn’t discount the individual characteristics of your nails, as well as the way you are used to handling your manicure: if you expose your hands to excessive friction and frequent exposure to moisture, no polish will last more than 2-3 days. Of course, if you do a sand design on gel polish, it will last much longer - up to 2-3 weeks.
- Difficult to remove. It's no secret that polishes with a rough texture are more difficult to remove from nails than regular ones. To remove any remaining sand polish, soak a cotton pad in remover and press firmly onto the nail plate for a few minutes. The coating will soften and you can easily remove it. Under no circumstances should you try to remove polish residue with highly abrasive metal files - this can cause serious damage to your nails.
