The main stages of processing manicure tools
Processing a nail technician's tool includes 5 stages, none of which can be excluded or interchanged with others:
- Disinfection
- Pre-sterilization cleaning (PSC)
- Drying
- Sterilization
- Storage
Sometimes this scheme is simplified and only 3 stages are called: disinfection, PSO and sterilization, since these are really the main stages, it is at them that most mistakes are made, and drying and storage often do not raise questions from the masters.
So, let's look at each stage in detail.
Disinfection of manicure tools
Why is disinfection needed?
At this stage, most viruses, bacteria and fungi in the “active” state are destroyed. Absolutely all tools used in work are disinfected , even disposable files for files and pedicure caps before disposal, as well as individual client kits.
How is disinfection done in manicure?
Nail technicians most often use special disinfectant solutions prepared from concentrate and water according to the instructions for a specific disinfectant.
For example, for Optimax Prof concentrate there are several dilution options. For disinfection in combination with PSO (in an ultrasonic cleaner), a choice of 1, 2 and 3 percent solutions is offered with a holding time of 60, 30 and 15 minutes, respectively. It would seem that it is best to choose a 3% solution, because it allows you to disinfect faster. But not everything is so simple - the higher the concentration, the more aggressive the solution is towards the instrument. Therefore, to avoid damage, it is important not to overexpose it in the solution, to note the exact time, or even set an alarm clock for yourself. If the technician is not sure that he will be able to remove and wash the instrument from the solution in time, then it is better to choose a lower concentration.
How to choose a concentrate for disinfection
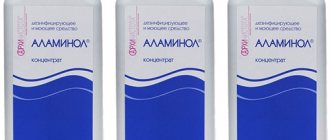
The composition and pH of the disinfectant plays a role. Some manufacturers add non-foaming surfactants to the concentrate, which allows disinfection to be combined with PSO. Anti-corrosion additives are also common.
Optimax Prof, for example, like many others, contains anti-corrosion additives and has an alkaline pH from 9 to 12. But Alaminol with an acidic pH of 2.6 - 5, in contrast to Optimax, kills the tool (but not the fact that microbes) in one usage. Therefore, if the manicure instrument is quite expensive, then the disinfectant should be selected at the appropriate level.
How long can the disinfectant solution be stored?
The prepared solution can be stored for the time specified in the instructions only unused. You can use it only until it becomes cloudy/changes color/precipitate appears - again, see the specific instructions for the purchased concentrate. It is convenient to prepare a large container of solution and pour it into a smaller container for disinfection as needed. We work with the solution wearing gloves.
Disinfection algorithm
- all the tools, cutters and scissors in an open form, in a container, there should be at least 1 cm of solution on top of the objects; We place the cutters in a separate small container in the Us-washer so that they are not damaged;
- close the container with a lid and note the time/set an alarm;
- the exposure time depends on the concentration (see instructions);
- if during the process it becomes necessary to add another item to the solution, then we measure the holding time again;
- After the exposure time has expired, we proceed to the next stage - PSO.
disinfection combined with PSO in a washing machine
How often should the treatment be performed?
In nail salons, tools are processed after each client using special devices. Washing with water is not considered disinfection. When taking care of your nails yourself at home, wipe scissors and abrasive files with alcohol.
Every month you need to disinfect your manicure set in distilled boiled water. If the tools are used by more than one person, then boiling must be done before and after use. With the help of clean tools, performing a manicure will not only be safe, but also enjoyable.
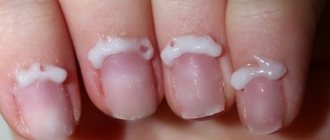
Pre-sterilization cleaning of manicure instruments (PSC)
First stage of PSO
1. We wash metal and plastic products with a brush in a disinfectant solution or use an ultrasonic cleaner and a disinfectant suitable for the disinfection regime combined with PSO;
For the first part of the PSO, you can use a nylon brush (not metal, as it severely damages the surfaces) or an ultrasonic cleaner. Here it is important to “loose” biological residues while they are still in the disinfectant solution.
Second stage of PSO
2. We wash everything with a brush under running water from disinfectant and protein residues; The washing time can be found in the instructions for the specific disinfectant.
The second stage requires running water, so an ultrasonic cleaner cannot be used here. The disinfectant solution takes quite a long time to wash off the instrument and many craftsmen, saving time, do not wash it off, as a result of which the aggressive substance remains on the surface and during subsequent sterilization causes very rapid corrosion. Therefore, it is recommended to add a little regular soap to the brush - it significantly speeds up washing.
rinsing the cutter clippers under running water with a brush
Drying manicure tools
After making sure that the instrument is completely washed, take it out and wipe it dry with a clean cloth so that there are no water stains left. Then we lay it open on another clean napkin, cover it with a clean napkin on top and dry it completely.
Drying is especially important for cutters, since tiny droplets of water remain in their abrasive. Drying can be carried out at room temperature for about 12 hours or in a dry heater using a special drying mode (if available) . After the first sterilization of wet metal products, you can see how much they oxidize - rusty spots and yellow stains appear. Therefore, you should not neglect drying; thanks to it, any metal tool will last a long time and will not require cleaning.
Processing of files and attachments
How to disinfect nail file-shaped manicure tools at home? It is necessary to take into account the material from which they are made. It may be necessary to wipe with a cotton pad soaked in a special solution. The method is suitable for glass and metal files. They are also subjected to heat in the oven.
Paper and wood-based files are cleaned with a brush and antiseptic is sprayed on both sides. The cutters also need to be sterilized depending on the material. Rubber and silicone are subject to processing.
Sterilization of manicure instruments
Aimed at destroying the hepatitis C virus, fungal spores and bacteria that are inactive but did not die during disinfection.
Methods for sterilizing manicure instruments: what for what
Below is a table that shows the most popular methods of sterilizing manicure instruments and, directly depending on the chosen method, the conditions for its storage.
Methods for sterilizing manicure instruments
The most affordable way is to use a dry-heat oven. The only caveat: corundum cutters, due to their porosity, cannot be effectively sterilized in dry heat. Naturally, plastic and wood are not subject to sterilization at 180° - that is, ordinary reusable files, brushes and brushes. Therefore, it is recommended to choose disposable ones or choose chemical sterilization for them.
One of the students in a manicure course for beginners put a plastic brush in a craft bag with cutters. It was fun, but I had to throw away the completely new cutter along with the brush.
Sterilization algorithm
- We place the instruments in a craft bag specially designed for sterilization and sign the date. Nippers and scissors, of course, in the open form. You can also put a class 4 sterilization indicator inside the bag. It is advisable that each item have its own separate package. It is allowed to assemble sets, but in such a way that the instruments inside the package do not rest against each other and can be heated evenly. Close the bag along the fold line and seal it.
- Depending on the volume of the sterilization chamber of the dry heater, we place craft bags inside so that each of them is blown with air from all sides. If the dry heat is small, you may have to add 1 packet at a time. Close the camera door.
- We set the sterilization mode to 180°C, 60 minutes. It is under this regime that the hepatitis C virus, fungal spores and some bacteria die. The GP-10 dry heater, for example, has this mode by default. Let's start the process.
- The dry heat will take some time to heat up. Only from the moment of complete heating to 180°C does the 60-minute countdown begin.
- After sterilization is completed, the dry heat will take some time to cool down. So, GP-10, for example, lowers the temperature to 75°C and only then emits an end-of-work signal. This is also an important point for the master, allowing him to preserve the tool for as long as possible, because with a sharp change in temperature, its sharp edge quickly becomes dull.
- It is convenient to remove packages with hot instruments using tweezers onto a tray provided for this purpose to avoid burns.
tool placement in GP-10
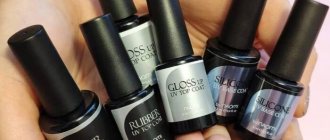
Types of disinfectants
When choosing a disinfectant, you need to understand what options are available. It can be sold as:
- concentrate;
- powder for further mixing with water;
- ready solution.
The third option is less economical. The product can also combine the capabilities of processing instruments at different stages of the sterilization process, namely:
- Suitable for both disinfection and chemical sterilization : in different preparation concentrations and with different holding times;
Chemical sterilization of manicure instruments: rules according to SanPiN - Combine the possibility of disinfection with pre-sterilization cleaning (the composition contains detergents).
This is important when working with ultrasonic washers. Disinfection and pre-sterilization cleaning of manicure instruments: how to choose a disinfectant and prepare the solution correctly
Storing manicure tools
- In a craft bag, the tool is stored outdoors for 3 days, in a UV box for 30 days. That is, all this time the contents of the package are considered sterile, but after this period they are no longer sterile. Now there are white craft bags that promise to maintain sterility for one year after sterilization in dry heat and two years after autoclaving.
- Without a craft bag, the tool is stored only in a UV box and only for one working day before use. The next day or in the open air it loses its sterility. Therefore, if you sterilize an instrument without craft bags, you must understand that after the previous client it was sterilized, but its sterility is not maintained.
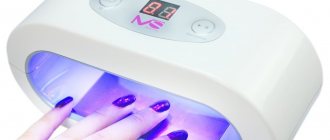
The UV box must be constantly on
Attention! Ultraviolet cabinets, Germix-type boxes and simply UV lamps built into the table are not sterilizers! Contrary to what is written on the packaging or lid. It is simply a tool storage container that maintains an environment in which microorganisms cannot grow. Real UV sterilizers exist and are actively used in medicine, but they look completely different and the power of their lamps is much higher.
Glasperlene sterilizers are only suitable for emergency sterilization of work surfaces. BUT! Firstly, the instrument is heated by contact from the surface of the glass beads, as a result of which the surface of the sharpened edge of the instrument, being very thin, is deformed and dulled. Secondly, a sharp change in temperature when taken out into the air contributes to dulling. Therefore, often after the first sterilization in Glasperlen, cutters and pushers require sharpening or even replacement if they were made of low-quality mild steel.
Please note that correct step-by-step processing of manicure tools is necessary in order to work calmly with any client. The master does not need to know whether or not the client has any infectious disease, because with proper treatment, both the master and his other clients are protected from the transmission of infection.
Ball sterilizer
It is also called quartz. Presented in the form of a compact tabletop device designed for disinfecting instruments using high temperature.
A special feature of the device is that it disinfects not the entire instrument, but the area that comes into contact with the skin during the procedure. The operation of the device is based on heating quartz beads located in the sterilizer tank.
How to sterilize manicure instruments at home? Operating the device is simple:
- Before using the equipment for the first time, you need to open the lid and fill the tank with quartz balls, which are included in the kit.
- You need to close the lid and turn on the device with the button on the case.
- The device heats up to the required temperature - this is done for 10-12 minutes.
- After the indicator goes out, you need to open the lid and place the accessories into the device.
- After 15-20 seconds, you need to take them out and you can perform a manicure.
You need to use a sterilizer before using manicure devices. It quickly eliminates pathogenic microorganisms. But manicure products quickly become deformed. Such equipment can be used for devices made of heat-resistant medical alloy.
This equipment is usually used in salons, but it can also be purchased for home use. It is necessary to choose devices from trusted brands, and then the processing will be of high quality.