Today we will look at what layers of coating are in manicure and how to apply them correctly. Coating is an important concept in manicure, meaning any material that we apply to the nails. The finished manicure consists of several layers of different coatings. We'll talk about this today.
This material is a continuation of the first part, in which we talked about leveling the nail plate, preparing for applying the base coat, and looked at base coats.
Coverage areas of nail plates
Modern coated manicure is the application of several layers of materials with different functions, aimed at preserving, strengthening, and decorating the nails.
There are four coating zones on the surface of the nail and in each of them there are certain rules for positioning the brush, pressure on it and stroke speed:
The central area under the cuticle or color line . There are three ways to apply the material to the color line so as not to touch the cuticle and get streaks:
- Thin brush. Place a small amount of material on the tip of the brush and draw a line along the cuticle.
- Nudge. We place the brush almost end-to-end to the cuticle line, flatten the brush at an angle of 25 degrees and push it in 0.5 mm increments, bringing the material to the roller. The main mistake in this method of painting is to take a large amount of material on the brush and push it from afar under the cuticle with a sharp pushing movement.
- Fan technique. We flatten the brush and place it in the sinus, move the corner of the fan of the brush along the cuticle line and go to the second sinus. Using the same pressure, draw a “fan” with the brush.
The central plane is the easiest area to paint. On the central plane, we need to hold the brush at an angle of 25 degrees while pressing the dome of the brush to flatten the brush on the surface of the nail and get a good contact area. We move along the central plane only with long movements, without interruption. When moving, the brush falls almost into the plane with the nail surface, and we pull it towards ourselves. The angle is only 3-5 degrees. You cannot lift the brush 45 degrees on the central plane and drag it towards you, as this will remove all the color behind you. Under no circumstances should you press the varnish with a brush;
Lateral planes or slopes. To draw the side lines beautifully, you need to step back from the end line of the nail, that is, we do not place the brush end-to-end to the side, but step back 1 mm. We do this so that when pressed the brush flattens out and does not touch the periungual ridge, but rather “move up” to it. We paint with the same pressure, with one movement straight down, it is not recommended to make strokes;
Sine turns . We place the brush diagonally at a distance of 1 mm from the turn, flatten it and paint the sinus around the circumference.
If you are not very confident with a brush, you can first carefully paint the sinuses separately, then cover the remaining areas.
Coating layers
To obtain a beautiful and high-quality coating, it is necessary to follow the correct sequence and technique of applying materials. There are several important points to pay attention to:
Coating layers depend on:
- From the original nail architecture. If the nail plate is flat or has flaws, then the leveling layers will be denser to raise the architecture, making nails with a curve, that is, a beautiful arch. And vice versa, if the nail is without flaws, with the correct bend, then it will be enough to apply one thin layer of the base material.
- Depending on the consistency and density of the materials used. More fluid varnishes with a medium consistency produce thinner, more elegant layers. Thicker materials adhere more tightly.
- From designrequiring fixation. The more different designs are combined on the nails, which need to be covered and secured with a top coat, the thicker the nails will be, which means, initially, the base needs to be made elegant.
Sealing the end of the free edge of the nail plate is done in the following cases:
- In various reinforcing systems, if required by the application technique prescribed in the instructions for use;
- On thin nails, if you want to protect and strengthen the free edge of the plate;
- If desired, especially if it turns out neatly. But it is best to make beautiful and correct architecture and refuse to seal it. This will make your nails look neater and more aesthetically attractive.
Coverage depth . To prevent the layers of decorative manicure applied to it from creating an unsightly “step” when a natural nail grows, you need to consider the following:
- If the sinuses are narrow and low, then the base and color are combined with the roller.
- If the sinuses are open and deep, then the base is applied by pushing it under the roller by 0.5-1 mm, and the color by 0.5 mm. We lay out the top end-to-end with the roller.
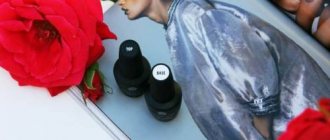
There are three main products that we apply in strict sequence - base, color and top.
Base coat
A single-color coating that is used as a base for decorative varnish. The base strengthens the nail plate, evens it out, protects against penetration of the pigment of colored varnish into the nail, and also ensures good interaction of the natural nail with the layers of coating and increases the wear time of decorative nail art.
Base coating - base, comes in the following types:
- Rubber . The most common composition. Rubber gives a thick, dense structure and strengthens perfectly.
- Silicone . It is easy to apply to the nail and also allows you to remove the coating in the most gentle way.
- Acrylic . Contains acrylic powder, which gives strength to nails during extensions.
- Gel or camouflage . Combines base, top and colored gel polish at the same time. It lasts much less on nails, so it is mainly used as a base for light gel polishes for easier painting.
- Vitaminized . It contains vitamins E and D. Good for damaged nails, especially after acrylic extensions.
In the article on preparing and leveling nails, we looked in detail at the technique of applying and leveling the nail plate using a base coat, so we move on to the next material.
Necessary materials for applying gel polish
Before painting your nails with gel polish, it is important to take care of the necessary materials and tools.
- pusher;
- buff;
- napkins (lint-free);
- UV or LED lamp;
- dehydrator (degreaser);
- primer;
- base;
- top;
- color coating;
- cuticle oil.
You will also need nippers/scissors to cut the cuticle, a nail file to shape the free edge, and a chamomile infusion to steam your hands in a bath.
This is interesting: How to Get Your Loved One Back After a Breakup
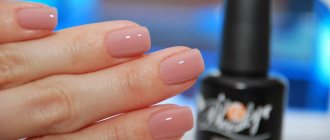
Color coating
Decorative varnish is the most visible coating in manicure, represented by a wide selection of colors and textures. With the help of pigmented gel polishes, you can create absolutely any effect and design on your nails without much effort.
Let's consider the technique of applying the first layer of decorative varnish:
- We check the base coat for deep unevenness, buns, hairs and bubbles. If there are any imperfections, then after applying pigmented varnish they will be even more noticeable.
- If desired, you can remove the sticky layer from the base coat.
- Place the colored material on the brush and remove the excess from one side.
- Place the brush on the coverage area at the correct angle. We reviewed these techniques at the beginning of the article.
- When moving, adjust the pressure on the brush and monitor the wave of the material so that longitudinal clumps and bald spots do not form.
- We smooth the material evenly and let it level out.
- Dry it in a lamp.
For deep color, it is better to apply several thin layers, drying each of them in a lamp. If you initially chose a varnish with a dense, rich pigment for your manicure, then you can use the following technique:
- Apply a thin, even layer of color as close to the roller as possible, but do not dry it in a lamp.
- We put an additional amount of color on the brush and add it to the wet first layer, that is, we put a drop.
- Distribute over the surface as for leveling.
- We turn the finger at an angle of 45 degrees to the table surface for 10 seconds so that the varnish is concentrated at the apex.
- Then we check for the presence of buns.
- Dry it in a lamp.
Thanks to this method, the time for applying pigmented material is reduced and the architecture of the nail plate is improved.
If you have chosen pastel-colored material for your decorative manicure, then you should take into account some important points:
- Before applying the pastel, make sure that the alignment is done well;
- Under the pastel you need a base of white or camouflage base. If you don’t want to make a backing, then you need to remove the top sticky layer;
- Apply pastel with a plastic brush with an even cut;
- Maintain the correct angle of placing the brush on the surface of the nail;
- Avoid pushing from afar;
- There should be a medium amount of material on the brush;
- We smooth out the pastel exclusively with long vertical strokes and at a fast pace. You can't work with pastels slowly;
- Also, do not press the brush too hard into the pigment.
Pastels from Lunail have proven themselves to be very effective in their work, they are perfectly pigmented with beautiful shades and are easy to apply.
Correct application of gel polish - instructions
Below is information for those who do not know how to use gel polish, taking into account all the subtleties. Creating a beautiful manicure at home comes down to the following:
1. Start by steaming your fingers and nails in particular, immersing the phalanges in a heated chamomile infusion. After a quarter of an hour, stop the procedure, cut the cuticle with tongs, and file your nails to shape.
2. Prepare everything to make gel polish, since it must be applied correctly quickly and without distractions. Start by sanding the surface using a buff. This move should not be skipped in order to ensure high-quality adhesion of the coating to the natural plate.
3. Wet a cloth in the dehydrator, then go over each nail. Spread the primer in a thin layer. You need to apply the base within 15 minutes (if you don’t do it within this period, apply a second layer of primer). Dry your nails for 30-60 seconds.
4. Start distributing the color coating by making 1 high-quality thin (!) layer. Don't touch the cuticle. At the slightest mistake, collect the excess with an orange stick. Dry the color for 60-120 seconds.
5. Repeat the layer, making it a little denser. Carry out polymerization using a lamp, holding your fingers for 1-2 minutes. Complete the manicure by applying the finish and dry for 45-60 seconds.
6. Now, using a cloth soaked in degreaser, go over each plate to remove any stickiness. You will see that your nails shine and become richer.
7. Cover the cuticles with oil and voila, the gel polish is ready! Once you understand how to correctly apply primer, base, color, finish, you will no longer ask yourself such questions.
Top coating
The last thing to apply to a decorative manicure is a top coat. It is also called finishing because it is applied to the nails last. It protects color from mechanical stress, makes nail art durable and gives an additional effect. It can be dazzling shine, matte, quick drying or glow in the dark. The top should not be too liquid in consistency, otherwise it will quickly drain and you won’t be able to apply it carefully on your nails. Therefore, pay special attention to this.
If you are confident in the correctness of the architecture, you don’t want to change anything, everything suits you, then you can apply the top coat thinly to the entire surface of the nail plate and hold it in the lamp until it dries completely. But you can also use the additional leveling technique, which will beautifully complete the architectural process and give the color coating depth and shine:
- Apply the first thin layer to the entire colored nail surface;
- Near the cuticle we paint with a pushing movement of half a millimeter;
- Do not dry in a lamp;
- Immediately place a drop in the hole area and flatten it left and right;
- We make a pushing movement forward, and then pull the material towards ourselves;
- We level it with light flat movements and turn it over at an angle of 45 degrees, hold it like this for 10 seconds;
- We send it to a LED lamp for complete polymerization for 30-60 seconds.
- After drying, wipe the nails with a lint-free cloth soaked in cleanser.
What is a sticky layer and means for removing it
Shopping therapy
When going shopping, it is always advisable to think through your shopping plan in advance. Believe me, the nail world can easily drive you crazy with the range of products on offer. Therefore, you will need a list of what you need to buy to apply gel polish using the classic three-phase technique. The average prices shown in online stores are indicated.
Curing lamp
The Queen Mother of the entire parade. Modern manufacturers present four types of lamps:
- UV lamps are old-timers who are gradually being evicted by revolutionaries. They are bulky, dry for a relatively long time from 1 to 3 minutes, “live” about 3000 hours and require replacement of lamps depending on the intensity of use every 3-6 months. The price starts from 700 rubles.
- CCFL lamps have the same efficiency and drying time as ultraviolet lamps, have a compact size and a longer service life, approximately 30,000 hours. From 2500 rub.
- LED lamps are the forefront of the drying business, they are compact, fast, drying usually takes no more than 30 seconds, durable, and promise to serve faithfully for 50,000 hours. From 800 rub.
- CCFL + LED hybrid - they say it combines the best qualities from its individual owners, from 3000 rubles.
Manufacturers have adjusted and are producing varnishes that dry equally well in any lamp. The price depends on two factors. The first is the manufacturer, the second is the power. The power ratings are 3, 6, 9, 12, 24, 36, 40 W. Accordingly, the higher the power, the faster the unit dries, but this condition applies only within its group of lamps. The 9 W LED baby copes with polymerization in the same time (or even faster) than the 36 W UV.
For example, for less than 1000 rubles. you can buy JessNail LED 9 W, which came from China, and Tatnail LED 18 W from South Korea. Not only the country, but also a brand from the same country can vary greatly in price. Chinese Kodi for LED 9 W already wants 3,500 rubles. And they will all do their jobs very well.
A simpler model is suitable for home use. If you are not into extensions and plan to only do a manicure with gel polish for yourself and sometimes pamper your girlfriends, then in the price-quality category a compact 9 W LED lamp is perfect. The most enterprising ones order lamps directly from China.
Primer
He's Bond. A special primer that enhances the quality of adhesion of the coating to the natural nail. The item is optional and can be used at will and in special cases. For example, if the technique for applying gel polish is followed according to all the rules, and the coating quickly chips and peels off during wear. Price per bottle 15 ml from 180 rub. You can read more here.
This is interesting: How to make a busy board for a child with your own hands
Base and top coat (base and top) go hand in hand. The base is needed to protect the nail from the coloring pigment and improve adhesion, the top is to fix the color and create additional gloss. It is believed that they must be from the same manufacturer. There are also 2-in-1 products that perform both functions simultaneously. The price starts from 200 rubles. for 10 ml.
Colored varnish
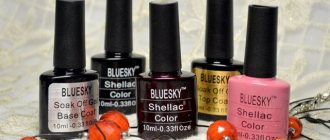
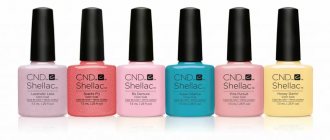
You will be blown away by the palette, colors and textures on offer. Glossy, matte, magnetic “Cat's eye”, with and without mother-of-pearl, dense and translucent, with sparkles of various shades and sizes. Price category from 200 to 1500 rubles. for 15 ml. It all depends on the manufacturer. Among those who make gel polish, there is an opinion that it is better to choose a more expensive base and top coat; they determine the further quality of wear. The colored varnish can be any. The same Chinese Bluesky offers more than 300 different shades and shows itself perfectly on nails.
Means for degreasing and removing the sticky layer (degreaser)
Here, many save money and use alcohol as a degreaser. Whether to buy or not is a personal preference, given that the price is ridiculous - from 50 rubles. for 100 ml, and not everyone can get good alcohol.
Gel polish remover (remover)
You will definitely need it to safely remove all the beauty applied. Price from 50 rub. for 100 ml. You can read about how to choose a remover and remove gel polish correctly in this article.
Important little things
Here's everything you need to apply gel polish at home.
Proven top coatings
- Klio Brilliant Top – glossy, without a sticky layer, flexible, does not distort the shade of the decorative coating, does not chip or crack after drying;
- One Nail top Cristal – rubbery, glossy, without a sticky layer, does not bubble, does not crack, quickly self-levels;
- Linto Top – glossy, with a sticky layer, with a convenient brush, easy to apply;
- AmiLac Gel Top - without a sticky layer, used for an even more solid architecture, perfectly holds decorative manicure until correction or removal;
- One Nail No Wipe Top – without a sticky layer, easy to apply, flexible, gives super shine to nails;
- Nail Club Velvet Top is a matte top; it cannot be applied in a thin layer because it will rub off quickly when it dries. Under it, either a top with a sticky layer is used, because without a sticky layer the matte top will quickly slide off, or a glossy top is applied, treated with a buffer, and only then this matte is applied.
About the 10 best top coatings and how to choose the right one:
Types of topcoats: how to choose a topcoat, review of the 10 best brands
We looked at paint areas and the features of working with them, as well as techniques for applying basic coatings when creating a manicure. The most important thing is to follow the sequence of layers, then nail art will delight you with neatness, freshness and shine for a long time.
Write in the comments what top coats you usually use and do you have any favorite pigmented varnishes, from which brands?
Comment