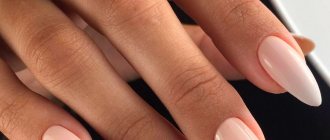
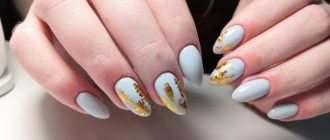
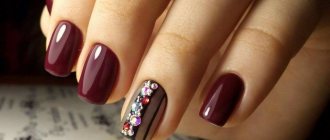
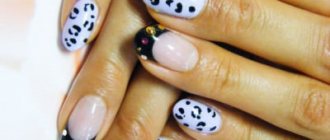
It's hard to imagine a more fresh and inspiring shade than a delicate mint color. Pistachio color is a cross between juicy turquoise and azure. This is the best shade for bright spring and summer nail designs.
Pistachio color is always relevant. It can be combined with a wide variety of shades, decorative elements and patterns. A pistachio-colored manicure looks feminine, natural, and when looking at your nails it evokes only positive emotions.
Fashionable pistachio manicure: features of stylish nail art
Pistachio manicure is the choice of bright personalities, optimists, whom the design will charge with energy and good mood. Even a plain pistachio manicure looks great. It gives the whole image innocence and spiritual purity. Delicate warm shades of pistachio color look great in the image of calm girls. Nail art with ornaments and patterns will highlight the image and add original notes to it.
Attention! Pistachio color has a significant drawback - it emphasizes any imperfections in the cuticle and nail plate.
A bright pistachio manicure with a design looks great on girls with tanned skin; other fashionistas suit more delicate tones. Nail art in pistachio color goes well with bright outfits and accessories. Choose orange, coral, purple, lemon, scarlet wardrobe items.
Manicure in pistachio color: combination with other shades
Monochrome manicure is again at the peak of popularity. Pistachio design is no exception. This is the best solution for everyday nail art that is not too noticeable and distracting. But if you dilute calm pistachio with other shades, you will get incredibly stylish nail art that will become a chic decoration for a formal look.
The following shades are considered the best complement to pistachio color:
- black - contrasting nail art always looks noble and solemn. Complete the design with rhinestones, ornaments, and geometric decor.
- pink – use this combination to create a bright youth look. Emphasize floral patterns and lace decor with red and orange.
- white and brown – these colors, completely different in color, look incredibly stylish in tandem
- lilac – in combination with pistachio, you get a very delicate and feminine look
- gold - an option for a chic formal look
Nail design in pistachio shades: new items and fashion trends
Fashion shows show us again and again that manicure is part of the look, without which the look would be incomplete. It is during fashion shows that artists and beauty bloggers draw inspiration from each season. When it comes to pistachio nail designs, the trend is interpreted in different ways.
Designer pistachio manicure is a great idea! For example, patterns in the form of leaves, hearts and stems were integrated into the models' manicure by artists who worked at Vivetta fashion shows.
The Roksanda brand relied on a contrasting manicure, in which pistachio served as the base, and black varnish was responsible for edging the fine lines.
See also:
Orange manicure: 130+ great ideas for 2022
With their appearance, the Alice + Olivia brand models confirmed that the jacket will not leave the catwalks. It just changed a little: the tips of the flesh-colored nails are now decorated not with white stripes, but with stripes of a calm pistachio color. This manicure looks fresh and creative. You can try repeating this design with Essie Crumpled Frosting.
As you can see, there are many examples of creative design. But we advise you not just to follow the example of the models from the shows, but to be inspired by trends and create your own versions of fashionable pistachio manicure.
Return to summary
Pistachio manicure with geometric design
Geometry is a popular solution for everyday and formal looks. The design looks strict and laconic, which is why it involves the use of contrasting color combinations.
Pistachio and black look perfect. The dark shade only complements the monochromatic pistachio color. Use thin lines and non-massive shaped blocks for your design.
Draw shapes only on 1-2 fingers, otherwise the design will look heavy. The best complement to a geometric design would be gel polish with glitter and sparkles. Use them to fill individual areas and draw thick lines. With a shiny addition, pistachio manicure will look brighter and more original.
Matte pistachio manicure: velvety design ideas
The matte design continues to win the hearts of millions of fashionistas. Gloss undoubtedly looks expressive and beautiful, but the velvety design has its own charm. Matte pistachio manicure is an ideal solution for a business and everyday look. Calm pistachio just needs a bright addition, so design with rhinestones, glitter, sand and geometric shapes.
Matte design goes with:
- pink elements
- white thin lines
- black geometric shapes
- mehendi patterns
The design with acrylic powder looks incredibly gentle and fascinating. Use the material to decorate 1-2 nails, cover the rest with plain gel polish. Select shades of acrylic powder depending on the main shade, a little darker or lighter.
Simple manicure
The shade being studied looks very gentle, romantic and reminds many of spring. Therefore, most beautiful ladies choose it specifically for this season. To create the manicure usually presented, you need a yellow-green light varnish and several rhinestones. The design technology is incredibly simple. However, it is more convenient to work with gel varnishes, because they hold various decorations much better and longer. It is also important to note that rhinestones must be placed on fresh varnish. That is, the nail on the ring finger must be painted with the prepared shade and immediately complemented with jewelry. And then dry it under a lamp.
Pistachio manicure with gold
Gold decor is not for everyday looks. It looks great in formal looks, especially if combined with accessories. Pistachio color looks great with gold decor. Most often, gold or a dark sand color close to it is used for lace decor and manicure using the craquelure technique.
Current manicure techniques
What manicure to do: French, moonlit, ombre? Or maybe you want a strobe effect? Our selection of photos contains many interesting ideas that will help you make the right choice.
See also:
What to do if your fingernails turn yellow?
French
Fans of a laconic and elegant jacket received carte blanche to choose a combination of shades. The color of the strip on the free edge of the nail could be pistachio. This “smile” will harmonize with any nude colors or variations of white.
We told you how to do a French manicure yourself in this video.
Lunar
Lunar design is still at its peak. Here's an idea on how to use pistachio color when doing a manicure using this technique.
Gradient
We advise you to pay attention to a gradient or ombre manicure - this is a sure way to attract attention to your hands.
Playing with textures
The finish may not be completely matte or glossy. Different parts of the nail or design elements may have different finishes.
Return to summary
Pearlescent pistachio manicure with rubbing
Pistachio color is fresh and delicate, looks great with a new product of recent seasons - rubbed. Pearl dust looks especially beautiful in light shades, so use light green, pale green, or olive for your design.
A manicure with rubbing practically does not require decorations. The main highlight of this design is the pearlescent dust, which creates a delicate and deep coating.
Color combination and design
The pistachio-colored nail design easily complements any decorative details and can be combined with a large number of shades. The color “pistachio” is a youthful and delicate shade of green. A light tone is often called “life-giving,” the color of growth and multiplication.
Pistachio and pearlescent pink look advantageous and easy, which gives a romantic and pleasing result to the eye. Other warm colors based on red are also suitable, for example, brown, orange, burgundy, scarlet.
Pistachio manicure with design: how to decorate nail art
In manicure, the main role is played by the main shade. It is he who sets the tone for all nail art. The decor only complements the overall picture and adds original notes to it. Pistachio manicure itself is gentle and calm, so the patterns should be appropriate.
The best addition to pistachio manicure are:
- delicate twigs with leaves of contrasting color
- lace decor
- floral motifs
- rhinestones, sequins, bouillons and other 3D designs
Pistachio color, like any other, fits perfectly into classic manicure techniques. Use it for French and lunar nail designs. It can be a simple, no-frills design or original nail art with rhinestones, glitter, and mother-of-pearl.
Pistachio color, as one of the shades of green, looks great in spring and summer nail art. The shade looks much more interesting than classic green, captivating with its tenderness and calmness. Be sure to replenish your manicure set with pistachio-colored gel polish and you will not have problems choosing a shade for your next nail art.
Pistachio-colored manicure: instructions, ideas and manicure examples
Scientists have long proven that women distinguish shades much better than men. However, even they sometimes cannot clearly explain what a pistachio-colored manicure is. What shade is it - yellow or green? In this article we will look at which pistachio tones are considered the most stylish and fashionable. We will also present instructions for the best nail art options for this shade.
Simple manicure
The shade being studied looks very gentle, romantic and reminds many of spring. Therefore, most beautiful ladies choose it specifically for this season. To create the manicure usually presented, you need a yellow-green light varnish and several rhinestones. The design technology is incredibly simple. However, it is more convenient to work with gel varnishes, because they hold various decorations much better and longer. It is also important to note that rhinestones must be placed on fresh varnish. That is, the nail on the ring finger must be painted with the prepared shade and immediately complemented with jewelry. And then dry it under a lamp.
Pistachio-colored manicure with a pattern
If a girl wants to perform the original fruit manicure shown in the photo above, she should:
- Prepare a matte yellow-green varnish, light turquoise, black, white and transparent, you also need a thin brush for applying the pattern and a brush for stretching the shades.
- First, you should paint your nails in a monochrome color and dry the result under a lamp.
- Then mark a white semicircle on the side of the first nail plate.
- Do not let it dry, cover the rest of the nail with turquoise polish.
- Using a brush, lightly blend the border.
- Apply subtle black stripes with a thin brush.
- Then you need to dry the base under the lamp.
- And apply black “bones” near the white area.
- Add white highlights on top of them.
- And fix the result under the lamp.
- Now all that remains is to cover the design with topcoat and place drops on the nail plate. Also using a top.
- After this, perform final drying and remove stickiness with a cleaner.
And the original delicate pistachio-colored manicure is ready!
Lunar manicure
To complete the design shown in the photo, you should:
- Buy gel polish in a pale green and white shade, a thin brush, base, top and clinser in the store.
- Apply and dry the base.
- Then paint all your nails with pistachio color.
- Dry and proceed to the next step.
- Using a thin brush, mark a semicircle at the base of the nail.
- And fill it with white varnish.
- Dry the result.
- And cover the pistachio-colored moon manicure with a top coat.
- Dry one last time and remove the stickiness with a napkin and cleanser.
Original moon manicure
The design that can be seen in the photo has become very popular recently. It can be done with both regular varnishes and gel ones. However, the latest compositions are loved by fashionistas because they are considered more durable and significantly reduce the duration of the procedure. If conventional varnishes are used, the process consists of only a few steps:
- Applying base varnish.
- Drawing a semicircular area at the base of the nail, white “skin” and green citrus “veins”.
- Fix the result with transparent varnish.
If gel is used, then the pistachio-colored manicure, the photo of which is presented above, should be done slightly differently:
- First apply the base and dry it.
- Paint your nails with light green polish.
- And dry it.
- Apply a light green area at the base of the nail by hand or using stencils.
- Record the result under the lamp.
- Apply a lime pattern.
- Dry and seal with topcoat.
- And then remove the stickiness with a cleanser.
Dark manicure with a pattern
Another version of the pistachio-colored nail design is most conveniently done with gel polishes. Therefore, a young lady who decides to decorate her nails in this way needs to prepare: a base, dark green varnish, black, a thin brush, a matte top, a clinser and an ultraviolet lamp. The technology is quite simple:
- Applying and drying the base.
- Cover all nails with varnish of the main color.
- Drying the result under a lamp.
- Cover all nails with top coat.
- Another drying and removal of stickiness.
- Applying an ornate pattern to the nails.
- And fixing it under the lamp.
Bright pistachio jacket
Classic and colorful French manicure will always be popular. And this season it is also considered relevant. To perform it in pistachio color, the nails should first be processed. Their shape should be round and their length should be medium. After this, you can proceed to the execution of the selected design:
- Applying and drying the base.
- Drawing with a thin brush or special “smile” stencils on the tip of the nail. You need to use a warm salad shade.
- Recording the results under the lamp.
- Drawing on the border of a white thin stripe.
- Another drying session.
- Apply topcoat, dry and remove stickiness.
You should draw a heart on your thumbnails. For this:
- First, the base is applied and dried.
- Then a heart is drawn with a thin brush.
- Dried and completed with a white outline.
- It is dried again, covered with a top coat, decorated as desired and sent for final drying.
- After which the young lady can only remove the stickiness with a cleanser.
Dark manicure with rhinestones and sparkles
This pistachio-colored manicure design is done with both regular polishes and gel polishes. Many young ladies believe that the first material allows the procedure to be carried out much faster. But it doesn't last as long as the second one. The technology consists of applying selected varnishes to different nails. If you use gel polish, you will also need to use a base, top coat and remove stickiness with a cleanser. Prepared rhinestones can be glued to the top, and then the manicure can be dried under an ultraviolet lamp. If the young lady chose ordinary varnishes, then she will have to purchase special nail glue. And place rhinestones on it. But only after the manicure is completely dry.
Original design with butterflies
With the help of simple manipulations you can create an original spring or summer pistachio manicure. However, it is much more convenient to work with gel polishes. In this section, we invite the reader to watch step-by-step instructions that will help you decorate your nails with a stylish design at home. It is also based on the spectacular pistachio color. Therefore, it can safely compete for the title of this year’s trendy manicure.
Dark manicure with voluminous rose
With the advent of gel polishes, the collection of fashionable nail art has expanded significantly. For example, in this paragraph we invite the reader to consider and implement an impressive design with a three-dimensional pattern at home. To do this, you need to watch the videos presented below, prepare the necessary tools and materials, and try out the technology at home.
Pink and green design
The pistachio manicure with pink flowers looks very gentle and romantic in the photo above. At first glance, it may seem that it is not possible for beginners to perform it. However, this is a big misconception. If the reader dares to follow the instructions described below, everything will definitely work out. But let’s not rush, but first we’ll talk about the materials and tools needed:
- pale green, light and bright pink, yellow, black and green varnish;
- thin brush;
- tool for applying small peas.
It is more convenient to carry out the presented design with gel polishes. Therefore, you should also prepare a base, top, clinser and a special lamp.
The pistachio-colored nail design technology (photo above), presented earlier, consists of the following steps:
- Applying and drying the base.
- Covering the nails with the main shade.
- And subsequent drying.
- Then, using a thin brush and green varnish, you need to outline a branch with leaves.
- Record the result under an ultraviolet lamp.
- Then apply the silhouette of the flower with dark pink varnish.
- And also dry it under a lamp.
- Next, highlight the flower with a light pink shade, slightly retreating from the main outline.
- Lightly blend the border and dry your nails under the lamp.
- Fill the core of the flower with yellow varnish.
- Shade the border and dry the nails again.
- Place several black dots in the center of the flower.
- Add small peas to the surface of the nail and dry.
- Cover the pistachio design with topcoat, dry thoroughly and get rid of stickiness.
Water manicure
Using regular polishes, you can also create a spectacular pistachio-colored nail design. A photo of an approximate version is offered above. As you can see, this nail art looks very original. But to implement it at home, you don’t have to perform extremely complex manipulations or use inaccessible materials and tools. If the reader is unfamiliar with the above-mentioned technology, then we offer step-by-step instructions below. Let's start, as usual, with a list of necessary things:
- small bowl of water;
- hand cream or PVA glue;
- cotton swab;
- regular nail polishes in different shades of pistachio color;
- skewer or toothpick;
- clear nail polish;
- nails glue;
- several green rhinestones.
When everything you need is ready and at hand, you can move on to studying and implementing the technology. Which consists of the following actions:
- The first step is to cover the skin around the nails with cream or glue. It is better to do this with a cotton swab. Then the layer will be more dense, which means it will be able to protect the handles much better from excess varnish. The only important nuance is that when using PVA, the young lady will have to wait some time for it to dry completely.
- Then place a bowl of water in front of you.
- Add a drop of prepared varnishes into it. Too much product is not required, because we only need to cover one nail with the resulting blot.
- Then we take a skewer or toothpick and move it along the surface of the water, creating an original pattern with smooth transitions from one shade of pistachio to another.
- Finally, dip your finger in the water, trying to position the nail in the middle of the blot.
- Hold for a few seconds and remove.
Similarly, you need to decorate each nail. When all ten fingers are “dressed up,” you should remove the excess varnish along with a layer of glue and cover the result with a transparent varnish. Finally, all we have to do is glue a few rhinestones onto the nail plate. This requires special nail glue. A drop of the product should be applied to the nail, and rhinestones should be placed on top. As soon as the glue dries, the manicure can be considered completed.
