Posted date: July 9, 2017
Pigment is a highly concentrated colored dye powder. They can be used for makeup and manicure. With their help you can both highlight your makeup and create a unique manicure.
The market offers a variety of pigment manufacturers in terms of price and quality; choose based on reviews and the possibilities of your personal budget.
Previously, pigments were used only by professional nail artists. Now you can see a special variety of them on sale, designed for creating stylish designs with gel polish. This material opens up new possibilities for creativity - you can create completely unique designs and experiment with colors. With pigment, the manicure procedure turns into a real creative process. In this article you will learn how to work with nail pigments.
Pigments can be used not only in nail design. Their discreet colors are boldly used instead of shadows, and shimmering shades can be combined with regular face powder. This option is perfect for a disco or party.
Pigments and acrylic have similar properties. Therefore, they are prepared in separate containers. Using nail pigment in excessive quantities can reduce the rate at which acrylic hardens. At the same time, the resistance of the coating to external influences will also deteriorate. To avoid troubles when using the material, it is worth experimenting with the consistency in advance.
Few people know, but pigments come in different varieties. These include metal, synthetic and natural. Metallic is obtained through the use of a variety of metals and alloys that have been crushed. Synthetic can be either organic or inorganic. Natural pigment is obtained by grinding natural rocks and minerals
If you want to get beautiful extended helium nails, then in order for the gel not to lose its natural properties, you need to add about 5% pigment to the gel. As for the colored gel, you only need 1%. As practice shows, it is advisable to introduce metallic and pearlescent pigments into the gel base, as well as those that can glow in the dark.
Nail pigments vary in texture and can be dry or liquid.
- Dry powder form is the most popular.
- The advantage of liquid pigments is that their texture allows the product to be applied to the nails evenly, without streaks.
These substances consist of very small particles that range in size from 5 to 180 microns. Thanks to their small size, you can lay the coating in a thin, even layer and still get a rich shade.
It is very important to maintain the proportions correctly for the result to be successful.
They depend on the type of modeling material:
- Gel polish. No more than 5% of the substance is added to it, since it is important for the gel to preserve the polymerization properties. Adding more substance will increase the polymerization time.
- Colored gel polish already contains a coloring agent, so in order not to spoil the basic tone, add no more than 1-2%. The paint and gel can be mixed in advance or immediately before use. Use any available material for this, for example, an old orange stick will do. The gel may bubble a little during the mixing process - just leave it alone for a while and the bubbles will disappear on their own. Also, the pigment substance may settle a little - in this case the gel needs to be mixed a little again.
- Acrylic powder and regular clear varnish. You can add any amount, even in a 50:50 ratio. Acrylic and paint can be mixed with a brush. Please be aware that large amounts of paint may affect curing. To ensure you get the perfect combinations, use proven acrylics and mix the ingredients in advance - this will help determine the ideal proportions. If you are an absolute beginner in this matter and want to cover your nails with gel polish at home, then you can start with a simple experiment. To see how your mixing and coating techniques will work out, experiment with old eyeshadow and clear polish. You will get a rough idea of how this kind of work works, but don't forget that the pigment for the varnish is designed specifically for such mixing, and is therefore more adapted to the job.
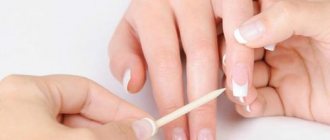
Rubbing pigment into the sticky layer
Here, at first glance, it seems that everything is simple: the pigment is transferred with a brush, finger or special applicator to the gel polish or pattern. But there are nuances.
- Some pigments are rubbed into the gel polish without stickiness, while others are rubbed into the sticky layer only. So, neon pigments belong to the second category, and they must be applied to gel polish or topcoat with dispersion.
- You can cover the entire surface with pigment (for example, make a gradient), or just the pattern (or make a gradient pattern!). If you choose the second option, then it is important to first remove the stickiness from the background gel polish so that the pigment does not cling to it, but remains only on the design. Well, for the drawing itself you need to use gel paint with stickiness.
I decided to make this abstract drawing with a neon gradient on a black background:
Black background gel polish in this case makes the manicure even brighter. Using lighter colors will tone down the neon a bit.
Pigments in nail design. Use cases.
Hi all! Today I want to talk to you about pigments that have just captivated me lately. While still at school, I loved to use crumbly shadows in manicure - sprinkle the ends, get some interesting shimmer, but my imagination didn’t work beyond that. When I started working on gel polishes, I also remembered about pigments, and here the scope of use was much wider. Therefore, I immediately decided that I needed to buy different colors, since they are very inexpensive. The variety of designs is simply amazing, but very often you see questions in different communities from beginning craftsmen about how to use this material.
I would like to tell you a few words about what pigment is and what its characteristic features are. People knew many ways to obtain pigments from minerals and plants many hundreds of years before our era. Stones were ground into dust, plants and flowers were boiled and dried, roots were crushed, all in order to obtain just a little coloring matter. Almost all the names of coloring pigments came to us from those distant times - indigo, ocher, carmine. Today we don't have to put in as much effort, thanks to the chemical industry! Currently, more than 800 organic compounds are known that can be used as dyes.
A pigment is a coloring substance, usually of synthetic origin. But they can easily be replaced by mineral or any other dense crumbly shadows. But keep in mind that the shadows still contain binding components and give less saturated shades than pure pigments. But the variety of textures and shades will not leave you indifferent. For example, pearlescent crumbly shadows can easily replace pearl rubbing, and golden shadows can be used to imitate casting. The only question is what will be more profitable – to buy shadows or pigment for manicure.
The substance itself is very finely ground – particle sizes range from 5 to 180 microns. Due to the small particle size, the pigment is applied in a thin layer and evenly covers the surface. Pigments can be matte, pearlescent, with a metallic sheen, or transparent with different shimmer effects. The list of them is huge, but the most interesting thing is that by purchasing several pigments you can significantly expand your palette of coatings. They can be mixed with each other, obtaining new exclusive colors and shades, and various interesting effects. Recently, even chameleon pigments have begun to appear, giving a multi-color tint. They can be added to gel or gel polish, thereby obtaining a coating with an iridescent effect of several colors.
Pigments can be mixed with other materials; if the correct proportions are observed, they will not affect the quality of the material itself.
Application.
Now a little about the use of pigments. The very first thing we can do is mix colors into a transparent gel or gel polish, thus obtaining a new color. The material should not contain more than 5 percent of pigment if we mix it with a transparent gel and no more than 1 percent if we add it to a colored one. Be careful - a large amount of dark pigment can significantly increase the polymerization time of the material. It is better to mix pastel pigments with a translucent texture into white gel polish, thereby giving it a light tint. We get new colors or add an effect to a ready-made gel polish - metallic shimmer, mother-of-pearl, glow in the dark, and so on. By the way, stained glass gel polishes can also be made using a gel polish base and a small amount of dense pigment. Calculate how you can expand your palette with just 10 types of pigments? And considering that their price is on average 50-100 rubles? Nice, isn't it?
Rubbing in pigment.
This was the very first and simplest method. The second option is rubbing in pigment, it looks a little different than a coating with pigment and allows you not to calculate the proportions for mixing. The pigment is rubbed in according to a scheme similar to that of glitter. For design, it is better to choose a background that is similar in color; for light pastel colors, a white background is suitable.
We apply a color coating to the base; if the color of the gel polish has a very fine dispersion, then it is better to put an even thin layer of base on it and polymerize it, then rub the pigment onto the base. It’s better, of course, to try it on a tip in advance and see if the pigment sticks to the surface well enough. If it goes on with bald spots, then use a base before applying it. An important point - if the pigment is very dense and saturated, then it is quite possible to do without a colored base - apply it in 2 layers, sandwiching the base between them. That is, you will get the following sequence - base, polymerization, rubbing in pigment, polymerization, base, polymerization, rubbing in and polymerization again, top coating. Another option is to rub the pigment into white gel paint with a sticky layer - gel paints have a more “tenacious” dispersion layer and the pigment lays on it just perfectly. Also, a very interesting option is rubbing it into black gel paint, but here you need to use metallized pigments, which results in a kind of replacement for casting. I will show these two options a little later.
Apply the pigment to the dispersion layer very carefully with a soft brush. I use a very soft synthetic fan brush. First, I sprinkle the pigment on top, covering the entire surface, then, barely touching it with a brush, I pull it off and at the same time distribute it evenly.
When I see that the entire surface is already covered evenly, I can put the nail in the lamp for a short while and then better brush off the residue with a brush. It is especially good to clean the lateral sinuses and the area near the cuticle so that later there are no detachments there. Here you can use a stiffer brush to clean the skin.
It is also better to remove the pigment from the end so that it can be sealed properly. Now you understand why it is better to choose a substrate that is similar in color. I apply a thin layer of top coat to the pigment and, if necessary, a second leveling layer.
Here is an option just with rubbing in pigment. Here it is applied over white gel polish, covered with a top coat and complemented with velvet curls.
Gradient pigments.
Let's move on to the next example - this is a gradient with pigments. It is much easier to make than a gradient with gel polish. The gradient with matte pigments in light colors looks especially chic. I’ll show you just like this below. There are no special tricks here, except, perhaps, shading. I also do this with a fan brush, barely touching the surface. First, I apply the color to one third near the cuticle, rub it in and pull it down a little. I apply the second color a third at the free edge and, vice versa, pull it up. I clean the brush and run it from top to bottom several times to smooth out the transition. Try not to scratch the surface with the brush, but rather stroke it lightly. And do not use a brush with hard bristles - it can leave unsightly grooves on the surface.
Then follow the same procedure - remove the excess and cover with top.
In order for such a design to hold up well, it is necessary to remember that there should be no excess pigment in areas near the side rollers, cuticles, at the end and even on the very surface of the plate; only the pigment that has stuck to the dispersion should remain, everything else must be carefully removed . Only in this case will your top adhere well to the surface and provide a strong coating. Otherwise, chips are possible. Another important point when covering the pigment with a top coat is to remember to clean the brush, because after you brush it over the nail, small particles settle on it, which can stain your top coat.
By the way, this coating in the top photo lasted me more than two weeks without chipping. Due to the fluorescence of the pigments, they look pale in the photo, but in reality they are much brighter.
Design with pigments.
And I’ll show you two more simple designs that can be made using pigments. The scope of your imagination is unlimited here.
For the first option I will need - white gel polish, white gel paint with a sticky layer, pigments in peach, pink and purple shades, a brush for rubbing - any fluffy or large flat one, a brush for monograms, a base and a top coat.
Execution step by step:
1. Covered it with white gel polish in two layers and removed the dispersion layer. I’ve often seen advice to apply a buff over the surface, but when rubbing in light pigments they don’t stick to the surface so much, so I do without a buff.
2. I painted curls with white gel paint and a thin brush and polymerized them in a lamp.
3. I rubbed all three pigments in just spots onto the sticky layer of gel paint. I polymerized it again.
4. Carefully shook off all excess pigment and covered it with 2 layers of topcoat.
The result is such a cute design with multi-colored gradient monograms.
For the second design I used black pearlescent pigment, black gel paint with a sticky layer, white gel paint without a sticky layer, white gel polish, top and base, a thin brush, micro glitter.
Execution step by step:
1. Covered it with white gel polish in two layers and removed the dispersion layer.
2. I painted the pattern with black gel paint and a thin brush, and polymerized it in a lamp.
3. Black pearlescent pigment was rubbed onto the sticky layer; it gives a very interesting platinum effect. I polymerized it again in the lamp and shook off all the excess pigment.
4. I decided to make the design three-dimensional. I covered the tips with topcoat, removed the sticky layer and filled the entire space between the drawn cells with white gel paint.
5. Sprinkle generous amounts of micro-gloss onto the undried gel paint. I polymerized it in a lamp and shook off all the excess glitter.
You can cover only individual cells or just round pieces with white gel paint, and leave everything else as is. But, overall, it turns out to be very interesting and voluminous.
As you can see, design variations are simply impossible to count. By rubbing different pigments into spots, you can create different gradient backgrounds for your designs. The same spots of pigment can then be turned into flowers using 3D gel paints or gels. Pigments can be used to “color” some drawing or pattern made with gel paint.
I hope you enjoyed my little excursion into the world of pigments and will take away something useful from this article. If you have any questions, feel free to ask, I will try to answer everything to the best of my ability.
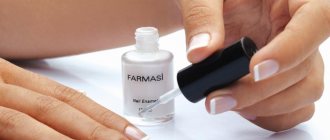
Mixing pigment with gel polish
The pigment can be carefully added to the top or base - then you will get the same neon colors as the material itself.
You can also mix pigments with ordinary colored gel polishes - this way you can get both different shades of the same color by adjusting the amount of pigment in it, and completely different colors if you add the same pigment to different gel polishes.
I made this design with just two colors of gel polish: one of them with glitter, and in the second I added 2 different pigments, thus getting 2 more additional colors!
These are such different options for using one inexpensive material!
The KrasotkaPro online store thanks blogger Tatyana Samal (blog: Tanyusha) for her review and photos.
Bright nail art ideas with pigments
There are a huge number of options for nail design using pigments. With them, limitless scope for creativity opens up before you. By mixing all kinds of shades and using different application techniques, you can create a stunning, unique manicure that will highlight your bright personality. We bring to your attention a collection of interesting ideas that will give you inspiration and encourage you to create your own nail design. Shiny, matte, plain or shimmery – there are a lot of solutions.
Please note that all colors are truly vibrant. It is difficult to achieve such intensity of shade using ordinary varnishes. With pigment you can create an incomparable gradient, monochromatic coating or any other nail design. Therefore, if you want your manicure to immediately catch the eye, then be sure to learn how to work with pure paints. Once you have practiced with monotonous surfaces, you can move on to more complex techniques.
Today you learned what pigments are and what they are needed for, and got a basic understanding of working with them. Professional manicurists use them to create incredible combinations and transitions. We would like to bring to your attention a final video in which you will find a master class on gradient stretching with pigments. With a little diligence and practice, and soon you will be able not only to do the same manicure, but also to embody your own unique designs.
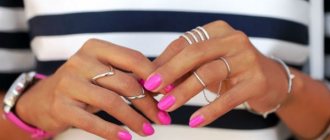
Neon manicure for short nails
Those with short nails are offered a large selection of nail designs in neon manicure. For spring, choose softer colors and decorate a few nails with neon designs. Rhinestones will look great as decor in this manicure. In the summer, cover the entire plate of marigolds with bright, flashy colors, such as red, pink, blue and acidic shades. A manicure will look summery and fun if you add it with a gradient design or safari designs.
Mint color in neon manicure, covered with a matte texture, looks fresh and light on the nails. In the autumn, give preference to warm colors such as khaki, gold, yellow with themed autumn patterns and prints. Nail art masters decorate this manicure with foil and a nude addition.
In winter, fashionistas choose a cool color as their main color - blue, combining it with black, red and white. Most often, winter neon manicure is decorated with designs in the form of snowflakes and Christmas trees. But even in a mono coating, the bright blue varnish is also spectacular.
Features of neon manicure
Neon manicure is not just a bright polish color, but a real explosion of color. Even without design and decor, such a manicure will not go unnoticed. This manicure has its own peculiarity. During the day, a manicure is just a bright polish on the nails, and in the evening, the nails glow. Neon manicure is ideal for parties and discos. This manicure looks ideal on short or medium-length nails.
Neon colors combine most accurately and effectively with tanned skin, so give preference to neon manicure during the summer holidays. If you have chosen a neon manicure, remember that it is better not to overdo it with makeup. This manicure is in harmony with clothes in beige, light and blue tones. For a stylish look, choose denim clothes in light yellow, blue and lilac.
With the help of neon colors you can create entire pictures using drops, blots and spots. Various colors of neon varnishes are splashed on a white background. If you choose carelessness, you will get a more abstract drawing. Such a manicure always requires careful wearing. Use cuticle oil and protect your nails from chipping.
Nail design with mirror shine, photo
A very beautiful manicure is obtained from mirror foil. Moreover, ordinary baking foil is not suitable for these purposes. This material for nail design is sold in specialized cosmetics stores. It comes in two varieties:
- Regular (transferable), which is glued to nails
- Thermo-foil, you can cover your manicure with it by exposure to warm air
Mirror manicure with foil.
French with foil Below, look at examples of manicure based on a shiny, mirror rub.
Stylish nail design. Nail art obtained by rubbing onto a gel base
A mirror design of nail plates with a special varnish will look beautiful under a little black dress.
Manicure with yellow mirror polish
What is rubbing and its types
Rubbing is a fine dispersive dust, a shiny powder made of polyester mixed with pigment (therefore, rubbing is often also called pigment). The particles of this powder are almost weightless and so small that when applied to the nails they come into close contact, creating a smooth thin layer that imitates the material or effect.
The most common way to use it is to rub it on top of gel polish. It is easy to apply the design by rubbing and on extended nails. But rubbing in does not work well with regular varnish, since it must be applied to a completely dry coating in order to achieve exactly that shiny or mirror effect that is obtained by rubbing in the pigment.
Rubbing is divided into several types depending on the color and the resulting effect on the nails:
Mirror rubbing
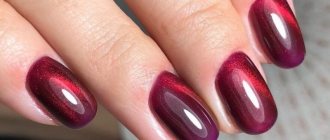
. It is this version of rubbing that can create mirror-like nails that shine with an unreal shine. It is usually a gold and silver colored pigment. This also includes rubbings of other colors: purple, blue, red, which can create a smooth metallic effect on the nails. It is better to use dark colors of gel polish as a base for them to enhance the luxurious highlights of the rub.
Pearl rub
(unicorn rub, mermaid tail, aurora). This rubbing gives your nails a delicate, light shine, like real pearls. The use of such a rub is very important for nail design for brides, as it looks sophisticated, noble and at the same time feminine. Pearl rubbing is suitable for any nail length and any age; it is romantic and modest compared to other types of rubbing. That is why it looks best on light shades of gel polish.
Rubbing chrome
(Chameleon, chameleon, northern lights). If you see unusual green, blue or purple tints on your nails, then this is a chrome effect rub. The play of light and sparkle in the rays of the sun are simply mesmerizing to look at! This pigment is also best applied to a dark base to obtain the most saturated color tints.
Holographic
(rubbing prism). A rub with shimmers of all the colors of the rainbow - this is holography on nails. The prism effect appears most clearly on dark, predominantly black surfaces.
How to fix the rub on your nails so that it goes on before removing the gel polish
At the beginning of the article, we already said that the nail design rub does not have its own stickiness, so it has nothing to “hold” to the nails. The top without residual stickiness is also a non-sticky material. What magical things do the craftsmen do to make this miracle dust fly by for a month and not come off?
- Firstly, it is more difficult to stay on a soft and moving surface than on a hard one. Therefore, dry pigment requires strengthening of nails with gel or a hard base using the leveling technique.
- Secondly, the top into which the pigment will be rubbed is, on the contrary, better to choose an elastic one. This will avoid chips and cracks.
- Thirdly, you should remove pigment particles from the end of the nail with a buff and go over it with an acid-free primer. At the end, normally, all materials lie in a thin layer, but the load on this area is very large. The top will better cover the thin line of the end if there are no protruding elements on it. And the primer will add the missing stickiness.
- Fourth, cover the rub with two layers of material on top. The first layer should be made of a material with residual stickiness - this can be a transparent base or a sticky top for sliders or rub-ins. Apply your usual favorite topcoat as a second layer.
Neon colors on long nails
Those with long nails will appreciate neon colors. In the spring-summer period, it is better to choose neon colors for nail art. This season, the “color block” technique is very popular among fashionistas, to create which several very bright or acidic shades are used. To make this design, the nail is divided into several sectors and filled with multi-colored varnishes. The result is a bright and catchy nail design for spring-summer!
On long nails, the ombre technique made with neon bright colors looks no less impressive. This neon manicure can be applied in various ways: in the form of a vertical or horizontal transition of varnish colors. In this case, you can even highlight one or more nails by decorating them with rhinestones.
“Broken glass” looks intriguing on long nails. Preferred colors: purple, lilac, blue. “Broken glass” is usually decorated with foil.
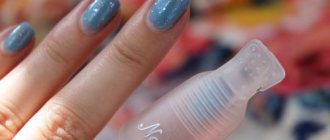
How to apply powder on gel polish?
The procedure is extremely simple and in general is no different from applying regular glitter. The preparatory work is the same as for any manicure.
- Hygienic procedure (removing cuticles with a remover or tweezers, filing nails and giving them shape).
- The nail plates are prepared for the application of gel polish. Their surface is lightly filed to remove the glossy layer and improve the adhesion of shellac.
- Nails are degreased with a special product; if it is not available, then with ordinary alcohol. Allow to dry.
- Apply the base (depending on the brand, the product may require drying in a UV lamp for 1-2 minutes, so read the instructions on the bottle). If UV drying is not needed, simply let the base air dry for 3-5 minutes.
- Applying gel polish. Cover your nails with shellac as usual, paying attention not only to the plate, but also to the outer edge, as if “sealing” it with a brush.
- Sprinkle the still damp (no need to dry in a lamp yet) layer of gel polish with powder. If you decide to powder your entire nail, first dip the edge of the nail into a jar of powder to seal it, then, with your finger over the nail pad, use a spatula to dust in the powder until all areas are covered. Shake off excess by tapping on finger. Dry in a UV lamp for 2 minutes.
- Use a brush to lightly smooth the finish and remove loose dust particles.
- Cover with a finishing layer if you want to remove the roughness of the coating, or leave it as is.
- The coating is ready!
Acrylic powder is always applied to the last layer of gel polish. That is, if you are used to covering your nails with shellac for 2-3 layers, but you should sprinkle the very last one. The previous ones are applied as usual and dried in a lamp.
Properties of mirror sand
“Chrome pigment” or glitter is a microscopic dust of aluminum that, when rubbed into gel polish, gives a mirror effect.
The shades of such sand can be varied, but the most common are gold and silver, and bright pink and purple shades or chameleon colors are no exception.
Mirror pigment has a very interesting feature: shades of sand can be mixed with each other or added to gel polish to obtain the picture we need.
This manicure is quite simple to apply and does not require additional skills, so it can be easily done at home, without the help of a professional.