One of the best ways to achieve a truly perfect manicure - beautiful, expressive and long-lasting - is to use high-quality shellac. This product has many advantages - being convenient and absolutely safe, it creates a very attractive and impressive nail coating. Thanks to its unique features, shellac, or in other words, gel polish, has gained enormous popularity among fashionistas all over the world.
Clothespins for removing shellac
The only difficulty in using this product until some time was that it was not so easy to remove this coating yourself. However, now that special reusable clothespins for removing shellac have appeared, the situation has changed dramatically for the better. Now you can easily get rid of outdated gel polish coating yourself at home, without going to a beauty salon.
Clothespins for removing shellac
How to remove gel polish from nails
Most girls use the method of removing gel polish using foil, but those who have used this method know that it is not very convenient, so caps will be good helpers. Next, we’ll look at what the caps are for, how to work with them, and how to remove gel polish correctly.
Gel polish is much denser than regular polish, and in order for it to adhere to the nails, it is not enough to apply it and allow time to dry; you will need a special lamp with ultraviolet light, which polymerizes the gel polish and allows it to remain on the nails for up to 30 days.
In general, such a manicure can take a lot of time, especially if we are talking about beginners in this matter. But the process of removing gel polish from nails is considered no less labor-intensive, because in this case you cannot do with ordinary nail polish liquid and a cotton pad. In addition, it will take a long time for each nail to become saturated with a special liquid, and the coating will peel off from the nail.
In the case of gel polish, you need a special liquid to remove the coating; it is sold in stores, and most often it does not contain acetone, which means it is not as harmful as liquid with acetone.
Steps for removing shellac using clamps
Reusable shellac remover clothespins are very easy to use. To do this, you need to perform several simple sequential steps:
- moisten cotton pads in a special liquid and apply tightly to the surface of the nails;
- securely fix the clothespins on your fingers;
- after five or ten minutes (depending on the instructions in the specific instructions), carefully remove the caps;
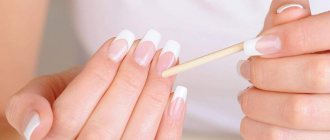
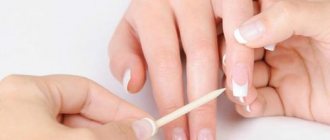
- take a manicure pusher and, using smooth, careful movements, remove the coating that has softened sufficiently;
- At the end of the procedure, treat the cuticle and nail plates with a special nourishing oil.
With the help of special clothespins, the process of removing shellac is greatly simplified. Therefore, now you have no obstacles to creating a spectacular manicure yourself!
Removing gel polish using foil
There are several ways to remove gel polish from nails, and the first of them is to use liquid, foil and cotton pads. The process requires 10 cotton pads, 10 small squares of foil and gel polish remover.
Cotton pads need to be well moistened in liquid and wrapped around the nails, and secured with foil on top. Thus, the process of removing gel polish can take 15 minutes, since in order for the coating to peel off from the nail, you need to soak the cotton pad for just that long. But if you take into account the fact that it is inconvenient to do this procedure on both hands at the same time, it will take 40-50 minutes for the entire procedure.
Shellac, Cody varnish: how to remove it at home yourself?
The question regarding removing shellac and Cody polish at home is quite common. So, let's start with shellac. Professional removal of shellac requires the following things:
- Of course, a special liquid that is designed to remove such coating
- Special sponges
- Orange wooden sticks
- Suitable nail file
- Cuticle oil
However, when carrying out this procedure at home , the following products are perfect for us:
- Take nail polish remover
- We replace special sponges with what every home has - cotton wool (cotton pads)
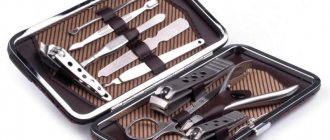
- Instead of a stick, we take a special tool that is designed to push back the cuticle (any young lady definitely has such a tool in her house, because a pusher, that’s the name of this tool, is in any manicure set)
- We also need foil
Well, let's proceed directly to the process of removing shellac:
- In order for the shellac to be removed efficiently, we initially need to thoroughly wash our hands with soap, this way we will degrease them and allow the acetone to effectively act on the coating.
- If we use cotton wool, then we need to make sponges from it that will completely cover our entire nail.
- The sponge you make must be moistened in nail polish remover, then applied to the nail and carefully wrapped in foil.
- Having done similar manipulations on all nails, leave them for about 10-20 minutes.
- After the time has passed, we remove the foil and cotton wool from our nails and evaluate the result.
- Don't worry about the shellac not being completely removed - this is quite possible. If everything happened exactly like this, then we will need the help of that same wooden stick or pusher. It is with these devices that we remove shellac residues.
- All is ready. Remember, after any such manipulations, your nails need care and restoration, so it would not be superfluous to use a cream or, if possible, a special oil or Smart Enamel.
Now let's move on to the next method of removing shellac - without foil:
- This method is more harmful to nails, however, less time-consuming. What is more important for you is, of course, up to you to decide. We take a container that will fit two hands
- acetone
- the same wooden stick or pusher
- polishing file (bafik)
- hand cream
Let's start the removal procedure again with washing your hands, which you already know for:
- carefully cut off the top layer with buff
- Apply cream to fingers first
- pour acetone into the container
- Dip your fingers into the liquid for about 10 minutes. You do not need to lower all your fingers, but only the tips
- After the time has passed, it is necessary to remove the coating from the nails. We do this using a pusher or an orange stick.
- Now you need to thoroughly wash your hands and apply cream
Cody varnish is also very easy to remove at home, and there are no big differences from removing shellac:
- Cody polish can be removed with almost any product that contains acetone, the only difference will be in the duration of the procedure.
- Many people say that this varnish can only be removed with a special liquid, but girls who have tried other methods on themselves say otherwise. Also, according to some reviews, such nail polish can be removed even with a nail polish remover that does not contain acetone.
- So, let's start: soak the sponge in any liquid that can remove gel polish, then apply it to the nail and wrap it in foil.
- This procedure differs in its duration. To achieve maximum effect, keep your nails in this state for about 20 minutes.
- Be prepared to see remnants of the coating on the nail: remove them with a wooden stick or a metal spatula. This should be done from the cuticle to the edge of the nail.
- It is strictly prohibited to cut or saw down the remaining coating.
Caps for removing gel polish
The second method involves the use of special caps for nails, with the help of which cotton pads are also placed on the nails, but they are fixed with special clips and not with foil.
In order to perform a procedure with clamps, you need to understand how to use these caps, otherwise injury may occur. In principle, the procedure is not difficult, and the caps are used like clothespins on nails. But there are types of caps that are simply put on the nails, and not pinched, and it is these caps that can crush the fingers, thereby disrupting the blood flow.
Rubber bases
To use abrasive caps, rubber bases are required, which are not a disposable consumable and are easy to clean and disinfect. Rubber bases mean a special holder inserted into the router. This holder is made of two parts - a metal rod and a rubber head, on the surface of which there are special notches necessary for reliable fixation of the abrasive cap. It should be noted that for the manufacture of heads they use not simple rubber, but a more durable and wear-resistant material, so the bases are durable. For caps of different diameters, bases with sizes from 5 to 16 mm are used.
Advantages of gel polish remover caps
The caps are very convenient to use, since you don’t need to cut the foil, and they hold on much better than foil, because they have a special clothespin mechanism. Each clothespin is made of plastic and is the same size, which sometimes causes discomfort when using the clothespin for the little finger, but since it can be pressed end to end, this problem will be solved. That is, the caps act as foil during the process of removing gel polish, which is much more convenient and comfortable. But nail clips have some advantages.
Firstly, they are convenient to put on both hands, even if they are already on one. Secondly, the caps save time on the procedure for removing gel polish and can always be at hand, unlike foil. And thirdly, caps have already been invented for pedicures. In such sets they have different sizes, since you need a larger cap for the big toe and a smaller one for the little toe.
Removing harmful dispersion
After performing a manicure with gel polish and drying it, for example in a UV lamp, a thin dispersion layer, quite sticky, forms on the surface of the nail plate. It must be removed as it can cause allergies. It is best to remove it with a special liquid that completely eliminates allergenic particles of the dispersion. You should remove it carefully so that particles of the dispersion do not get on the skin around the nail.
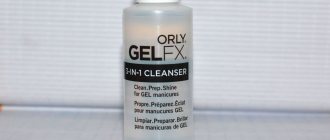
The best way to remove the sticky layer of gel polish is with a clinser - a special liquid. Salons use a professional cleaner, but you can do it yourself at home. To do this, mix 7 parts water and 3 parts regular alcohol. The removal procedure is very simple:
- dry the top layer (top) in a lamp;
- moisten a smooth napkin in the cleanser;
- wipe the nail plates with it;
- Be sure to protect the cuticle and side rollers with oil.
In pursuit of fashion, continuously applying “the most fashionable super polish,” and then, in a hurry, erasing it with whatever you have to, stop. Take care of your nails, use only products from reliable brands, in which everything is thought out to protect and strengthen the plates and cuticles.
Reviews of different methods of removing gel polish
Julia:
“Since I really love doing manicures, I always pay attention to all sorts of new products in this area. And some time ago I bought special caps for removing gel polish, before that I decided to read the reviews, but I never found any normal and sensible advice. I bought them on the website, manufacturer China, there are only 12 pieces in the set, and they are all the same size.
I decided to try it right away, and there was sugar polish on my nails, and girls know how difficult it is to remove it. First, I unpacked it, prepared cotton pads and nail polish remover, moistened them and placed them inside the clip, and then quickly put them on. This should be done with each nail.
After 10 minutes, the nails become clean; for complete cleansing, I additionally apply a cotton pad, and the whole procedure is over. The caps are very convenient for me. I’ve been using them for two years now, and the process always ends quickly.”
Siren:
“I bought clips for removing gel polish, used them once and won’t touch them again. They crushed all my fingers, they were all blue for half an hour, and it was painful, I was even scared. Still, for me it’s better the old fashioned way - with cotton pads and foil, but I don’t want to buy clips anymore and I don’t recommend them to girls.”
Alternative option
Option for removing gel polish with the same composition, but without using foil:
- pour acetone into a bowl, but nail polish remover with acetone is better;
- the top (top) layer should be removed with a regular file;
- Lubricate the cuticles and rollers for protection with any nourishing cream or warm oil;
- dip your fingers into a bowl of liquid, completely immerse your nails in it, and keep them in this bath for 5 - 10 minutes;
- The gel polish will begin to peel off; it can be removed with a wooden stick, such as an orange one.
Advantages
This type of nail design has a number of advantages:
- the result is ideally shaped nails;
Beautiful “arched” French
The procedure is quite lengthy compared to conventional extensions and takes 2-3 hours in the salon; modeling at home can take even longer, since the master has more opportunities to take into account the individual characteristics of each client.
How not to remove shellac from nails
- To remove shellac, use only a special remover liquid specifically designed for removing gel polish. Regular liquid is harsher in composition and can leave a chemical burn on the skin. Once, of course, it is possible, if there is some kind of force majeure, to soak it, but on an ongoing basis it is categorically not recommended.
- Never peel off gel polish from your nails mechanically, like a film, no matter how much it asks for it. Sometimes the coating peels off so neatly, remaining intact, and you really want to “help” it. By tearing off tips from gel polish, you break the upper layers of the nail plate. It may not be immediately visible, but under a magnifying glass you can see some “shaggyness”. And let it all be smoothed and polished with hand cream, but with the subsequent application of shellac, when it is sealed under the “armor” of the coating for 2-3 weeks, the nail will begin to peel off. And not necessarily from the end side; it may begin to delaminate in the center of the plate. In general, then you will have to splice it together and walk without a manicure.
Review of tools for pressing arched nails
A couple of years ago there wasn’t such a wide selection of tools for pressing arched nails. When they first started making arches, nail industry masters adapted improvised means for these purposes, from their nails to construction clamps and homemade wooden sticks. What the masters couldn’t come up with to achieve the perfect arch! But time passes, everything changes, and a large number of tools for clamping the arch appear on the nail industry market. I would like to conduct a short review of the tools that I have worked with during my career.
1. Glands and tubes
remain my most faithful assistants to this day. Now every master can easily tell you about these simple devices, but back then it was a novelty. Craftsmen on the forums shared their experiences on what is best to use tin; the most common were tubes of paint, baby cream and mustard. Nowadays you can buy tin without any problems. Modern forms sometimes make it possible to do without hardware; in this regard, judging by the reviews, transparent plastic forms are very good. Unfortunately, I have not yet been able to verify this from my own experience, since at one time I purchased a large supply of molds. For a long time it was impossible to purchase straws in our city, but I still managed to do it.
I think there is no need to go into detail about how the glands and tubes are used to press the arch, especially since many basic courses teach this.
2. Clips in the form of clothespins.
I purchased my clothespins in a store from Natalya Stepanova through an intermediary in our city. Small, very tight, comfortable, they squeeze the arch perfectly when doing acrylic modeling; I also use them when strengthening with gel. When using clothespins, the most important thing is to clamp them correctly so that the client does not get hurt.
Just for fun, I purchased 1 piece of a larger iron clothespin from an online store and a plastic clothespin from the same Natalya Stepanova. I didn't have a good relationship with these clothespins. The iron clothespin broke into two parts after several uses, and was not of good quality. And I had a small incident with a plastic clothespin. I clamped the acrylic with it a little ahead of time, as a result of which it dug into the material and had to be pulled out with great effort. I no longer experiment with clothespins and successfully use my first clothespins both for gel strengthening and for modeling.
3. Tweezers.
It was purchased from a representative of the Victory company in our city. To pinch straight parallels with these tweezers, you have to try very hard. Too “soft” to press, as a result of which the side parallels could turn out to be waves. To pinch in the mustache area, you had to apply force, but at the same time manage not to pinch.
4. Reverse tweezers.
I don’t remember under what circumstances I got him, but I worked with him for quite a long time. In principle, I was happy with everything about it, the only thing is that my tweezers have a slight tilt to the left, which needs to be taken into account when clamping.
5. And finally, a hard clamp
from Nayada Nails Studio. Now it is my favorite. Not only does it have a stylish design, but it is also made of stainless steel, which is easy to clean and disinfect. Long jaws (4cm) allow you to clamp the material efficiently and accurately, which gives the artificial nail a beautifully modeled shape. It will work clearly even in cases where you did not have time to press the material in time. And even if its price is quite high, but with it I achieve the result I need.
From the review it is clear that the choice of tool for compressing the arch plays an important role. No nail modeling can do without them. With their help we create beautiful and durable nails.
Share what tools do you use to press arched nails?
The main content of the post is posted here
How to replace foil?
There are situations when there is no foil at home, but you really need to remove the gel polish. In this case, the foil can be replaced:
- Cling film - it will not allow air to pass through and will not allow the gel softening agent to evaporate;
- A medical plaster that does not allow air to pass through - it will also prevent the cotton pad from drying out;
- Special caps (bottles) are special devices for removing the gel coating. Some experts still recommend wrapping your finger in foil before attaching the bottle cap, but this is not necessary.
- Shot glasses - you simply pour liquid into a shot glass or other container and dip your fingers into it.
You can find these and other products (orange sticks, pushers and files) from our partners “Cashback service LetyShops ”. You not only buy goods from trusted stores, but also receive cashback.
Tips for caring for your nails after the gel removal procedure
We have already talked about how to properly remove shellac, and now we will focus on how to care for your nails after the gel removal procedure.
- Firstly, after removing the gel polish, be sure to wash your hands with soap.
- Secondly, buff your nails with a buff.
- Thirdly, lubricate the cuticle with special oil.
- Fourthly, do not forget to “pamper” your fingers and nails with restorative masks and baths.
Remember, if you remove the nail polish using a remover, then no one forbids you to reapply the gel. But if you used acetone or alcohol, you can reapply shellac only after a week. This is exactly how long it takes for nails to recover.
Tips for removing gel polish yourself
If you decide to remove the gel at home, it is recommended to do this armed with the advice of professionals. Otherwise, it is easy to harm the health of your nails. The most significant advice is to never use technical acetone. Yes, it will dissolve the varnish, but in addition it will injure the cuticle, and in the worst case, also the skin of the hands.
When the solvent has been on the plate for 10-20 minutes, remove the foil and soaked cotton wool in a circular motion. This will help in more thorough removal of the coating. Upon completion of the procedure, be sure to make a nourishing mask for your hands and nails, or at least use a cream. The manipulation will not pass without a trace, even if you use a gentle liquid.
It is advisable to apply a rich cream to the skin of the hands and fingers in the affected area. In this way, the aggressive effect of acetone will be minimized. Remember that products of this type greatly dry the cuticle, so it needs to be lubricated with oil after removing the nail polish. And lastly, if you have discovered an allergy to acetone or already know about its presence, contact a specialist. A specialist will select a liquid without acetone for the job.
Content
- Is it possible to remove shellac at home?
- How to remove gel polish?
- Factors affecting the speed and safety of removing shellac from the nail plate
- Methods for removing gel polish
- First way
- Second way
- Third way
- Fourth method
- Removing gel polish with remover. Step-by-step instruction
- Removing gel polish using a liquid containing acetone
- Removing gel polish using alcohol or vodka
- How to replace foil?
- How not to remove gel polish
- Tips for removing shellac from nails
- Tips for caring for your nails after the gel removal procedure
- Recipes for traditional medicine that will help nails recover
- Conclusion
[ads-pc-2][ads-mob-2]
