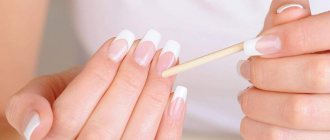
French manicure has not gone out of fashion for many years. It is obtained in different ways - by extensions, on natural nails or using false nails. Most often, French manicure on natural nails is done using white polish and a stencil, but there is another, less common method - a pencil for a French manicure.
[yandex1] [google1]
Why is it needed?
Natural nails may turn yellow over time. At the very beginning of regrowth, the free edge of the plate is snow-white. But over time, it begins to turn gray and stain. This can happen both through the use of colored varnishes and cleaning, for example, oranges and other everyday activities. Dust can even stick to your nails, making them darker, etc.
A whitening nail pencil helps solve this problem. However, this name is not entirely correct; it does not bleach, but simply colors the plate. To do this, you need to sharpen it sharply, remove dirt from under the free edge, and then draw a pencil under it along the smile line. This will help remove any remaining dirt and also give the tip of your nail a healthy white color.
What is a French manicure pencil?
Speaking about the varieties of pencils for manicure, it should be noted that there are enough of them that you can easily get confused in them. French manicure pencil is a bleaching agent designed to whiten the inside of the free tip of the nail.
We all know that dust and dirt, which surrounds us at work, at home, and on vacation, gets under the nail plates. Exposure to external factors and the environment provokes the appearance of a yellow coating on the tips of the nails, which reduces their aesthetic appeal. A whitening pencil for French hair helps combat such problems and eliminates yellowish plaque.
Whitening pencil for French hair is mainly made from white clay and medical chalk. Such pencils guarantee snow-white nails, which does not require much time to create. The pencils may contain a natural ingredient such as aloe extract. Often, pencils are equipped with special slopes on the cap, which allow you to process the cuticle and clean the inside of the nail. In the composition of capillary pencils of the Bogema brand, you can see propylene glycol, water and glycerin. The cost of pencils is not high and varies from 130 to 250 rubles.
Composition and features
At its core, this product is a white pencil. Depending on the brand of the manufacturer, medical chalk or white clay may be used to create the lead. The lead is placed in a wooden case, like in ordinary drawing pencils. It is dense enough that you can sharpen it sharply and draw a line under the free edge.
There are other forms of release of this pencil, which are much more reminiscent of a manicure corrector. They are used in almost the same way and give similar results. French hair done using such a device does not look like one made with extensions or painted with varnish. The pencil rather gives a more natural effect of healthy nails without coating. Although, as the manufacturers of this device claim, it is enough to create a full-fledged French manicure and you just need to apply a clear varnish to the nail. But practice shows that this is far from the case.
First of all, the difficulty is that such a pencil follows your natural smile line, which can be uneven, blurry, wavy or asymmetrical. In addition, it does not produce a sharp enough border or a rich enough white color. And also, the result of using such a pencil disappears after the first or second hand washing. However, it does not take up much space, which means you can successfully take a white nail pencil with you in order to correct your manicure if necessary.
Nail polish pencil
Many girls have the problem of how to apply varnish so that the coating is smooth and even.
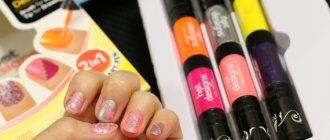
The solution to this problem was a nail polish pencil. It is very similar to a regular cosmetic pencil. It has a metal tip on one side and a small brush on the other. This brush allows you to create a flawless finish or apply an interesting pattern to your nails.
The varnish pencil is very easy to use and has a compact shape. It will never spill or leak, will not dry out and will not ruin your things or bag.
Terms of use
The nail polish stick has a replaceable cartridge that allows you to change the color of the polish as you use it up. A fully filled cartridge will allow you to paint both hands. A used cartridge can be easily replaced with a new one.
To coat the nail, lightly press the tube and begin applying evenly. The varnish pencil dries quickly in autumn, unlike regular varnish. A set with a high-quality varnish pencil should contain 2 brushes - a wide one and a thinner one. With a thin brush you can apply the most interesting patterns, while with a wide brush you can create a flawless finish.
One big advantage of this product should be noted - if your coating or pattern turns out to be uneven, you can wipe it off with a damp cloth. A popular company that produces this product is revlon nail.
Minuses
The main disadvantage of using such a pencil is the extremely low durability of the manicure obtained with its help. Essentially, when using it, you simply apply a layer of chalk to the inner surface of the free edge of the nail. Naturally, the result of such coloring remains unchanged only until the nails first get into water. This is especially noticeable on long nails; on short and very short nails, the manicure can last a little longer - until the second or third wash. In addition, chalk may also remain directly near the smile line, since water does not always get there.
The second disadvantage of a whitening nail pencil is that it is inconvenient to use. It is especially difficult, and sometimes completely impossible, to use it on short and very short nails. The fact is that the cone-shaped shape of the stylus does not allow you to do a manicure quickly and accurately. While the sharp tip of the stylus gets close to the smile line, the rest of its width stains not only the nail, but also the finger underneath it. It is almost impossible to avoid this drawback during operation, as well as to eliminate it after application, since the chalk simply smears or is erased from the nail too. This makes using the pencil impossible, especially for those whose nail bed is located far enough from the tip of the finger, that is, a fairly large part of the free edge is above the finger.
However, even if you understand how to use a whitening nail pencil so as not to stain your finger during application and do not wash your hands during the day, this still does not guarantee you a perfect manicure. In the process of performing the simplest actions with your fingers, the skin of their tips will still come into contact with the free edge, and your hands will sweat. This together will create all the conditions for the chalk to remain on the skin of your hands.
In addition, these pencils are often very soft. Applying color this way is even more difficult, since it gets more dirty and goes on unevenly, but the main problem is different. The coating remains quite sticky all the time after application, heating up from the skin. As a result, dust and other particles of dirt accumulate under the nails many times more intensely, and the manicure loses its attractiveness within three to four hours after application. In addition, if it is done on short nails, then there is a possibility that the pencil coating will stain not only the fingers, but also the palms and everything around.
[yandex2] [google2]
Can a French manicure pencil replace white polish?
Based on the advantages and disadvantages of a pencil for a French jacket, let’s summarize and join the opinion of the majority of women who claim that a pencil is not able to completely replace decorative white varnish when creating a classic French jacket.
- Firstly, you can only use a pencil with a clear varnish; even if you add glitter or use a translucent varnish in a natural tone, the white effect will not be so noticeable.
- In addition to this, we remind you that the pencil will have to be applied to the nails several times a day, since it quickly loses its whitening properties. You can use a pencil only to complement the French, to make the white stripe at the tip of the nail brighter or to hide dirt and yellowness on the inner surface of long nails. In any case, when choosing a pencil, you need to be prepared for the need to apply it regularly throughout the day.
Wax pencils
Relatively recently, wax French pencils appeared on the market. They eliminate some of the negative features and disadvantages of chalk and clay analogues. In particular, if you applied the coating with a wax pencil, then the likelihood that it will survive hand washing is much higher. In addition, it is these pencils that provide the densest layer and are most evenly and easily applied.
However, they also smear on the finger when applied. But during use, the coatings, even on short nails, do not get dirty, since they are resistant to sweat and the wax coating itself is not sticky. After several uses, your own nail becomes denser and whiter, and may even become less flaky. This shows the therapeutic effect of such coatings.
Design ideas
persikovyy-francuzskiy-manikyur.jpg Attractive peach-colored French manicure, with ring fingers decorated with rhinestones nezhno-rozovyy-francuzskiy-manikyur.jpg Delicate pink French manicure with white short edges oval edges fioletovyy-s-serebristym-obratnyy-french.jpg Reverse French manicure with silver edges and ring fingers klassicheskiy-french-s-risunkom-cherniki-na-bezymyannom-palce.jpg Cute blueberry pattern - unusual to do in a classic French manicure belo-zolotoy-french.jpg Unusual French manicure in white with golden free edges and ring fingers fingers french-s-dark-sinimi-svobodnymi-krayami.jpg Classic French manicure with a twist - dark blue free edges raznocvetnyy-french-s-cvetochnym-risunkom-na-bezymyannom-palce.jpg French emerald, pink and blue colors with a picturesque flower design on the ring finger belo-rozovyy-french-s-belymi-bezymyannym-i-srednim-palcami-na-kotoryh-akkuratno-vpisalis-strazy.jpg Small rhinestones look very neat on the ring and middle fingers french-s-massivnymi -strazami-na-bezymyannom-palce.jpg Massive rhinestones look laconic on the ring finger against the background of a classic French manicure nezhno-bezhevyy-francuzskiy-manikyur.jpg A beige French manicure with an oval free edge is suitable for a daily trip to work klassicheskiy-francuzskiy-manikyur-rozovogo -i-belogo-cveta.jpg Pink French manicure with a short free edge nezhnyy-french-v-bezhevyh-tonah-s-chernym-risunkom-na-bezymyannom-palce.jpg Beautiful French manicure with a black pattern on the ring finger belo-rozovyy -francuzskiy-manikyur.jpg White and pink jacket with a long free edge klassicheskiy-francuzskiy-manikyur-s-belym-bezymyannym-palcem.jpg Delicate jacket in pastel colors with a white ring finger, on which a cute three-dimensional pattern is made klassicheskiy-french-s- dekorom-folgoy.jpg Classic French jacket with middle and ring fingers decorated with foil french-krasnyy.jpg Cute French jacket with red free edges nezhno-rozovyy-french.jpg Delicate pink jacket with ring fingers decorated with a pattern french-chernyy.jpg French jacket with black free edges and ring fingers decorated with a pattern bezhevyy-french.jpg Delicate beige French jacket with white free edges and rhinestones zelenyy-french.jpg Green French jacket is perfect for summer holidays french-dark-zelenyy.jpg French jacket with free edges in deep green color raznocvetnyy-french- so-strazami.jpg Bright multi-colored French manicure with rhinestones
So, having looked at the process of creating a French manicure using different methods step by step, you can make sure that there is nothing complicated here
It is important to follow simple tips and recommendations, then the result will be amazing!
Varnishing pencil
This pencil is something similar to a traditional office manicure corrector. It is made in the form of a plastic pen with a thin spout at the end. There is a small ball in the nose, which, when pressed, releases the polish contained in the pen onto the nail. Thus, the principle of operation and method of using such a pencil are similar to a stationery proofreader.
The disadvantage of such a pencil is that it gives a thin strip about 1 - 1.5 mm wide. Thus, it can only be used on short nails. After all, if you try to shade a long free edge with it, you will notice that it lies extremely unevenly.
https://youtu.be/JJx_asF_-BA
The work takes place in several stages:
- the base is applied, a wide brush allows you to create an even background of the selected shade;
- the next step is a neat white smile;
- if desired, drawings are added, but with a thin tip;
- A protective base is applied over the finished manicure.
The convenience of varnish pencils also lies in the fact that the applied layers of varnish dry almost instantly, you don’t have to take breaks or wait long. In addition, a poorly executed drawing can be erased with a regular napkin, and the bottom layer will not be damaged.
As you can see, there are a huge number of tools to make hand care easier. The main thing is not to let your imagination fail you and not to give up the desire to experiment.
Useful tips
Whatever pencil you choose, clay, chalk or wax, when applying it you need to follow several rules. They will not only simplify the application process, but also extend the life of the manicure and make it better and more accurate.
- All work with a pencil should be carried out strictly on dry nails. It is important that not only the plate itself is dry, but that there is also no liquid along the smile line. If you have recently washed your hands, it will be quite difficult to remove the water from there, and therefore it is better to wait a few minutes until it dries completely;
- The pencil should be sharpened as sharply as possible. This is especially difficult to achieve when working with soft pencils, which, moreover, tend to wrinkle when they get under a nail, etc. Clay pencils are most often soft and flexible;
- Before use, it is recommended to moisten the lead in water to make the coating more dense and even. Some pencils already create such a coating, however, chalk pencils often have to be kept in water for a little while;
- In order to reduce the amount of pencil that gets on the skin, the tip of the finger under the free edge can be sealed with tape or separated with a sheet of paper. These measures will not make the application completely clean, but will reduce the amount of pencil on the skin;
- You can wipe off anything that does get on it using a cotton swab dipped in water. But this must be done very carefully, so as not to damage the coating on the nail.
To complete this manicure, it is recommended to cover your nails with clear varnish.
It is better to seal the edge very carefully, because the varnish can “wash off” the coating. However, if it remains on the brush and ends up in the bottle, it can cause the finish to fade or become cloudy. [yandex3] [google3]
Design ideas
An elegant and laconic French manicure is good in itself, but thanks to lovers of variety, the idea has received comprehensive development. Based on the classic version, fashionistas create new designs, experimenting with color, shape, texture, and decorations. Of course, it was not without criticism, but many girls like the idea. Even Hollywood actresses do not deny themselves the pleasure of decorating their nails with an unusual pattern.
Art French is not distinguished by the versatility of the original and does not suit all outfits, but it allows you to choose a harmonious manicure for each specific look. There are so many variations that it is impossible to list them all, but they can be conditionally divided into several groups.
Colored French
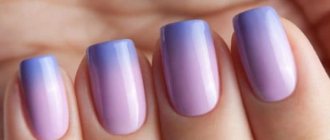
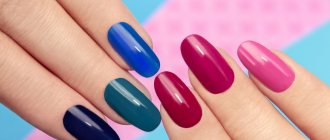
This idea turned out to be the easiest to implement; you just need to draw a smile line using any other varnish, not white. The central part of the nail can also be coated with a contrasting color. The result will be an unusual manicure, which, depending on the chosen range, can complement both a strict business image and a bright youth look.
Colored French manicure can combine any shades
Twist
You can paint the tip of your nail with several colored varnishes. They are used to draw parallel stripes, waves, zigzags and swirls.
In the twist version, the tip of the nail is painted in several colors
Millennium
You can decorate the smile line with sparkles: paint over the entire tip of the nail, draw a thin strip along its edge, or create a sparkling gradient. The French jacket turns out to be very bright and festive, making it great for parties.
Millennium French is a manicure option where the smile line is decorated with sparkles.
Fan French
The tip of the nail can be decorated not only with colored or shiny varnishes. Granules for caviar manicure, velor fibers for velvet, mica, foil, rhinestones, beads, lace and even fragments of dried plants are used. The variety of materials will allow you to fully enjoy the creative process and create a unique design for any event.
Fan-french involves the use of all kinds of decorations in manicure.
French with a non-standard smile line
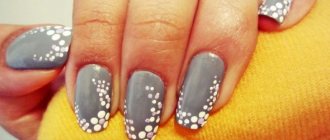
The smile can be of any shape: beveled, triangular, wavy, V-shaped, double. Additionally, it is decorated with dots, thin lines, and patterns. It’s not difficult to make such a manicure, but the result of your efforts will not go unnoticed.
The smile line may be part of a complex pattern
Wedding jacket
To create this variety, traditional colors are usually used, but the nails are additionally decorated so that the manicure matches the dress and hairstyle.
Wedding French is a combination of classic manicure with patterns and decorations
Video: moon manicure, colored French manicure and version with rhinestones
French is simple and complex at the same time. Its flawlessness and naturalness are the result of painstaking work. To master the technique, you will have to try, but the game is worth the candle, because the famous manicure will always help out, including situations when it is difficult to decide on an “outfit” for your nails. Even those who prefer variety in everything will be able to find dozens of original ideas for themselves or come up with an individual one, taking as a basis a classic design that is unlikely to go out of fashion.
Application
Below we will describe the technology of how to use a pencil for a French manicure yourself. Almost all such pencils are intended exclusively for home use and are not used by craftsmen. Before you begin your manicure, sharpen your nails and carefully remove any dirt from underneath them.
- Sharpen the pencil sharply;
- Place small pieces of paper under your nails to separate the edges of your nails from the skin;
- Dip the pencil in water;
- If the instructions recommend, keep it in water for the required amount of time;
- Place the lead under the nail and draw a line, pressing one side of the lead cone against the back of the nail;
- If the nails are long and you have painted not the entire free edge in this way, but only part of it, shade the unpainted area;
- Apply a thin coat of clear varnish on top, leaving the cut edge unsealed.
After the top coat of varnish has dried, your manicure is ready for use. More information about what a white nail pencil is, what it can be and how to use it is described in the video in this material. The use of this pencil is suitable for everyday manicure in a nude style.
How to do a French manicure at home: step-by-step instructions
First you need to remove the old manicure, if any, make your favorite hand bath or simply wash them with soap. Then you should treat the nails: remove excess length and flaking tips, give the intended shape, carefully cut off the burrs, push back the cuticle, sand with a soft buff. Gel polish will require more thorough sanding to remove the top glossy layer. After this, wipe the nail plate with nail polish remover to degrease it and remove sawdust. Then the creative process begins.
- Apply a protective base. This step is not mandatory, but desirable, since such products strengthen the nails, smooth their surface, and make it easier to apply varnish. In addition, they protect against harmful substances that are found even in expensive products from luxury brands.
- Cover the nail with two layers of base polish and wait for them to dry.
- The most difficult stage of the entire process is to draw the so-called smile line, that is, paint over the tip of the nail. He must be extremely careful, since he plays a key role in the entire manicure. By the way, the smile line allows you to visually correct the shape of your fingertips: if the pattern is moved a little higher and made more rounded, then the nail bed will acquire exquisite oval shapes. Some girls find it easy to draw a straight line using a regular brush from a bottle of nail polish, but most still cannot do without additional devices, which will be discussed below.
- Decorate the manicure with a pattern, if it was planned.
- Apply a topcoat that will add gloss, speed up drying and increase the durability of the manicure.
The final coat will give your manicure a glossy finish.
When using gel polishes, the procedure looks similar:
- Treat prepared nails with primer and let it dry.
- Apply a thin layer of base gel and cure it in a lamp. The drying time must be specified in the instructions, since it may differ from company to company, and failure to follow these rules can lead to nail breakage or peeling of the gel.
- Paint each nail in the main color and also dry it in a lamp. If necessary, add another layer of base varnish.
- Draw a smile and dry again. If a stencil is used for this purpose, then first remove the sticky dispersion film using a special tool - a clinser. At this stage, gel polishes have an undeniable advantage over regular ones: they retain their consistency and do not set in the air, so you can correct blemishes at any time with a toothpick or other suitable tool.
- Apply top, trying to level the surface and smooth out the thickening above the smile line. This may require two layers, each of which must be polymerized in turn in a lamp.
- Remove the sticky dispersion, then moisten the skin around the nails.
If you do French polish with gel polishes, you will need to get an LED or UV lamp
