If gel polish flows onto the cuticle
In this article, I propose to analyze one of the most common problems faced by both beginning artists and those who do their own gel polish coating - gel polish runs on the cuticle and side rollers. This usually happens when you try to apply the color as close to the cuticle and side edges of the nail as possible. This can happen not only with colored gel polish, but also with base and top coat, it’s just that with a colored coating it’s more visible and can be corrected before drying in a lamp, which is much easier.
What is liquid tape for manicure used for?
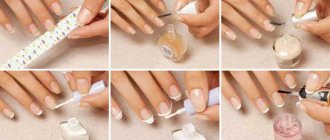
Manicure film is needed to protect the cuticle and side rollers from paint coatings during the design process. The rough component found in any polymer can cause damage to delicate and sensitive skin. Use it when performing the next technique, which involves getting material on your fingers. It is better to cover the areas close to the plate with a protective film, thereby protecting the delicate epidermis and making it easier to remove excess dye from the skin.
The tape serves as an auxiliary material for design in the following directions:
- gradient;
- marble pattern;
- any airbrush work;
- a technique that involves direct contact of the skin with varnish.
Reasons why gel polish runs dry
I think you already know that the beauty and ease of applying gel polish is largely determined by the pre-treatment of your nails. To apply gel polish as close to the cuticle as possible without streaking, you need to not only cut the cuticle evenly, but also lift it and clean the space underneath it.
Pterygium is a thin weave that fits quite tightly to the nail, so removing it is not always easy. The most convenient way to clean a pterygium is with a device, but when performing a classic or European manicure, this is a little more complicated.
Usually, dust remains under the skin after processing the cuticle and pterygium using cutters during hardware manicure. It is removed by degreasing the nail plate. Therefore, to prevent it from remaining, do not forget to lift the skin at the cuticle and apply a degreaser there too.
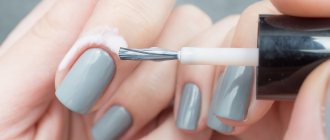
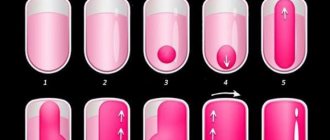
If you take a well-saturated brush from a bottle directly to the cuticle, you will inevitably get streaks. Start applying the gel polish, stepping back slightly so that most of the material remains on the nail, and a semi-dry brush approaches the cuticle.
In addition, with the first layer, it is better not to immediately try to apply gel polish under the cuticle - it is better to do this already on the second layer, or use a thin brush for this.
If you paint under the cuticle with a brush from a bottle, you need to press it so that it lies like a fan against the cuticle, and then push the gel polish as close to the cuticle as possible.
It will also be difficult to apply without streaking the skin. In this case, I can recommend making the layer thinner and applying it with an almost dry brush. The number of layers, of course, will have to be made more.
Shellac under the cuticle: how to paint using the technique so that it doesn’t smear
You should apply shellac under the cuticle to prevent it from running, using the same technique as with gel polish, that is, this is your choice:
- A “native” brush from a flower garden, with which the product is applied first in the center, then along the side rollers. At the same time, the cuticle is pulled up, and the pile of the instrument is pushed towards it with small movements.
- Fan technique, in which the brush is fluffed. Staining under the skin is carried out with the edge of the pile, and the cuticle itself is strongly pulled away from the nail.
- Use a thin brush for the most difficult operations. You can first paint the main part of the nail with the tool from the bottle. Only then take a “hair” and apply the material close to the cuticle. Or you can also use it first and dry this gel polish track in a lamp. Then the nail is painted completely.
It must be taken into account that the texture of shellacs is usually more liquid than that of gel polishes. Therefore, beginners should use the latter method, although the choice, of course, depends on personal preference. And be sure to dry each nail separately in a lamp, and not cover everything and only then polymerize it.
What to do if gel polish gets on the cuticle?
If it so happens that the gel polish does get on the skin - the cuticle or the side ridges - then you can still save the situation, but it is better to do this before placing the numb nail in the lamp.
How to fix streaky cuticles before drying
As you can see, the technology is almost the same as in the case when regular nail polish runs - it is also removed with a brush, only moistened with nail polish remover.
I saw that some people use the sharp tip of an orange stick instead of a brush - this method also has a right to exist.
How to remove gel polish from skin after drying
In this case, the first thing to do is to separate the gel polish from the skin.
If the leakage is small, then you can do without tweezers and immediately remove it with a cutter, for example, a flame.
How to remove gel polish without foil
Gel polish can be removed without foil. This removal method requires the following components:
- cotton pads;
- orange stick;
- liquid with acetone.
How to erase:
- First of all, the top coating is filed using a nail file. This is done easily, carefully and there is no need to press on the nail plate;
- Next, the cotton pads need to be cut into two parts and soaked in nail polish remover;
- The moistened halves of cotton pads are wrapped around the nails;
- We hold the discs for about 15 minutes, during which time the product should dissolve the gel polish;
- After this, remove the cotton pads and carefully pry off the coating with an orange stick. You may not be able to remove it the first time;
- If you can’t remove it the first time, you will have to apply cotton pads with solvent to your nails again.
This method is not very good and can harm your nails. After removal, it is best to treat the cuticles with oil and leave the nails without polish for several days.
Gel polish runs on the cuticle: what are the reasons and what to do
Manicure salons have not yet opened in all cities, so some girls have to, for example, make their own gel polish. Long, tedious and not without problems.
We've already talked about cuts, now let's move on to streaks - also a common problem when the base, coating or top can flow onto the cuticle and/or periungual fold.
As it grows, the cuticle outline will be unclear and blurred. Many girls begin to pick at the swelling, which will lead to detachments in the future. To prevent this from happening and you don’t have to redo everything all over again, let’s look at the reasons for the formation of streaks.
Poor quality manicure
The presence of pterygium ( these are thin films layered on top of each other, between the cuticle and the socket
) and poorly processed cuticle.
By the way, when a master is told about “removing the cuticle,” they do not mean cutting it off completely (this is dangerous to health), but removing the pterygium.
Due to an insufficiently cleaned pterygium, any base will have streaks.
I don’t recommend cutting manicure; it’s better to buy a remover - a product that softens the cuticle. Apply it to the cuticle. You wait until the pterygium gets wet (just don’t let the remover dry out) and simply clean it with an orange stick.
Dust
After you have done your manicure before applying the coating, the dust remains under the cuticle. She also provokes swelling
Don’t just brush over your nails, but carefully remove the dust under the cuticle. This can be done with an orange stick, which is tightly wrapped in a napkin.
Holding your hand in the lamp incorrectly
You put your hand under the lamp and accidentally touch the coating. We get something like the one in the photo below.
You can't put your hand down. Drying all your fingers at once is wrong: either 4 at once and the thumb separately, or each nail separately.
If you suddenly touch the coating of the lamp, then remove with a napkin everything that has not dried, then dry the nail completely. Then, in the lateral sinuses, carefully clean the nail with a cutter, sand the surface, degrease and reapply the coating.
Problem with materials
The consistency of the varnish or base is too thin. The problem may also be with a specific shade that constantly flows.
Here are the options:
How to prevent polish from getting on the skin around the nail
Manicure design requires a subtle approach to applying varnish and designs, so you can warn yourself in advance against unprofessionalism. To prevent the gel from sticking to the skin and having to rub it for several minutes, you can go the other way. To do this, use protective measures by applying gel and cream formulations:
- Vaseline;
- fat cream;
- special cosmetics.
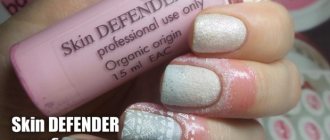
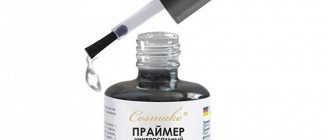
Some go further and use PVA glue. Professionals advise purchasing a liquid mixture called “defender,” which translates to “defender.” This product consists of natural rubber. This sticky consistency is applied around the nail plate before painting with gel. When the defender dries, a manicure design is performed. Next, remove it from the nail in the form of a gel film, carefully prying it off with tweezers. It is impossible to do without it if you plan to make a complex design - gradient, stamping, creative painting. In the case of cream and Vaseline, everything is simple, they are applied before coating the varnish, then the product is removed with a cotton swab with all the imperfections.
Advice! Choose a defender from the popular brands RIO Profi, El Corazon, Barlet. The product is usually pink, but recently other shades have appeared on sale.
Why gel polish runs and how to remove smudges
What troubles can happen when working with gel polish, especially for beginners. A frequent request for advice is the question of gel polish running - how to fix it, what’s wrong and how to prevent it in the future.
In this article we will tell you how to avoid smudges of gel polish during application and what to do with existing ones.
Gel polish runs dry
When gel polish leaks, two scenarios can be distinguished:
The root causes of problems lie in application.
Having discovered and solved them, you won’t be afraid of gel polish streaking onto the cuticle in the future:
Summing up the reasons for gel polish flowing onto the skin and cuticles, there is clear advice - practice correct application. Your family members can become wonderful “nail models.”
How to remove dried gel polish
Remove the stickiness from the dried gel polish. We separate the coating that has dried to the skin using a scalpel or hatchet-shaped scraper/pusher.
Afterwards, we remove the dust and perform the remaining layers with a slight overlap of the processing area with a milling cutter.
This guide is intended solely to help beginners and occasional problems with pros. It is normal to constantly progress and not allow the coating to bleed.
Source
What to do if the top is numb and dry
Every girl dreams of a luxurious manicure. Today this is not a problem. In any nearby beauty salon, masters will create a unique manicure design. If desired, you can create beautiful nail decor at home using gel polish and the necessary tools, which are offered in specialized stores. But in addition to the necessary materials, you must have the skills to use helium varnishes. For example, if varnish accidentally gets on the cuticle and skin, how can you remove it without disturbing the beauty of the manicure?
Removing polish residue from cuticles
Tool requirements
There are thousands of nail art masters in any city, dozens of worthy ones. Do you remember your ordeals and adventures before finding the treasured phone number of her - the girl who makes your nails perfect without blood loss in the cuticle area, nervous fidgeting and ridiculous advice? Have you ever met a master who makes decor and chooses colors without listening to your wishes, selects and files a nail into an oval shape, although you categorically stated exactly 3 minutes ago that you need a clear square, uses materials that are not of very good quality, violates technology to such an extent that long-lasting shellac lasts exactly 2 days? Sorry, inspired by personal memories.
Visit only a specialist who has been trusted by your friends, or learn how to paint your nails first with a single-color gel polish as carefully, evenly and correctly as possible on your own. Today is not about the technology of use, but about the technique of careful application.
First of all, you need to have the appropriate tools and the proper quality of the substance:
- Do you remember how many makeup brushes are in a cosmetic bag? The situation with manicure is similar: well, you will not be able to avoid smearing the cuticle if the brush in shellac resembles a blush brush. It should have a pile of medium length, preferably flattened, clearly cut, the hairs cannot bristle or separate into 2-3 separate brooms. The handle itself should be comfortable and not slip out of your hands. It is better if the bottle is of a classic shape or decreases in diameter towards the bottom - when the brush reaches almost to the bottom and when collecting the product you do not have to turn the bottle over; the process will be much more convenient and simpler.
If you see that the brush does not fit or it begins to bristle after several uses, you can use a separately purchased one, with a long handle (this is very convenient), with the correct length, shape and stiffness of the bristles. A specialized store will recommend this to you.
- The pigmented varnish itself should have a gel consistency. Gel polish should not be too liquid - compare several products from different manufacturers, read reviews first. Otherwise, the product will spread quickly even before it polymerizes a little. Or it will have to be painted in three very thin layers.
- Please note that primer and top coat are much more liquid. We apply them and immediately place the nail in the lamp. Most often, it is the finish that floats under the nail.
- The lamp for polymerization (drying) must be of sufficient power so that the coating “sets” immediately after placing a finger in it. For home use, 12 watts is sufficient.
These are such simple, intuitively predicted tips.
How to keep the skin around your nails clean?
Masters advise using several of the following secrets in the process of decorating nail plates:
It is recommended to apply any of the above products immediately before starting the artistic part of the work. If you apply Vaseline or glue while treating your nails with a buff or file, small shavings will clog the skin and cuticles, forcing the nail technician to clean the area. When applying petroleum jelly, greasy cream or PVA glue to the periungual surface, you must be careful to ensure that the product does not get on the nails. If a greasy composition gets on the plate, you must immediately remove the product by carefully wiping the surface with clean cotton pads.
Girls who create their own manicure at home note the ease of using PVA glue. It is applied a few minutes before the start of nail art. Apply a small layer of PVA to the periungual surface and wait for it to dry. The glue forms a thin film on the skin, which is easily removed in warm water. After waiting for the adhesive protection to dry, you can begin decorating the plates with gel polish.
Using an orange stick
Note that when performing an Ombre style manicure, it is recommended to use special products to remove excess gel polish after drying under a lamp. Since this technology involves painting the nails and part of the adjacent skin.
From the professional products that professionals use in salons, it is recommended to choose those that have protective properties. Emollient components not only make it easier to remove the sticky layer of gel polish, but also soften the skin and cuticles.
Applying PVA glue
Ways to keep the skin around the nail clean
There are several secret techniques with which the manicure is attractive and the skin around the nail is clean and unharmed.
Some of them:
- Using Vaseline.
- Using PVA glue.
- Applying rich cream.
- Use of special means.
In addition to the above methods of protection, there is one more method - gluing tape. But in the case of water manicure, this product will not be effective at all, since upon contact with water, the tape loses its adhesive properties, as a result of which it simply peels off and the varnish gets on the skin.
Tools to help
To remove gel polish from the skin around the nail at home, it is not enough to choose a suitable composition to protect the cover. For convenience, you will need to use the following tools:
The most convenient device, according to manicurists, is a wooden stick obtained from the wood of an orange bush. You can buy it at your nearest specialty cosmetics store.
How to properly use an orange stick?
Dip the stick into gel polish remover and shake off excess. Carefully, trying not to catch the decorative coating on the nail, collect the sticky layer of shellac from the cuticles and periungual surface. After each time, wipe the stick on a napkin. We repeat the procedure until the excess varnish is completely removed from the skin. This method is the most convenient for removing gel polish, even after drying the manicure under a lamp.
Cotton swab or toothpick
Another common way to remove gel polish from the cuticle is to use a cotton swab or toothpick. Girls claim that the second option is more convenient, since a toothpick removes excess gel polish from both the cuticle and the periungual surface very carefully. You can also use a cotton swab. But it will not be possible to clean the surface in hard-to-reach places. A cotton swab leaves small particles on undried varnish, which are quite difficult to remove.
Small brush
This is another tool that allows you to remove gel polish from nails and the periungual surface. The brush is very convenient to use for evenly applying the product to remove the sticky layer from the nail plates, as well as for cleansing the cuticles and skin around the nail. There is absolutely no need to buy a separate brush for home use. For such work, a small artistic brush or a brush from used varnish, previously rinsed from the previous composition, is suitable.
Application technique
Follow each of the recommendations:
- Before carrying out the procedure, we carefully cut or push back the cuticle.
- We collect a sufficient amount of product, then wipe one side of the brush on the side. We apply gel polish or shellac with the side from which the excess was not removed.
- It is very important to put the correct amount of product on the brush: so that the bristles are completely enveloped, but not dripping from them.
- We pull the side rollers to the sides - this way you have a better chance of applying the gel to the nail closer to the skin. By the way, if you want to visually lengthen the nail plates, do not paint too close to the skin - leave the plates a millimeter apart on the sides.
- We paint the base and finish in a thin but even layer.
- We apply all liquids in the same way, namely: dip the brush, remove the excess, place a drop on the plate a few millimeters from the root of the nail. Then we move to the root, to the cuticle (we adjust the distance to the cuticle with a brush) and stretch the strip to the free edge. Then in the same way we paint the side surfaces and again the central one. Dip the brush once, paint the nail completely once.
Very important: do not try to paint the nail all the way to the cuticle . A gap of half a millimeter will protect you from jambs, the coating will look as even, neat and beautiful as possible. In the case of gel polish, at the finishing stage you need to apply makeup so as to cover the border of the colored varnish, so this technique is especially relevant.
- We place each nail in the lamp immediately after covering it again. A minute of delay - and the product flows down to the nail folds, here the coating becomes thicker, which means the manicure comes off faster. And if the product is liquid or you apply a lot of makeup, it will float onto the skin or even under the nail.
- Do not perform the procedure too close to the UV lamp.
- If the skin is dirty, it is best to erase all the layers from the nail and paint it again - such a correction is fraught with complete failure. If the defect is minor, we remove it with our own nail (professionals forgive me) or with a special pencil to remove fragments. It is impossible to qualitatively remove defects after even a second of placement in a lamp.
- Some novice young ladies use a skin protection technique (you can often find it on the Internet): cover it with a thin layer of rich cream near the nail, remove it at the end. We wouldn't recommend doing this. Firstly, even the slightest particle of oil that gets on the nail will ruin the manicure, it will come off very quickly, and secondly, it is long, very painstaking and inconvenient. It is better to pay attention to precise and precise application with a regular brush, practicing on a dummy or your own fingers.
To begin with, we can recommend using varnishes of non-contrasting colors, the boundaries of which may not be so clear. Look, in a month you won’t need the services of a professional to get a perfect chic red manicure.
Mistakes when applying gel polish at home
Have you learned how to apply gel polish at home, spent money buying a lamp, tools and a bunch of gel polishes, but the artificial coating does not last for the promised 2-3 weeks and chips after a few days? Don't be upset.
Perhaps, when applying the coating, you simply make mistakes, correcting which you can enjoy a lasting result!
Manicure stages and possible mistakes
Today there are 3 main types of manicure:
Combined and hardware manicure must be done using a special manicure apparatus, but before using it, it is better to undergo training, since improper operation of the apparatus can lead to damage to the nail plate, for example, cuts. For beginners, it is better to do a classic manicure at home.
Stage 1. Shape filing, cuticle processing
Before applying gel polish, you need to put your nails in order: treat the cuticle, file the shape.
What do we do at this stage?
Stage 2. Preparing the nail plate for coating
What do we do at this stage?
Mistakes at the nail plate preparation stage
Mistake #1:
Typically, people with oily skin or those prone to excessive sweating have a moist and oily nail structure. When preparing such nails for coating, it is necessary to use a dehydrator (nail prep) to deeply dry the nail plate, remove excess moisture from it and improve the adhesion of the natural nail to the artificial coating.
Mistake #2:
The free edge of the nail is one of the most vulnerable places: if you do not pay proper attention to it, chips and detachments may appear. To improve the adhesion between the nail plate and the artificial material, it is necessary to use a primer. Primer is translated as “primer”. There are acid-free and acidic primers.
The acid-free primer acts as double-sided tape and ensures strong adhesion of the natural nail to the artificial nail.
The acid primer lifts the keratin scales of the nail plate for better adhesion to the artificial material. Since the acid primer contains aggressive components, you must be careful not to get it on the skin and cause a burn. It is recommended to use it before extensions for girls with wet or oily nail texture.
Stage 3. Covering the nail plate
What do we do at this stage?
Errors at the stage of covering the nail plate
Mistake #1:
You used the wrong base for your nails.
The condition of the nail plate is different for everyone: for some it is strong, while for others it is thin, soft and plastic. You cannot use the same base for all nails. It is necessary to analyze the condition of the nail plate and pay special attention to the choice of base coat.
Today there are 3 main types of base coatings: hard, elastic and camouflage. What are their fundamental differences? Which one to choose? Let's figure it out.
Hard bases
Elastic bases
Elastic bases are great for beginners: they are easy to work with, as they do not spread, and the alignment is perfect. Using elastic bases you can extend your nails. Elastic bases are great for soft, highly flexible nails. But on long nails they sag over time, that is, after a while a “dip” appears across the nail.
Why is this happening?
Bases are soft gels, and they, in turn, as we said above, can be elastic or not.
Elastic bases perfectly strengthen the nail plate when leveling, because they are flexible, tenacious, and when the free edge moves, they, like an elastic band, move with it. But this is precisely why shrinkage occurs.
There are bases that contain solid plasticizers. Solid materials do not move with the nail and, accordingly, do not shrink. But keep in mind, UNDER HEAVY LOAD, almost any base will give minimal shrinkage.
What to do?
Strengthening with acrylic or hard gel, but this is a completely different procedure. In addition, the harder the material, the worse it soaks and the more difficult it is to cut.
ADVICE! Sometimes it is not very clear from the name of the base whether it is hard or elastic. To determine the type of base, you can do the following: apply a small drop or strip of base to the surface of a transparent plastic bag and put it in a lamp to polymerize. If after polymerization the drop (strip) bends, it means you have an elastic base in your hands. If you can’t bend the drop and it cracks, then the base is solid.
Mistake #2:
You held your hand in the lamp incorrectly and the coating did not dry well.
How to hold your hand in the lamp correctly?
Mistake #3:
You stored and transported the gel polish incorrectly, it has thickened or air bubbles have formed in it, which is why the coating does not adhere well and is difficult to work with.
Step-by-step instruction
Shellac does not dry out under normal conditions at home or outdoors. You will need a UV lamp for drying. Under the influence of ultraviolet rays, the gel base dries in half a minute. It is also important that the claws are properly prepared for the procedure.
For perfect application, it is necessary to follow all points in order, use high-quality materials and special equipment.
Softening the cuticle
Manicure includes care not only for the nails, but also for the skin around it. Hangnails, cuticles, and dryness will not allow your hands to look beautiful, so to soften them, use a regular bath with slightly hot water or apply a remover (lotions or creams).
Attention! You cannot use boiling water for the bath. The skin will become over-hydrated and coverage will not work.
Treatment
The softened cuticle easily moves to the base of the claw if it is well moistened. A scraper is used for this procedure.
Grinding
At this stage, it is necessary to sand the nail plate and trim the edges, giving it a certain shape. Grinding is done with a special device called “Buff”.
Nail polishing
Degreasing
In order for the gel polish to adhere well to the nail, it must be degreased. A primer is used for this. Example in the photo.
Applying varnish
The first layer is the base. It must be applied with a pepper colored coating. It ensures a smooth plate and durability of the manicure.
Applying gel polish
After the base coat, apply gel polish. A wide range of colors from various manufacturers allows you to choose and paint a cheap and high-quality option with the perfect highlight.
Rules for applying varnish
Drying
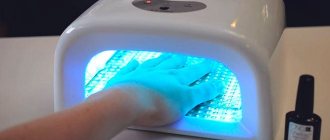
After the varnish is applied, it must be dried. For this you will need a special lamp. It is desirable that it has mirrors on all sides. This way, ultraviolet radiation hits the entire finger area evenly.
Drying nails in a UV lamp
There are also lamps for drying on one or both hands at once. The choice depends on the buyer. There are also models with a timer and a fan. Studying the reviews, we can say that you can save money on such additions and, while performing the procedure, time the time on a separate watch.
Application of a protective layer
The protective layer (top) must be applied over the gel polish. It allows you to achieve the perfect highlight and fix the shade. After coating, you must use the lamp again to dry.
Apply base to nails
For reference! There are varnishes on sale that can be used as a base and top at the same time. Judging by the reviews, they can be painted once.
Removing the sticky layer and moisturizing
It is carried out at the last stage. The skin of your hands suffers in the lamp because it dries along with the varnish. It should be moisturized with oils or cream.
Important! The master class is presented clearly in the video.
What else can cause problems when applying artificial turf?
Have you tried all kinds of bases, but your nails still appear chipped and peeling? There are several explanations for this, for example:
What to do? Do you want to part with your long-lasting, flawless manicure forever?
Of course not! You can take the webinar “Complicated cases in base coating of nails” from the teacher of the ParisNail school Velmitina Zaitseva.
You will receive a detailed algorithm for applying and fixing the material, learn all the secrets of the teacher and be able to avoid material detachments!
How to remove artificial material correctly and why is it important?
You've probably heard that gel polish spoils your nails, making them thin and brittle. It is a myth! It's not the material that ruins your nails! One of the reasons for damage to the nail plate is improper removal of the artificial coating, so this procedure must be approached with special responsibility!
Is it possible to remove gel polish yourself at home without damaging your nails? What materials and tools are needed for this? Let's figure it out.
How long can you wear gel polish?
First, let's figure out what period of wearing the coating is optimal. Often girls wear gel polish for a month, or even longer. However, they do not understand that they can damage the nail plate.
Technologists advise walking with the coating for no more than 2-3 weeks. Prolonged wear puts stress on the tip of the nail plate, its root suffers from the weight of the coating. All this can lead not only to breakage, but also to deformation of the nail plate.
How can you not remove gel polish?
RULE 1: Under no circumstances should you pick at the gel polish or tear it off the surface of the nail plate, because this can cause serious injury! If you are careless, you can remove the top layer of the nail along with the material, and this can lead to thinning and, at a minimum, painful sensations when in contact with water and various surfaces.
RULE 2: do not file away partially peeled off gel polish. In this case, you also risk cutting off the top layer of the nail and ruining it.
What other consequences might arise?
We hope these reasons are enough to convince you not to peel off the coating from the nail plate and do the gel polish removal according to the rules!
By the way, the peeling process itself is quite painful, it’s hardly worth it!
Gel polish removal methods
There are two ways to remove artificial turf: using sawdust and by soaking it with a special liquid or napkins.
To remove the coating using sawdust, a special apparatus and removal cutters are required. Therefore, this option is suitable only for those girls who are familiar with hardware manicure.
Perhaps someone will have the thought: “Why not try to remove it with a rough file?” But we’ll immediately answer that this method is quite problematic, takes too much time and can damage the natural nail. It is necessary to try very hard to treat the area near the cuticle, and there is a risk of rubbing the skin. Therefore, at home, the easiest way to remove it is by soaking.
If you want to master sawdust removal, then sign up for basic courses at our licensed school “ParisNail”! After training, you will not only do a flawless manicure for yourself, but will become a real professional in the nail industry and will be able to work as a manicurist!
Maceration
This method involves soaking the gel polish with a special acetone-containing liquid. You will find a list of materials required for this procedure and detailed technology for removing gel polish in the article “How to remove gel polish (shellac) at home?”
NOTE! Not all base coats can be soaked, so ask the seller to select the base that is suitable for this type of removal.