Today, many girls for whom the beauty of their hands is important strive to master the basics of manicure art on their own. It’s more difficult for them than for professional craftsmen, because they have to look for answers to many questions on their own. Yes, and for those who have received a diploma as an oil master, sometimes it is not easy to master working with some material.
Currently, a huge number of products are being produced. And technologies from different manufacturers may vary. This is why situations arise when the usual established technique does not bring the results that we would like to expect.
Our article is devoted to one of those issues that cause a lot of controversy in the beauty communities. Do I need to remove the sticky layer from the base? Most professionals answer this question in the negative, but if everything were so clear, disputes would not arise at all.
What is a sticky layer
Many gel materials, which include bases, varnishes, building and strengthening gels, paints for painting and top coats, polymerize in ultraviolet or LED rays and form a sticky layer. Why is this happening? During drying, the substance passes from one state of aggregation to another, and a crystal lattice is formed. The process is accompanied by the release of a dispersion liquid, which is the very stickiness that can be seen on the surface. In some cases, heat is also released - it is because of this that materials are said to be baked in a lamp.
Will there be a sticky layer on the base?
Many people know that there are tops without a sticky layer. But it is unlikely that you will be able to find a base with such a feature on sale.
Why is that? Because in some cases the stickiness of the top interferes with the master. Non-dispersion material is used for complex designs. For example, it is used to color rhinestones and bouillons. Removing stickiness from a non-uniform surface is extremely problematic.
The base is top coated with varnish, gel or top without fail. The craftsman does not have to wipe the material lying in the thin crevices between the rhinestones and opals. Even if the stickiness is not needed, it is quite easy to remove it from the base. Therefore, almost all bases on the market are not without this stickiness. When buying a new material, be sure that after drying you will find stickiness.
Do I need to remove the sticky layer from the base?
But the dispersion layer is not only a side effect, otherwise manufacturers would have long ago figured out how to get rid of it. The sticky layer also serves to adhere the layers to each other. The coating adheres better when applied to a dispersion substrate. So is it necessary to remove the sticky layer from the base? It turns out that it is an integral part of the right technology.
But we have not yet received an answer to the question of whether it is necessary to remove the sticky layer from the base. It’s too early to draw conclusions. But let us remember that if there are no “aggravating circumstances”, you can simply ignore it. After applying the base and drying it, simply move on to the next step.
How many layers of gel polish should I apply?
For some reason, there was a dispute or confusion about the number of layers of each coating. Perhaps this is due to the rich and vibrant color, which is achieved by applying several tiers of color.
Therefore we want to highlight:
- dehydrator and primer go in one layer without drying in a lamp. They dry instantly and naturally. The layer should be as thin as possible;
- The base is applied in one layer. Moreover, this must be done literally in a millimeter layer, without reaching the skin. Although we don’t worry, there won’t be a burn. It’s just that when the nail grows, there may be a small protrusion at the joint;
- Color gel polish comes in 2-3 layers. The less pigment in the varnish, the more layers are needed. Each layer must be dried in a lamp for the proper time;
- The finishing coat is applied in one layer. In this case, it is necessary to secure everything at the ends.
Is there any difference in applying gel polish to extended nails?
- It is impossible not to touch upon this aspect. In principle, the application scheme does not change. But there is one “but” - the primer should absolutely not be applied to acrylic . Otherwise, he will simply destroy all efforts. Primer and bonder are applied only to natural nails.
- After degreasing, you simply move on to applying the base. And then follow the above instructions.
We examined in detail the algorithm for applying gel polish. But do not forget that you will also need to remove it. This is not your ordinary varnish that will even wash off with water after a while. Ripping it off is definitely not an option, since you will tear it off along with the scales and even entire plates of your nail. Therefore, we suggest you take a look at this page and see how to carefully and efficiently remove gel polish without damaging your nails.
Don’t forget that gel polish also needs to be removed correctly.
Before sawdust
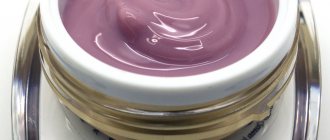
Thick bases are used not only to ensure adhesion between the nail bed and the decorative coating. Using this material you can level the nail plate and even complete the missing corners.
Of course, to get perfect highlights, you need experience, dexterity and theoretical knowledge. For a beginning craftswoman, the result may be the opposite: the base will not level the surface, but, on the contrary, will distort it. Material that is not laid out correctly can form sagging and bumps when baked in a lamp. What to do in this case? Will we really have to do a complete dismantling and start all over again?
Fortunately, the situation can usually be corrected with a file. It is enough to simply polish the tubercles and thickenings well, removing excess volume. But before you pick up the file, you need to remove the sticky layer from the base. Otherwise, you will get dirt and you won’t be able to get the job done quickly. Sanding a sticky surface is a waste of time. Wipe the nail, getting rid of the dispersion layer.
What are the substitutes?
Since liquid for removing the sticky layer is usually expensive, this product can be replaced.
- Every store sells a variety of liquids that can be used to remove gel polish. However, their choice must be approached responsibly: they should not contain acetone, as it can undermine the health of the nail plate or ruin the entire manicure. Even if you dilute acetone with water, it will still have a destructive effect on the gel polish layer. In addition, they do not need to contain essential oils, since after using them no paints will stick to the nails.
- Regular alcohol has the same effect, which can be obtained without a prescription at any pharmacy in order to replace the liquid for removing the sticky layer. Formic alcohol is also considered a good substitute because it does not in any way affect the structure of shellac gel polish. It has a good ability to relieve allergic reactions that may occur when applying shellac, and can also perfectly degrease nail surfaces.
- Sometimes girls buy an antiseptic medical solution that contains a large amount of alcohol. They also have the opportunity to replace shellac remover.
- Boric acid, which is available in pharmacies, can be perfect for such a responsible task. It is worth considering that using boric acid in large doses is strictly prohibited, otherwise it can have a destructive effect not only on the manicure, but also on the nail.
- A folk remedy that is sometimes well used not only in everyday life, but also in the field of beauty is an alcoholic drink, i.e. vodka. They are recommended to replace the liquid for removing the sticky layer if there is a risk of clouding the shade of the shellac gel.
Vodka has absolutely no effect on shellac and its structure.
Varnish and base of different brands
Some people believe that it is absolutely forbidden to use products from different brands. But if earlier such an idea was quite common, today most masters claim that this statement is greatly exaggerated.
And yet there is some truth in it. It happens that when using products from different companies, the varnish simply rolls off the base. Before you have time to finish painting your nail, you may notice a bare end or a gap near the cuticle. Let's not argue with the fact that some products are simply categorically incompatible. But in most cases, simply wiping your nails with a clinser is enough.
So, an important point that is also worth remembering: after the base, you need to remove the sticky layer if the varnish and base of different brands do not work well together. As a rule, this trick works well. But it also happens that simple wiping is not enough. Then it’s worth going over a well-dried base with a soft buff. There can be no clear recommendations. Experiment to determine which method works best for your materials.
How to properly apply gel polish at home: step-by-step instructions
If all the tools are already available, this does not mean that the varnish can be applied immediately. First, you need to prepare the nail plate and decide on the type of manicure that you prefer. There are three directions for nail cleaning.
- Trim manicure. The whole process has several recommendations: special tongs must be sharp and have beveled edges;
- the tool must be disinfected before work, because there is a risk of injury;
- during the cutting process, hold the pliers perpendicular to the nail and press firmly;
- You cannot pull the cuticle, as it will be painful and unpleasant. Therefore, take your time and trim carefully;
- If you suddenly get injured, apply a special disinfectant to the wound site.
- before moving the cuticle, you need to apply remover to it, wait a few minutes and wipe;
- Do not work close to the plate itself. So that cuts do not occur;
We will not delve into this aspect, if you want to do a proper and high-quality manicure at home, then read it here.
Important: Please note that your nails need to be shaped before you steam them in warm water. Otherwise, you will provoke delamination of the nail plate. But we are talking only about the shape, you don’t touch the upper scales themselves yet, you need to work with them immediately before applying the gel polish.
Shape your nails before procedures
- If we have already done a manicure and the nails have received the desired shape, it’s time to get rid of nail dust and thoroughly wipe the surface of the plate.
- Now we determine the condition of the nails. If they flake, you need to carefully file everything down. We use a low abrasive natural nail file. Allowed from 180 to 240 grit. Files for artificial materials have increased rigidity, so they can harm the nail plate. We process only the edge that will peel off; we do not touch the surface of the nail.
- Remove the top ball with a buff using coarse-grained material. The main thing here is not to overdo it, but to remove only the shine of the nail without damaging the surface.
Important: When filing your nails, work in one direction only. If you are polishing a surface, only go up and down. Under no circumstances “walk” perpendicular to the scales. That is, we don’t move the nail file to the side!
Buff your nails
Algorithm for applying gel polish on nails: sequence of each layer
It’s worth working hard on a laconic and neat manicure. And in order for it to last long enough, there are certain stages and rules of the process itself. They should be known and taken into account.
- To remove excess from your nails, that is, creams, dust, dead skin particles and fat, arm yourself with a dehydrator. Using a cotton pad, treat each nail with degreaser and allow the product to dry. Please note that the time between applying the primer and this preparatory layer should not exceed 15 minutes. There is also no need to straighten your hair with your hands or do other inappropriate things.
- The primer is applied not only if the nails are weak, flaking or there is a risk of the gel polish itself quickly chipping. It's like a rough putty or even a primer; it acts to better adhere the materials to the nail. And for extensions, this is not a replaceable thing at all. “Nail primer” does not dry in a lamp! It dries on its own, like alcohol, in a few seconds. It's worth expanding your vocabulary. We did not include bonder in the required materials for applying gel polish. The fact is that beginners in this business often “rakes” all suitable materials from the shelves. So the bonder acts as that slightly unnecessary element. Yes, it is cement or double-sided tape that is applied after the primer. But for gel polish there is no point in overloading your nails if you do not plan to do extensions. Moreover, you should not replace them with each other.
Important: Work first with 4 fingers of one hand, then with the other palm, and then work with your thumbs. If you paint your entire hand at once, the layer of varnish may flow into the side cavities. As a result, it will turn out convex and uneven. Moreover, this happens precisely on the thumbs, which are difficult to place evenly with all the rest on the same surface.
All subsequent layers should be applied from the top center of the nail plate. You go down, and then stretch the “drop” across the entire plate.
Apply the varnish from the top from the center, distributing the gel along the edges and the entire base.
- The base gel looks like a regular clear polish, but at the same time, it does important things. This coating protects the nail from harmful colored elements that are in the gel polish. But the main purpose of the base is the reliability and strength of the entire coating. The quality of the manicure as a whole depends on the quality of the base. We apply not only the base gel, but also all the layers with a thin ball, carefully stretching it over the plate and without touching the cuticle. The base needs to be dried using a lamp; how long depends on the characteristics of the device. On average, in a lamp with UV lamps it takes a minute, but an LED lamp can handle it in 10 seconds.
- After drying, the base coat exhibits a sticky layer. We do not remove it under any circumstances, because the adhesion of all subsequent layers occurs due to this “varnish double-sided tape.”
- By the way, we are not afraid if the layer comes out uneven. As a rule, the base is thick and covers the plate well. But smoothness depends on the finish.
The base is the first layer that is dried in the lamp
- Applying your colored varnish is a critical step. If there is a lot of varnish, it may not dry and flow into the side grooves. A little colored gel polish will make a dull manicure. Also consider the pigmentation of your polish. Pay due attention to the end of the nail plate so that the manicure as a whole looks good and without gaps. Application is also accompanied by drying. If you have a UV lamp, then the time for polymerization will cover a little more than the base - 2 minutes, but if you have an LED lamp, then drying the color will last only 30 seconds.
Manufacturers have taken into account the popularity of gel polishes and their application at home. Therefore, starter kits for beginners in this field have appeared on sale, where everything they need is already included. It’s very convenient because you don’t have to buy everything in bulk. But we will once again remind you about the quality of materials: the higher the quality, the better the result. And you can save on some materials and even equipment by looking at Aliexpress.
How to remove the sticky layer from the base
We looked at some special cases when it is necessary to remove the dispersion layer, and also talked about when this should not be done. If you are faced with a situation in which it is better to get rid of stickiness, you will probably wonder what is the best way to do this.
The ideal option is a special liquid. It is not so expensive that saving on it would be worthwhile, and its consumption is low. A pack of lint-free wipes will also last a long time. These are the best materials for removing stickiness.
But it happens that the right remedy runs out at the most inopportune moment. You can replace the clinser with alcohol tincture, cologne, and even regular vodka. But in this case, some side effects may appear, for example, clouding of the base, acquisition of a yellowish or gray tint.
You can also wipe your nails with nail polish remover, but you need to do this very quickly to avoid a reaction. If you hesitate, the base may peel off.
How to avoid mistakes when applying gel polish: tips
Even following all the recommendations and algorithms, you can make a mistake. The gel coating will tell you what mistake you made. This will also prevent your nails from peeling and becoming brittle.
- If you degrease the nail poorly before applying the varnish, then as a result it will bend away from the cuticle within a few days. Don't help him and don't even think about tearing him off. Remove and do everything again.
- The method of removing varnish by tearing it off without preliminary treatment is unacceptable! Yes, a manicure can be of poor quality and peel off from the nail plate. Even this gel polish needs to be removed correctly. By tearing it off, you undermine the nail itself, scratch the plate and get unpleasant and even painful sensations.
- If the polish peels off quickly or has chips and cracks, this indicates poor nail treatment or a poor-quality topcoat.
- Although over-polishing removes your scales, making your nails thin and brittle.
- If you apply too thick a layer, the varnish will soon begin to bubble. And in general, thick tiers do not dry well and can spread, creating waves and unevenness on the nails.
- Use the base and top of the same company, so they will give a better manicure.
- Check the expiration date - quality and durability also depend on this.
Don't forget to take care of your nails after removing gel polish
- Once your nails are free of polish, take care of them. To restore shine, apply special oil to the plate itself. Buy a strengthening, transparent varnish at the pharmacy and apply it for several days.
- And don't forget that your nails also have the right to rest. Therefore, take at least a short break after each application of gel polish.
Manicure with gel polish will not soon lose its popularity. The privilege of doing your own manicure is an obvious cost savings. Your nails will always look well-groomed and neat. At the same time, you will not wait for the master and adapt to his free time. And there is nothing complicated about this technology! Moreover, we have already shared all the important secrets.
What not to do
The main thing to avoid is experimenting on your own hands. If you want to see how materials from different brands will work, practice on tips. Be sure to make a mark on the tip if you think it’s better to remove the stickiness from the base!
Do not use household chemicals or medications to remove stickiness. In general, you should be especially careful with any substitutes for professional products.
Never use cotton pads, sponges, napkins, paper or regular cotton balls to remove stickiness. Any material that leaves lint is detrimental to manicure. In extreme cases, lint-free napkins can be replaced with paper tissues. But working with them is much more difficult.
So, we have found answers to the question of whether it is necessary to remove the sticky layer from the base, when it is worth doing this and when not, and also considered what materials should be used for this.
