In the article you will learn:
- Cuticle removal. 4 different ways. Their advantages and disadvantages
- How to properly care for your cuticles at home
- The best care products and procedures
- 6 life hacks that will help you avoid hangnails and other problems with the butt.
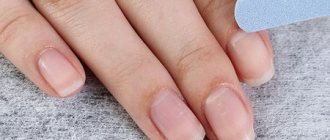
To keep the cuticle healthy and well-groomed, you need to constantly monitor it. Even the best manicurist will not be able to immediately make your nails beautiful if you care for your cuticles irregularly and without love.
As you probably already know, the cuticle was not created by nature to spoil your manicure. It reliably protects the base of the nail from the penetration of various types of bacteria and infections. The beauty and health of your nails depends on how you care for this seemingly insignificant piece of skin.
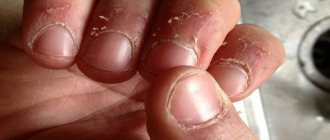
It is necessary to get rid of not the entire cuticle, but only the dead cells. The overgrown cuticle dries, begins to crack, burrs appear, over time the nails begin to grow more slowly, their shape changes, longitudinal stripes appear, which significantly spoil the appearance. Regular removal and daily care of the cuticle protects against all these problems.
There are 4 types of manicure:
- Classic or edged
- European or unedged
- Brazilian
- Hardware
Now about the advantages and disadvantages of each.
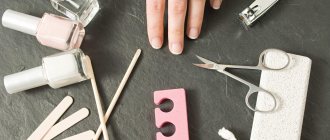
Cuticle care at home
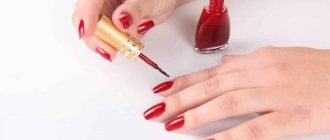
Use oil
You should apply oil to your nails and cuticles daily and the more often the better. By caring for the periungual skin, you will soon notice that the cuticle has become elastic and fits more tightly to the nail. The growth of the nail plate accelerates, and the surface is leveled.
American Dadi'oil, in our opinion, is the best nutritional product. There are no analogues on the market yet. By the way, all KrasotkaPro employees use it. Read more about its properties in the article Review of natural dadi oil for nail and cuticle care.
Hand creams
In addition to cuticle oils, it is worth using moisturizing hand creams. Ideally, the cream should be applied after each hand washing, but realizing that this is not an easy task for a modern woman, we recommend thoroughly rubbing it into the skin and cuticles at night. It will have time to be absorbed well and in the morning the skin will be sufficiently moisturized. Before leaving the house during the cold season, always apply nourishing cream.
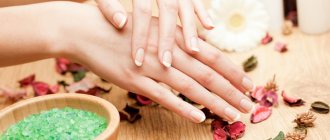
Spa treatments for hands
Paraffin therapy not only has a beneficial effect on the skin, but also moisturizes the cuticle well. There are products for both hot and cold paraffin therapy, as well as entire spa sets for hand care. Choose those that contain more plant extracts and vitamins.
Reviews
Katya: I really like doing unedged manicure. I use CND Cuticle Away Remover for this. I think this is a very good and effective remedy.
Alena: I was very impressed by the remover from Sally Hensen. This is not just a great product - it is the best product. Instantly softens the skin, while removing the cuticle is much easier than after using any other product that needs to be left on for several minutes.
Nika: In the salon we use Laufwunder “SALU” - this is a high-quality alkaline remover that does a good job of softening the cuticle without leaving any marks on the skin around the nail. The product is used very economically, and if you purchase the liquid in large quantities, you can work carefree for six months.
Lifehacks for cuticle care
- The sun dries out and damages the skin of the hands and cuticles. Don't let this happen. When tanning, lubricate it generously with sunscreen or lotion.
- If you like shellac or often remove and paint your nails with nail polish, double the frequency of applying oils and creams.
- If you are for a European manicure, it is better to choose cuticle removers with fruit acids. They can be used more often without fear of drying out the periungual skin.
- If you are for the classics, choose only high-quality sharp hand-sharpened tweezers made of medical stainless steel. Our master recommends Silver Star.
- Massage the cuticles of each finger thoroughly for about a minute when using the cream.
- Buy products with a high content of vitamin E. It is this vitamin that keeps the skin young and elastic for many years.
Follow our tips and your nails will always be healthy and beautiful. If you have any questions, write in the comments and a specialist will answer you in a couple of hours.
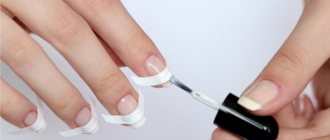
Classic method
Tools:
- nail clippers;
- ampoules with vitamins A and E;
- manicure spatula.
Step-by-step instruction:
- Place your hands in a bath with various additives and hold for 5-10 minutes to soften the dead particles.
- Take a cotton pad soaked in alcohol or hydrogen peroxide and wipe the tweezers and scissors.
- Lubricate the skin of the nail with vitamins A and E.
- Push back cuticles using orange sticks.
- Grasp the finger being treated with your hand and stretch the skin.
- Using scissors or tweezers, cut the cuticle from one side, moving towards the middle, then cut from the other side. Avoid cutting in one direction to avoid cutting into the living skin.
- Remove any burrs.
- Wipe your fingers with alcohol or peroxide, again apply vitamins A and E to the nail plates.
Tools for work
What is the best way to remove cuticles? Many girls use wire cutters rather than scissors. For the first time, wire cutters .
- Push away the skin with a stick, then open the nippers.
- Position them so that the lower blade is under the steamed layer.
- Do not open the nippers too wide, let their lower part be pressed against the nail plate, and the upper part raised by 1 mm.
- While lifting the cuticle, gently “bite” it, being careful not to tear it.
The method of removing cuticles without cutting is increasingly being used. This technique is considered safe and painless. If the skin is thin and grows slowly, then you are better off using the European method.
You can do without scissors if you use an orange stick . It is good because it does not damage the skin, which means the infection cannot penetrate inside the nail.
It has one sharp tip and the other flat, so it can be used to clean nails.
Today, a product such as gel remover . It is applied to the fingers after steaming and kept for as long as written on the package. To avoid damaging your nails, choose a less aggressive gel. It may not have such a strong effect, but it damages the skin less.
A strong remover can be kept for only 30 seconds, a weaker remedy - up to 15 minutes. After the procedure, quickly remove any remaining gel, because it is harmful to leave the gel on your nails. And you should use it only 2 times a week.
How to remove nails as quickly and safely as possible?
Surprisingly, from time to time clients decide to remove their nail extensions
This may be due to the fact that they want to follow European fashion to return to natural manicure, or simply change the design. Whatever the reason, clients will always value two aspects when it comes to nail removal: quality and speed. No one will want to quickly remove the material if the natural nail plate is damaged. But quickly and safely removing artificial turf is very important, especially for business people who value every minute.
Improper removal of nails by nail technicians or clients is one of the most common reasons for myths about the dangers of extensions. It is not allowed to pick or bite off artificial nails. It is not recommended to use cutters and tweezers, which can accidentally remove the top layer of the natural nail along with the material. The master’s task is not only to remove nails correctly, but also to explain to the client how important it is. {Photo of damaged nails after careless removal}
Since the invention of special liquids for removing artificial surfaces, nothing radically new has been invented. However, there are several ways to speed up this procedure that you can use in your work.
Nail removers are usually acetone based. They also contain added fragrances and nourishing moisturizing components that prevent drying of the skin and natural nail plate.
Nail removers that do not contain acetone do not work as quickly or safely. When used correctly, acetone can be considered the safest solvent used in the nail industry.
Acrylic and soft gel nails have a cross lattice structure. That is, in addition to longitudinal connections, there are also transverse ones, which makes the structure more durable. That is why they are more difficult to dissolve, unlike coatings with silk, fiberglass or varnish, which are easily removed when exposed to solvents. It is cross-links that prevent the solvent from penetrating into the coating structure.
How to remove acrylic and soft gel nails?
Modern nail removers penetrate the structure of the material and partially destroy cross-links. Similar to a sheet of paper, when wet in water, it becomes soft and tears easily, but does not completely dissolve. Also, artificial materials, when exposed to solvents, the structure changes, which makes the artificial coating softer and easier to remove from the nail plate.
To speed up the reaction, i.e., the dissolution of the material, you need to place your hands in heat. You can also heat the liquid itself to remove artificial nails. Be careful, remember that this is a flammable product, so never use a microwave oven or other electrical appliances for heating. The most convenient way to do this is to lower the container with liquid one third into warm water. Another option is to place the liquid between bags of special sand or gel that maintain a warm temperature.
It is not recommended to immerse your hands in a container with warm liquid. When heated, acetone begins to evaporate faster, which leads to overconsumption of the drug. In addition, prolonged contact of the skin with liquid does not have a very good effect on its condition. How to do it in such a way as to retain heat without allowing the product to evaporate?
We need to create a kind of “greenhouse”. Soak the cotton wool in the liquid and wrap it around the client's finger with foil. Then place your hands in a plastic bag, seal it tightly, and wrap it in a warm cloth. Thus, body heat will be directed directly to the hands, skin contact with the product will be minimal, and the substances will not evaporate.
As already mentioned, the material has a dense lattice structure. By sanding and polishing the nails, or by covering them with topcoats and protective coatings, we create a smoother, more sealed surface. In order to “break” this tightness, it is recommended to remove all coatings and treat the nails with a coarse abrasive. For acrylic, you can use 100 or 80 grit files. For soft gels, a 150 grit file will be sufficient. By filing the surface of the nail plate, we destroy the tightness of the coating, which gives solvents the opportunity to penetrate the material faster and deeper.
Before removing your nails, use the clipper to remove as much material as possible. You can quickly remove the length of your nails with a cylindrical cutter. To remove the top layer, you can treat the surface with an abrasive cutter with deep notches. By making the remaining layer of material on your natural nails thinner, you also facilitate faster removal, because the thinner the layer, the faster it dissolves.
Nail removal procedure
- We remove the entire length of the nails with a cylindrical cutter.
- Using a cutter with deep notches, we remove the top layer of material and make it a little thinner. Be very careful when working with coarse abrasives, do not bring the cutter close to the cuticle and side ridges.
- Using a 100 grit file, we process the surface, making it rougher. Carefully remove all dust.
- Soak a small piece of cotton wool and wrap your finger tightly in foil. Foil for highlighting is very convenient to use; it is of the required width, and you just need to cut the squares of the required size.
- Next, fold your hands with your palms facing each other and put a clean plastic bag on them. We secure the bag so that it is almost closed.
- Wrap your hands in a towel or warm scarf. Be careful! Clients with sensitive skin may feel warm and uncomfortable, in which case a warm cloth may be unnecessary.
- After 15–20 minutes, remove the bag and foil.
- Use a pusher to push back the cuticle.
- Using an orange stick, carefully remove the material from the nails. Do this one at a time. That is, having removed the foil from one finger, we immediately remove the material from it. If you remove the foil from all ten fingers at the same time, the reaction will stop and the already soft material in the environment will begin to harden again.
- If a small amount of hard material still remains on the nail, you can repeat the procedure using an already soaked piece of cotton wool and foil. As a rule, if you have previously removed a small layer of material using a machine or file, this will no longer be necessary.
- Using a 180 grit file or higher, carefully remove any small remaining material.
- Next, you can perform a manicure. Apply a protective coating to natural nails and treat the cuticles with oil.
If it is necessary to remove a thick layer of coating, it is better to do this in two stages. After 10–15 minutes, remove the foil and remove the dissolved material with an orange stick. Then wrap the nail again with the soaked cotton swab and place it in foil and a bag. After another 15 minutes, the remaining material can be finally removed. This procedure will take much less time than placing all the nails in the product once and waiting forty minutes or more.
What about traditional gel nails?
Classic gels can only be removed with sawdust. Thus, the first steps will be similar - you need to completely remove the length and remove the top layer of coating. Next, we use cutters of medium abrasiveness, gradually removing the material from the surface of the nail. Don't forget about the basic rules for working with cutters. Do not work at too high speeds, make light, jerky movements to avoid overheating the nail plate. When a thin layer of gel remains on your nails, take a file with an abrasive of 180 grit or higher and carefully remove the remaining material.
Remember that with proper removal of artificial nails, the natural nail is never damaged, much less worsened. Understanding this and knowing how to carry out the nail removal procedure, you will show clients that the material does not harm natural nails at all, they remain the same. Tell clients and colleagues that careless removal leads to unpleasant and sometimes irreversible consequences. And it is in your power to debunk the myth about the dangers of nail modeling.
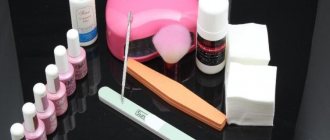
How to Remove Cuticles at Home: Video Tutorials
Special cuticle remover: Cuticle file and pencil Don't forget to take care of your cuticles weekly and you will always have well-groomed hands.
| Take a free manicure course. Start taking the course! |
| Photo and video lessons of drawings on nails (from our partners). Start watching lessons! |
| Nail designs by color (from our partners). View! |
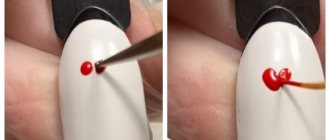
Baths for exfoliation of keratinized particles
To soften the skin layer, use folk remedies.
- In 250 ml. add 2 tbsp of water. starch and 15 gr. salt. Stir, dip your fingers into the solution, hold for a quarter of an hour.
- Heat a quarter glass of olive oil a little, hold your fingers in it for 10 minutes. Then wipe them with a paper towel.
- Combine the juice of 1 lemon with 3 tbsp. spoons of vegetable oil and 50 ml. hot water. Hold your fingers for 15 minutes.
- Pour 2 tbsp into a glass of warm water. l. soda, drop 6 drops of iodine, soften for 10 minutes.
- In 240 ml. add 60 grams of warm milk. flax bran, let it brew for 10 minutes, then dip your fingers in this product and hold for 20 minutes.