General information
The pterygium of the nails is the lower, thin layer of the cuticle. It is able to grow over the entire surface and fit tightly to the nail plate, so to speak “sticking” during the growth of the nail and thereby covering its surface. Since the nail apparatus is a constantly renewing formation, capable of restoration (with the exception of the matrix), the growth of pterygium is a fairly common problem.
Formation, structure and functions of the nail
Normal growth of nails is observed from the moment of birth, their intrauterine development is extremely slow and begins with the gradual formation of dense structures in the places where future nails are localized, followed by the formation of growth buds and a matrix zone.
Nail structure
The normal structure of the nail plate in humans consists of a root - the main growth zone (a white hole protruding outwards), a body and an edge. They are surrounded and somewhat “hidden” under the posterior and two lateral ridges, which form the nail sinuses. The constantly growing cuticle with pterygium protects the nail root from pollution, aggressive environments, pathogenic bacteria and other types of infections. Under the roller there is a primary young nail - a matrix consisting of a layer of germ cells - onychoblasts, located in the subungual bed (hyponychium) and connected to the root. It determines the nail shape and thickness, growth rate, structure and color, as well as the chemical composition and, in general, the general condition. The processes of renewal and keratinization occur in it. The hyponychium, with its fibrous structure, determines the nail pattern and forms a fixing, fixed base woven into the bony phalanx - directly into its periosteum.
The main functions of the nail include protecting the fingertips from injury, fine movements, access to deep and small objects, assisting in grasping objects, and combating skin itching.
Matrix (nail root).
The matrix is exactly the place where the nail is formed, and on which all its parameters depend: shape, thickness, density and growth rate. The structure and shape of the matrix are individual and depend on the genetics of the person. If the nails are naturally thin, then the matrix is short, and this cannot be changed, but you can use products to artificially strengthen nails: varnishes, gels, acrylics. If the nail plate begins to thin out over time, under the influence of a painful condition, dystrophy or injury, it is possible to find out the cause and restore the size of the matrix.
Severe damage to the matrix can lead to deformation of the nail or complete cessation of its growth.
Pathogenesis
The structure of the pterygium is connective tissue and keratinized epidermal, most often made of dead cells. The term comes from the ancient Greek pterуx, which means wings. Pterygium on nails usually grows in large quantities in the areas where the cuticle transitions from the lateral ridges, hence the name “wing-like.” By its origin, it is a hypertrophy of the eponychium - the living protective tissue around the nail plate.
The pathogenesis is usually based on a violation of blood circulation and blood supply to the nail apparatus. In this case, the cuticle begins to grow excessively forward and attach to the base of the nail.
What is pterygium
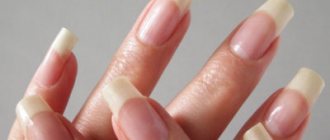
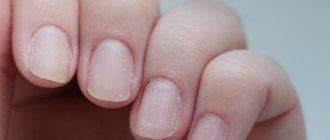
Ptiriga on nails is a thin layer of living tissue that fits tightly to the nail. Essentially, it is the lower layer of the cuticle, which consists of dead cells separated from the skin and nails. In every woman it is expressed ambiguously: for one it can be barely noticeable, for another it can represent a serious obstacle to a neat manicure.
It is located immediately next to the eponychium, protecting the nail matrix - preventing dirt and various harmful bacteria from getting to the nail root. In other words, from a physiological point of view, this element does not pose any threat and even brings undeniable benefits.
But on well-groomed nails it is unnecessary, because the manicure turns out untidy, and the varnish peels off faster.
Causes
The main cause of pterygia on the nails is circulatory disorders caused by injuries in particular - eponychium, internal or external physical and chemical influences, as well as inflammatory processes. Among the most common causes are vegetative-vascular diseases, lichen ruber and the habit of biting nails .
The severity differs significantly from person to person. At risk are men and children under 14 years of age who experience a powerful growth of pterygium against the background of delicate and thin skin of the nail folds and thin cuticle. They are more prone to frequent hand injuries, gnawing, irregular manicures and lack of nail care.
Causes and methods of dealing with pathological pterygia
Body characteristics and habits influence the accelerated growth of pterygia. The following factors increase the rate of tissue growth:
- vegetative-vascular disease of the distal parts;
- habit of biting nails;
- Lichen planus is red in color.
The development of diseases can be eliminated with timely treatment. The habit of biting nails needs to be eradicated. To treat lichen, remover and hot baths with essential oils are used. Cosmetic treatment of nails is carried out only by hardware and not by cutting; it is better to do this in beauty salons.
If there is serious deformation of the nail plate, you need to contact medical specialists to identify the original cause of the pathology. For nails, even with minor imperfections, shellac or acrylic extensions cannot be used.
Tests and diagnostics
Nail growths are a cosmetic problem. Pterygium can be very inconspicuous and not cause any inconvenience, but when applying a decorative coating, aesthetic quality, neatness and durability are significantly reduced. Normally, the coating should last for at least 2 weeks; if the period is much shorter, this may be a sign of poor-quality removal of the pterygium and cuticle.
To study the size and extent of distribution of pterygium in laboratory conditions, biomicroscopy and keratotopography can be used. Vascular disorders are attempted to be detected using fluorescein angiography.
How to do an unedged European manicure with your own hands: step-by-step technique
- First you need remove old varnish.
For this:- Soak a cotton swab with nail polish remover and apply it to your nail for a few seconds.
Then, moving from the base of the nail, remove the decorative coating, without smearing it on the skin and surrounding tissues.
- For a faster process, prepare 10 pieces of cotton wool, soak them in nail polish remover and apply to each nail.
- After a few seconds, remove the cotton wool from each plate one by one.
- Shape your nails.
Use a glass file to file the plate, as it is less dangerous. The movements of the nail file should be in one direction, so the plate will delaminate less. - Then use a buff to polish and sand. It is often not recommended to use a buff, as it can remove the top layer of the nail plate, and it will begin to crack.
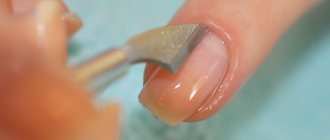
- Apply remover to the pterygium . Use an orange stick or a metal spatula to remove any remaining cuticle and move the roller away. Do this carefully so as not to damage the nail.
- Dampen the pumice stone and remove any dead around the nail . Movements should be from bottom to top, left to right. As you work, periodically immerse the pumice stone in water.
- Then you need to neutralize the effect of the remover with water . To do this, add a few drops of liquid soap to it. Dip your nails in water and then dry them with a towel.
- Apply oil to the pterygium so that it nourishes the skin with beneficial substances.
- Degrease your nails.
- Apply nail base.
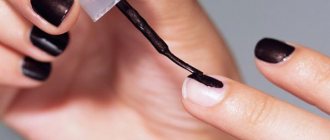
- Paint your nails with a decorative coating.
- Apply sealer.
Watch the video for a tutorial on how to do an unedged manicure yourself.
Treatment with folk remedies
There are a lot of folk remedies for caring for hands and nails. To prevent the formation of growths on the nail plates, it is recommended to: several times a month:
- treat nails with a soft brush dipped in olive oil and citric acid;
- make nourishing masks with kaolin, allantoin, mallow and cosmetic paraffin;
- treat the cuticle with essential oils, such as almond, lavender, tea tree or another plant that helps soften and soothe the skin;
- rub the nail growth areas and ridges with citrus fruits such as lemon, orange or grapefruit.
Types of unedged manicure
There are several ways to perform this procedure: from a simple dry Euro manicure to a hardware procedure that requires certain skills.
Techniques for performing European manicure
- dry – performed without using a nail bath;
- wet – before using the remover, the cuticle is soaked in a bath with oils and lotions;
- hot – before removing the pterygium, the nails are immersed in hot cream or lotion. This procedure is recommended for brittle nails and during the cold season;
- Brazilian - to perform a manicure, use special gloves soaked in useful creams and a cuticle softener. Gloves for Brazilian manicure are disposable.
- Before using them, your hands must be treated with an antiseptic.
- Next, put on gloves.
- The pre-creamy mass that is in them needs to be moved to the cuticle area. This is necessary to increase the effectiveness of the procedure.
- After 7 minutes, you need to cut off the tip of the glove on the little finger so that you have access to the cuticle.
- The pterygium is removed with an orange stick.
- While you work with one finger, the rest continue to be saturated with cream and oils.
- After processing one finger, cut off the tip of the glove on the adjacent finger and continue working with the pterygium.
- Work each finger in this way.
- At the end of the procedure, remove gloves and rub the remaining cream into the skin.
For an example of a simple unedged manicure, see the video.
You will learn more about hot manicure by watching the video.
Watch all the stages of a Brazilian manicure in the video tutorial.
Prevention
Removal of cuticle and eponychium during hygienic manicure, without unnecessary trauma. Cuticle removers or cuticle removers can also be used for this. To soften the skin, it is recommended to soak your hands in a bath. Then, with light movements, the pterygia with the cuticle can be moved away using a manicure spatula and then trimmed with scissors. If traces of the pterygium remain, they can be carefully cleaned off using an orange wood stick.
Removing remnants of pterygium using an orangewood stick
To slow down the growth of loss, you should regularly care for your nails, use creams and make softening hand baths at home weekly, which include soda, natural oils and sea salt.
Slowing down the growth of pterygium
It is not always possible to carry out removal procedures on a regular basis and therefore a thin translucent film appears again sooner or later. Is there any chance to stop her from growing so fast?
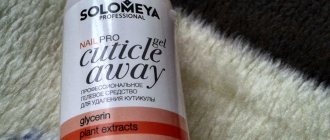
Currently, you can find many cosmetic products on sale that are designed to slow down the growth of the cuticle.
Mostly they have a liquid consistency and are quite effective in slowing down the growth of pterygium.
It is important to use these products regularly. It won't do any good if you only use them once or twice.
If you devote a small amount of time to your nails regularly, you will be able to avoid many aesthetic problems. Such, for example, as the rapid growth of the cuticle or the growth of pterygium. In addition, there are so many cosmetics on sale now that taking care of yourself becomes a real pleasure.
If you don't know what to choose, watch several review videos on the Internet. It usually describes in detail the features of a particular product, as well as the effect of them.
Diet for pterygia on the nails
Fish diet
- Efficiency: from 3 to 5 kg per week
- Terms: from 3 to 14 days
- Cost of products: from 400 to 1000 rubles. in a day
Problems with nails may be evidence of a deficiency of vitamins (particularly E), minerals, or the result of systemic diseases. Therefore, at the first symptoms, you should consult a doctor and undergo a health examination, as well as adjust your diet by adding to your diet:
- seafood, in particular grilled, steamed, boiled or simply lightly salted fish;
- eggs and dietary meat;
- cheese and low-fat fermented milk products;
- vegetable oils, seeds and nuts;
- greens and vegetables;
- fruits and berries.
Tools and products for performing European manicure
The procedure requires the following tools and materials:
- nail polish remover and cotton wool, cotton pads;
- nail file;
- buff;
- remover;
- orange stick or metal spatula;
- pumice;
- hand cream;
- varnish, base and fixer.
An approximate set of tools for European manicure
Cutters for hardware manicure for beginners
Milling cutters vary in material, shape, diameter and hardness.
For beginners, it is recommended to use ceramic tips. They are quite soft, which means they are safer. But there is also a drawback - such cutters quickly become unusable.
Experienced craftsmen use diamond bits. With their help, you can treat the free edge of the nail, side ridges and cuticles, and remove rough skin.
Milling cutters come in various shapes. Each of them is intended for a specific area of work, but many can replace each other:
- “olive”, “bud”, “oval” - used to remove cuticles and treat side ridges;
- “ball” and “flame” also cope with this task;
- a “needle” is needed for treating cracks and side ridges, for rounding the corners of the nail, as well as for removing gel polish;
- a straight and truncated cone helps remove detachments and smears of gel polish, and also polishes and grinds well;
- a reverse cone, in addition to the above, creates a smooth edge of the nail;
- rounded cylinder - designed for processing side ridges and polishing the nail before extensions;
- straight cylinder - for modeling the free edge of an artificial nail, treating calluses and corns.
The hardness of the nozzles is determined by the colored notches that the manufacturer applies to the base. The classification principle is simple: the darker the color, the higher the hardness. It is not difficult to guess that the black and blue stripes will mean a high degree, and the red and yellow ones will mean a low degree.
During the procedure, we recommend using hard attachments first, gradually moving to medium and soft ones.
The small diameter of the attachments is intended for manicure, and the large diameter is intended for use during the pedicure procedure: with the help of such cutters it is easy to remove calluses, corns and other aesthetic imperfections on the feet.
Planet Nails, Manicure and pedicure device Orbita Smart
Manicure and pedicure device for treating nails.
(193)
RUB 11,050
RUB 11,050 Buy
Milv, Watermelon Nail Oil, 15 ml
Strengthening nail oil with mastic tree resin.
(21)
200 rub
200 RUR Buy
Step-by-step work with a manicure device
Each home manicure machine comes with instructions. It is worth studying carefully before starting work. It is in it that it is said how to switch modes, change attachments, set the rotation speed of the cutter and switch to reverse (reverse) stroke if necessary.
Before starting work, the nozzles must be disinfected. Almost any antiseptic spray with a quick action and drying time is suitable for this. When this process is over, you can move on to the home hardware manicure itself. It consists of the following steps:
- Removing old polish or artificial nails, gels.
- Formation – filing of the nail plate.
- Cuticle work – opening the pocket for easy skin removal.
- Lifting the skirt.
- Cleaning dead tissue and side sinuses.
- Gently remove cuticles.
- Polishing and removing residual nail dust with a brush.
- Applying a new coat of varnish.
This is a classic scheme for working with a machine for home manicure. Masters in salons adhere to it. Let's look at each stage in more detail.
Tips about the dangers of manicure:
1. Notice how clean the cabin is. A dirty floor, stains on mirrors and countertops already indicate non-compliance with sanitary standards. Inspect the toilet, the technician's workplace, and even the rack with magazines - if the magazines have not been changed for years, a lot of bacteria have probably accumulated on them.
Pay attention to the appearance of the master - it is not necessary that your nails be painted by a person who is ideal in every sense, but clean clothes and a neat appearance are still important.
2. Please arrive 15 minutes before your scheduled time. This will help you see how the master cleans the workplace after the client. Pay attention to whether the master throws away disposable tools after your visit - if he didn’t do this, it’s not a fact that he used a new nail file during your session.
Give your nails a rest
Almost any varnish, except biogel, somehow harms the nail plate. Therefore, it’s really not worth constantly applying gel polish.
Experts advise doing this manicure 3-4 times, and then covering your nails with medicated varnish and letting them rest for at least a month.
It is not recommended to wear gel polish for more than 3-4 months without a break, and every master or client herself who regularly goes for a manicure should monitor the health of her nails. After using gel polish for too long, you need to restore the nail plate for at least 4-6 months.
Safety cutters
The conditions for safe use of a cutter are compliance with the basic rules of work.
Such criteria include:
- incline;
- pressure intensity;
- position angle;
- aggressiveness of the instrument.
99% of attachments will be dangerous if mishandled.
The first category of safe cutters is Silicone Carbide Grinders.
- They consist of a mixture of silicone with carbide chips, giving it the desired shape for manipulation in manicure. They are convenient for cleaning ridges and pterygium from the nail plate.
- Silicone carbide grinders come in different shades, which are responsible for marking the abrasive. Possible colors are green, gray, brown.
- The softest ones are green. Only polish the skin: fine grinding and polishing of the nail plate.
- Gray is a more functional sander. Removes small burrs and dry areas.
- Brown is the most functional, as it polishes both the cut and the skin, and removes pterygium from the nail plate. It is the brown silicone carbide grinder that can be called a safe attachment. It has a soft and elastic surface with small abrasive inclusions, which removes only soft tissues, and cannot damage the nail or strong skin.
The second category of safe ones is Corundum stones.
Used to polish the skin and clean off the pterygium. They are considered safe, but do not forget that this is a stone. Its difference is that the surface does not consist of bulges, but of small pores and depressions that capture and clean the skin. If the pressure and position in relation to the work surface are incorrect, it is still capable of making cuts.
Safe cutter “Oney Clean” - without abrasive, with blades. It can be used to remove pterygium from the nail plate without scratching it, and also lift the stuck cuticle. Like any rotary tool, it requires careful operation. If you grip incorrectly and apply intense pressure, you can make cuts with it.
