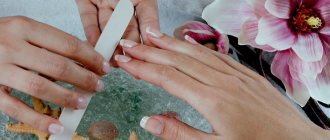
When working with gel polish, it is important to use high-quality tools. A drying lamp, files, buffs are necessary devices, without which it is impossible to get a beautiful manicure. But shellac cannot be applied to the nail surface without convenient brushes. An experienced master should have more than one brush for applying gel polish in his arsenal. The assortment should include wide brushes for applying the base, thin brushes for decoration, and medium brushes for finishing. But what specific brushes are suitable in this case, the master can determine during the work process. For the initial choice, it is recommended to adhere to certain rules.
Choosing brushes
Main criteria
To ensure that the brush for applying gel polish in the photo does not disappoint during use, you need to choose a tool with sharp bristles. The pile can be of either natural or artificial origin. The first option is considered more durable and of higher quality. But it also costs much more than artificial analogues. When choosing a brush for gel polish, we also pay attention to the handle of the product. Wooden ones are ergonomic and environmentally friendly, but plastic handles make the device cheaper. In order for the gradient of gel polishes with a brush to turn out flawless, the tool must have a strong clip - the part that connects the bristles and the handle of the brush. Thanks to the high-quality clip, the pile does not fall out or fluff up more than necessary.
What to look for when choosing brushes for manicure?
In order for the brushes to last a long time and not create problems during use, when purchasing you need to pay attention to the following:
- reliability of fastening of the metal part - it should not wobble and, moreover, detach from the base;
- the pile should hold tightly and not fall off - for this it is recommended to lightly pull the hairs - none should fall out;
- price. It is not recommended to take the cheapest brushes; as a rule, the low price is due to low-quality materials that were used in the manufacture of the tool.
About forms
The shape of the brushes depends on the purpose.
- To create a French look, you need to use brushes with beveled bristles, as shown in the photo. The special configuration of the tool will allow you to make your smile line perfectly straight.
- Devices with an oval shape make it possible to paint nails at the base of the cuticles.
- Small, mini options are used for applying patterns.
- Large manicure brushes are not used for applying shellac, as they are not convenient for this technology.
Yes and no
If you decide to master the art of drawing such drawings, you need to start with the simplest ones. And even if you don’t do well at first, don’t give up. As time passes, your hand will become more confident, and your drawings will become more complex.
In order for you to create beautiful and interesting drawings, you need high-quality tools - design brushes. Brushes come in different types, depending on the shape, the material from which they are made and the thickness of the bristles.
In our article you will gain knowledge not only about the types of brushes for manicure, design and painting on nails, but also about how and when which ones are best to use.
For the gradient
Typically, to create a gradient manicure, masters use foam sponges or brushes. Considering that the gradient is a color stretch, to create it you need to use flat, thin brushes in the photo. It is very important that the bristles of the brush are soft. This will allow you to carefully shade the colors of the gel polish applied to the surface of the nails. If the brush is stiff, you won’t be able to make a beautiful stretch.
To ensure a beautiful gradient, experts recommend that you wash the tool thoroughly after each shade. This can be done easily by dipping the brush into a container of degreasing liquid and dipping it on a clean napkin. Repeating this action after each time of use will keep the manicure brush clean.
How to properly apply a gradient with gel polish with a brush is shown in detail in the video.
Method one
In order to make an ombre using this method, you will need a thin brush as an additional tool. The method is more labor-intensive, however, the result is more accurate and there is no need to wipe off excess gel from the pre-nail ridges. Thus, the best quality manicure is achieved on the second or third try. Stretching manicure, as in the photo, using this method is performed as follows:
- Prepare your nails for applying gel;
- Degrease the nail;
- Apply primer;
- Cover the nail with gel base;
- Dry the base under the lamp;
- Apply the first shade of gel to the area from the cuticle to the middle of the nail;
- Apply the gel of the second shade close to the first, from the middle of the nail to the free edge;
- Do not dry the coating;
- Take a thin brush and make longitudinal movements along the border, achieving mixing of the varnish and blurring the border;
- Dry your nails under a lamp;
- Apply another layer of varnish and repeat the steps;
- Dry your nails again;
- Apply top coat and let it dry.
At this point, color stretching on nails with gel polish, such as in the photo and video, is completed.
For the most decorative effect, it is better to use varnish without forming a dispersion layer. However, if you did use a gel that forms a sticky layer, then it must be removed with a lint-free cloth after each drying. [yandex2] [google2]
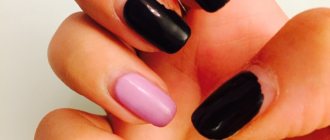
For French
To get a beautiful French nail polish, it is recommended to use a thin, round brush, which is numbered 4 or 3. The bristles of the product should be soft but elastic. This tool will allow you to create a perfect smile line. Manicurists prefer to apply gel polishes with a thin brush, which is shaped like a school corrector. To create a smile line, you need to press on the top of the device until a white drop of shellac appears at the tip. This drop is quite enough for drawing a French coat. To create a French manicure, it is important that the brush is selected correctly. After all, the beauty and accuracy of the design depends on the shape and softness of the instrument.
General recommendations
In order for the nail design to turn out as beautiful as in the photo, and for the stretching to be smooth, you need to know a few tricks. They will help not only improve the result, but also speed up and simplify the process.
- If you perform stretching using the first method, then prepare a napkin on which you will wipe your brush after each stroke. Then the result will be better, since the shades will be cleaner;
- If you have some experience with brushes, you can try blurring the border with a wide fan brush. The result will be no less decorative, but you can save significant time;
- If you decide to make a French jacket using stretch technology, it is recommended to use transparent varnish as an additional coating. Since if it has even a minimal shade, it will negatively affect the purity of white;
- When performing stretching using the second method, first lubricate the pre-nail ridges with a rich cream. Subsequently, this will help to quickly wipe off excess gel from them.
[yandex3] [google3]
The process of how to stretch nails with gel is shown in the video below. It is performed by a professional master, and therefore you should not expect a similar result when doing it at home yourself, at least not the first time. However, after some training, the quality of the manicure will be quite comparable to that presented in the video.
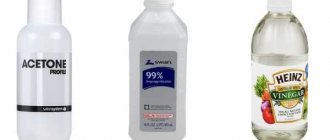
How to wash
It is clear that manicure brushes need to be kept clean. Only in this case will the tool last as long as possible. How to clean a brush? You can use nail polish remover. But this liquid negatively affects the quality of the pile. After washing the tools in this product, the villi become unruly, hard, or, on the contrary, excessively fluffy, which is also not suitable for creating a beautiful manicure.
In order not to think for a long time about how to clean the brush after gel polish, it is recommended to purchase a special composition. Reviews from craftsmen claim that after washing the brushes in a special solution, the period of use is extended and the appearance of the product is preserved for a long time.
Summing up
It is not enough to know how to choose the correct shape and softness of the bristles of the device for working with shellac. In order for the tool to serve for a long time, it is very important to know how to clean the brush from gel polish. Keeping your tools clean will not only create beautiful work, but also extend the life of your tools. When choosing suitable options, pay attention to the labeling. As a rule, shellac brushes are labeled according to their purpose. It is quite difficult to confuse this instrument with others. This category of products has a special shape, which is required for clear modeling and creating a manicure design. A good brush should be soft enough and made from natural materials.
Types of manicure brushes
So, let’s look at the description in more detail: why which brush is used. Which ones are right for your work?
By purpose:
- Gel modeling is carried out using rectangular or square .
- Modeling with acrylic is done with an oval brush with long and hard bristles.
- To draw small details, use very thin brushes with long bristles.
- Sculpting small details from acrylic is ideally achieved using a special sculpting brush with a sharp tip.
- The area of application of flat or oval tools is Chinese painting. They make it convenient to apply a double stroke
- French is painted using large tools.
- A fan brush is ideal for working with glitter and other bulk design materials .
- brush (dotter) has balls of different diameters at the ends; rhinestones or paint are applied pointwise to the nail plate.
- A special pen for nail art is filled with special paint, which allows you to draw patterns of any complexity.
Rectangular brush
Dots brush
| Brush type | What is it used for? |
| Dots | Dots, straight lines, curls, application of rhinestones |
| Flat brush | Chinese painting, complex and voluminous drawings, smooth transitions |
| Round (spot) | Small details and patterns, lace ornament |
| Oval | Chinese painting, acrylic sculpting of small decorations |
| Fan | Shading, background, creating halftones, working with glitter |
| Thin | Fine lines, drawing contours |
According to the material:
- Natural. They are made from natural wool. The most commonly used wool is sable or kolinsky. If used correctly, these brushes will last a very long time. They have an excellent pile, which makes them versatile in using any type of paint.
- Artificial. They are made from special polymers, such as nylon. The service life of such brushes is significantly less than natural ones. But they have an affordable price, which makes them an ideal option for beginning craftsmen.
By thickness:
The tassels are numbered from zero to eight. The thinnest ones are numbered 0. They are used for drawing patterns with small details. The largest one is number 8. It is used to model the tips of artificial nails.
Basic information about nail design brushes
In order to realize your fantasies in nail designs, you do not have to be a professional artist. All you need is the right brush and practice - and you can create amazing nail art yourself.
Nail design brushes are divided into groups according to the following categories:
- according to the thickness and shape of the pile;
- according to the material.
Let's talk separately about each of the categories of brushes that will help you draw designs of varying complexity on your nails.
Thin and thick brushes
The thickness of the brush bristles is determined by the generally accepted numbering of brushes with values from 0 to 8. 0 or 00 is the thinnest brush, and 8 is the largest. Usually the largest brushes are used to model artificial nail tips.
You can use brushes of different shapes depending on your artistic intent. Come up with your own composition and decide which brushes are suitable for you to implement it on your nails. A thick brush will be useful for large elements, but for small strokes and subtle patterns you will need a more accurate and correct nail art tool. Drawings with paints on nails look nicer than designs with varnishes, because the structure of the paints is lighter and flowers, for example, look very delicate.