Which color to choose
The embodiment of the most beautiful New Year's manicure always begins with the choice of colors. We have a rating of the most win-win shade options that create the right association with the festive mood.
- Rose gold is one of the main trends of the 2019-2019 season. Choose a polish with small sparkling particles - it’s very New Year’s.
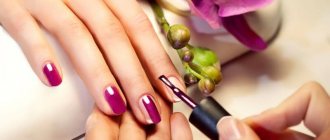
- Spectacular nail art in the best New Year's traditions almost always includes red. Its active palette includes both bright scarlet and noble burgundy shades. You will get a win-win combination with white and gold, but other color experiments are also welcome.
- What would a festive manicure be without some exquisite precious metals? Take out silver or gold nail polish from your cosmetic bag, their finest hour has come!
By the way, gold symbolizes financial success. With such a manicure, you can hint to the symbol of the year what you want to get from her.
- Transparent varnish with shiny elements has the amazing property of turning any manicure into a formal one.
- The symbol of the year will certainly appreciate a manicure in yellow, green, brown and blue and will thank you with good luck next year.
- A magnificent emerald shade best depicts fir branches and thematic patterns.
- White is the color of luxury, purity and elegance. With the right approach, you can get a very beautiful holiday manicure.
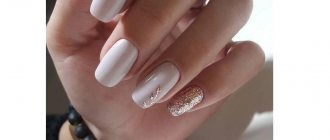
- Beige nail art can be the best accompaniment for your modesty and impeccable taste.
- Pink color in nail design symbolizes tenderness and romance. This manicure will match a feminine dress.
- Black looks great with sparkling elements. It's like a little black dress - a classic that is always appropriate. But in splendid isolation, it is rarely suitable for holiday nail art.
The most effective method for the best New Year's design is thematic designs. With them you will definitely be the main star of the holiday party!
But what nail art should you choose to get the maximum number of compliments? We have compiled for you a rating of current New Year's nail designs. Using our descriptions and photo tutorials, you will understand step by step how you can create incredibly beautiful designs in your manicure.
New Year's themed manicure
Note! To make your look look cohesive, at least one color from your manicure should match your outfit.
French
For those who want to get a manicure while following what the monkey wants, we can recommend a New Year's French manicure.
In its classic version, this manicure usually uses light and pastel shades. It looks strict and stylish at the same time. But it can sparkle with completely different colors if you change the basic colors and make it bright and catchy.
For this type of decor you will need 3 varnishes of different colors: with a golden tint, bright red and transparent to secure the result, and you must also have self-adhesive strips from the French manicure kit. Execution instructions are presented below.
- Stage 1. You need to apply two layers of red varnish to the nail surface one by one and wait until it dries. This will take about 10 minutes;
- Stage 2. A self-adhesive strip is glued to each nail of the length that will be painted over with a different color;
- Stage 3. Now the free space of the nail must be covered with golden varnish, also in two layers, and wait for it to dry.
After everything is completely dry, you need to remove the strips and apply a colorless varnish to your nails in order to consolidate the result. A bright and fashionable “french” is ready!
Snowflake design
Charming snowflakes on nails look great both at 15 and 45 years old. It is noteworthy that such wonderful drawings are not difficult to draw at home. Be inspired by our examples and start creating beauty!
This design uses either a glitter polish as a base or a layer of a regular solid color coat combined with a layer of pearlescent topcoat. After the background has dried, start drawing thin, contrasting snowflakes using a toothpick or brush.
You can also create a whirlwind of cute snowflakes on your nails using this scheme:
The elegance of French manicure can be easily diluted with a festive mood using a design with snowflakes. You just need to make a traditional French jacket using stencils, and after it dries, start drawing snowflakes according to the pattern.
Interesting : French manicure with a pattern
Chic New Year's manicure with rhinestones
You will need:
- gel polish black;
- gold glitter;
- matte top;
- small rhinestones;
- medium rhinestones;
- large rhinestones;
- broths.
Rhinestones can be of the same or different colors, the same applies to broths.
Stages:
- Cover your nails with base coat and dry in a lamp.
- Cover your ring and thumb nails with gold glitter.
- Paint the rest of your nails black.
- Apply a matte finish to the black color.
- Collect Christmas trees from rhinestones on the nail of your middle finger.
- Fill the empty spaces between the rhinestones with broth.
New Year's manicure is an opportunity to do something bright, interesting and original. Don't miss this chance and amaze everyone.
One comment on ““The most fashionable New Year’s manicure: the best ideas in different techniques””
- Olga:
01/27/2020 at 09:03
Holiday manicures are always the most beautiful, especially New Year's and Christmas-themed ones. I once made snowflakes with pebbles for myself, it turns out very beautifully and the metallic rub is great for a holiday, but it quickly rubbed off around the edges, even though it secured well (((Now I dream of learning how to draw Christmas balls with bows and pebbles, they look so elegant )))
Answer
The symbol of the year will be delighted
The earthen pig - a symbol of the coming year - craves sparkle and luxury in the New Year's image of girls. Also, she will not be indifferent to her own image in manicure.
It’s not for nothing that the sign says that if you please the symbol of the year, you can stock up on happiness and prosperity for the next 12 months. A nice bonus is that this design looks incredibly cute and girly.
Interesting : Beautiful designs on nails
In the colors of the New Year holiday
White, gold, silver and red together. Too much, you think? Not at all! Just a discreet minimalistic New Year's manicure for short nails.
@oliveandjune/Instagram
Let's add more ideas in the “minimal” style:
@paintboxnails/Instagram
It is worth saying that on world catwalks they prefer this kind of not too pretentious design. There is no arguing about tastes, and we are glad that today there is plenty to choose from.
Holiday characters
In New Year's manicure, it doesn't matter whether you believe in Santa Claus or not. This funny character will always take its rightful place in holiday design. And to draw it, you don’t need to have great artistic talent.
Look at this wonderful snowman - isn’t he a miracle?! This simple and at the same time interesting drawing can be created in less than 15 minutes, and it will delight you with its charm and fun at least on New Year's Eve.
A beautiful deer, funny looking out from under the edge of the nail, guarantees a great mood for all holidays.
Interesting : Stylish manicure - new items
Manicure with confetti (indie polishes)
Among the colored varnishes on the shelves of beauty stores, there are also transparent ones with various sparkles, shiny stripes, and multi-colored circles. The latter acquired the name “Indian varnishes”. They imitate confetti, and recently opaque-based products have appeared. “Confetti” on the nails can be very contrasting in relation to it, or they can only shade it a little - the choice is yours, but a New Year’s manicure can afford to please you with all the colors of the rainbow, and in their brightest shades.
If you decide on such a fun and truly bright New Year’s design, then keep in mind that it looks best in this version:
- A blue or light blue base and “confetti” of different diameters look very bright.
- Colored mugs on a black background will go with any outfit.
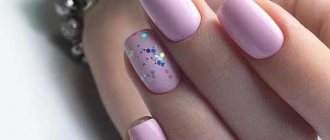
- Pink background - for glamorous ladies.
- A white background will add tenderness to the image, but will not diminish the effect.
You can choose a varnish with a base of any color, but the ones listed will probably be the most successful.
The beauty of this manicure is that it does not have to be applied perfectly evenly and monitor its integrity until it dries completely. The varnish for its creation can be found in many stores, but most often it is not singled out; it stands among the usual ones. Many consultants have not even heard the name “Indian varnish”. Therefore, try to look for the product on the shelves yourself.
When purchasing online, manufacturers simply post photographs of varnishes, and you will also have to look at them, since they also do not have a separate section for such products. Pay attention to the company China Glaze, they specialize specifically in India and holographic manicure varnishes.
We turn any manicure into a festive one
We know secret techniques that can transform even the simplest and most ordinary nail design into a magnificent addition to your New Year's outfit.
- A win-win option is to add sparkling decor to your nails. Moreover, this is not just a laconic accent, but real chic, shine, beauty! Feel free to use rhinestones, shiny pigment, decorative tape, microbeads, stamping and sliders.
- Bright or themed colors will immediately give away the solemnity of the occasion. For example, nail designs for the New Year are most often done using red, white and green shades.
- Gold and silver are true associations with a festive atmosphere.
Red, white, green and gold are the surest symbols of New Year's nail art
- Complementing your manicure with themed designs also transforms a simple design into a festive one.
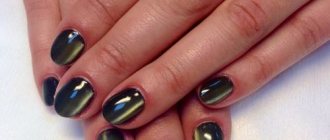
- Fashion trends 2019-2019 welcome noble manicures with rich colors and the “cat’s eye” technique. It looks very solemn!
Winter nail design: all kinds of designs step by step
New Year's manicure with a monkey
In preparation for the New Year of the Monkey, you should practice painting amazing “portraits” of the hostess of the coming year on your nails. You will need black, beige and white varnishes, as well as a thin brush. You can use any shade of varnish as a base; in this example it will be rich green.
Step 1. Apply a green base color.
Step 2. Apply black varnish over the green base as shown in the photo, depicting an animal head with ears.
Step 3. Using beige varnish, paint the muzzle and the inner surface of the ears.
Step 4. Paint the eyes with white varnish.
Step 5. Using black varnish, paint the pupils, nose and mouth of the monkey as shown in the photo.
The following options are also possible.
New Year's manicure with animals
For example, a baby penguin, polar bear, fox, hare, squirrel or seal would look funny as a winter manicure.
Let's see how to draw a penguin on nails step by step.
Drawing of a polar bear on nails with step-by-step photos.
Step-by-step photo on how to draw a hare on your nails.
How to draw a fox on nails (step by step photo).
Drawings of bullfinches on nails.
Other options for winter manicure with animals.
New Year's manicure with snowflakes
You will need blue and white varnishes, as well as a thin brush for applying the design.
Step 1. Cover your nails with white and blue polish using the ombre technique, described in detail in one of our articles. Paint the base of the snowflake with white varnish, as shown in the photo.
Step 2. Draw snowflake crystals.
Step 3. Draw dots in the center of the snowflake and the arrows.
Step 4. Decorate the center of the snowflake with a bead or rhinestones.
Snowflakes can be drawn in the center or from the edge of the nail plate. Fragments of snowflakes on individual nails will look beautiful.
New Year's manicure with deer
You will need a white base varnish, a thin brush, as well as beige, brown and red varnishes.
Step 1. Apply base polish to your nails and draw the deer's face with beige polish.
Step 2. Using brown varnish, draw the outline and depict the horns.
Step 3. Draw a large red nose on the edge of the nail.
Step 4. Draw the eyes.
Manicure with deer is ready. Be sure to apply a colorless varnish on top, which will allow the design to last longer.
Or this step-by-step manicure with deer:
New Year's manicure with Christmas tree
Even novice artists can do such a simple drawing.
Step 1. Apply a base of white polish to your nails.
Step 2. Using green varnish and a thin brush, we begin to draw the Christmas tree, applying small strokes from the bottom up. Each next stroke is shorter than the previous one.
Step 3. Apply random dots using different varnishes that will imitate Christmas tree decorations.
Step 4. Decorate the tree with sparkles and glue a small star on the “top”. We cover the drawing with colorless varnish.
Another option for drawing a Christmas tree on nails in a step-by-step photo:
And more options for “Christmas tree” manicure.
New Year's manicure with Santa Claus
Step 1. Apply a colorless base to the surface of the nail. Apply red polish to the edge of the nail (like a French manicure).
Step 2. Using a thin brush, draw the deflated cap of Santa Claus's hat and paint over it with red varnish.
Step 3. Draw a white border along the contour of the cap and create a “tassel” on the cap.
In principle, we can stop there. If you wish, you can finish the drawing by depicting the nose, eyes and white beard of a fairy-tale hero. A simpler option would be to paint New Year's hats on your nails. If you have no experience, we advise you not to paint on all nails at once, but to decorate the surface of 1-2 nails.
Fairy-tale characters and minions “dressed” in a Santa Claus costume will look interesting.
New Year's manicure with a snowman
Step 1. You will need orange, black and white varnishes, as well as a thin brush for drawing details. Apply a white base.
Step 2. Using a thin brush and black varnish, apply coal eyes, draw a sharp carrot nose and coals that form the line of the mouth.
A snowman can be like this (see step-by-step photo).
New Year's manicure with Christmas balls
A white base is applied to the nails. To apply designs, use a thin brush, as well as green, red and black varnishes. Black varnish is used to make threads and bows on which Christmas tree decorations are attached. Green and red varnishes are used directly to depict toys, approximately as shown in the photo.
Or such options.
New Year's manicure with the Snow Maiden
Drawing the Snow Maiden is more difficult; you need to have some skills in drawing on nails. And as an idea you can use this option.
To complete your New Year's look, read the rules for performing New Year's makeup.
Manicure with a rooster (photo)
Manicure for long nails
Among the new nail art products, you will certainly find ideas that are suitable for decorating your long nails. They provide great scope for imagination and the implementation of the most daring experiments. What better time to create the most dazzling nail design on New Year's Day?
Long nails allow you to create real pictures
On long nails, a matte top in combination with rhinestones, an elegant French manicure with themed designs and any decorative elements look luxurious.
Interesting : The luxury of gold in manicure
https://youtu.be/https://www.youtube.com/watch?v=wAyFgwNO7cU
_
Herringbone
What New Year would be complete without a Christmas tree? This forest beauty decorates not only homes, but also the nails of a modern fashionista. For this manicure you will need several different varnishes: gold; 2 types of green varnish in different shades for the Christmas tree - rich and shiny; red for the Christmas tree top, as well as a clear sealer. The step-by-step instructions below will tell you how to perform such a New Year's manicure.
- Stage 1. You need to apply two layers of gold varnish to your nails and wait for it to dry completely.
- Stage 2. In this step you need to select the finger on which the design will be. Bright details and patterns look most advantageous on the ring finger. You need to stick 2 adhesive strips on it so that a triangle is formed, and then two more diagonally. This is the frame of a Christmas tree.
- Stage 3. Now this Christmas tree needs to be painted green. And after it dries, apply green varnish with glitter on top and let it dry too.
When this happens, you need to very carefully remove the strips and decorate the tree.
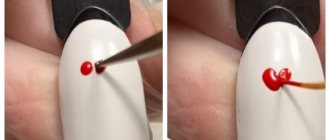
This can be done by dropping a drop of red varnish onto its top. The highest class of skill is to draw decorations. Cover the resulting pattern with clear varnish to secure the result. [yandex3] [google3]
