Decorating your nails with gel polish has many advantages, since the wear-resistant coating remains in the same condition for up to a month or more. Because of this, girls are eager to learn this technology and begin to do it themselves at home, trying to achieve a positive result.
However, keep in mind that before covering your nails with gel polish, you need to pay attention to all the intricacies of the technique, since failure to comply with any stage may affect the quality of the work.
How to properly apply gel polish to your nails at home?
Not all girls know how to apply varnish and gel correctly, which is why they have difficulties when applying pigment. In fact, correctly performed stages of applying gel polish often guarantee a positive result and long-term preservation of the effect.
What tools and supplies will we need?
Before applying gel polish at home, you need to pay attention to preparing the tools and supplies that you will need during work. You should choose high quality materials to prevent you from getting a sloppy manicure.
To complete the work you will need materials and tools:
- File;
- Metal pusher or orange stick;
- Nippers or nail scissors;
- Buff for polishing;
- Ultraviolet or LED lamp;
- A brush for applying gel polish (if it is not attached to a jar of pigment or you want to make a design using it);
- Decor: stamping, stickers, foil, rubbing (if desired, decorate your nails in an unusual way).
When choosing a lamp for drying decorative coatings, you should pay attention to its quality, since not all devices are suitable for drying pigment due to too low power.
Minimum parameters for the device: ultraviolet lamp - from 36 W, LED - from 20 W.
You should also first prepare the compositions and means:
- Remover for softening the cuticle;
- Dehydrator (means for degreasing the plate);
- Primer (increases the adhesion of the decorative coating to the nail);
- Gel varnishes: base, color dyes, top;
- Cleanser (for removing the sticky layer from the top).
If you need to remove the previous decorative coating, pay attention to the method of its removal. As a standard, there are two options for removing gel polish – hardware or chemical. Beginners most often use the second one because it is safer.
To chemically soak shellac, you will need several materials: remover, cotton pads, foil or manicure finger clips, pusher or orange stick.
All instruments must first be disinfected to eliminate pathogenic microflora using an antiseptic. This way, in case of accidental damage to the periungual area, you will prevent infection from entering the bloodstream.
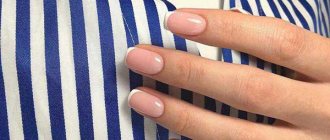
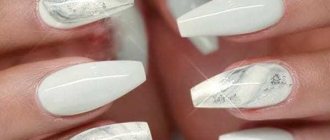
Light colors on short nails
Some people believe that light gel polish should not be applied to short nails because it visually shortens the fingers. This statement is only true if the tone of the gel polish matches the skin tone. In practice this happens extremely rarely. For example, when there is a strict dress code at work or you need to divert attention from your nails.
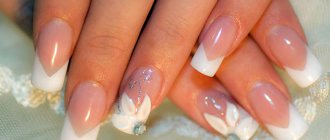
White manicure looks very impressive. It stands out on any hand and gives the impression of cleanliness and freshness. All pastel colors also look great in short lengths. These can be light lilac, lemon or mint colors. This season it's fashionable to have a rainbow on your nails. Try it by painting each nail a different color and choosing soft pastel shades to apply.
Stages of the procedure step by step
Gel polish for beginners is a rather complex procedure, since it contains many stages, each of which must be paid attention to and followed.
The technology for applying gel polish includes four main stages:
- Preparing the nail plate for decoration.
- Applying the base.
- Performing a color design or a single-color coating.
- Fixing the work with a top.
To ensure that the manicure looks well-groomed and remains in the same condition for up to 2-3 weeks, be careful when carrying out each stage, make sure that the work surface is clean while performing them.
Preparation
To ensure that the gel polish lays evenly on the nail bed and does not form bumps and detachments ahead of time, you should perform a rough manicure, which involves completely cleaning the nail.
You need to start working by washing your hands and then drying them completely. This step can be replaced by using an antiseptic, as it ensures that moisture quickly drains from the skin.
The preparatory stage most often takes about forty minutes:
- Adjust the shape of the free edge with a file.
- Apply the remover to the cuticle.
- After a minute, push back the cuticle with a pusher or an orange stick and lift it.
- Use nail scissors or clippers to cut off the keratinized epidermis.
- Polish the nail bed with buff.
- Remove excess sawdust with a stiff brush.
- Apply dehydrator to degrease the surface.
Keep in mind that all manipulations should be performed carefully, slowly, otherwise there is a risk of accidental damage to the periungual area, and a manicure with bruises will look sloppy.
Also, before applying the pigment, it is recommended to use a primer - a special product that increases the adhesion of the decorative coating to the nail. There are acidic and acid-free compositions that differ in the direction of action - the former remove the fatty film from the surface, tightly fixing the gel polish, and the latter strengthen the weakened surface, which also increases the long-term preservation of the work.
As a standard, the primer does not need to be dried in a lamp, but some acidic products need to be dried, so before using them you need to pay attention to the instructions prescribed by the manufacturer.
Applying base coat
The base is an important stage when applying dye, since when the pigment is distributed over a clean plate, there is a high probability that it will quickly begin to chip and come off. The base layer is the ideal medium for fixing the dye.
Apply the base evenly over the entire nail plate. The layer should not be very thick so that it can be dried in an ultraviolet or LED lamp for 1-1.5 minutes. Only after this can you apply the main gel polish, which will create the design of the manicure.
Keep in mind that sometimes you can use not ordinary bases, but self-leveling solutions. They not only create high adhesion to the pigment, but also smooth out the nails, eliminating minor cosmetic defects in the form of bumps and depressions that can interfere with the technology.
After distributing the base, you can apply colored shades of pigment in two middle layers to completely cover the natural manicure. Each stage is dried in a lamp for one minute. After drying two layers, you can create a unique design using simple nail design options:
- Stamping;
- Stickers;
- Rubbing;
- Foil;
- Stencils.
The applied design also needs to be thoroughly dried in a lamp.
Application of topcoat
To prevent the work from coming off prematurely, it must be fixed with a finishing coat - top. It is recommended to use all formulations of the same brand so that their active ingredients do not conflict with each other.
Pay attention to the technology of uniform distribution of the top:
- Apply the mixture to the center of the nail.
- Spread the solution on one side, moving the brush from the base to the free edge.
- Repeat the manipulation on the other side.
- Align the remaining product in the center.
- Seal the end (to do this, run along the free edge of the nail) to prevent premature convergence of the work.
- If the coating turns out uneven, turn the nail face down for a few seconds so that the topcoat flows to the center and spontaneously distributes over the nail.
It takes a little longer to dry the finish coat in the lamp - one and a half minutes.
Final stage
Most topcoats have a sticky layer after drying, so the final stage of the manicure is removing it. The standard way to do this is to use a lint-free cloth moistened with a cleaner, which should be passed over the surface 1-2 times.
If you don’t have a cleaner, you can use available materials (medicinal alcohol, acetone, liquid for removing regular varnish dye), but you need to be as careful as possible with them, because there is always a risk of accidental damage to the gel polish and deterioration of its visual condition.
Tips for choosing a design
To make your manicure look perfect, you need to take careful care of the cuticles and rollers. This is the secret of any design. When your nails are light, gel polish can affect the color of your hands. The fact is that the skin has a natural color - some have a warm shade, some have a cold shade. This can be determined this way: if the veins that are visible on the arms from the inside are bluish, it means the skin is warm in tone. If the veins have a purple tint, it means the skin has cool tones.
By choosing a cool shade of gel polish, for example, mint, a girl with cold-toned hands risks getting a greenish tint to her skin. The same thing will happen if you choose beige or soft pink. This happens because the human eye is able to summarize color sensations. In order not to cause unwanted associations, you should pay attention to this aspect.
In combinations on the nail, unwanted effects are suppressed. This allows you to select from a wide range of colors those that look good both on your hands and in the design with each other. White color can also be warm or cold, but its combination with black suits any design option.
Try a light manicure in trendy colors and feel fashionable and stylish.
What is gel nail polish
Gel nail coating, the photo of which emphasizes the natural appearance of the plate, and the extension procedure are two different things. Although these processes are often equated with each other. The only thing they have in common is the result. In both cases, nails acquire a well-groomed appearance. The purpose of using gel polish is to cover the nail plate and smooth its surface.
With its help, you cannot achieve lengthening, as with extensions. The execution method has its own characteristics. The coating can be plain, without the use of rhinestones, patterns or stickers. Thanks to this, your nails look as natural as possible. That’s why this manicure option is so popular among girls who stick to naturalness in their appearance.
The gel has a positive effect on the cuticle, and not just on the nail plate. It makes the skin look neater and protects against drying out. The technology is used not only in manicure, but also in pedicure. Toenails are protected from fungus, brittleness and peeling.
If you want to change the design while wearing it or just add a little brightness, you can apply varnish over the gel. The coating is highly resistant to damage and scratches. If applied correctly, it will not peel off or roll off. You can wear it for a long time, up to 3 weeks. Over time, the manicure does not lose its color, shape and shine.
Finish coating
If you just do a manicure with gel polish, the coating is unlikely to last long. To avoid discoloration and other troubles, the surface of each nail is coated with a finish.
The topcoat seals the material, protecting it from moisture and cracks and preventing peeling.
The surface of each nail is covered with a finish
There are 2 types of finishes on sale:
- glossy;
- matte.
The choice depends solely on the design. The top is applied in a thick layer, carefully treating the edges of the nails and areas in the cuticle area. Drying in a UV lamp takes about 2 minutes, and for an LED lamp 30-60 seconds are enough.
Manicure options
It is difficult to create the perfect nail design by simply taking any shade of gel and decor. Color, pattern and design should be in harmony with each other. For successful coverage, it is important to know some features.
In different shades
There are about 15 different color coating technologies. This manicure allows you to create a gentle, playful or mysterious look. Different combinations of shades and techniques help create a special design. But not all solutions are suitable at different ages.
Color combinations that are considered the most successful are presented in the table:
| Color | Technology | Image | Age | Relevance |
| Pastel and nude | Gradient, monochrome | Light, delicate and sophisticated | Any | For work and everyday life |
| Acidic | Monochrome, gradient, artistic, geometric, water | Perky, infantile, childish | 15-20 years | For holidays and parties |
| Pastel with sparkles and rhinestones | Monochrome, gradient | Romantic and graceful | Any | For the holidays |
| Contrasting light | Patterns, stripes and alternation | Light and fresh | 15-25 years | For everyday life |
| Bright | Rainbow | Summer and fun | Up to 30 years old | For the holidays |
| Unicorn shade | Rubbing | Soft, gentle and mysterious | Over 18 years old | For everyday life |
| Contrasting dark | Patterns, drawings, stripes and stickers | Brave and Passionate | Over 18 years old | Dates, photo shoots, holidays and parties |
| Muted and bright | French | Intriguing and discreet | Any | For everyday life |
Matte
Manicures in different colors with a matte finish hide minor scratches and other surface imperfections. Women over 35 years of age are not recommended to experiment with bright nail polish colors. It is better to opt for a delicate, strict or light design.
The following shades are ideal:
- brown;
- grey;
- dusty pink.
This palette will fit well into an elegant and serious look. For young girls, bright and rich colors are considered the best option. Matte manicure using the “Rainbow” technique looks especially good. It turns out to be more delicate and soft, so it is well suited for the age group under 30 years old.
The matte gradient looks no less impressive than the glossy one.
Suitable for both young girls and adult women. This manicure is appropriate for any event and on weekdays. Pastel colors are good in combination with bright colors. The design should be in a minimalist style. It is recommended to choose from a palette from white to pink.
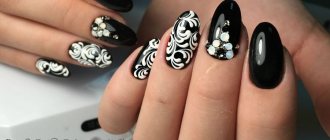
With patterns and drawings
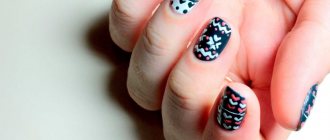
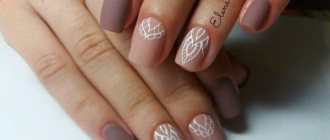
Gel nail coating, the photo of which shows design options, can be made using various designs and patterns. Decorative elements may differ on different hands. A delicate manicure is also emphasized with a pattern applied to only one nail. A light coating with a small black pattern is considered a universal option for women of any age.
You can apply patterns and designs in several ways:
- stamping;
- stickers;
- artistic painting.
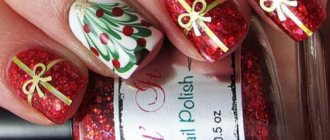
During the beach season, it is easy to create a feminine and delicate design. For manicure on sunny days, designs of palm trees, juicy fruits and bright greenery and flowers would be appropriate. They look most impressive on a plain white surface.
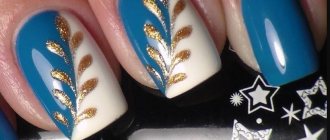
Successful color combinations in drawings:
- silver and blue;
- copper and black;
- golden and red.
Such combinations look harmonious in the nail design of women over 35 years old. A manicure in these colors is well suited for everyday wear. Bright accents on a light coating make the image original, light and creative.
With simple decor
You can make your design interesting not only with a bright varnish color, but also with various additional decorative elements. This solution has no age restrictions and is suitable for everyone. An example of such a manicure is microbeads. It is used on 1 or 2 fingers, carefully selecting the color of the beads to match the gel polish. Photos of nail designs using beads on a gel coating look impressive.
It is not difficult to achieve this result at home. First, apply the base gel and dry, but not until completely dry . Next, dip your finger into the package with decorative elements so that they stick to the plate. For better fixation, the material is additionally pressed onto the nail. Finally, cover with a layer of finishing gel.
Regular polish will not be able to fix the microbeads on the nail. Its consistency is not as thick as compared to gel. Rhinestones add sensuality and originality to the look. They go well with bright colors of the coating. Can be used as an addition to patterns and designs or to highlight one nail. Golden rhinestones look good on dark varnish and light ones on white.
This type of decor is suitable for both girls and women. Multi-colored foil is also used for decoration in manicure. This option is more suitable for young girls. The design will be appropriate for parties, discos and various holidays. Due to its impracticality, it is not suitable for everyday wear. Foil will add a touch of playfulness to the design.
Holographic rubbing can be used not only for the base of a colored manicure, but also for its decoration.
Features of use depend on the size of the glitter. Most often, craftsmen take sparkles measuring 0.1 or 0.2 mm. To create a perfectly mirrored nail surface with multi-colored tints, smaller particles are suitable. This option is suitable for every day. There are no age restrictions. Larger glitter is used for the scale effect.
This design is appropriate at a young age for parties and festive events. Using gel polish in manicure gives a lot of scope for imagination and creativity. Despite the wide variety of nail design techniques, you need to remember that the beauty of a design lies not only in its complexity.
An ideal gel coating cannot be imagined without proper technical execution . If you follow all the subtleties, you can get an interesting result, as in the photo, without compromising the health of the nail plate.
Author: Pronina Marina
Article design: Anna Vinnitskaya