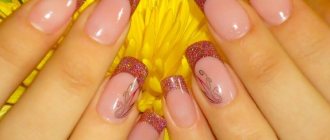
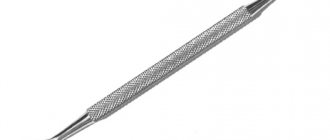
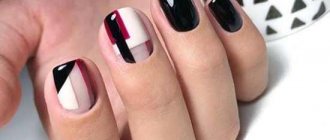
A beautiful, well-groomed manicure is a calling card for every representative of the fairer sex, age does not matter here, nails should always look beautiful. However, not everyone can boast of the ideal appearance of their nail plates; in these situations, you can use extensions. But the result depends on preliminary preparation and nail treatment. Special liquids can be used for these purposes. They perfectly prepare the surface for subsequent extensions and decorative coating. But it is still worth considering the features of the primer and degreaser, as well as what the difference between them is.
What is a primer and what is it for?
A primer or a degreaser are not the same thing; they may differ in composition and purpose. They are often used for degreasing and increasing the adhesion of the coating to the surface of the plates.
The main functions include:
- Restores natural acidity;
- Has a healing effect on the nail structure. The liquid reduces the risk of developing possible complications and diseases to a minimum;
- Disinfects the plates, protects them from penetration of bacteria and microbes into their structure;
- Increases the life of the artificial turf that is applied over it;
- Using it, you can remove contaminants of a natural, technical nature from the surface;
- Removes excess moisture and has a drying effect. This is what ensures the high strength of artificial turf compared to natural turf.
Nail primer is especially needed in situations where a person has “wet” hands. To create a high-quality manicure, it is worth carrying out a complete disinfection of the nail plates.
What does it contain?
Available in liquid form, it has a transparent structure. The product has no odor. The structure is similar to ordinary water. It is placed in small bottles made of plastic or glass base, with a lid with a brush on top. To increase service life, opaque bottles are often used.
The composition contains the following substances:
- Ethium acetate;
- 2-hydroxyethyl matacrylate;
- Methacrylic acid. This substance often acts as the main one.
Based on their composition, they are divided into two types – acidic and acid-free. The latter type has a gentle composition, this is due to its low acid content. Products of this type have a weak effect on nails, but may not retain the results for long.
How to use
To create a beautiful, neat manicure, it is important to know the application features. Its use must be correct, so it is worth considering the sequence of all actions:
- At the initial stage, a regular hygienic manicure is performed;
- The nails are given the required shape using a nail file;
- Using an orange stick or buff, carefully remove excess cuticle on the sides;
- The next step is to apply the primer. Use a brush to pick up a small amount of product and distribute it evenly on the surface;
- Excess can be removed using a cotton swab, which can be moistened in water;
- Then wait a few minutes. Sometimes it is necessary to use a UV lamp for drying.
A nail dehydrator is the key to a long-lasting manicure!
To create a flawless manicure and give your nails a beautiful shape, you need a number of products: bonder, primer, degreaser, dehydrator.
As for the last thing, it can safely be called one of the most irreplaceable things in the modern nail industry. What is a nail dehydrator and how to use it correctly, let's figure it out.
What is a dehydrator and what is it for?
Dehydrators are widely used in the nail extension process. At the initial stage of extension, when preparing the nail plate, it is necessary to remove excess moisture from the nail and dry it slightly.
This is exactly what a dehydrator does. It looks like a clear liquid. Using a brush, apply it to the nail plate and allow to dry. Dehydrators can be purchased at any perfume and cosmetics store.
Often on the label of this product you can find the words “bond”, “bonder”, “bondex” - this is the same as a dehydrator. This product is indispensable for nail extensions: thanks to it, the artificial material will last much longer.
And if you do a manicure on your nails, then a dehydrator will help improve your nail health and reduce various complications and diseases of the nail plate to a minimum.
Degreaser or dehydrator?
It is a mistaken belief that a degreaser and a nail dehydrator are the same thing. In fact, these are completely different products in composition and function.
Read in full
A degreaser removes dirt and fatty deposits from the nail plate, while a dehydrator removes excess moisture and dries the nail.
In principle, both products perform similar functions, but only the degreaser does it superficially, and the dehydrator does it more thoroughly. Of course, you shouldn’t use both a degreaser and a dehydrator at once. It is enough to choose one thing, taking into account the characteristics of your body.
So, if you have oily skin and excessive sweating, then you should use a dehydrator. If you don’t have any problems of this kind, then you can use a degreaser.
Never use nail polish remover as a means to clean and dry your nails.
Yes, it tends to dry out the nail, but the components it contains have an extremely adverse effect on the nail - it begins to peel and burst. That is why nail professionals advise using nail polish remover as intended and as rarely as possible.
Purpose and price of a nail dehydrator
Many cosmetic companies, both domestic and foreign, are engaged in the production of dehydrators. Here are the most popular:
- CND Nail Fresh - products for any artificial coating, including regular decorative varnish. Cleans even the deepest layers of the nail plate. Price 786 rubles.
- Bond ruNail - these products do not contain fragrances, dyes or other harmful substances. But they also do not clean the nail as thoroughly as previous products. They should also not be used before applying decorative varnish. Price 230 rubles.
- El Corazon – designed for both natural and artificial nails. Removes dirt, moisture, promotes adhesion of natural and artificial materials during nail extensions. Price 120 rubles.
- Red Carpet, PREP max adhesion sanitiser – a product for nail disinfection and adhesion of natural material to artificial. The price is about 300 rubles.
- Entity One Natural Nail Prep is another nail plate cleanser. Price 339 rubles.
- Cuccio Veneer is a product that removes excess moisture. Intended for use before applying gel polish. Price 960 rubles.
Terms of use
The use of the dehydrator depends on the packaging it comes in. If it is a bottle with a brush, then you should apply 1-2 layers of the product to a dry and clean nail. If the dehydrator is in a tube, you need to squeeze a little product onto a cotton pad and wipe your nail with it. After this procedure, you can begin coating.
What is a degreaser and why do you need it?
A degreaser or nail prep is a special product with a special composition. It comes in the form of a liquid that quickly dissolves fatty stains. Certain elements have a disinfecting effect on the plates and the skin next to it. After this procedure, decorative coatings can be applied to the surface.
So what are nail preps used for:
- Using them, you can clean the plates from all kinds of contaminants;
- The product removes excess fat, moisture, and has a drying effect;
- Used to disinfect nails and nearby skin;
- Increases the degree of adhesion to coatings;
- Extends the duration of manicure.
What does it contain?
When choosing nail preps, special attention should be paid to the composition. Acid-free or acid-containing components can be used as the base of the product. They have some distinctive features - cost, action, degree of purification, therapeutic effect and many others.
In addition to acids (methacrylic is usually used), the composition contains other components:
- Vitamin complexes;
- Substances with a disinfecting effect - alcohol, ethyl acetate;
- Fragrances;
- Special oils;
- Isobutyl or butyl acetate;
- Isopropanol
How to use a degreaser?
Nail degreaser must be used correctly. It should provide strong adhesion of the natural surface to the decorative coating - varnish or gel. For this reason, it is important to strictly follow the rules when using nail prep:
- To begin with, prepare the nails, cut the cuticle;
- Next, using a buff, the shine is removed from the surface;
- Then we start applying nail prep. Using a brush located on the lid of the bottle, place a small amount and distribute it on the surface;
- Dry it a little, remove excess with a napkin.
How to use?
First of all, you must carefully follow the instructions that come with the bottle. There are general principles of use and secrets of professionals that are suitable for any type of primer:
- applied after a hygienic manicure, cutting cuticles, shaping nails, but before using the base coat;
- surface degreasing is necessary;
- movements during application must be very careful so that the composition does not get on the skin;
- First, the brush should be drawn from the end to the center, only then distributed to the sides;
- be sure to squeeze the brush so that the layer is loose;
- liquid compositions dry on their own, gel-like ones may require drying in a special lamp;
- gel-type primers have a sticky surface, they take longer to dry and require particularly thin application;
- If the surface is wet even after a few minutes, blot it with a napkin.
You can replace the primer with a bonder or prep, but only if you use a gel coating or regular non-persistent varnish. They do not provide much durability, however, their composition is quite comfortable and does not damage the nails.
What is the difference between a degreaser and a primer?
These cosmetic products are similar, they have practically the same functions, but still there are some characteristic qualities and differences that relate to the composition and features of application.
Many people believe that these liquids have the same purpose and have no distinctive qualities, but this is not true. If you are going to get a professional manicure, then you should find out the difference between a primer and a nail degreaser, but the difference between them is significant. It is related to the purpose:
- The degreaser is used to clean the nail plates from sebum, dust, and other various contaminants. They increase the degree of adhesion to artificial turf;
- The primer is used as an intermediary between the nail and the coating. It provides high-quality adhesion of the artificial turf to the natural surface.
Usually the degreaser is applied first, and then the primer is applied on top. This ensures the creation of high-quality manicure with a long-lasting varnish and gel coating.
How to choose a nail degreaser
Types of degreasers by composition and purpose:
- Klinser. Universal liquid. Removes moisture from the surface without penetrating into the deep layers of the plate. Contains a lot of alcohol, so it disinfects well.
- Dehydrator. The liquid removes dust and dirt from nails. It differs from clinser in that it penetrates into the deep layers of the nail plate, drying it well from moisture. After using a dehydrator, the decorative coating will last much longer.
- Primer. Liquid for degreasing, but its main purpose is to lift the scales of the nail plate and loosen the top layer.
Primers are divided into two types:
- Acid. Contains methacrylic acid, which lifts keratin scales and removes impurities. Acid primer is used before acrylic nail extensions. In case of contact with the skin, the product may cause redness, irritation, burning, and allergic reactions.
- Acid-free. Used before applying gel polish or gel nail extensions. An acid-free primer is not as aggressive as an acid primer, but it degreases well.
Tips from a manicurist
Many masters note significant differences between manicure primer and nail prep. They often use them in combination to increase the adhesion of the coating. But many women often have some questions regarding these liquids.
What to apply first - primer or degreaser?
Experts recommend applying a degreaser first. You should first prepare your nails, file them, and remove the cuticle. Next, liquid is applied, it removes all kinds of dirt, grease, and moisturizes the plates. After this, you can use a primer; it will have a disinfecting effect and dry it out.
Is a degreaser always necessary?
When creating a manicure, the use of nail prep is desirable. This product will cleanse your nails of grease and contaminants that reduce the degree of adhesion to the coating. If not used, the coating will not last long.
If you don’t have a degreaser on hand, experts recommend using the following advice:
Primer and degreaser are important tools for increasing the adhesion and service life of the coating applied to the surface. But still, before using it, it is worth considering their main properties, qualities, and distinctive features. If applied correctly, you can get a professional manicure at home without the expensive services of specialists.
Is it possible to use a degreaser, dehydrator for nail and eyelash extensions instead of a primer?
The primer is used if an acrylic system is used for extensions, or if the client’s nails are very capricious. There is a naturally very moist nail plate, which is surrounded by a large number of sweat glands. The nail is constantly wet, so even after a short period of time, a large number of detachments appear on it.
The most interesting thing is that such capricious nails must be treated with a degreaser and primer not just once, but several times. There are masters who apply degreaser, dehydrator and primer five times to capricious nails
Is it possible to use a degreaser, dehydrator for nail and eyelash extensions instead of a primer:
- Many are trying to replace funds with each other. This cannot be done under any circumstances, since the properties of the means are completely different, and the tasks are also different. The fact is that the primer fluffs up the nail plate and scales and prevents the proliferation of pathogenic microflora.
- Some believe that this is a kind of primer layer, exactly the same as that applied when plastering a wall. A dehydrator and a degreaser also have different purposes.
- Unlike a degreaser and dehydrator, a primer not only dries out the nail plate. In addition, it fights pathogenic microorganisms. As mentioned above, an acid primer that contains acid is usually worn under the acrylic system.
Bonder
The difference between a bond and a primer
Many novice manicurists make the irreparable mistake of replacing bonder with other products, such as primers. At their core, these substances are involved in preparing nails for further design.
But they have a different chemical composition, which is intended for a specific layer of manicure.
Distinctive features of bonds and primers:
- Structure. Primers are available in liquid form. Bonds have a thick, sticky structure.
- Primary goal. Primers of any type are used to protect the body from toxic substances entering through the nail plate. They cleanse nails of dirt, dust and grease, thereby acting as a primer. Bond mainly acts only as adhesion.
A distinctive feature between a bond and a primer is the drying process. If an ultraviolet lamp is required to dry the bonds, then the primers dry in the usual way in the open air.
Bonder: product features, purpose
Bonder, like primer, is considered one of the basic products used in nail extensions. Its main function is to ensure reliable adhesion of the nail plate to the artificial material. Simply put, a bonder (pre-primer) performs the task of glue. This is a special base that will allow you to create a high-quality and durable manicure with acrylic or gel coating. It is thanks to the bonder that you can avoid such a nuisance as peeling of the extensions and provide your natural nails with a reliable protective layer.
Advice. To check the level of qualification of a nail service technician, just ask him a question about what the bonder is used for and whether he uses it. Not everyone is able to answer correctly, and many even try to save on materials, making do with just a primer and turning a blind eye to the bonder (by the way, when creating a far from cheap manicure).
The main purpose of the bonder is to maximize the adhesion of the nail plate to the artificial material being built up. Yes, the primer partly performs this function, but (!) the components included in the two products act differently and are intended for different purposes. They cannot be replaced with each other. In fact, the primer prepares the “soil” for applying a bonder, which acts as a “gluer”.
Main features of the bonder:
- Provides uniform “gluing” of the nail with artificial coating;
- Prevents the possibility of peeling of the extended material;
- Creates a protective layer that “protects” the nail from the negative effects of cosmetic products applied after it;
- Increases the strength of the applied coating.
- Like primer, bonder can be divided into 2 main types: acidic and acid-free. First
- Suitable exclusively for thin, weakened or overly oily nails. Can only be combined with pigmented varnishes. The second is relevant only for strong, healthy nails. Ideally combined with any coating (even transparent).
Due to its structural features and sticky texture, craftsmen sometimes call bonder “double-sided tape.” In order for the layer of this cosmetic to dry thoroughly after application, you should hold your nails under a UV lamp for several minutes. After this, you can begin applying the main nail coating.
Required tools and materials
Of course, for nail extensions using tips, you will need the tips themselves that you choose.
You will also need:
- lamp for drying nails;
- glue for gluing tips;
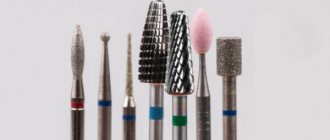
- a manicure machine or several nail files with different abrasives;
- tip cutter, which removes the excess length of the tip;
- buff for filing artificial ends;
- pusher for moving away contact areas (cuticles and side ridges);
- brush for applying gel (acrylic, biogel, etc.);
- lint-free wipes that will not leave small lint on artificial plates;
- degreasing liquid;
- acidic or acid-free primer;
- base, to create durable nails;
- a topcoat used on artificial plates to give a shine or matte finish.
Before applying the top, you can use a colored gel coating, so that later you can proudly show off your perfect manicure, saying, “Wow, how good I am at doing my own nails!”
Tools for nail extension with tips
@kashlanskaya_nail
@nail.art.studio_kovrov
Strengthening nails with gel: what is needed for the procedure
Strengthening nails with gel is only possible if you have a certain set of products and tools:
- lamps for coating polymerization,
- nail files,
- soft buff
- orange stick,
- clinser,
- primer,
- degreaser,
- lint-free wipes,
- brushes for applying strengthening composition,
- the means for imparting rigidity to the plates.
The list of what is needed to strengthen nails with gel depends on their general appearance and condition. Before starting the procedure, you must perform a hygienic manicure. Then the list of tools will expand; you should add cuticle scissors, an applicator with a silicone tip, or a pusher. After all, in essence, strengthening nails with gel is a procedure that precedes the application of a decorative coating for longer wearing. That is, doing a manicure after using a product that gives your nails strength and smoothness is pointless.
Instructions for gluing false nails
How to grow nails
What happens if you apply false nails incorrectly? In this case, they will not last even a few hours.
To make the decor look natural and elegant, it is important to follow the advice of experts and keep step-by-step instructions in mind
Before you begin the process itself, you should understand the types of nail implants. There are two of them:
- self-adhesive;
- without adhesive base.
The first type involves the presence of an adhesive layer on the inside of the lining. The second type is tips without a sticky layer. In order to glue them, you will need special glue. Depending on the type, there are instructions for fixing the decor.
Guide to working with self-adhesive tips
- An appropriately sized overlay is selected for each nail. The tips are laid out on the table in order so that they can be conveniently applied to the appropriate finger.
- Nails are freed from old varnish.
- Hands are treated with antiseptic.
- An express manicure is performed: nails are filed, cuticles are removed.
- The nail plate is lightly filed with a buff, the abrasiveness of which is 900 grit.
- The surface is degreased with an alcohol solution.
- The film is removed from the inside of the lining. The exposed sticky layer of the accessory is applied to the nail.
Before gluing the decor, the nails are sanded with a buff
Guide to gluing regular decor
Activities for the selection of tips, manicure, and degreasing are carried out as in the first case. Next, the inner side of the tip is coated with glue, then it can be applied to the nail plate. The decor is fixed with your fingers within 1-2 minutes.
Note! To level the base of the overlay and the base of the nail, the tips are filed down a little in this place. As a result, the overlay in this area will become thin and look natural.
This option is only possible if the tips are colorless. This cannot be done with decorated elements.
Small overlays
For girls who prefer short, small nails, there is the opportunity to purchase a set of overlays and trim them to your liking. To make small ones from long overlays, use manicure scissors and a nail file. False nails are also available in small sizes. They can be used in the same way as regular pads.

