Design using wet gel polish is drawing on an undried coating, which allows you to make the image more natural due to the fuzziness and vagueness of the lines.
It requires flower beds of medium density, as well as a choice of thin, flat, beveled brushes, dots, toothpicks, and needles. There are also special products with a spreading effect from Nika Nagel, BlueSky, Gellaktic Mystic, MiiS. You can make beautiful patterns, abstract images, dots, cobwebs, twigs, shells, hearts. Drawing roses, butterflies, reptile skin, feathers, marble surfaces, and a bridal bouquet will require more skill.
Design features for wet gel polish
A wet gel polish design is an image, pattern or vague shapes that look as natural as possible. The technique itself gives them greater naturalness, because the wet coating makes all the lines a little fuzzy. To get the desired effect you need:
- choose a gel polish of medium consistency so that it does not spread instantly and at the same time easily mixes with other flower beds;
- use a suitable tool, because the details of the drawing can be larger or smaller.
Which varnish is best
For a vague design, it is important to choose the right gel polish:
- Well pigmented. If the flower garden leaves streaks, you will have to deal with them. Otherwise, the drawing will look sloppy.
- Correct consistency. A product that is too liquid will spread, may flow onto the cuticle or mix so that vague spots appear instead of a pattern. And thick textures do not mix well; soft transitions will not work.
If the gel polish is too viscous, it can be diluted with a liquid finishing agent.
How to apply drawings
Drawings are made:
- with a thin hair brush or liner,
- dotsami,
- a brush from a bottle of gel polish,
- orange stick,
- toothpick or needle,
- point brush, petal brush, beveled or flat.
The tool is chosen in accordance with the design and for reasons of convenience. Brushes are suitable with natural and synthetic bristles, even silicone ones. The main thing is that the gel polish does not slide off the instrument instantly.
What is flowing gel polish?
Gel polishes have been on the market for a long time. At the same time, manufacturers of such products never cease to amaze manicurists with new inventions, as well as interesting innovations. One of them is flowing gel nail polishes. The wet painting technique has been known for a long time, even before the advent of gel polishes. Then they painted directly on the nails using liquid droplets of varnish. To create the design, drops were placed, after which they were connected using a needle or brush. In this way, original, interesting, unusual designs were obtained. This technique has returned, but with gel polishes.
Bleeding effect
The fact is that not all gel polishes are suitable for such painting due to their density and thickness. Some brands are very thick, so the drop stays in place and does not spread anywhere. Therefore, gel polish manufacturers decided to create an unusual, interesting product, the so-called spreading base. This is a base coating that represents and combines amazing and unusual properties.
Such bases can be quite dense and thick, but at the same time the varnishes will spread very well on them, creating fancy patterns. If you combine all this with small brush strokes, or work with dots, you get simply gorgeous masterpieces. They can be supplemented with drawings, as well as broths and rhinestones. This is how you can achieve unique designs. These techniques are mainly used in floristry. There are several directions and groups of designs that can be created using flowing varnishes.
Options:
- Flowers. Accordingly, it is possible to draw petals, leaves, which are then combined into entire compositions, unusual, interesting combinations
- Similar to natural stone. By mixing tones and spreading them, you can achieve a unique, unusual design that is inherent in natural stone such as malachite
- Unusual drawings, abstraction . Usually this kind of design is complemented with foil and thin drawing lines.
Watercolor design
Possible mistakes when creating nail designs using wet gel polish
Nail design using wet gel polish is also accessible to beginners, but difficulties may arise when performing due to:
- Wrong choice of flower garden. Too liquid and dense are not suitable. And to avoid unpleasant surprises when mixing, it is better to take products from one company.
- Poor quality manicure, errors in applying the base and the first layer of the flower garden. All this can create unevenness on the nail plate, which will interfere with the distribution of gel polish over the general background.
- Uncertain, repetitive or too intense movements of the instrument. This causes bald spots to form on a wet surface, rather than clear lines that should blur slightly.
There are many other factors that prevent you from doing the job beautifully and quickly: incorrect position of the hands (upside down), excessive tension, poor lighting, etc.
Wet gel polish drawings that beginners can do
Drawings using wet gel polish for beginners should be simple:
- smooth divorces,
- different sizes of dots or circles,
- abstract images,
- cobweb,
- simple ornament,
- hearts, shells, and other easy-to-make figures.
And it’s better to sketch out in advance on a piece of paper what you would like to have on your nails. This makes it possible to think through the movements of the tool in advance and determine the location of the parts.
Step by step drawing on wet gel polish is done like this:
- The nails are filed, the cuticle is cut or pushed back, and the skin around the plates is polished.
- Surfaces are treated with a buff to remove gloss.
- Nails and skin are wiped with a degreaser.
- After it evaporates, a primer is applied to the surfaces of the plates and ends, and allowed to air dry.
- The next stage of the gel polish base is its polymerization.
- Nails are painted with the first layer of flower garden.
- This coating must be dried and residual stickiness, if any, must not be removed.
- Apply another layer of gel polish of the main shade, do not polymerize.
- The second flower bed is laid out as a drop on the palette.
- By dipping a dots or other tool into it, they apply patterns to the undried layer of gel polish on the nails.
- The hand is placed in the lamp.
- Cover the nails with a finishing agent and polymerize it.
Divorces
Divorces can be done using 2 or 3-4 flower beds plus the main background, and there are 2 ways to do this. The first one is done like this:
- The prepared nails are covered with a base and dried.
- Apply 2 layers of the same color, leaving the second undried.
- Gel polishes of other shades are dripped onto the foil or palette separately from each other.
- Take each one in turn with thin brushes and use them to make lines on the nail along the undried base color.
- When the design takes on the desired appearance, the coating is polymerized.
- All that remains is to apply the top coat and dry it too.
Watch the video about design options for wet gel polish:
The second method is more difficult, but the divorces are more natural:
- The base is applied to prepared nails without leveling, so that in the end they do not look too thick.
- Cover them with the main color and dry.
- Additional shades of gel polishes are dripped onto each other onto the palette and mixed with a thin brush or dot until streaks appear.
- Using a wide brush, pick up this mass and transfer it to the nail, stretch it from the base to the free edge, without disturbing the formed lines.
- The same is done on the side parts of the plate.
- Use a thin brush to paint the space around the cuticle.
- Dry the coating.
- Next you need to apply the top coat and place your finger in the lamp.
With this method, you don’t have to paint the nail with the main color, but apply stains directly onto the dried base, because they will cover the entire surface. If such a technique seems difficult, stage 2 is not skipped. But stains from the palette are applied to part of the nail. And then they level the gel polish with a thin brush so that it does not lie in a lump.
Dots, circles
The dot pattern is one of the simplest, you just need to follow a few rules:
- The second and subsequent shades of the flower garden are dripped onto the palette so that they do not mix.
- From there they are taken with dots; you can use different sizes of tools.
- If the first gel polish is not dried on the nail, they leave marks on the surface of the second and subsequent flower beds.
- Decorate the entire plate or part.
- To make the dots of different diameters, apply several pieces of gel polish with one portion until it runs out.
- Immediately after application, the circles blur, so there must be a certain distance between them, otherwise the entire decor will merge into spots.
When the pattern is completed, it is dried and covered with topcoat. The dots can be made of the same shade or different.
Abstraction
An abstract image is beautiful because of its uniqueness, because you won’t be able to make exactly the same thing again. This design is done as follows:
- Drops of gel polish of different colors are placed next to each other on the palette so that one flows into the other.
- After preparation, the nails are covered with the main background and dried.
- Paint them again with the same color.
- Using a comb brush or other flat brush, scoop gel polishes from the palette, like a spatula.
- Transfer them to the nail slowly, making a broken line in one movement.
- You can turn the brush over and walk it next to the already applied stripe.
- If bubbles have formed on the surface due to the large thickness of the gel polish layer, they are removed with a tool with clean bristles.
- The abstractions are allowed to spread a little more for a couple of seconds and the finger is sent into the lamp.
- The top of the nail is covered with topcoat and it is also polymerized.
For abstraction, you should use at least 3 shades - contrasting and intermediate.
Patterns with cobwebs, twigs
Patterns in the form of a cobweb and a branchy ornament are very relevant this season and are easy to do:
- In the first case, 3 thin stripes are applied along the nail along the wet base gel polish. They should be parallel to each other, and their edges should be at a short distance from the end and cuticle. Using a toothpick or a needle, transverse lines are drawn from these strips at different levels in both directions so that they form a circle consisting of broken segments. This is how a web turns out.
- The branches begin to be drawn from points that are scattered quite far from each other. Using a needle or toothpick, they are pulled out to form leaves and connected to form stems. You can use different shades of gel polish.
Hearts, shells
To draw a shell, dots are placed on the nail plate so that they form a circle. Inside it you need another circle - a small one. It is pulled out with a thin brush so that you get a blot with uneven edges. It is necessary to connect this element with a large circle with thin lines. And also draw segments between the points that make up the outer circle.
The heart is drawn based on several marks made with a dots or a thin brush:
- one in the middle of the plate,
- two on each side of her and above,
- another point located below the central one.
The first mark is connected to those above with smooth lines. Curved stripes are drawn from the paired lateral points to the lowest one.
The heart can be made from circles. Use 2-3 shades of gel polish, place large and small dots with them so that overall they form the intended figure.
Gel polish with spreading effect
- Unusual design
- Products Nika Nagel
- Possible errors during application
- Instructions for creating a manicure
Gel polish is very popular among many manicurists, as it has many advantages over conventional coating due to its consistency and strength of the material, which lasts on the nails for several weeks.
Unusual design
Technology with flowing patterns is a new trend, thanks to which the owner of such an exquisite manicure will definitely be the center of attention. A similar pattern can be applied to both a light and dark base, because in any case, the spreading design will bewitch and attract only interested glances.
The product is applied in the same way as applying regular gel polish.
When coated with an appropriate base and then with colored gel polish, we can say that a real miracle occurs when the effect of spreading varnish is achieved, which smoothly transforms into a pattern, literally spreading across the nail plate.
To create drawings you will need a dots or thin brush and flowing gel polishes. This technology is suitable even for beginners, because creating a design with blurred edges does not require any special skills.
Products Nika Nagel
The Nika Nagel company produces and offers appropriate products for nail extensions and design. The company's products are developed in Germany. The Nika Nagel brand of gel polishes is very popular among most nail designers and is also safe for natural nails. Gel polishes in this series dry quickly and stay on the nails for a long time. Also among the gel-based products in Nika Nagel there is the above-mentioned gel polish with a spreading effect. Shading the edges of the nail with varnish of this brand turns out to be mesmerizing, as one shade smoothly transitions into another, forming a chic play of colors.
You will learn more about gel polish with a spreading effect in the following video.
Possible errors during application
It is very important to have an idea about the correct application of gel polish, since there are several negative aspects that worry many girls. For example, the fact that often this type of varnish begins to crack, and during this time the nails can grow, thereby making the manicure not as perfect as we would initially like. But it’s worth considering that everyone makes mistakes, and even the most experienced manicurists are not immune to them.
There are many mistakes that can be made by both professionals in salons and beginners who perform manicures with gel polish at home.
Typical shortcomings when preparing a nail:
- No degreasing of the nail, which must be done right before applying gel polish. For this procedure, you should not use a cotton swab, as its fibers may remain on the nails, thereby ruining the entire manicure.
- You should not apply cuticle oil right before coloring as it leaves a layer of fat that will prevent the nail polish from taking on well.
- There is no need to treat your nails with a polisher, as this does not make sense; it would be better to use a buff. The purpose of such a product is to create roughness on the nail plate, which will ensure effective adhesion of the varnish and the nail itself.
Problems that arise during operation:
- You should not apply too large a layer of gel polish, because in this case you simply cannot avoid the appearance of waves and bubbles, moreover, the gel may lie unevenly, which will look extremely unsightly;
- One of the shortcomings of many girls is the use of an acid primer , which is intended for nail extensions, but it is not suitable for applying gel-based polish;
- Another oversight can be shaking the jar before use, although it is enough to slowly rotate the bottle from side to side to lift the gel pigment;
- You need to make it a rule not to throw away a bottle of gel polish in an open form, since if exposed to sunlight it can simply dry out;
- It is necessary to dry your nails well in an ultraviolet lamp, keeping in mind that over time, ultraviolet radiation loses its strength, so it is worth heating your nails longer. Ideally, you need to dry each nail separately, but since this takes a lot of time, most people do not take this nuance into account and complain about an unsuccessful manicure;
- When using the base coat, as well as the first layer of colored varnish, do not forget about sealing the end;
- It is important to apply the top coat with another brush so that no particles of colored gel remain on it;
- Many people remove the stickiness between layers, which also equates to a negative result of applying gel to the nail plate. This coating binds all layers together and you should never disturb the stickiness.
Based on the above, I would like to note that in order to get a chic manicure, you must definitely try to avoid these types of mistakes.
In addition, you must remember that you need to take care of your nails and take care of them - wear rubber gloves when washing dishes or floors, since getting water on the gel polish will undoubtedly shorten its stay on the nails.
Instructions for creating a manicure
In principle, the steps are the same as when applying a gel-based product without spreading, that is, you must first prepare your nails for coating with such varnish.
- The initial stage is processing the cuticle and giving the necessary shape to the nails.
- We remove the gloss from the nails and degrease their surface with lint-free wipes.
- Next, you need to apply a base coat and dry it in an ultraviolet lamp.
- Then the gel is applied in two or three layers and evenly distributed over the nail plate, while it is not necessary to take a colored one, since it all depends on your imagination and the desired final design.
- The next step is the most interesting, as it is at this stage that the magic base layer is applied, which makes the colored varnish spread.
- Next, you need to apply a sticky base layer with any color, which spreads over the nail, giving it charm and a beautiful look.
But applying the spreading varnish itself has its own characteristics:
- You need to apply it in a thin layer, otherwise the effect will be very weak;
- You should avoid applying varnish to the cuticle, as it may bleed onto it;
- You don't need to make a lot of movements with the brush;
- When a spreading effect is achieved, you need to remove the coating from the edges of the nail, thereby giving an edge to the design;
- To achieve the desired effect, you need to wait about thirty seconds and then dry it under ultraviolet light from a lamp.
The manicure turns out to be very beautiful and luxurious, but here it all depends on your imagination.
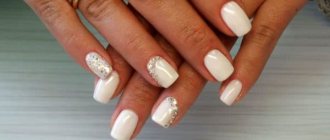
Stones can be used in a design like this, for example if you are painting flowers using stones for the core of the design. In general, the results of creating manicures with flowing patterns exceed all expectations, since their original patterns will fully delight all lovers of bright and unusual manicures.
Wet gel polish design: patterns for experienced craftsmen
Design schemes for wet gel polish can be more complicated, but they can only be completed with the ability to draw and sufficient practice in nail art:
- roses and other flowers,
- several small butterflies or 1 large one covering the entire plate,
- imitation reptile skin,
- feathers,
- marble texture,
- the bride's bouquet.
Roses
Roses are painted on a damp surface with a thin brush. First, a dot is placed in the center of the future flower.
Short, arched strokes are made around it, moving further and further from the middle. For greater naturalness, these lines should be of different thicknesses and lengths. They become thinner towards the ends.
For roses, choose a background that is lighter or darker than the flowers themselves. You can draw several small ones or 1 large one on the entire nail plate. Here, 2 gel polishes are enough - for the main background and the flower itself. But you can also use 3.
One covers the entire nail, the other is used as the main color of the rose, and the third draws the edges of its petals. That is, a stain is made on the dried base shade with another gel polish. And while it is wet, the third color is used to outline the petals. The last shade should be darker than the previous two.
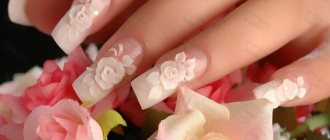
You can additionally decorate roses with rhinestones, sparkles or acrylic powder to get velvet flowers. In the latter case, the top is not applied to these areas.
Painting with butterflies
Painting with butterflies is performed in the following sequence:
- Draw 3 intersecting lines. The central (shorter) one will be the basis for the body of the insect. Through a point just below its middle, 2 other lines are drawn so that the entire structure resembles the letter Z.
- Using a thin brush, a stroke is made from the side strips to create the outlines of the wings. The top ones should be larger than the bottom ones.
- Inside the wings you can make another outline, but in a different color. The body, along with the tail and mustache, is drawn in black or dark gray.
- You can add dots and irregular multi-colored spots inside the wings. Or paint these parts with one color. And along it make thin black lines from the insect’s body to the edges of the wings.
You can draw several of these butterflies on 1 nail. To simplify the task, use a bright general background and only 1 gel polish to outline the image.
How to Draw Reptile Skin
Drawing snake or crocodile skin is quite simple, since the main thing here is maintaining the distance between the elements. Dots are placed on the nail so that when they spread, they do not merge. First, perform 1 vertical row in the middle of the nail. Then they make adjacent ones, but put points at the level of the spaces between the parts of the first line. Thin partitions should form between the spots.
Watch the video on how to paint reptile skin using wet gel polish:
To make “reptile skin” look as natural as possible and seem textured, choose similar colors of gel polish. For example, if the main shade is blue, the dots are made blue. You can also outline the lines separating the spots with gold or silver paint. But this is done after drying.
Technique for drawing a butterfly
To depict a large butterfly, a different technique than mentioned earlier can be used:
- Drawing a silhouette of an insect in profile, covering almost the entire nail. It looks like the number 9, but completely shaded. Use black gel polish over undried light gel polish. And on a dark background with a thin brush they draw colored narrow lines and spots.
- Drawing with five colors that smoothly flow into each other. The main shade depicts an insect with outstretched wings. It looks like the number 9 and its mirror image. The inside of the image is outlined with a different color, then with a third color. The remaining shades are used to draw small details - dots, spots, lines.
Feathers
There are two ways to depict a feather:
- Place dots at a certain distance from each other and circle each one with several colors of gel polish to create multicolor circles. They are connected to each other by making movements from one to another with a dry thin brush. It is also used to make short strokes from the edges of each circle. The result is a multi-colored peacock feather.
- Drops of gel polish are placed along the nail on a damp surface so that they form a curved line. The size of the spots spreading from them should gradually decrease. A thin dry brush is drawn along this row to depict the shaft of the feather. Use the same tool to stretch the edges of the spots. For this scheme, you can use several colors of gel polish or just one.
Marble
Marble coating is done as follows:
- Nails are painted with light gel polish in 2 layers and both are dried.
- Then a liquid finish is applied.
- Black gel polish and thick top coat are mixed on the palette.
- This product is applied to a thin brush and used to make uneven, winding lines along the wet finish on the nail.
- They are combined in some places, shaded in other areas.
- When the pattern looks like marble, it is dried, coated with topcoat and polymerized again.
For the desired effect, you always need a light main background and a darker color to draw the veins.
The bride's bouquet
The composition “bridal bouquet” is made in pastel colors:
- On a damp base coat (pink, beige or white) paint 3 abstract spots with outlines similar to flowers. They must lie on line 1.
- After polymerization, flower leaves are painted on with silver gel polish. You can also use light green.
- The coating is dried again. Then the edges of the petals are painted with white gel polish, as in the image of a rose, as well as the veins on the leaves.
- All that remains is to cover everything with topcoat and polymerize it. For flowers you can use a matte finish, for the rest of the surface of the nail - glossy.
Nail designs with flowing gel polish: instructions, photos
There are many techniques and methods; below we will consider the main ones.
Watercolor design of feathers in wet
In addition to all the designs described above, it is very easy to make a design with feathers using a stretcher.
Instructions:
- To do this, you need to paint your nails in a basic tone, apply a thin layer of base after drying, and apply a few drops onto the wet base, which describe an arc. After this, a thin brush is drawn from the highest point to the bottom.
- This way you will get something like a leaf. Next, you need to draw thin stripes directly to the top, from the side of the drops, with a very thin brush, imitating the fibers of a feather. All this is quickly dried, and if necessary, painted with the necessary gel paint.
- Often they add shimmer, shine, drawing with silver, golden paint, and also complement them with rhinestones and bouillons. This design is secured with a top as standard.
Watercolor feather design
Reptile on nails using flowing gel polishes
You can also create a reptile design using flowing gel polishes.
Instructions:
- To do this, you need to paint the nail with the desired color and dry it in a lamp. After this, apply a thin layer of a spreading base and on top of it you need to place several dots in a row one after another. The next row is placed in a checkerboard pattern until the entire area of the nail is filled with these dots.
- Place them at a decent distance from each other so that there is room to spread and the drops do not merge. After this, everything is quickly listened to in a lamp, and if necessary, drawing is carried out using casting, gold, or silver gel paint.
- You can also apply drops of thick topcoat or building gel to make the design voluminous. Don't forget to cover everything with a thin layer of topcoat.
Reptile on nails
Flowers on nails with wet spreading gel polishes
This way you can create interesting, unusual solutions. Most often, flowers are painted this way. One of the simplest options is a drop.
Instructions:
- To do this, you need to cover the nail with the main color, and after drying, apply a very thin layer of spreading base.
- Five dots are placed on the surface next to each other in a circle, inside of which dots of a different color and slightly smaller size are placed. After this, from the side farthest from the drops inward, using a brush, connect all the points.
- Thus, by blurring and combining tones, unique, unusual designs are obtained, reminiscent of a flower. In order to give it expressiveness, the contours are often drawn with white or black acrylic paint or gel paint. The center is complemented with sparkles, bouillons or rhinestones. This design is very interesting and unusual. In order for everything to stay in place, be sure to cover it with topcoat. There is another method of painting flowers, the so-called watercolor design.
- To create it, you need to apply the main tone to the nail, then apply a thin layer of base for spreading. Using a thin brush, starting from the middle, draw semicircular monograms. When they blur, the illusion of a flower will be created. Do not wait long, when the result suits you, you need to quickly dry it all in a powerful lamp. Next, it is drawn and supplemented according to your wishes.
What are the mistakes when painting on wet gel polish?
Painting on wet gel polish fails for several reasons:
- Incorrect base application. If it lies in lumps, a flower bed applied to a wet coating may flow in the wrong place.
- Air bubbles at the base of the nail. This happens when a manicure is of poor quality, when the cuticle is unevenly cut or not pushed back enough. The same problem as in the previous case is possible.
- Incompatibility of the means used. First of all, these are gel polishes, which are chosen for the general background and for painting on it. They may mix poorly, leak or shrink, and the design will not come out.
- Insufficient drying of the design. With some of them, there is a lot of material on the nail, and the standard 2 minutes in a UV lamp or 30 seconds in an LED lamp is not enough. The design lags behind the nails, despite the presence of a topcoat on top.
Tips for beginners
To get the design right the first time, you should use the secrets of experienced craftsmen:
- All movements and brush strokes must be clear. There is no need to carry the tool several times over the same place, this will lead to the appearance of bald spots.
- If the stains seem unsightly, they can be corrected. To do this, take a dry and clean brush, and wipe the bristles on a napkin from time to time.
- To make the design more expressive, you can use glitter gel polish where appropriate. It is also used to paint the contours of individual parts.
- It is important that nail art is performed on well-prepared nails. No drawing will hide the “shaggy” cuticle and irregular shape, bumps and depressions on the surface.
How to create a wet nail effect with gel polish
The effect of wet nails in a gel polish manicure is done by rubbing. First you need to cover them with a flower bed or camouflage base. And after drying and removing the sticky layer, rub shiny powder into the surface. It should be finely ground, and the color should be chosen according to your taste, since the shade of the gel polish will be hidden under it. After using the rub, fan the nails with a fan brush and cover them with a glossy top coat. The final step is its polymerization.
There is a second coating option, but “wet” nails will look as if there is dew on them. Manicure is performed in the usual way. After applying the flower bed, you can use a matte top coat over the entire surface. But then they put droplets on it with a glossy finish. And they send their hand into the lamp again.
Gel polish with spreading effect Lianail
With this article I begin my acquaintance with the Lianail , which already has an impressive collection of colors and an assortment of gel polishes, among which you can find very interesting effects. And one of the ones that I liked was the spreading effect.
Gel polish with a spreading effect is still new, so with such a manicure you will not only fall into the trend, but also surprise everyone around you. Lianail has a whole collection of them called World of Illusions. Gel polish can be applied to a dark or light substrate, or you can do without it at all - in each option your design will look different. The only thing that is required is a magic base : without it, unfortunately, no spreading effect will work.
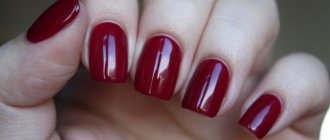
Lianail “Enchantment” gel polish with a spreading effect , I want to show that it can be used not just on one or two or even all nails to demonstrate the current action, but to do very interesting things in design. My copy of the gel polish is a dense ruby red color, without impurities in the form of mother-of-pearl or sparkles.
How to apply gel polish with a spreading effect
To get the same effect, you need to know the correct technology for applying gel polish and the drying time of the base and color. I demonstrated it on video:
The instructions here are simple:
- We carry out preliminary preparation of nails for applying a long-term coating: we process the cuticle, adjust the length and shape of the nails, remove the natural gloss from the surface and apply a degreaser.
- The next step is to cover the nails with a base for gel polish and dry it in a lamp. If required, we perform the procedure of leveling the nail plate under gel polish. The polymerization time of the base depends on its manufacturer and your lamp: for UV it is usually 2 minutes, for LED – 30 seconds.
- Next, apply colored gel polish in 2-3 layers so that it lays evenly and without gaps. Dry each layer for the required time. If you want to create a spreading effect without a colored base on “bare” nails, then you don’t need to do steps 2 and 3, go straight to step 4.
- And here the magic begins, namely, applying the magic base SOBS-03 from LIANAIL to obtain a gel polish that spreads on the nails. It is applied as a regular base to the entire surface of the nail or to part of it. I did both on different nails. To apply the base to part of the nail, it is convenient to use a thin brush. For my design, I covered the half nails and made a stripe down the center of my index finger. The base dries in an ultraviolet lamp for 1 minute, and in a LED lamp for 15 seconds.
- Now we apply any color from the World of Illusions collection to the sticky layer of the base (in no case do we remove the stickiness - this is the key to spreading the gel polish). There are several nuances here: It is necessary to apply a thin layer, otherwise the spreading effect will be very weak.
- We try not to apply gel polish close to the cuticle and side ridges, otherwise it may flow onto them.
- You should not make many movements with the brush in one place, smoothing the color evenly, otherwise the effect will also suffer. And from uneven application the smudges, on the contrary, are more interesting.
- When spreading, the color moves slightly away from the edges of the nail and a kind of edging is obtained. If you don’t like it, you can correct the smudges with a thin brush before drying, extending them to the right places.
- We are waiting for the effect to appear. Usually 30 seconds is enough for this. Now we send it to the lamp: the gel polish dries in ultraviolet light for 2 minutes, under LED rays - 30 seconds.
- On the index finger, where I painted only the central strip with the base, I applied the color to the entire surface of the nail, and it spread only in the center on the base - this way you can immediately get a very interesting design.
That's all - a lot of words, but the algorithm is simple: the magic base + color does all the work for you. I tried to describe all the nuances that may arise when working with this kind of gel polishes. Well, in the end, as usual, I wanted to experiment how this color looks on a dark base and whether it is possible to use regular gel polish on a magic base. Here are the results:
As you can see, on a black base this gel polish looks very pale and is barely noticeable in daylight. But the second result made me very happy: it turns out that it is not at all necessary to buy a set of gel polishes for this effect - it works with any other color on a magic base!
And here I have everything, thank you for your attention, I hope you found it interesting and informative. If this is the case, then subscribe to blog updates in any way convenient for you (Instagram, YouTube, VKontakte, Odnoklassniki or by e-mail) and stay up to date with all the fashionable news in nail design!
Materials provided by the online store krasotkapro.ru
If you found this page useful, please recommend it to your friends:
Is there a gel polish that spreads with a pattern?
Gel polish, which spreads in a pattern, is available from many manufacturers; the following products are known to provide the desired result:
- Nika Nagel gel polishes;
- MiiS base, which can be combined with flower beds from any company;
- flower beds and Rosalind solvent;
- BlueSky Flower Gel gel polishes;
- Gellaktic Mystic compositions.
These media may be called watercolors. Or there is no such definition on the bottle, but there is information about the spreading effect.
Drawing on a wet surface will make your nail design unique even with a simple image. This technique is accessible to beginners; it does not require additional funds or costs. And an unsuccessful picture can be corrected with a clean brush or erased with a napkin soaked in a degreaser.
