The hands of a real woman should look well-groomed, otherwise they are not hands, but the paws of Chewie from Star Wars, and the owner of neglected nails herself turns from a mystery girl into a slob from work who is used to washing with her hands, not arousing any sexual interest.
Therefore, you should not be lazy and look for excuses for yourself, you need to learn to be beautiful and natural. For starters, you can at least paint your nails. The manicure procedure takes an hour at most, even using gel polish at home it will take two hours.
You can devote two hours a week or two to your nails, because they signal to the whole world about a woman’s attitude towards her beloved. But the world doesn’t need to know that a girl walks around at home disheveled, cooks only in the presence of a man and often forgets to wash off her makeup before going to bed - in short, that she doesn’t really love herself very much...
How to properly apply gel polish to your nails at home
What tools and supplies will we need?
Before starting the procedure, you should make sure that you have all the tools and accessories for manicure or that an equivalent replacement has been found. Which materials are definitely needed, and which can be neglected? To get a manicure, you need everything from this list (what’s missing can be put in, and what’s superfluous can be put aside):
Manicure set
- standard manicure set (files, pusher, buff, scissors, grinder, tweezers, brushes and nippers of different shapes and sizes, so that you can remove all unnecessary);
- oil for removing cuticles (castor, burdock, almond or jojoba);
- spatula or orange stick (by the way, so named because these manicure sticks are made from orange wood, it is soft but durable, injures the nail plate and has anti-inflammatory properties, it is convenient for removing excess gel);
- primer (it is best to choose a degreaser without toluene and formaldehyde);
- brushes for application (allow you to make nails with an unusual design);
- bondex;
- cuticle trimmer and burr;
- UV lamp (or any other device with ultraviolet radiation - the only manicure equipment at home);
- lint-free wipes (allow you to adjust your nail manicure);
- clinser (solvent of the liquid layer, it can be prepared even at home: you need to mix 70 ml of water and 30 ml of alcohol);
- cotton wool;
- gel polish remover (Santera, De Lacroix, Cody, vinegar, hydrogen peroxide and even extraction gasoline, if we are talking about washing off the coating at home);
- foil (needed to cover the nails during softening); An example of using foil for manicure
- varnish of the desired color;
- thermovarnish (for water manicure);
- finishing and base shellac (to seal the color).
If all the manicure products are ready, you can begin the application procedure itself. Below it is discussed step by step. The application sequence must not be violated.
Stages of the procedure step by step
Step-by-step photo instructions for performing a classic manicure with gel polish
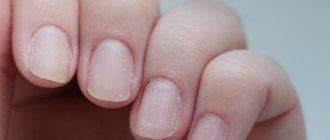
Preparation
Before applying gel polish or first you should prepare your nails. You need to carefully clean them of the previous coating, trim the cuticles along the edges, adjust the free edge and be sure to disinfect the nail plate!
Preparing for a manicure
Disinfection is the prevention of fungal diseases under the varnish, since it removes fat, excess moisture and bacteria from the nail. Also, the disinfectant simply cleans the nail from dust and dirt so that the shellac adheres better.
Professional preparations that come in sets with gel polish can be used as disinfectants, but regular alcohol is suitable for manicure at home. Moreover, it is pure alcohol, and not vodka, not perfume or lotion! There are simply too many additional components in these products that prevent the varnish from fixing to the plates and can erase it. Plus, alcohol has a long period of activity and works even under shellac.
Before starting the procedure, you must once again make sure that the nail is cleaned of the previous varnish. To remove cuticles, you need to use a special product or oil, but you cannot steam your nails, as they can peel.
In fact, when preparing, you should do a regular soft hygienic manicure as a base, but do not immediately apply varnish. Moreover, you don’t have to shorten the nail too much; shellac usually strengthens the nail plate, but everything needs to be sanded, otherwise the gel base will lie unevenly. Polish the nails with a buff, holding it along the nail plate. Removing the top keratin layer of the nail helps the shellac to better adhere to the plate. You will have to remove it, although it seems that this causes great harm to the nail, but this is not so. Then the nail is degreased and a primer is applied.
As a little trick: the skin of your hands can be protected from the harmful effects of shellac by applying regular sunscreen or baby cream. Otherwise, the effect of ultraviolet radiation may dry it out ahead of time.
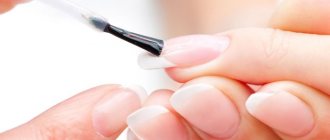
Applying base coat
A transparent shellac base is needed for better adhesion of the product to the nail plate. The weaker the nails, the worse the polish will adhere to them, so they are strengthened with a base coat. You can’t skimp on shellac base, even at home, because a bad base will ruin the entire manicure. The base shellac must be applied carefully and evenly to the nails in a thin layer and begin to dry in a UV lamp, then repeat the painting again, and apply the top coat immediately after the base.
Application of topcoat
The top coat of shellac is also called the topcoat because it seals the entire coating. It is done at the very end on fully prepared and treated nails. The brightness of the color and the neatness of the nails depend on the correct coating.
Immediately after application, you should use a dryer, and after two minutes, you should evenly lubricate the area around the nails with hand or lip balm so that the skin does not dry out or crack.
If you follow the classic concepts of gel polish, then nothing is glued or applied to the top. Exceptions may be large elements, for example, rhinestones, but if possible you should avoid this, since a manicure or pedicure will look untidy due to such sealing. This is one of the many secrets of manicure.
Final stage
After properly applying the top coat and drying it in a UV lamp, blot your nails with a napkin containing liquid to remove the liquid. After this, the hands are lubricated with moisturizing cuticle cream and the shellac coating procedure is considered complete.
Marble manicure: photo collection
It’s not at all difficult to make a beautiful, trendy nail design if you have the Internet and a great desire to learn a new technique. On the Internet you can find step-by-step videos and photo tutorials of any beautiful manicure. It should be borne in mind that the resulting pattern is almost impossible to repeat.
This is the whole point of this technique. Often marble design is combined with a mirror manicure and looks very beautiful. The ability to create interesting manicure designs for short and long nails will help you save a lot on trips to the beauty salon!
Differences between primer, bondex, and clinser from each other
Shellac terminology is full of unfamiliar words, the meaning of which a novice manicurist can only guess. At least some of them should be considered. Below is a step-by-step comparison of three key shellac products.
- The primer is used to prepare the nail for adhesion, but it does not adhere anything, but only removes everything unnecessary on the plate. It can be compared to priming walls for wallpaper. It restores the pH of the nail plate, cleans everything so that the product adheres as correctly and firmly as possible. The degreasing primer does not require additional drying under an ultraviolet lamp.
- Bondex is a gel-like substance used to increase adhesion between the nail plate and shellac. Thanks to this product, the nails do not peel off, and the artificial material stays on the nail plate for as long as possible. Its action can be compared to double-sided tape, when it tightens both the nail and the shellac. Bondex should not be applied to the skin or cuticles; if the product gets on your fingers, they should be washed with running water. These two products (bondex and primer) are often confused.
- Klinser is a water-alcohol solution with fragrances and oils. Removes the sticky layer at the very end of applying gel nail polish at home, a fixative, although it can replace the primer if necessary, since it is a good antiseptic.
These three different manicure products are a must-have for any woman who takes care of her nails and doesn't mindlessly try to grow them. If possible, you should purchase them from the same brand, for example, Ingarden, Bluesky, to avoid chemical incompatibility and deterioration of adhesion. Proper care guarantees healthy nails and a beautiful appearance of shellac.
Marble manicure with design
Marble nails are beautiful on their own. But if you want something more and festive, you can add any other decor or design. The most commonly used combination of marble manicure is:
- sparkles or shimmer;
- foil and mica;
- metallized strips;
- trituration;
- matte finish.
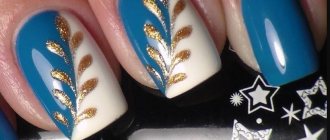
With foil
One of the new products of the season is decorating nails in shades of silver and metallic. If you want to achieve the ultimate effect on your nails, add gold or silver accents using foil. Marble manicure with foil will satisfy the needs of most fans of the original manicure. Laminated marble looks impressive and unforgettable.
This manicure does not require any additions; it looks quite good on its own. The color range of marble manicure with foil can be varied: from a palette of nude shades to rich and bright shades. Every master who performs such a manicure should remember to use a sense of proportion in bright accents.
With glitter
This manicure is a hit this season and earlier. Nail decoration uses glitter, which can be formed like all the nails as a whole, or as a separate part of the nail. In any case, such a marble manicure will look just great.
Shiny ribbon
Another interesting type of manicure in combination with a marble finish looks like this:
- The marigolds are covered in a single-color varnish with a marbled finish, and the two bases are usually separated by a shiny ribbon.
- This nail design will look more interesting on long nails.
French
French can be called a classic nail design. The manicure is performed in a delicate pink shade, highlighting one or more nails with a marble coating. The result is a fashionable and delicate manicure.
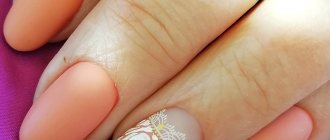
Nude
Quartz, flesh-colored, beige with light veining and delicate colors. For fun and expression, try adding spider webs.
Matte
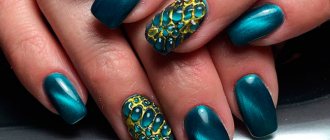
Bright
Shiny marble will help you stand out from the crowd. After all, it contains bright green, blue, purple, red and other shades of paint that are used to create a marble pattern. It will be especially fashionable to create contrasting color transitions on your nails, which will allow you to create a fresh and catchy manicure.
This design is suitable for any time of year. But you can incorporate negative space and sparkles into a marble print.
Inscription
This is a type of nail art. The nails are coated with varnish of a calm shade, then the nail plate is separated with glossy tape:
- One side of the nail will have a marbled finish.
- The remaining side of the nail plate is decorated with an inscription or design.
- This is a very interesting type of manicure with elements of marble inscriptions.
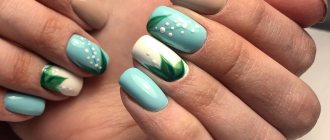
Nautical
Here you can make blue plates, the design of which will follow the quartz, or turn strips of marble into a real marine theme. To do this, we combine several blue-green shades.
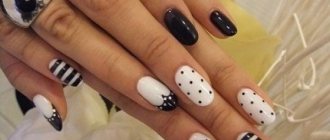
With holes
Manicure has been a trend for more than one season. Complemented by nude shades and glossy shine. In addition, the holes are decorated with sparkles, which makes this manicure simply unforgettable in a marble design. Suitable for parties and daily life. Every fashionista will appreciate the beauty of this nail design.
With rubbing
Rhinestones
This nail design looks gorgeous on long nails. Suitable for special occasions. It is mainly created with delicate shades, decorating one or more fingers with beautiful rhinestones.
With glitter and shimmer
With stripes
Texture of stones
Here, perhaps, the most impressive design will be malachite, especially complemented with sparkles, gold or silver. Let's not forget about other stones: lapis lazuli, jade, jasper, turquoise, emerald, opal and so on.
How to make designs on nails with gel polish?
Nail art is a type of manicure in which, in addition to the standard classical treatment of nails, various designs are also reproduced on them according to the technique. Shellac quickly gives freedom to decor, which is why there are entire trends in nail design where images are applied to a ready-made coating. You can make absolutely unimaginable pictures on your nails, it all depends on the artist’s imagination, but you need to understand that individual bright patterns will look more impressive on long nails, and their use on short nails is unacceptable. Examples are shown below.
Nail painting techniques.
There are many techniques for painting with gel polish professionally, but only a few of them can be used at home:
- painting technique with a thin brush;
- dotting technique (a special tool with a small ball at the end);
- dot manicure technique (somewhat reminiscent of children's drawing using dots with the described order);
- “wet” technique: the varnish moves freely on the nail plate using a toothpick or needle;
- liner manicure technique.
Before starting to use any of the techniques, you should observe the master and his manicure sequence. If you can’t go to a salon, you can get the necessary tips from videos on manicure lessons on the Internet. But to gain experience, you still need to work and improve yourself.
Rose gel polish: step-by-step instructions
Rose gel polish is one of the simplest designs, so it can be reproduced even by beginners. The entire procedure from scratch can be divided into several stages.
First you need to choose the right colors. Most often they choose white for the background and red and green for the flower, but this is not necessary. You can play with the colors and choose something unusual. For example, on a matte natural beige tone, a glossy rose is slightly visible. Or paint your nail with black polish and make the rose itself from rhinestones. It all depends on personal preferences and clothing range. And a colored matte manicure with a large abundance of small roses looks very beautiful. Then the nails are coated with the main color, and all at once, and not one by one, are dried in a UV lamp, this gives additional durability. The dryer allows you to seal the color for a long time.
When the varnish has dried, use the tip of a needle to make several dots on the nail with the colors you like and connect them to create the image of a rose.
Butterfly gel polish
Butterfly is a universal design, as it is suitable for both short and long nails. It looks most impressive on a classic French manicure or just white nails, when insect wings contrast with the background.
You can draw a butterfly yourself using a liner or a brush, or you can simply buy a sticker and attach it to your nail. This won't work with a rose. And this is an undeniable advantage of the butterfly.
If you still want to make a drawing yourself, then it should be applied to a good ready-made base. First, the outline of the insect is drawn, and then the wings and body of the butterfly are filled with color. If desired, the drawing can be left as a contour. But learning how to apply color inside the outline is a must.
Skull shellac
Sometimes you want to step away from something cute and decorate your nails with something like a skull. The application technology will differ little from the same butterfly; this is also an easy manicure, but the inside of the skull can be painted with shiny varnish or rhinestones. Looks impressive! But the manicure ideas don't end there.
Hieroglyph shellac
Hieroglyphs are the easiest to draw because they only use two colors. Usually choose black and white varnishes, but you can try a combination of black and red, blue and white, or yellow and green. But the most important thing here is not to miss the meaning of the symbol. Hieroglyphs are in fashion, but you shouldn’t wear meaningless lines or descriptions of public toilets on your hands, this is one of the mistakes beginners make when designing nails.
Pirate theme
Using gel polish, you can cover your nails with the profile of Jack Sparrow, the outline of his Black Pearl and the pirate's helm. Of course, such a design will take a lot of time, but the end result will be a stylish, unique design, and not a typical nail painting!
Shellac letters
You can also write your name on the manicure. Conveniently, if your name is Alexandra or Constance, you get one letter per finger. Others will have to come up with the arrangement of letters from the first and last names of relatives and children, but these are the subtleties of nail coating. In general, gel polish at home gives a huge flight of fancy if you remember the rules of application! The main mistakes in application: it is better to use the alphabet that has the most letters in the name. The Latin or Cyrillic alphabet is chosen according to your own preferences, otherwise you will want to quickly wash everything off later.
Materials
The difficulty of creating such a manicure lies in the fairly large number of necessary materials and equipment. In addition, all this is quite expensive. However, these are durable and necessary acquisitions that will help you work not only with this type of varnish, but also with others. Application technology and the list of what is needed to cover nails with gel polish are inextricably linked. So, you will definitely need the following:
Gel polish
- Actually gel polish. In this area of the market, the price of a product directly depends on its quality. You need to understand that by purchasing a more budget-friendly product, you also save on quality. Of course, such a gel will surpass the quality of an ordinary coating, but for a higher price you can purchase a product of much higher quality. This means that it will adhere better to the plate, be less subject to wear, less damage will be caused to the nails, etc.;
- Almost all video tutorials on applying gel polish show the drying stage under a UV lamp. This device is absolutely necessary for you, since only under it polymerization of the coating occurs, and it dries completely only with a device power of 36 W. Often this device is supplemented with a basic set of gel coatings for manicure;
- A degreaser is absolutely necessary; it will eliminate the fat on the surface of the nails, which could interfere with the full adhesion of the coating to the plate. It comes from various companies, in some cases it is applied to a cotton pad, which is then used to wipe the nails. Another option is to apply it with a brush from a bottle, similar to varnish. This one-time solution can be replaced with nail polish remover or alcohol wipes. However, with constant use, these liquids can harm the nails;
- In order for a manicure coated with gel polish to last even longer, you need to use a bond when performing it. This is a manicure product that cannot be replaced with anything else. It will help you dry the nail plate a little;
- It would also be a good idea to use a primer. It will help make the adhesion to the nail plate very strong. This means you will forget about chips and cracks for 2 – 3 weeks;
- It is worth purchasing transparent gel polish. You will apply it as a base. After all, applying a simple base will only spoil the result, since it will begin to peel off and crack even when the gel coating is flawless, thereby causing harm to it;
- Top coating;
- Standard materials for manicure are a nail file, polishing buffer, orange sticks. For lovers of trimmed manicure - scissors, etc.;
- A video lesson on how to apply gel polish to nails includes such a mandatory step as removing the sticky layer. To do this, you will need a special lint-free cloth. You can purchase this item in stores that sell manicure supplies. It is absolutely irreplaceable and has no analogues.
Shellac UV lamp Degreaser Bond Manicure set Lint-free wipes
This list is applicable for traditional painting of nails in one tone. Of course, if you decide to perform nail art on a plate, then you will need tools to perform it. And in addition, perhaps additional color coatings and accessories.
Ombre gel polish step by step at home
The gradient ombre manicure method looks simple in the pictures, but you shouldn’t start it as a self-taught person without practicing on other options, for example, roses. An ombre manicure is characterized by a smooth transition from bright and shiny to a matte pale shade of one color, but only a professional can accurately draw all stages of the coating.
And some more facts about shellac.
- Shellac is a resin secreted by certain insects in Asia. Then this resin is bought and used as a key component of gel polish. None of the mechanical devices make shellac.
- Gel polish promotes the growth of your natural nails; if desired, you can grow them under such a shell.
- Thanks to a special coating technology, shellac protects the plates from scratches and traumatic damage.
This product has a natural base, and therefore is harmless to the body and has nothing to do with destructive extended nails. With shellac, constant nail correction is not required.
Marble manicure: current colors
What color is trendy this season, what are the fashion trends for marble on nails? Many girls ask this question when choosing a marble manicure. White color is considered classic marble; this design looks calm. A nail design with the effect of a marble coating with holes will look original and impressive.
The combination of red and white, pink and burgundy, black and gray will give your nail design a unique charm. To make your nails longer and more elegant, marble veins are best applied vertically. You can achieve the desired effect in several ways, which are actively used by nail technicians.
Pink
With lots of creative ideas and rich imagination, you can create a huge variety of designs using a combination of different paint shades. A pink marbled manicure attracts special attention with its tenderness and lightness. The combination of pink marble with glossy pink paint will look original and elegant. The colors must be chosen so that the combination turns out beautiful.
Pink color can be decorated with rhinestones, this marble is suitable for special occasions. Pink marble manicure looks great on both short and long nails. If desired, the marble manicure can be complemented with a matte top. Knowing the technique of performing marble manicure, the result will definitely be excellent.
Grey
Very discreet and elegant, like beige. By the way, both of these colors can be combined on a white base - it turns out noble. Gold craquelures add luxury to this design.
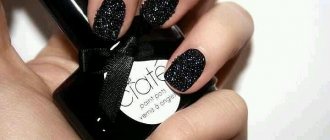
Black
This season, black marble is the favorite choice of many fashionistas; it has a certain extraordinary charm that attracts the eye and attention. Black marble can be done on all nails with the addition of rhinestones or sparkles. Also an interesting combination of a matte top with a glossy one.
Black perfectly conveys all the beauty of marble stone. White stripes placed randomly along the nail go perfectly with the black base color. And if you complement the black color with gold varnish, you can get a truly royal design. Black marble will complement your everyday outfits. This elegant manicure tends to look quite beautiful and versatile.
Beige
The manicure is presented in nude shades. It looks good on both short nails and long nails in the shape of a ballerina and an oval. It is created in delicate varnish colors, complemented with sparkles and elegant stripes. Beige marble finishing is a universal option for all ages and regardless of the field of activity.
White
The marble effect looks very beautiful and elegant in white colors. White marble is a trend in the nail industry today. This design is perfect for every day, and will also look great as a wedding manicure. For a unique design that will attract the attention of others, you can choose bright notes on white marble. White marble with a velvet finish also looks attractive.
White is a classic that will never go out of style. White goes well with other colors. And of course, rhinestones, kamifubuki, foil, mica and much more will help add an extra touch to a white marble manicure.
Malachite
The very name of this design speaks of the image of a natural stone on the nails, but it does not have to be marble (blue, white, black or red vein stone). You can also imitate other semi-precious or precious stones: lapis lazuli, opal, ruby, turquoise, jade, malachite, etc. Mixing colors gives spectacular nails, each finger is decorated individually and uniquely, because it is impossible to draw the same stones.
How to make “malachite” for marble manicure? It is enough to mix different shades of emerald color on the nail.
An extravagant solution in manicure would be a mixture of rich and bright shades. To make a marble manicure, like in a salon, you can try using paints with different textures: metallic, mother-of-pearl, matte, holographic, iridescent.
Red
Red nail design harmoniously matches almost any look and suits any age category. The most important thing is to choose the right shade of red. Red marble nails go well with black polish. Small black spots on a scarlet background look perfect, and with the addition of a little decor it’s simply chic. The combination of red and white adds elegance. With gold or silver it looks bright and elegant.
A chic manicure is always the center of attention. Manicure is a whole system of hand care that we trust to our masters. Well-groomed hands are not uncommon today and, at the same time, the dream of every woman. A fashionable manicure will always help complete the look and make it complete.
Photo examples
Master class on applying a single-color manicure with gel polish
The trend in 2022 is manicure in pastel shades. Such as beige, powdery, pale pink. This color scheme is perfect for gentle and sophisticated natures.
A classic red manicure will never go out of style.
It is ideal for self-confident and self-sufficient women. And most importantly, it will be appropriate at any time of the year and in any environment, be it everyday work or a relaxing vacation.
Technology for creating a monochromatic manicure with gel polish:
- It is necessary to disinfect your hands with an antiseptic.
- Next comes the removal of the old gel polish coating using a special solution, cotton pads and foil.
- Correcting the shape of the free edge of the nails using a file and a buff.
- Having previously removed dust from the surface of the nails, you need to generously moisten a lint-free cloth and thoroughly wipe your natural nails with a degreaser. Especially in the cuticle area. You will need one napkin per hand.
- For more reliable adhesion of materials, it is necessary to apply a primer. You only need the right amount of the drug so that moisture does not remain on the surface of the nail. The primer should evaporate following the movements of the brush.
- Applying the base should begin with your thumbs. This will save a significant amount of time during the procedure. The consistency of the base must be stretched from the cuticle to the free edge of the nail.
- Fix the coating in an ultraviolet lamp for at least 30 seconds.
- Next, you should evenly distribute the first thin layer of colored gel polish over the entire surface of the nail. Paying special attention to the sides of the nail plate and the end of the free edge.
- Fix the coating under UV radiation for at least 1 minute.
- Using the same scheme, it is necessary to apply a second layer and then seal it under ultraviolet rays.
- After applying the color, you need to alternately cover all the nails with top coat (finish coat) and dry them under the lamp. For best results, it is recommended to apply the top in two layers.
- At the end of the procedure, use a degreaser to remove the sticky layer with a lint-free cloth.
Tip extension procedure
Extension with tips
Nail extension with tips can be presented in stages, and with a photo of such a manicure and a video showing the execution process, the training will be even more effective. This type of extension is relatively simple. It will work even for those who have undertaken this procedure for the first time. However, such a manicure lasts less time compared to extensions on forms. The process occurs in several stages. First we prepare:
- Disinfect all tools;
- Remove nail polish and polish them, push back the cuticles;
- Treat your hands with a disinfectant solution or wash them;
- Select tips according to size, nail width and length;
- Give them the desired shape.
https://www.youtube.com/watch?v=r52FPK0FWWE
After that, we proceed directly to how to do gel nails, that is, to what the video lessons show.
- Degrease and dry your nails;
- Apply glue to the natural plate in small quantities and distribute well;
- Press the tip onto your nail;
- Displace air bubbles from under the tips;
- Glue all the nails and wait a little;
- Apply the gel and dry under a UV lamp for 2 minutes. A common mistake when applying gel nail extensions is to under-dry or over-dry the layer;
- Apply another layer of gel and sculpt the new plate;
- Dry under a UV lamp;
- Remove the sticky layer and file your nails;
- Apply a finishing layer of gel;
- Dry under a UV lamp and the manicure is ready.
This tutorial on how to do proper nail extensions with colored or transparent gel and a training video will become your best assistants in performing the procedure. Thanks to them, the quality of the extensions that you do yourself will be comparable to those in the salon. Now you can move on to a more complex method.
Master class on applying multi-colored manicure with gel polish
French manicure, or French in other words, has been popular for many years. Due to the organic combinatorics of the natural shade of nails with white color, you get a neat, beautiful manicure that is ideal for girls and women of any age.
French adds femininity to the image of its owner and emphasizes the length and beauty of her nails.
Step-by-step instructions for creating a French manicure using gel polish:
- The first stage is preparing the nail plate. It is necessary to process the free edges of the nails, remove the cuticle using auxiliary tools, and degrease the surface.
- Apply primer and dry under lamp for at least 30 seconds.
- Apply a thin base coat and dry for at least 1 minute.
- Apply the main color (light beige, light pink) to the entire surface of the nails and dry under a lamp for at least 1-2 minutes. It is recommended to apply 1-2 layers.
- Using a thin brush for nail art, you need to draw a crescent line on the tip of the nails and dry it in a lamp for 1-2 minutes. Cover in 1-2 layers. If you can’t handle a brush, you can use stencils to create a French manicure.
- Fixing the design with a top. Dry under lamp.
- Removing the sticky layer using a degreaser.
- Applying nourishing cuticle oil.