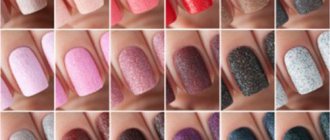
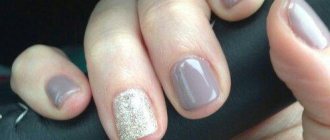
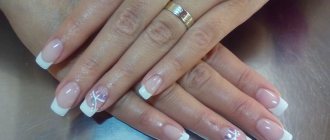
For a long time, the world has been dominated by vintage style - a fashionable echo from the past. At first, antique design was present only in interior items and clothing. But today, stylists have even brought craquelure into manicure. At first, creating vintage nail art required a certain skill and dexterity, since the cracking effect was painted with a thin nail design brush. Later, when a special cracking nail polish was invented, unusual manicures became more accessible.
The spectacular craquelure nail design is in many ways reminiscent of the color of the majestic python, so it will most likely appeal to snakeskin lovers. To create nail art, you need to master some of the subtleties of applying craquelure and acquire a cracking varnish. In order for you to better master the technology of applying this coating and gain interesting ideas for design, the article is supplemented with colorful photos and a video lesson.
What is craquelure?
More and more new trends are appearing in such an area of art as manicure. Yes, yes, you were not mistaken, manicure has long ceased to be a severe necessity for a well-groomed woman and has become a part of fine art! Volumetric design, extensions, drawings using acrylic paints and gel polish, decoration with rhinestones - all this can turn tiny ladies’ nails into real masterpieces.
What is craquelure? A manicure with this name may be associated with something magical. However, there is no magic in this technique; you only need two products to apply the color to your nails.
Artificial aging of manicure became fashionable at the beginning of 2011 and still remains relevant. This technique is chosen by both young fashionistas and serious adult ladies. Still would! According to the women themselves, craquelure looks stylish, unusual and relevant.
Nail polish with a craquelure effect, as soon as it appeared on the market, was immediately loved by many girls. “Crackelure” is not a Russian word, this term is borrowed from French. True, it was initially used not in nail design, but in furniture decor. Translated, the word means “giving the effect of an antique, cracked surface.” The craquelure effect is used to decorate mirror frames, furniture surfaces, and for some time now has been a worthy and effective decoration for the nails of beautiful ladies.
What is craquelure nail polish?
Craquelure varnish, or “python” (it received this name because of its characteristic pattern), is sold in packaging typical for such products, but is applied somewhat differently. Before moving on to recommendations for applying craquelure varnish, let’s look at the varieties of this product.
There are thread (also called varnish) products for craquelure. The girls note that they create the effect of the finest cobwebs. To imagine what a similar effect looks like, think of finely crafted Chinese boxes or expensive, exquisite porcelain. The second type of varnish is called fence varnish, or crack varnish. Even the name sounds so that you can imagine the effect - rough cracks through which the lower layer is visible. It is fence craquelure, judging by reviews, that is most often used in manicure.
Crackling nail polish
The latest innovation in nail art is the introduction of crackle nail polish, also called python nail polish and craquelure nail polish. Translated from French, the word “craquelure” means crack, and such varnishes were previously used exclusively for furniture and paintings in order to create the effect of an antique object. It was from this area that this idea transferred to the nail industry, and a way to obtain the effect of a cracked, “old” nail surface appeared. It should be noted that manicure with cracking varnish has become a hit today and more and more girls are thinking about how to apply cracking varnish.
Cracks on nails are caused by applying craquelure over varnish - a base of a different color. The result is cracks through which the color of the underlying varnish is visible. Cracked nail polish is classified according to the type of cracks:
- Small cracks, through which the layer of underlying varnish is barely visible, are created when using spider craquelure;
- Large cracks, through which the color of the underlying varnish is clearly visible, are created using fence craquelure.
How to properly apply cracking varnish?
Let's take a closer look at how to use cracking varnish, because the final result also depends on compliance with certain conditions. So, here are all the stages of a manicure with cracking varnish:
- You should clean your nails of varnish, glitter, etc. using a special product without acetone and give them the desired shape;
- Next, a base varnish is applied, which will show through the cracks in the nails. Of course, you need to think about an effective combination and choose the right colors. The combination of black and white colors, as well as base varnishes in pink and gold colors, look win-win. The same can be said about the use of various varnishes with glitter as a base. It all depends on your mood; to create a bright manicure, use contrasting shades. If you want a more delicate manicure, you should turn to pastel colors. The duo of white varnish and baked milk varnish looks very good, creating a porcelain effect. To introduce current Gzhel motifs, turn to a combination of soft blue and white colors. Don't be afraid to experiment and use the full range of colors. It is optimal to apply two layers of base varnish to obtain a rich color. Dry the base polish on your nails completely.
- Then you need to apply a thin layer of crackling varnish over the base varnish. We wait until the layer dries and watch how cracks of various shapes spread on the nails. If you want to get harder and more pronounced cracks, then you need to apply as thin a layer of top varnish as possible and use a dried brush for each nail.
- The final touch to an unusual manicure will be the application of a fixative, colorless varnish. This step is mandatory, as it will give your nails shine and the cracking effect polish will not disappear from the nails ahead of time.
Thus, the above is the answer to the most pressing question of the season: how to paint nails with cracking varnish. Remember that only with careful implementation of all stages of manicure will the result be amazing. And using different color combinations, you can express your mood or make a manicure to match your outfit or accessories. Of course, you can go to a salon and get a manicure with cracking polish and not have to think about how to paint your nails with it. But the process seems quite accessible to any girl. However, everyone will choose where to apply cracking nail polish on their own. What is certain is that such a manicure will not go unnoticed, the main thing is that it matches the situation and your style.
How much does craquelure effect varnish cost?
It all depends on the manufacturer and brand popularity, but in general these varnishes cost the same as regular ones. You can purchase nail polish with a craquelure effect at any women's cosmetics store or order it online. Customers speak most highly of products produced under the brands OPi, China Glaze, EVA, Essence. The varnishes from these manufacturers adhere well to the nails and look bright. But you can safely purchase the product from any trading company, both well-known and not so well-known.
Execution order
- First, apply the selected base clear coat to your nails. Let it dry for a couple of minutes.
- Next, apply regular polish to the nail plates and again let it dry thoroughly. To speed up this process, you can use a hair dryer or a special nail dryer. Drying a layer of regular varnish properly is extremely important. If this is not done, then the subsequent layer of craquelure varnish will tear the layer of regular varnish, and it will not be the colored varnish that will appear through the cracking varnish, but the nail plate itself.
- Then we cover the nails with cracking varnish. This needs to be done quickly, literally with a couple of strokes of the brush on the nail plate, otherwise the cracking varnish will form clumps and look untidy. Craquelure varnish dries very quickly, becomes matte and, right before your eyes, instantly forms cracks on the surface of the nail plate, through which a layer of regular varnish will appear. The thickness of the application of the cracking varnish will determine the pattern of the web that it forms. If you apply the craquelure varnish in a thin layer, then the web will be thin, and the surface of the nail will be filled for the most part with the color of the usual varnish, the application of which preceded the craquelure varnish. If you apply the cracking varnish in a thick layer, then the web will be quite dense with the color of regular varnish barely visible.
- Finally, apply a layer of transparent fixative varnish to the craquelure surface. This is not at all necessary, especially if you prefer a matte varnish finish. This is exactly what is formed after cracking varnish dries. If, on the contrary, you prefer a glossy varnish finish, then simply complete your nail craquelure by applying a transparent fixative varnish. In the latter case, the durability of the craquelure will be higher and it will last longer on the nail plate.
What do you need to create a manicure?
Let’s say right away that the technique of applying craquelure varnish is simple and does not require artistic skills or any special skills.
However, you will need skill and following some rules that will help you make your manicure perfect. Prepare the following products in advance: a base varnish (it is best if it is a caring “smart” enamel), a colored base (black and white colors are considered the most successful and suitable for other shades), a craquelure product, a finish (fixer coating). The coating is optional, but with it the manicure will take on a finished, varnish-shiny look.
How to apply craquelure varnish?
Take these recommendations into account and you will end up with the perfect manicure:
- Get a manicure and lubricate your hands with cream.
- Buff clean, oil-free nails and coat them with a care product like smart enamel. This preparation of the nail plate will allow the manicure to last for at least a week.
- Apply a second coat of varnish. This is the base layer that will show through the cracks of the craquelure. Attention! This varnish must dry well before applying the craquelure directly. Also, be responsible when choosing the color of the base varnish. If you apply the color base carelessly, the cracks will not turn out beautiful.
- Let's apply craquelure. Shake the bottle with the product thoroughly before doing this - craquelure contains heavy particles that settle to the bottom of the container. Apply the varnish in one stroke, as the product begins to crack literally immediately after application. If you apply craquelure in two or three layers, then cracks will not form or will be unsightly. The product is best applied with a dry brush. To do this, wipe it with a sponge after each application of varnish.
- After applying the craquelure effect varnish, let it dry and coat the top with a fixative.
How to make craquelure varnish with your own hands
There are many types of craquelure varnish. There are also master classes on how to make it at home. You can replace the varnish with homemade ones based on gelatin, wheat dextrin and other materials. Vinegar and egg white must be added to the composition.
To create varnish with your own hands you need to prepare:
- acrylic based paints;
- brush;
- sponge;
- hair dryer;
- varnish PF-283;
- PVA glue;
- wheat dextrin.
Making a composition for craquelure from gelatin
The varnish consists of:
- 1 tbsp. l. gelatin;
- 1 glass of water.
Gelatin is poured into water to swell, heated and completely dissolved. After cooling, the composition is ready for use. It is applied to the surface and dried. Any other layers can be applied to the dried layer depending on the idea. Most often, a layer of protective varnish is used. This composition is good because, if necessary, it can be easily washed off with plain water and a fresh layer applied to achieve a cracking effect.
Making a mixture for craquelure from wheat dextrin
Varnish can be made from wheat dextrin. This is an adhesive obtained from wheat starch by heat treatment. All you need to do is take 40 grams of it, add boiling water and let it sit. The result should be a mixture that has the consistency of liquid yogurt. A layer of shiny varnish is applied to the surface treated with decoupage and dried. After this, a thick layer of dextrin is applied with a wide brush. It dries in about 30 minutes without a hair dryer.
Read on our website
Decoupage shelves with your own hands Decoupage shelves with your own hands is a great way to breathe a second life into
Making a liquid gel composition
To decoupage furniture, a composition based on washing gel is used. A base color is applied to the surface of the object and dried. After drying, apply a thick layer of gel with a brush. You can do this with a sea sponge. This method is used on fabric surfaces.
Egg white using craquelure technique
To use craquelure on the walls of a room, egg white is used. First, a section of the wall is covered with acrylic-based latex paint. You can do this twice. After drying, the white is applied in large strokes. You need to dry it without a hairdryer. The remaining layers can be laid on the dried layer.
What mistakes can happen when applying craquelure?
The most common mistake is applying the wrong or incompatible colors. For example, craftsmen say that if you choose colors of the same range, you can get the effect of not antique cracking, but sloppiness.
For example, a completely unsuitable option is to use a transparent base color.
The second mistake is applying craquelure in two or three layers. According to experts, if you want to get deep cracks, apply a thicker layer of the product at once, and then the varnish will crack more severely.
Don't neglect the final stage of creating a manicure. If you don't cover your manicure with a fixative, you will feel uncomfortable - the craquelure feels rough to the touch. Many women say that this is not very pleasant. In addition, the fixative will help you “wear” your manicure longer. In general, it is worth noting that craquelure is famous for its durability. If ordinary varnish begins to “peele” after 4-6 days, then this one, as satisfied customers report, lasts from 7 to 10 days even without a fixer.
Unusual color solutions
The most universal base colors are considered to be white and black. Nail polish with a craquelure effect of any shade, both matte and pearlescent, will look great on this polish.
In summer, experts advise giving preference to rich and bright colors, and in cold weather to prefer pastel colors. Gold on black or pearlescent turquoise and green colors look luxurious - the resulting craquelure effect will resemble snakeskin.
Colors that are located opposite each other on the color wheel will also go well together. For example, try combining blue and red, orange and lilac, light green and purple. The use of two and three shades of craquelure looks very unusual. For example, try this scheme: apply pink and blue craquelure varnish or yellow and light green varnish on a black base.
Another secret to a beautiful manicure is applying the product in various ways. So, you can apply craquelure horizontally, vertically, with a stroke, and you will get completely different results, since the cracks will have different directions.
Choose craquelure to your liking
Craquelure can be either bright and festive, or neat.
So, if you use a colored base and craquelure of various colors, your nails will look catchy. On the contrary, if both varnishes are in the same range, then you will get a manicure that is restrained in color. Experiment and try to create your own craquelure effect on your nails. Photos of the most interesting and successful color solutions can be seen in the article.
Varieties
Ten years ago, “antique” designs on nails were created using a brush, then they got the hang of using foil. However, the nail industry does not stand still. Experts have created a varnish with a craquelure effect.
This is interesting. What do you think causes cracking? It turns out it's all down to one tricky component. The varnish contains a special solvent, the particles of which repel each other at the molecular level. As a result, small cracks and veins appear, which expose the first layer of coating.
These days, four types of craquelure on nails are most often used:
- python - imitation snake skin;
- crocodile - your nails will look like the skin of this reptile;
- cobweb - the nail is strewn with small cracks that look like a cobweb;
- fence crack - creates an imitation of large cracks, like on an old, shabby fence.
Craquelure coating can be hard or soft. The first is the most popular in nail art. This is what allows you to create pronounced cracks.
