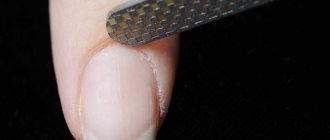
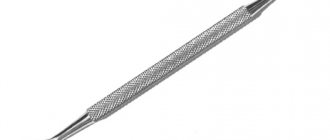
How to insert and secure the attachment in a manicure machine?
It is important for a novice master to carefully study how to correctly insert a cutter into a manicure machine, since the serviceability and service life of the device and attachments directly depends on this.
There are 3 types of devices with different methods of attaching cutters:
- Automatic: fixation occurs immediately after placing the attachment in the clamp. The nuance of this type of fastening is that either a cutter or a plug must always be in the clamp, since otherwise it may close. It can only be opened at a service center.
- Semi-automatic: fixation takes place in 3 stages. First you need to turn the handle, then open the lock, insert the cutter and close the clamp.
- Manual: the easiest way to attach. To do this, you need to press the button located on the body of the device, remove the washer and insert the cutter. Perform the steps in reverse order - secure the washer and press the button.
Important. Professionals say that all fixation methods are reliable, but the most convenient are manual and semi-automatic.
Next, you can watch a video on how to insert the cutter into the machine:
Materials: types, features, pros and cons
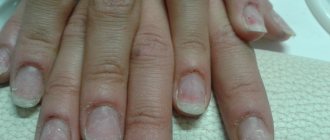
The main purpose of manicure cutters is to tidy up your nails without damaging them. Therefore, you should choose the material from which they are made very carefully. Each has both its advantages and disadvantages.
Pomegranate
New generation nozzles made of a polymer base coated with pomegranate crumbs. Thanks to its plastic structure, it does not damage the surface of the nail and the skin around it. The range of uses for garnet cutters is quite wide. Depending on the form, they are used for:
- correction of natural nails;
- cuticle treatment;
- preparation for extension;
- removal of calluses;
- polishing rough skin.
The main advantages are delicate processing and lack of heating. Corundum cutters have no disadvantages. The average service life is 3 months.
Reference! Due to the delicacy and safety of the material, you can use pomegranate tips yourself at home.
Silicone
Silicone cutters are used only for final nail processing - polishing and eliminating minor coating defects. There are 3 types of silicone tips:
- coarse for removing artificial turf and eliminating roughness;
- medium for grinding;
- soft for polishing.
They are distinguished by the color of the cutter; the darker it is, the tougher it is. The advantages of silicone cutters include:
- antistatic (no tendency to become dirty);
- delicacy;
- durability;
- ease of care.
Cons: heats up during operation, especially at high speeds. The service life is 4–5 months.
Reference! Silicone attachments, like almost all others, require mandatory sterilization after each use. To do this, they will need to be cleaned under running water and kept for 1 hour at a temperature of 180 °C in an oven or autoclave. Store in a sterile container.
Corundum
Corundum. Soft and pink. It is very important at the beginning of your manicure journey not to harm the client, and then in your work you should be careful about the client’s nails. Soft corundum is ideal for cleaning off the pterygium and lifting the cuticle. After using corundum, it should be refined with a “flame” at 7 thousand rpm.
Ceramic cutter
“Corn” or truncated cone. It is used to remove gel polish and is softer to work with compared to a carbide cutter. Its truncated “nose” works neatly in the lateral parallels of the nail. It does not heat up during use and should be operated at 30 thousand rpm in FWD mode.
Carbide (steel)
Carbide tips are most often used for pedicures, as their surface is quite rough. In manicure, they are used only to remove artificial coating or too rough skin. The service life will depend on the frequency of use; a maximum of 6 months can be used for a steel nozzle.
Combined
Combined attachments for manicure apparatus (“sand caps”) are a godsend for beginners. The combination of silicon and carbide is attractive due to its low cost and ease of use. You can find such cutters in any specialized store.
Sand caps vary in diameter, size and abrasiveness
Professionals consider silicon carbide caps to be disposable because they are enough for 1 manicure procedure. After use in the salon, such cutters are disposed of.
The roughness of the caps is determined in special units. They are selected depending on the operation:
- removing the main layer of the nail plate (grinding) – up to 80 units;
- grinding - up to 150 units;
- final polishing - up to 320 units.
Diamond
Diamond cutters are designed for:
- treatment of sensitive skin and thin nails;
- removal of thin cuticle.
Diamond spraying allows you to make the surface of the skin and nail plate more even. Small-diameter attachments help polish the nail ridge, while larger ones can remove calluses.
Diamond cutters are expensive, but reliable and durable
Diamond bits according to the manufacturing method are divided into:
- sintered (diamond dust is mixed with glue and heat treated at high temperature);
- deposited (stone chips are glued to the base blank during electrolysis).
The frequency of replacing diamond bits is every 3–4 months.
The degree of hardness of a diamond cutter can be determined by the number of side notches and their shade. A black mark indicates high hardness, a blue mark indicates medium, etc.
Ceramic cutters
Ceramic cutters can be included either in a professional machine set or in a mini-set for home use. The rigidity of ceramic tips is less than that of diamond ones. They are used to process the most difficult areas:
- removal of calluses, rough, keratinized skin;
- grinding down hard, dense nails;
- cuticle processing.
Ceramic is considered safer than diamond coating, but it wears out faster
You can determine the grain size of a ceramic cutter by its color:
- white - up to 200 microns;
- blue or pink - up to 100 microns;
- black (“artificial pumice”) – up to 400 microns.
How to remove it to change it?
Removing the attachment from the manicure machine is as easy as inserting it. The method for removing the cutter directly depends on the type of attachment in the manicure machine:
- with the manual method, press the button on the body, unscrew the washer and remove the cutter;
- with the semi-automatic method, you need to turn the handle clockwise until it clicks and remove the nozzle;
- With the automatic fastening method, the cutter can be pulled out only after turning off the device; to do this, you just need to pull it towards you.
It is important to remember that with the automatic type of fastening, the clamp should not be empty; it must contain either a nozzle or a plug.
Classification by hardness
The rigidity of the cutters is easily determined by the color designation. The color of hard cutters is always darker than that of delicate bits.
It is customary to distinguish cutters by shade:
- Black and blue highly abrasive attachments are used to treat rough and thick areas of skin, remove calluses, and also to shorten dense nail plates.
- Green and red medium abrasive attachments can be used to work on side rollers and medium-density nails.
- Yellow low abrasive nozzles are designed for thin, sensitive skin with nearby blood vessels. They are used to correct thin and brittle nails.
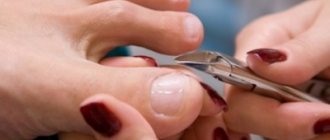
Possible problems: how to change it if it’s stuck, why can’t I put it on and something else?
Sometimes, when changing the attachment on a manicure machine, problems may arise. Some of them can be solved independently, and sometimes only a service center specialist can help. Solutions depend on the cause. The most common include:
- Breakage of the cutter. Perform the steps required to remove the attachment. Then shake the handle slightly so that the fragment can come out on its own by inertia. If it remains in place, you should disassemble the clamp and remove the rest of the attachment. You can try gluing the cutter using superglue.
- The nozzle is stuck. There may be several reasons - an incorrectly selected cutter, a broken clamp or motor, clogging, and others. You can only fix the blockage yourself; in other cases you will need the help of a specialist.
- The cutter is not fixed. The main reason is that the cartridge is clogged with biological waste (nail dust or shavings). To fix this problem, you will need to unscrew the cartridge and carefully clean it of dust using a brush. If this does not help, then the collet mechanism should be changed.
Attention! When solving the problem of changing a cutter yourself, it is recommended to photograph each step. Otherwise, you can assemble the mechanism incorrectly, which can lead to more serious damage.
Classification of cutters by purpose
| Name of cutter | Purpose |
| Reverse cone | Necessary for processing the free edge of the nail. With its help, you can file your nails to the same length without leaving nicks or unevenness. This attachment helps to level the tip of the nail, smoothing out differences in height. |
| spherical bur | Designed for treating the skin around the nail. Thanks to its spherical shape, the nozzle allows you to trim off rough skin without affecting the nail plate. Indispensable for eliminating growths and cracks. |
| Cylindrical nozzle | Nozzles of this shape are thin and wide. They are used to remove gel polish and correct nail designs. In addition, they are most convenient for shortening the length of the free edge of the nail. |
| Drum | Allows you to remove calloused, rough skin. It can be used to trim thick nails. It is also used in hardware extensions. |
| Polisher | This nozzle resembles a rounded cone. It can be soft, medium or rough in terms of hardness. The tip is made of plastic or silicone with a polymer coating. Used to smooth out roughness on nails and add shine. |
How to clean to use?
Almost all cutters are designed for reusable use and therefore require careful care, the first step of which is cleaning of biological material. It is carried out in different ways:
- Manually. The nozzle is cleaned with a brush (brass or plastic) under running water. The simplest, but at the same time the most energy-consuming method, most often used at home.
- In an ultrasonic sterilizer. Rinse the nozzles under running water and place them in the device so that they do not come into contact with each other. This method is not suitable for all types of cutters, so before use, be sure to study the care recommendations for each of them.
- Dental cleaning apparatus. Just as in the previous method, the cutters need to be rinsed under running water. Then set the temperature in the device to 90 °C and place the attachments in it for 5 minutes.
Regular cleaning can not only significantly extend the life of attachments, especially corundum and steel ones, but also prevent the spread of infection.
Below is a video about cleaning cutters:
Which cutter is better? Criterias of choice
Each manicurist has his own favorite cutters, which he chose after trying many attachments.
To choose the right tool, you need to pay attention to the following nuances:
- decide on the purpose: cutters are purchased for manicure and pedicure or for one job. If a master works in a salon and serves many clients, you should pay attention to expensive cutters and equipment; as a rule, their service life is much longer;
- decide on the scope of work. If a cutter and manicure apparatus are purchased for individual use, then inexpensive attachments are suitable. For salon use, it is worth choosing a device with overheating protection and those cutters that will not heat up at high speeds;
- pay attention to the length of the tip of the cutter. The length of the end that is not coated with abrasive must be suitable for the size of the handle clamping mechanism. The nozzle should be held firmly inside and inserted until it stops. Typically the tail has a diameter of 2.35 mm. If the size is larger or smaller, it will increase vibration and create inconvenience during operation;
- Black-marked cutters are not suitable for home use. At low speeds - less than 30,000 rpm. – you can damage the nail plate;
- Some cutters are marked with a “T”. This means they are coated with titanium alloy and will last longer.
Among the manufacturers that produce high-quality manicure attachments are the following:
- “Irisk Professional” (Russia); Cutters for removing gel polish produced by “Irisk Professional” (Russia).
- "TNL" (South Korea).
- "JessNail" (China);
- "Naomi24" (China);
- Planet Nails (Germany);
- "HDFreza" (Russia).
How to disinfect?
The next mandatory step in caring for cutters is their disinfection. To do this, use 2 methods:
- physical - ultraviolet or ultrasonic treatment, boiling, calcination;
- chemical – aging in special disinfectants.
Reference. The use of chemicals requires certification and strict adherence to instructions, so they can only be used in a salon environment.
At home, it is better to give preference to the physical method of disinfection. To do this, keep the cutters in an oven heated to 180 °C for 20 minutes or boil for 15 minutes.
Types of cutters by shape
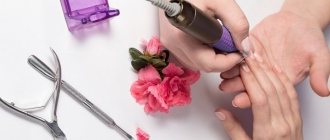
A manicure machine can replace many tools that were previously used for manicure purposes: nail files, nippers, scissors, buffs. By changing cutters, you can achieve a certain effect, since each attachment for a milling cutter has its own purpose. Rotating, it processes the nail, cuticle, skin around the nail, etc. The main thing is to know which form to choose for a particular area.
The most necessary attachments of the mini-kit (for home or as a starter kit for professional use) should include cutters for the following purposes: grinding and polishing the nail, cleaning it from rough skin, caring for cuticles, removing hard artificial coatings.
Milling cutter with attachments
The required set should also include the milling machine itself, which has a standard hole for cutters. Typically, attachments are suitable for all devices. The leading manufacturers of milling cutters are Strong, nail power, Scarlett, Beurer, Irisk, Babyliss, Kads, Vitek, Runeil. Most of these companies also produce components - nozzles (cutters) and caps.
A review of pedicure devices proves that the market is large enough to make the right choice. Their dimensions are different, they also look different.
For salon use, the list of cutters is varied and includes attachments of different shapes and materials.
Flame cutter
This is an attachment necessary for lifting and cleaning the cuticle; it is used to treat the sinuses. It is not easy for beginners to work with it due to the fact that it has a roundness in the middle, as a result of which cuts are allowed. You need to hold this cutter at an angle of 45°.
Cone
Like most other nozzles, it has different diameters with varying degrees of abrasiveness. You can use it to cut off excess gel during extensions and make a shape. The conical nozzle is also suitable for removing cuticles during pedicures and caring for the skin around the nail.
Frustum
A good cutter for working with artificial nail coatings. Having selected the required diameter, you can use the nozzle to polish the gel or acrylic coating of the nail, or remove a layer of shellac. Also suitable for caring for rough nails and skin on the feet, and correcting the shape of the nail.
All attachments in the hands of an experienced professional will give the expected effect. For beginners, you should carefully select the nozzle depending on the task at hand.
Pointed cylinder
It is a cylinder with a sharp end. They call it "bullet". This router attachment comes in a choice of 1.2 and 1.4 mm. It is most popular for nail design, namely for preparing a place for inserting a rhinestone or stone.
After extending gel nails, the cutter will help to even out the space under the nail. Also used in treating the skin around the nail plate.
Cylinder cutter
It is also called a roller and is used to cut the cuticle and side ridges safely for the nail.
Ball cutter
It's a sphere. It is used to cut the cuticle. Side rollers and burrs are also destroyed with its irreplaceable help. Where exactly it is used is determined by size.
Needle-shaped
The name fully characterizes the shape of the nozzle. It looks like a needle. It often has low abrasiveness, belongs to the fissure type of attachments - it penetrates into the most inaccessible places (removal of pterygium, treatment of periungual sinuses, cracks and calluses during pedicure, etc.). It has a gradation of thickness - from 1.2 to 1.8 mm.
Reverse cone
It has the shape of a cone, with its widened part turned outward. It is used to level the nail plate, polish small calluses, and correct the shape of the nail. There are varieties with a rounded back part and a flat one. It is popularly used in pedicures, as there are various options for the abrasive of this attachment.
How to sterilize?
The final stage of processing of cutters is sterilization, chemical (used only in salons) and hardware. There are several types of devices designed for hardware sterilization:
- glasperlene devices, in which processing occurs by heating to 230 ° C and takes 30–180 seconds;
- autoclaves are sterilized with hot steam for 15–40 minutes;
- dry-heat ovens process instruments at a temperature of 180–250 °C for 30 to 120 minutes.
Treated cutters should be stored in a sterile, hermetically sealed container.
Service life of cutters made of various materials
The service life of cutters will depend on what material they are made of:
- cutters made of steel and alloys are considered the most durable. Their service life is more than 5 years, depending on the frequency of use and quality of the material;
- Diamond or sapphire coating also wears off quite slowly, but requires regular cleaning. If used daily, such cutters are enough for 2–3 years of work;
- Ceramic attachments are designed for 30–45 days of use. But the service life of silicone and rubber cutters, as well as polishers, is much longer;
- disposable “emery” and “sand” caps are the most short-lived, their service life is limited to one manicure procedure.
At what speed should it work?
To perform a manicure using the device efficiently and painlessly, it is important to know at what speed it should operate at each stage of the procedure.
Important! When cleaning the pterygium and opening the cuticle, the optimal speed is 15,000–17,000 revolutions; for cutting, depending on the skin type, 5,000–8,000 revolutions.
There are also speed recommendations depending on the type of cutter:
- “flame” shape with red notch – 10,000–15,000 rpm;
- corundum – 7,000;
- “corn” shape – 30,000 in FWD mode;
- for polishing – 5,000–7,000.
To quickly learn how to perform a manicure using a device, it is important not only to know the technique of the procedure, but also all the nuances of working with it. A responsible approach to training will help you gain the necessary experience and client base in a short time.
Step-by-step instruction
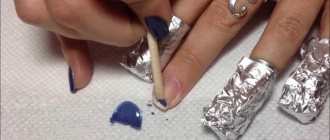
If you have already acquired a device and cutters, we recommend that you study the tips on how to properly do a hardware unedged manicure at home:
- The procedure is carried out only on a dry plate. Otherwise, the plate will begin to heat up, which will cause some discomfort. In addition, the areas will be less well processed;
- If you are using a combined or customizable device (for example, Strong), then you need to set the speed to a speed of up to 10,000. If it is higher, then you will simply erase your nails due to the lack of proper experience;
- Do not press the clipper close to your nail or, especially, put pressure on it while working;
- The first few times you need to practice on the silicone tips first. Then, when working with rough cutters, you will already know how to hold them correctly, at what angle and for how long.
Instructions and technology for performing hardware manicure step by step:
- The cuticle needs to be moved closer to the nail hole using a special wooden stick. Try to act carefully so as not to damage it;
Photo – Wooden stick - On it and the side rollers on the sides of the plate, the use of drums with medium hardness is allowed. Watch your own feelings, if it seems that the cutters are not removing enough, then you can take tools with more abrasiveness;
Photo - Drum processing - On the palms and fingers, you need to clean dead cells using soft abrasive ball-shaped burs;
Photo - Using a spherical bur - Use cylindrical or trapezoidal cutters to give the plate the desired shape. Be careful - the rules of proper manicure require leaving more than 2 mm above the level of the fingertips, even on short nails;
Photo - Processing with a trapezoidal cutter - After this, polishing begins. The technique of this stage is quite difficult for beginners. Firstly, you cannot bring the edge of the polisher to the nail - it will scratch the plate, secondly, you cannot hold the polish in one place for longer than 1 second;
Photo – Nail polisher - All that remains is to clean the space from dust and nail residues, lubricate it with oil and paint it.
Photo - Applying varnish
For a better understanding, we recommend watching a video master class from professionals on how to do a hardware manicure.
Video training for beginners on how to do a hardware manicure
Recommendations from professional craftsmen
To get a neat and attractive manicure, you need to choose a high-quality cutter. This can be done based on the recommendations of experienced professionals:
- First you need to decide what the cutter is needed for - to process arms or legs. The material of the tool depends on this, since each type of work requires certain characteristics.
- An equally important point is the place where the manicure cutter is used - at home or in a salon. For the salon, you need to purchase more cutters, and of high quality, since the tool will be used frequently.
- The product must be selected for a specific machine, since the power of all milling cutters is different, starting from 1500 rpm. The wear of nozzles depends on this indicator. At home, you can use the devices from the set without replacing them with new ones for a long time.
- The diameter of the nozzles also matters. Large devices are designed to work at low tool speeds, and small ones - at high speeds.
- Particular attention should be paid to the fact that some attachments may have the designation “T” - this means that the cutter is coated with a special compound to improve cutting properties.
Manicure and pedicure work requires treating the nail plate, cuticle and skin adjacent to the nail with different attachments. Using manicure cutters for purposes other than their intended purpose can lead to undesirable consequences such as damage to the nail plate, which can ruin not only the appearance of the nail, but also cause harm to health of varying severity.