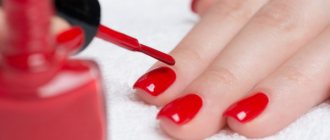
All girls want to stand out and attract the attention of others, which is why they pay such close attention to beauty issues. This includes facial, body, hair care and, of course, a flawless manicure, which is not complete without a color coating!
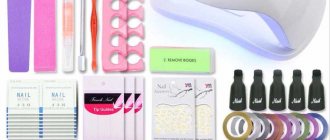
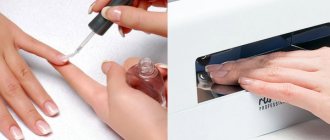
From the article “What is gel polish?” We have already learned how many advantages this material has! No wonder he was loved by millions of girls all over the world. But what if a girl doesn’t want to spend money and go to a beauty salon or a manicurist? How to apply color coating at home? What will you need for this?
Before applying gel polish, it is necessary to carry out preparatory procedures: do a manicure and properly prepare the nail plate for coating. And after applying a colored coating, you can complement it with a simple design and carry out care procedures that will help preserve the beauty and youth of your hand skin.
Conventionally, the entire procedure can be divided into the following stages:
- manicure;
- preparing the nail plate for coating;
- coating of the nail plate;
- design;
- hand skin care.
We will analyze the materials and tools needed for each stage, and the technology for applying gel polish at home.
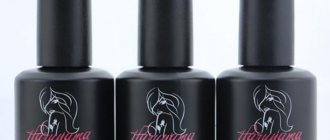
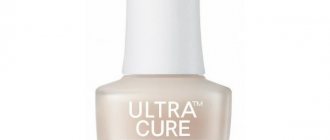
What is a gel polish base?
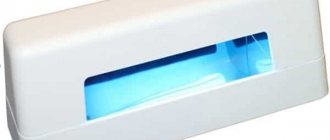
Base - Base coat - the same as the base for gel polish - this is the first phase of a three-phase gel polish system. It is applied as the first layer to a clean nail plate and polymerized in an ultraviolet or LED lamp. This is the first and most important stage of gel polish coating, the quality of which determines the durability, duration of wear and safety of growing nails. The quality of the base coating is determined not so much by the cost of the material, but by its correct selection according to certain characteristics, in accordance with the individual characteristics of the nails of a particular person.
How to beautifully paint your nails with pink polish?
Pink varnish, due to its soft neutral color, allows it to be easily applied to the plate without any special errors. Try to apply the varnish with concentration, without sudden movements or haste.
Do not overload the brush with too much polish and do not leave the sides unpainted so that the manicure does not look bad. Pink polish can be decorated with decorative elements, sparkles or rhinestones.
pink manicure
Why do you need a gel polish base?
The initial task of the gel polish base is to ensure adhesion of the color coating to the natural nail plate. But, firstly, this function is far from the only one, and secondly, different types of databases cope with it in different ways.
What a gel polish base can do:
- improving the adhesion of colored gel polish or gel to the keratin of the nail plate,
- smoothing the surface of the nail,
- strengthening and protecting the natural nail,
- tinting the nail plate (camouflage),
- extension of nails and repair of broken corners,
- fixing rhinestones and volumetric decor,
- fixing sliders and rubs,
- execution of designs “on wet”,
- mixing with dry pigments and glitter, diluting colored gel polishes, etc.
Gel polish bases can be classified according to several unrelated criteria:
- Consistency (thickness) in a liquid state
- Plasticity after polymerization
- Adhesiveness (stickiness)
- Polymerization temperature
- Pigmentation
There are different combinations of these signs. First, let's look at what each of them provides separately.
Stage 4. Nail design
Now you can move on to the designs. Since we make the coating at home and are not professionals, it would be logical to use the simplest designs. But don't be discouraged, they are very stylish and impressive!
For example:
- slider designs;
- stickers;
- foil.
Slider design Ibdi_Nails AIR FOIL 13
Stickers F660 Leaves gold
Foil for casting gold 4 cm*1 m RocheNail
In addition to the designs themselves, we may need a top coat to secure the sliders or glue for the foil.
Top for designs Factor Lianail 10 ml
Glue for foil ARTEX 15 ml
Now let's look at how to make each of the proposed design options.
Slider designs:
- Those nails on which we will attach slider designs do not need to be covered with topcoat;
- Soak the pre-cut slider design in water, dry it on a napkin, then separate the film from the backing;
- Apply the base coat. We do not dry it;
- We plant the design on an undried base coat. In order not to damage the slider design when smoothing it over the nail, you can use a brush or silicone hoof;
- Dry the base coat together with the slider design in a lamp;
- Apply a topcoat to secure the sliders. Dry it in a lamp.
Stickers:
- If they are used, it is necessary to remove the sticky layer from the coating;
- Remove the sticker from the backing, cut it if necessary, and apply it to the nail plate;
- Cover with topcoat and dry in a lamp.
Foil:
- If you decide to use foil as a design, then after applying gel polish you do not need to use a top coat;
- We firmly press the matte side of the foil to the sticky layer of dried gel polish and sharply tear it off. Dry in a lamp;
- We apply the top coat and dry it again in the lamp.
TIP: if the stickiness of the gel polish is not enough and the foil does not print, then you should use a special glue for foil.
It's very easy to use. Remove the sticky layer from the colored coating, apply glue to the surface of the nail and wait until it becomes transparent. This means the glue has dried. Then we print the foil as described above, secure it with topcoat and dry it.
Consistency: liquid, medium and thick base for manicure. What is more convenient and for what?
| Liquid | Medium (3-6 sec) | Thick (7-infinity) | |
| Leveling speed | 1-2 seconds | 3-6 seconds | from 7 seconds to infinity |
| Layer thickness | + Thin or rubbing - Large volume spreads, loses shape and forms streaks | + Middle layer (about 0.5mm) — A thin layer is applied slowly — A thick layer may spread and lose its shape in the lamp | + Thick layer (up to 1mm) - Does not level out with a thin layer, forming bumps |
| Which nails? | + Very short with minimal alignment + For arched (convex) nails + As a strengthening base for soft, sawn, long nails | + Medium length nails + Arched nails that require a little straightening — On too short and very long ones, the time spent on coating increases | + Long nails when volume is required + Flat nails without their own longitudinal and transverse arches - to create architecture |
| Who is it suitable for? | + An experienced master with developed motor skills, from whom the material “will not have time to escape” | + For beginners in the manicure business + For “selfies” - those who do their own nails at home and don’t see the point in buying many different bases | + An experienced craftsman who can quickly lay out thick material and help it level out |
| Additional features | Attaching sliders, rubbing, glitter, wet-on-wet designs | It forms a layer that is either too thick for rubbing and glitter, or too thin and spreads when attaching rhinestones or extending them. | Fixing rhinestones and voluminous decor Extending and repairing broken nails |
Liquid base for nails
The liquid base is quickly and easily applied to the nail in a thin layer, but spreads in a thick layer. It works best when covering short or convex nails without leveling. On long or injured nails, it is often used as a thin substrate under a reinforcing layer of hard material, which is laid out with a thick base, gel or acrygel (polygel). Also, “flowing” designs are made on such a base, and rubs, sliders and glitter are attached to it.
Thick nail base
You need to apply the thick material to the nail plate slowly and carefully so that it has time to transfer from the brush to the nail. Thick gels lay down unevenly in a thin layer; for a beautiful, even coating you have to add additional volume using the leveling technique. A thick base is suitable for any nails, but is most convenient on long or flat ones. If, after polymerization, such a material becomes hard and inelastic, then it can be used for strengthening and repair.
Medium thick manicure base
We recommend medium-thick bases for those who regularly do their own manicures, do not grow them to extreme lengths and do not bite their nails at the root, and are also not interested in creating a portfolio of selling photographs. Almost anything can be done with such a base, but slowly, which is rather a plus for “yourself”, as it increases the degree of control.
How to understand when purchasing whether the base is liquid or thick
When purchasing, you can find out how liquid the base is and how quickly it levels out in the following way: open the bottle, carefully take out a brush with a drop of material and see how long it takes for this drop to take a spherical shape and separate from the brush. Liquid materials drip almost instantly, medium ones take 5 to 7 seconds, and thick materials may remain on the brush.
Liquid and thick bases are produced for nail service professionals to solve specific problems. The choice must be made taking into account other properties, which will be discussed below.
How to make at home
Regardless of the type of gel polish (single-phase, two-phase, three-phase), all rules of hygiene and application must be followed.
- Hygienic manicure. This is the preparation of the nail plate, namely the removal of the cuticle, the hangnail, and giving the required shape. Next you need to disinfect and degrease your nails. Preliminary preparation is responsible for the quality of the future manicure.
- Applying the base layer. It is called the “first layer” and is applied using a “base”. This is necessary to strengthen and straighten the nail. First apply to four fingers, except the thumb, then dry. The same is done with the thumb. This sequence of application is necessary for even drying of the base.
- Next, colored varnish is applied. It is applied in a thin layer in several layers, constantly drying. This will help avoid uneven application, eliminate bubbles and varnish getting on the skin.
- The design, rhinestones and stickers are applied to the dried color layer. No special techniques are needed here. Of course, if this is not applying patterns or combined painting.
- The final layer is applying the top. It sets the polish and makes it glossy and shiny. During the final layer, it is important to secure the ends well, otherwise the gel polish may come off ahead of time.
Applying gel polish step by step guarantees long-lasting wear and healthy nails.
Plasticity: hard (hard), reinforcing and elastic (soft) bases
| Elastic (soft, flexible, soak off base) | Medium and reinforcing (strong, fiber) | Hard (hard, builder) | |
| For which nails | Suitable for short, thin, soft nails | For healthy nails, medium length | Suitable for strong nails To strengthen long nails |
| Layer thickness | Thin — Those applied in a thick layer peel off | Medium or thick They vary in hardness from different manufacturers, we adapt the technique | Thick (up to 1mm) — Applied in a thin layer, they chip |
| Additional features | + Adhere well to the mobile, soft nail plate | + Fiber - bases contain fiberglass and are reinforced — In the sock they sag in the stress zone, longer lengths are not strengthened — Short nails peel off if there was a leveling layer | + Maintains length and shape, does not sag in stress zones, therefore suitable for extensions and repairs |
| Removal methods | Dissolved with acetone, carefully cut down with a red ceramic cutter | Slowly dissolve with acetone The main volume is cut off with a blue cutter; if necessary, the remaining thin layer can be dissolved | They do not dissolve. They are cut off with a blue or green TVS cutter, about 5% remains on the nail. |
Elastic (soft, flexible, plastic, flexy, soft, soak off base) base for gel polish
They dissolve in acetone and can be completely removed by soaking. Worn for up to 3-4 weeks on short, soft, thin nail plates. They can be slightly more or less flexible and have different consistencies: from liquid like water to thick like cream, that is, consistency does not affect elasticity. But it is important to know that elastic gel polish materials, when applied in a thick layer, peel off, which means it is preferable to apply a thin coating with them and choose a consistency closer to liquid. Extensions, strengthening and repairs are not done with soft gels.
Solid (hard, constructing, hard base, builder base) base for gel polish
An insoluble base that is cut off with a milling cutter or file. Similar to extension gel, but a little thinner and comes in a bottle with a brush. A hard base is needed to strengthen long, weakened natural nails, repair and extend them. Retains its laid out shape and provides protection from external mechanical damage. When applied in a thin layer, the natural nail plate cracks and chips, so masters choose gels with medium or thick consistency that hold the laid out volume.
How to check if the base is hard or soft
If you have some kind of base in your arsenal, but you don’t know how hard it is and whether it is suitable for strengthening, then finding out is quite simple. Apply the material to the film in a stripe, leveling layer (up to 1mm thickness) and polymerize. After drying, separate from the film and try to bend it. If the base wrinkles and curls easily, then it is elastic. If it cracks and breaks quickly, then it’s tough. You feel an elastic, but hard material that neither bends nor breaks - what you see is a reinforcing base that is closer to solid.
We apply the bases as a leveling layer on a thin film and polymerize. Degrease and remove from film.
Bend and twist the base. A very soft base rolls up into a roll.
The elastic rubber base is more resilient.
The hard but resilient black rubber base only flexed when pressed hard. But it didn’t crack, which means it’s suitable for strengthening.
The rigid base never bent, but it didn't crack either. Durable material suitable for extensions.
We see how different bases are deformed after loading.
Reinforcing base or base with fiberglass (fiber base)
A strong but flexible base to which pieces of polyester or "fiberglass" are added. They may be clearly visible or look like thin fibers, or they may not be visible at all to the naked eye. Fiberglass plays the role of a reinforcing frame around which the polymer is built. The elasticity of such bases varies greatly, as does the consistency. Materials that are average in all characteristics are suitable for thin, soft nails of short and medium length. Sometimes there are also more solid fiber bases, which can be used for strengthening and repairs. You can find out what properties a particular product has on the website of its manufacturer.
So, we recommend using a thin layer of elastic bases on soft and mobile nails. If they are also long, then reinforce the dried thin layer of soft base with a thicker, leveling layer of hard base (or gel/acrygel). Without a plastic backing, hard bases can only be applied to strong and healthy natural nails.
Base for gel polish for pedicure
In pedicures, it is allowed to use only elastic materials and apply them in the thinnest possible layer, without leveling or strengthening. That is, only elastic and not thick bases. This is due to the stress that toenails experience even without coating. A thick layer of hard material, especially during the season of closed shoes, provokes the formation of subungual calluses, onycholysis, curling of nails and inflammation of the lateral ridges. During the cold season, a reasonable solution would be to avoid gel polish on your feet altogether and, if desired, do a pedicure with regular polish.
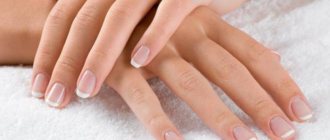
Hand skin care
In order for the skin of your hands to maintain beauty and youth for many years, it is necessary to do skincare procedures. We will need:
- cuticle oil;
- hand cream.
At the end of the manicure, you need to apply cuticle oil. Place a drop of oil on the cuticle of each nail and rub well. Please note that there are mineral and natural oils. Mineral oil forms an invisible film on the surface of the cuticle. If you use this oil every day, you will get the opposite effect: the cuticle will begin to dry out. This oil is more suitable for masters: the client comes for a manicure once every 3-4 weeks, and mineral oil is ideal for single use. At home, on a daily basis, it is better to use natural oil, for example “Dadi Oil”, “ruNail”.
Organic oil for nails and cuticles Dadi Oil Famous Names 3.75 ml
After the oil, you need to apply a moisturizing or nourishing cream to the skin of your hands and cuticles.
NOTE! It is necessary to take care of your hand skin not only after a manicure! Before going to bed, smear your hands with a moisturizing or nourishing cream, and in the cold season, before going outside, with a protective cream. Once every 1-2 weeks you can scrub and perform paraffin therapy. To save time and money, you can purchase cream paraffin from “Aravia”.
Cream paraffin Flower nectar with flower and beeswax ARAVIA 300 ml
Let's look at the technology for using such a cream.
- Thoroughly scrub your hands to remove dead skin cells.
- Apply a moisturizing or nourishing cream and rub it in well.
- Apply a thick layer of paraffin cream.
- We put on plastic gloves and do not take them off for 15-20 minutes.
- After the specified time has passed, remove the gloves and wipe off the remaining paraffin cream with a paper towel.
After the procedure, it is advisable not to wet your hands for two hours.
Be sure that after such care your hands will tell you: “Thank you!”
Adhesiveness: why does gel polish stick to nails?
Acid bases for manicure
The adhesion of the gel polish base to the nail plate is greatly affected by the acidity of the material. The more methacrylic acid in the composition, the more the material dries the outer layer of the nail and the better the adhesion. Many manufacturers are silent about this aspect of the issue and do not publish data on the pH level due to the fact that too frequent use of an acid base and severe drying leads to curling and brittleness of the natural nail, which will scare off buyers. You can independently check the pH level of the material using litmus paper. Bases with a pH level of around 5-6 are considered safe, 3-4 are considered medium acidic, and below 3 are considered strongly acidic.
Safe bases adhere well to healthy nails, but for damp, thin and worn nails you should choose medium-acid bases. Avoid using acidic materials too often if you do not want to at some point lose your natural nails due to their curling and brittleness and be forced to switch to extensions. Also, within a few days, the acid base can dissolve the pigment of the colored gel polish applied on top of it, which will cause yellowish spots visible to the naked eye. If you do use an acidic base, rub a thin layer of it into the nail and remove the stickiness from it before applying colored gel polish (or cover it with a less acidic one on top).
Rubber base (rubber base)
The adhesion of the gel and nail at the molecular level can be improved due to the presence of special components in the material that form strong bonds with keratin. Such materials include rubber bases . “Rubber” was initially positioned by manufacturers as “stickiness”, good adhesion, and not as elasticity and at the same time strengthening, as many have probably already heard somewhere. There is no natural rubber in the composition, but there are synthetic components with similar properties. Such bases should be applied in a thin layer, just like acidic ones, and strengthening should be done with solid materials in the second layer.
Some rubber bases will be soft, some will be harder; you can find information about this on the manufacturers’ website or on social networks, as well as in courses and in communication with craftsmen. They can also be quite acidic, medium or thick in consistency. If you are uncomfortable applying a thick base in a thin layer, it takes a lot of time, then get a separate brush for applying it: synthetic, oval, size 4-6 and quite hard. Application with such a brush will be quick and convenient.
Repeat nail shape
This is a simple and convenient way to carefully paint your nails without getting your fingers dirty:
- Place the brush as close to the cuticle as possible and use two even strokes to fill the sides of the nail with color, following their contour. Then paint over the central part and dry the gel polish in a lamp.
- Paint your nails with another layer and dry.
- Apply topcoat.
This technique allows you to paint your nails quickly and accurately.
How to carefully paint your nails
Polymerization temperature: hot and cold bases for gel polish
All materials in the gel system emit heat when polymerized in a lamp. This is due to the chemistry of the process and the formation of polymer bonds; it is almost impossible to avoid this effect. The rate of polymerization is directly related to the amount of photoinitiators - special substances in the material that, under the influence of ultraviolet radiation, trigger a chain reaction. The faster the polymerization reaction occurs, the more heat is released per second, the more strongly it is felt. If your nails are naturally thin or injured, then during the polymerization of a thick layer of base you may feel a burning sensation that occurs almost at the very beginning of drying and goes away when you remove your hand from the UV lamp. In principle, this is a normal phenomenon and you should not be afraid of it. With high sensitivity, you can reduce the power of the UV lamp (if there is such a function) or remove your hand a little in advance, before it becomes impossible to tolerate.
For those women who value maximum comfort during the procedure, the industry offers special “cold” bases and gels. They hardly heat up, require more drying time and the application of a thin substrate under them from a regular, “hot” base, since they often have rather poor adhesion. But you don’t have to worry about the risk of thermal burns to the nail bed on thin or injured nails.
Pigmentation: camouflage and color bases
Manufacturers in the nail industry over the past three years have moved away from the understanding of gel polish bases as a transparent product, applied in a thin layer and needed only to improve adhesion. Today, both among artists and clients, pigmented bases, which are applied using the leveling technique, are very popular. This gives sufficient color density and a beautiful, smooth surface with a relative acceleration of the procedure. Nude shades (pinkish, nude, milky, beige) of camouflage bases provide hands with a well-groomed appearance, grow unnoticed and do not attract attention. Bright colored bases, along with bases with added shimmer, gold leaf, flakes and even dried flowers, have become a hit in 2022. When covering your nails with pigmented bases, you should remember several important nuances.
Features of working with pigmented bases
- for good adhesion and subsequent safe removal with a cutter, a thin layer of transparent base is required,
- the denser the pigment of the material, the thinner the layer so that it dries completely in the lamp,
- on long nails the color base should be applied in 2 medium leveling layers,
- It is advisable to choose materials that are hard after polymerization and strengthen the nail for leveling.
As you can see, there is no need to talk about any significant acceleration of the master’s work with these technologies. But they expand the capabilities of professionals in nail decoration. It is popular to create aquarium designs and stone-like textures that are “light” in visual perception.
Of the camouflage ones, a milky base will definitely come in handy: it looks beautiful in itself, and allows you to create even a bright design on it, and will serve as a dense background for neon or “harmful” pastel shades. Natural pink and white-flesh pink camouflages are also very popular among customers. Of the colors that attract attention are mint, blue, and coral shades. The black base also makes it easier to apply translucent dark shades and is a good base for chrome rubs and cat eye gel polish.
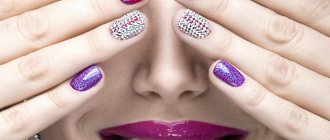
Master class with decor
Simple decor on nails will suit any woman, regardless of age, social status, race. The easiest way to do it is with stencils.
- The selected stencil is carefully placed on the base or colored layer and straightened. It should fit snugly to the nail on all sides.
- A different color is applied.
- The stencil is removed using tweezers slowly from the root to the edge of the nail. The resulting drawing is dried under a lamp.
- The final layer is applied.
There is no need to make patterns on each nail. It may look too colorful and tasteless. Most often, the decor is complemented by a monochromatic manicure. Applying gel polish step by step greatly simplifies the implementation of even complex decor.
You can decorate your nails with rhinestones. For example, depict raindrops or a crown. Rhinestones can complement both a plain manicure and designs. The size of the decor is selected based on the length and color of the nails. The emphasis should be placed on only one finger. Rhinestones or any other decorative elements are applied to wet gel polish without glue, then dried and strengthened with a top coat.
Which gel polish base to choose?
For those who do their own nails, as mentioned above, you can choose a medium-thick base, which is convenient. If there is no need to reinforce a large length, then a medium or reinforcing base is suitable in terms of hardness - strong and elastic. Medium acidity, rubbery, transparent.
For masters, you must have at least two databases:
1. Liquid or medium-liquid, elastic, with good adhesion.
2. Thick or medium-thick, firm, moderately hot.
In this way, the master’s basic needs will be covered in ensuring durability, strengthening, correcting imperfections of natural nail plates, and fixing various decors. It is better to choose hard camouflage bases, as well as colored ones, so that you don’t have to separately strengthen your nails with another material and waste time doing so.
How to beautifully paint your nails with regular polish?
Regular nail polish gives you the opportunity to correct the situation at any time by using acetone or any other nail polish remover. Choose only fresh and liquid varnishes for painting your nails. Such varnishes will dry faster and spread better over the nail plate.
Make it a rule to apply a base coat of clear nail polish to your feet and only then apply colored nail polish. This will straighten the nail and preserve it from disease, eliminating yellowness.
Frequently asked questions or FAQ for beginners
What happens if you apply gel polish without a base?
Depends on how sticky the colored gel polish is, how healthy the nails are covered, whether it's a manicure or pedicure. When the gel polish is sticky enough to cover your toenails, there probably won’t be much of a difference in wear. Nails on the lower extremities are stronger and experience less mechanical and chemical stress, so the coating can last for a month. If you apply colored gel polish without a base to the long nails of the right hand of a person whose work involves working with his hands in a humid environment: a hairdresser, florist, cook, etc., then this coating will last only a few hours and will soon come off as a thin film. Therefore, if your colored gel polish involves a three-phase system, it is better not to experiment and not violate the technology.
What is acid-free nail base
Bases that contain an acceptable minimum of methacrylic acid and whose pH is around 6-7 are called acid-free. Such bases can ensure the wearing of artificial material for a period of no more than two weeks and only on healthy, strong nails. But they are less likely to provoke allergies on the periungual ridges and dry out the nail plate less.
Solid base or gel for extensions: what is the difference?
The difference lies in the name, packaging and polymer density. As a rule, the base is bottled in glass bottles with a brush, and the gel is bottled in round jars without a brush (but it also happens vice versa). A thick hard base and extension gel have approximately the same consistency, but the base can be much thinner and the gel much thicker. Premium, high-strength construction gels after polymerization have a denser molecular lattice and are more economical in consumption. To strengthen extremely long nails or fully extend long artificial nails, it is more reliable to use gels.
What is a hypoallergenic nail base?
This gel polish base has a slightly acidic pH and does not contain rubber. The basis for it is, like extension gels, polyurethane. In addition, the quality of the raw material and the degree of its purification are important, which affects the cost. For allergy sufferers who do not want to give up a long-lasting coating, we recommend trying premium gels certified for sale in the EU.
How to improve the adhesion of the base to the nail plate
It is necessary to thoroughly clean the surface of the nail from pterygium, remove the hydro-lipid mantle (shine) with a buff and a degreaser to wipe off dirt and cosmetic residues. If your hands are wet, apply a dehydrator. If your nails are weak, injured, and the gel polish base contains little methacrylate, then apply an acid-free primer to the stress area and the free edge of the nail.
Base and top must be the same brand
No, this is not necessary. But, if the top is elastic, then the top must also be elastic, otherwise it will crack and chip when worn.
Why do you need to straighten and strengthen your nails?
Every person has a different nail structure. Those girls whose nails are perfectly even and smooth are truly lucky.
But those whose nail plate is too fragile and sensitive are much less fortunate. In addition to covering with base, varnish and topper, they also need to use a leveling base.
Such leveling and strengthening is necessary in order to give each nail the correct architecture, get rid of varnish runs, wavy structures at the ends, and bumps and dents that are invisible in the absence of a manicure, but appear when the coating is applied:
- The first layer will be a primer. It will help level out unevenness.
- The second layer must be distributed over the nail so that it smoothly fades away in the area of the side ridges and cuticle, while forming a perfectly flat surface along the entire perimeter of the plate.
This procedure has many advantages:
- The leveling base helps the nails to strengthen and the coating to last for several weeks before correction.
- The ability to give the nail plate the correct architecture (with proper correction, the nail will grow in the right direction).
- This leveling and strengthening procedure does not require the purchase of additional funds. And it only takes about 8–10 minutes.
- Leveling is important when removing the coating with a machine, so that when cutting, a layer of base coating remains. Such a thin layer will not only cover, but also protect the nail from mechanical damage.
- A smooth and even surface will always make your manicure perfect. It will help you achieve smooth and beautiful highlights in any lighting.