Nail design with thread on wet gel polish: master class
Using regular thread allows you to create real designer masterpieces on your nails.
This option, like the cobweb, is included in the 2022 manicure trends. Running a thread over wet gel polish creates intricate patterns and swirls that are difficult for a beginner to achieve with a brush. To create the design you will need the following materials:
- base;
- 3-4 colored gel polishes;
- top coating;
- threads;
- thin brush;
- rhinestones and sparkles for decoration.
The creation of patterns is carried out according to the following scheme:
- Applying base coat to the nail plate.
- Covering the base with colored varnish.
- Drying in a UV lamp. Be sure to dry the first layer! This is necessary for this. so that there are no gaps.
- Applying the 2nd layer (without drying).
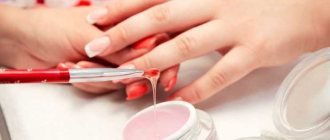
- Applying varnishes of contrasting colors to the thread.
- Applying a pattern to the nail plate using thread. If necessary, correct the drawing with a thin brush.
- Drying in a lamp.
- Complementing the design with decorative elements.
- Applying top.
- Removing the sticky layer (if necessary).
Watch a step-by-step master class that will help you quickly learn how to draw with thread on wet nail polish.
Source of the article: https://lifepodium.ru/dizajn-nogtej-nitkoj-po-mokromu-gel-laku-master-klass/
Step-by-step process for creating a powder-bonded manicure
Any girl can create the sweater effect on her nails at home, provided she has the following materials:
- gel polish;
- top coating;
- white acrylic powder;
- thin brush for drawing a pattern;
- pusher (a tool used to sprinkle powder);
- a voluminous brush to brush off excess powder from your fingers;
- Ultraviolet lamp.
Now let’s find out how to do a “knitted sweater” manicure yourself. We present to your attention how to do knitting on nails step by step:
- Apply two layers of gel polish of the selected color to the nail, alternately drying the plate after applying each layer in the lamp.
- Apply top coat to dry nails and put back into the lamp.
- Remove the sticky layer with a lint-free cloth.
- It's time to draw the knitting. For convenience, you need to apply gel polish into any shallow container (small lid, jar). Pick up varnish with a brush and draw a pigtail.
- After the knitting has been drawn, you need to take acrylic powder, place your finger under the jar and, using a pusher, begin to pour the powder onto the plate. After this, send it to the lamp.
- Remove any remaining powder that does not adhere to the varnish using a volumetric brush.
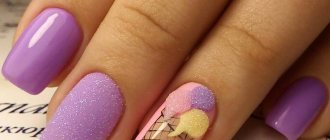
- The knitted sweater design is ready. This is the kind of beauty you can get.
If you are doing a knitted manicure with gel polish for the first time, then first experiment with making a design on tips.
If the gel polish is not dense, then you can apply 3-4 layers of coating.
Thread design is a new manicure hit!
If you haven't seen such a trendy nail design using regular thread, then tune in!
The idea of creating a manicure with thread is one of the latest hits on nail artists’ Instagrams. This is an express design that is performed with one movement of the thread on the nail. The pattern is always unique and attractive.
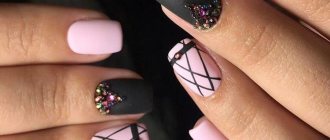
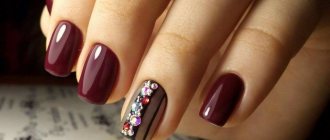
This design looks brightest on a white and black background. You can experiment with other contrasting colors. As for the color for the thread pattern, it can be either one shade or several. The main thing is that they are contrasting with the background and bright, otherwise they may get lost when mixed.
The thread design itself is somewhat reminiscent of a delicate and airy feather. It is made with gel polish very simply:
- On nails prepared for gel polish and covered with a base, two layers of white are applied, and the second is not dried in a lamp (the design is done wet).
- Cut a thread about 5-8 cm long and place it on the palette. Then we apply gel polish of one or more colors to the thread. They will take about 2 cm in length.
- Place the end of the thread coated with gel polish on the undried nail in any form. To get a feather, it is placed either in an arc or twisted into a circle.
- Pull the second end of the thread and get the original drawing. As you pull, the thread can be rotated, thereby obtaining a variety of patterns.
- We secure the design with a top.
You can draw another feather nearby. To save material, you can dip the thread in the same mixture of varnishes that remains on the palette. You can also draw a feather on top of an existing one: apply topcoat and, without drying it, repeat the pattern.
Alternatively, this design can be decorated with sparkles or other decor, or you can add contours to the feather with white gel paint, or you can play around with it in some other way. Then your imagination comes into play.
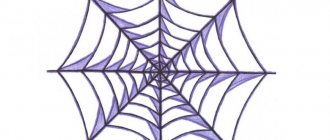
Methods of applying spider web gel paint to nails
- What tools to use with spider web gel paint.
Using gel web is easy; to make a design you will need to choose from: dots (preferably with a mini ball), a thin brush, an orange stick or gloves (vinyl, nitrile, latex).
- How to apply spider gel and make fine lines.
The thickness of the lines directly depends on the depth of immersion of the dots in the jar; the more composition you capture, the thicker the thread will be. In this case, if you dip the dots very lightly into the gel, the web will grip very weakly and may tear when stretched.
By stretching the gel (pull the dots with paint on the tip away from the can), thinner lines are obtained. Gradually, during the process of creating the design, the thread becomes almost transparent.
- How to use spider web gel paint.
You can apply spider web gel to a finished manicure with gel polish directly on the top without a sticky layer or after removing the stickiness from the finish or color coating.
Spider gel can be left as a convex design, diluted with additional decor, or covered with a top.
Since the web has a modest color palette, you can make it colored yourself. Microglitter, velvet sand, acrylic powder can be sprinkled onto the undried web or with the remainder of the dispersion layer; rub in the mirror rub.
- How long to dry the spider web gel.
A few nuances
- If somewhere it doesn’t turn out so smoothly, for example, the leg of a feather is thick, then using wet varnish this can be easily corrected with a dry brush. Well, if you don’t like it at all, you can always erase the undried layer and paint again.
- If the thread does not twist well, you can help press it to the nail, for example, with an orange stick.
- In general, it is better to use a thin thread. When cutting it off, a thin lint may remain, which can be used for design, or can be trimmed.
- We do not pull the thread with the applied gel polish, but lift it up, as if tearing it away from the palette, so that the colors do not mix.
You won’t be able to create such a design with regular varnish, since either the varnish on the thread will dry out or the background color will dry out while you are decorating the thread.
The advantages of thread design would include not only the speed, but also the ease of doing it yourself on both hands.
Write in the comments how do you like this express design idea? Does it have the right to exist not only on tips, but also on your nails?
If you found this page useful, please recommend it to your friends:
Source of the article: https://moi-manikur.ru/vidy-manikyura/dizajn-nitkoj.html
Advice from the experts
To ensure a neat manicure, take a few tips from experienced masters. Of course, with practice you will be able to adapt to this technique and choose the most successful solutions for yourself:
- You can cover the end of the thread not with one color of varnish, but with two or even three, the main thing is that they contrast with each other and also contrast with the background color.
- If you want to get a bright and catchy nail art, you can make several layers, placing designs one on top of the other. Each layer must be dried in a lamp.
- The thread design can be supplemented with rhinestones, sparkles or other decor, but most often craftsmen simply adjust the design using a thin dry brush.
- For work, take a thin thread that curls well in an arc, wave, or small rings.
- After dyeing the thread, do not pull it off the board, but lift it up, as if peeling it off. This way you will capture more polish, and the design on your nail will be complete and harmonious.
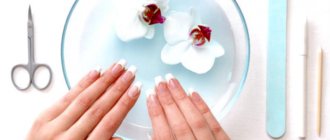
If it’s hard for you to imagine what the end result will be, practice on tips or on any glossy surface. In addition to abstraction, you can use thread to draw feathers or make an exquisite floral-themed pattern.
0 Comments
How to make a stylish striped manicure using threads
Every woman and girl loves to have a stylish and neat manicure on her nails. But not everyone can afford to go to salons for this. And some people don’t visit manicurists because they don’t trust them with their health, since, unfortunately, sometimes you can catch hepatitis from unscrupulous manicurists. In any case, you can always do a manicure yourself. And today we are sharing with you an interesting idea for a striped manicure. In order to draw colored stripes on your nails, you will need dental floss, as in this video, or ordinary threads that you need to pull on something. And what to do next - look.
How to make an unusual manicure using threads
Nail design threads are a non-trivial material with which you can create many interesting manicure options. They make especially good voluminous compositions. For a manicure to be successful, you need to know which threads are best to buy.
Where to buy threads
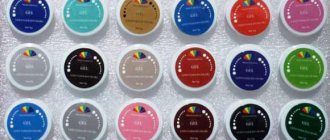
Special threads for manicure are sold in professional stores. Among the assortment you can find all kinds of options: thick, thin, metal, with different types of torsion, holographic, glossy and glitter-coated. If you can’t get to a store that sells professional products, you can buy silver and gold threads for embroidery.
Home option
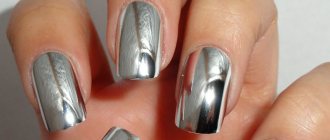
Metallic nails, if desired and persistent, can be done without leaving home. Let's start with the simplest method.
- Pre-made false nails with mirror effect made of acrylic
Sold in any cosmetics departments and professional stores.
Application method:
First you need to remove the old manicure and degrease the nail plate. Everything else is easy and simple! Take a false nail and glue it to yours! The time is very fast! And it will last for two weeks! But the glue you choose plays a huge role here.
- Tips
If time is short and you haven’t found a ready-made design with a metallic effect, then you can make them yourself. Tips are sold in every cosmetics department, and paint in craft stores.
Application method:
You will need ordinary transparent tips and acrylic paint with the color you need. Cover the tips with paint and simply stick them on your nails. It takes a little longer, but everyone chooses their own path.
Threading technique
Threads are decor, not an independent material, so first the nails are covered with the chosen color. Afterwards, drawings are made on them, if they are intended in the design. To attach the thread to the nail, you need to apply glue in the places where it comes into contact with the plate. The material can be laid out in a straight line, twisted or made into a grid. The work is performed solely within the limits of the master’s imagination.
There are several rules when applying threads:
- Under no circumstances should it touch the cuticle, as it will irritate it with its sharp tip;
- The thread should not reach the edge of the nail by about 1 mm. This rule was created so that after the manicure does not cling to clothes or other things;
- The thread is fixed on the nail with a transparent varnish or made under gel. The second option is more reliable, since the material will definitely remain in place while wearing the manicure.
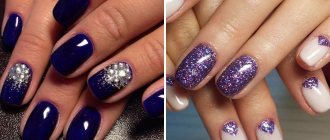
The use of gold and silver threads on a black background looks especially impressive. You can place two threads vertically on each nail. Or alternate between vertical and horizontal positions.
Technique for applying threads to nails for design.
When designing nails, threads are used as an additional decorative material, so first the nail is covered with a layer of varnish of the selected color. Next, the drawing is done with a needle or acrylic paints, if one is planned in the pattern. After the design has dried, glue or transparent varnish is applied to the places where the threads will be located, and then the threads are placed on it. They can be laid out in straight lines, made into a grid, twisted, bent, turned into various geometric shapes, and so on, as much as your imagination allows. However, you should adhere to the following two simple rules:
1. The thread should not come into contact with the cuticle under any circumstances.
2. The thread, located on the nail, should almost reach the free edge of the nail
These rules will prevent the thread from breaking or clinging to any objects. Next, you should fix the thread on the surface of the nail using transparent varnish or a special fixative.
This is how you can easily make a very original design from a simple manicure using one polish:
If you found this page useful, please recommend it to your friends:
Source of the article: https://moi-manikur.ru/vse-dlya-manikyura/niti-dlya-dizajna-nogtej.html
Alternative uses of thread
You can make decor not only from threads, but also with the help of them. We are talking about creating a random striped pattern. For ease of drawing, it is better to use thick dental floss.
To begin with, a regular manicure is done and a single-color coating is selected. Afterwards you need to decide on the color of the stripes on your nails. Next, the thread is dipped into varnish and transferred to the nail, creating a kind of strip. In this way, the entire plate is filled, and individual strips can be layered on top of each other. To diversify your manicure, you can use several colors for decoration, for example, blue and pink.
Source of the article: https://tvoirodi.ru/krasota/kak-s-pomoshhyu-nitok-sdelat-neobychnyj-manikyur.html
Where to start - necessary materials and manicure tools
Any quality manicure begins with good nail preparation. How to do this is a woman’s business. If desired, a trimmed manicure is done, and if possible, a special tool (milling cutter) is made using hardware.
In order for the nail plate to acquire the base color, a coating is needed - varnish, gel polish, gel. But then – this is a creative matter. But it’s still difficult to do without these tools and materials:
- colored varnish or acrylic paint (either special for painting on nails with a high pigment content or simple artistic paint). The colored varnish should differ from the base coat by at least a couple of tones.
- stencils, stickers, tape or other necessary adhesive accessories for the specifically selected design;
- thin and flat brushes, sewing needles (as an option - a sewing pin), toothpicks, dots with tips of different diameters;
Professional nail design tools
- additional decorative elements (glitter, sparkles in clear varnish, rhinestones, foil, rubbing, broths, etc.).
At home you can find many improvised tools that you should use to create a design on your nails. For example, a replacement for dotsu is an invisible hairpin or a sewing pin with a different ball-tip diameter.
How do you draw patterns on your nails?
The nail art industry is developing so quickly that it is very difficult to keep track of the techniques for creating nail designs. Who would have thought that the popular method of applying a design to a nail would be water based. But you shouldn’t underestimate the more familiar methods.
You can create patterns on both natural and artificial nails. Learning to draw complex patterns and ornaments with simple tools is not difficult, you just have to have patience.
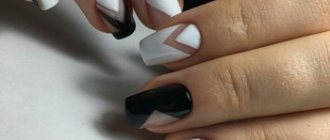
Using regular tape or foil
The essence of this method is to create an even geometric pattern or figure on the nails. But first, cover the surface of the nail with a base varnish (choose any color you need). But it is worth understanding that the main layer will ultimately become the color of the drawing itself.
The design itself depends on how the tape was glued: thin stripes or wide, straight, zigzag, diagonally, or it covers part of the nail, forming geometric shapes.
For manicure, it is better to take masking tape. It has less adhesion to the surface of the nail and will not damage the polish when removed. At the same time, its stickiness will be enough to make a beautiful drawing.
In addition to adhesive tape, they also use special foil tape for design. It is easier to use, since you do not need to monitor the width of the strip. Finished tapes can have different thicknesses, and it is not necessary to remove them. It can become part of the design.
Regular needles
To make a drawing with a needle, you need at least two colors of varnish (more is possible, depending on what kind of design is intended). One is for the base (this layer must be completely dry before starting to apply the drawing), the second and then for painting. There are many options for creating simple but effective drawings. Nail designs made with a needle do not require much time or additional costs.
The following effect on nails can be done with a thin dot tip, but the easiest way to do this is with the sharp end of a needle.
Option for designing nails using a needle and two colors of varnish
The technique of applying a design with a needle is accessible even to those who have never done nail design before. The main feature is to have time to apply a beautiful pattern before the varnish on the needle dries. And if the drawing is done pointwise, then until the drops of varnish dry on the nail.
If you paint with a needle, the line you draw will be thin. You can also use a needle to outline the contours of the design.
The result of drawing with a needle
Using dots
The result on your nails, if you paint them with dots, will be similar to what is done with a needle. Only using a dot for painting is more convenient - such an amount of varnish is wrapped around the tip ball that it does not interfere with the work (it does not roll off in large portions and it is more convenient to apply straight lines without “blunders”).
Select the color for the base. The design is applied with a “ball” that is dipped in varnish of the desired color. If you need to change the color, you can simply wipe the tip of the tool with cotton wool or a napkin moistened with nail polish remover.
Thin brush
A thin brush gives you more chances for high-quality nail painting. With its help you can create an unusual floral pattern and neat thin lines. You can especially go wild on long nails.
To start painting with a brush, you need to cover the nail with the main color (white, colorless, red, pink, black, multi-colored varnishes, including gradient manicure). The coating must dry completely. Then the pattern is applied with a thin brush. You can do this with regular painting brushes, but it is better to use special brushes with nylon fibers. To achieve different effects when painting, you may need other brushes with different thicknesses.
The most convenient way to apply beautiful patterns is with a brush. Its fibers hold enough varnish or acrylic paint to draw a long line without additional addition.
A regular toothpick
A toothpick is a great tool for applying designs to your nails. The technique of applying a pattern with these tools requires care, since a large amount of varnish is wrapped on the wooden base of the toothpick and then rolls off unevenly, which interferes with the work.
Nail decoration can be done on a dried or wet basis. The effect of this will vary.
The toothpick leaves a significant mark on the nail. She is comfortable drawing monograms, flowers, abstractions, etc., but it is almost impossible to achieve a thin line from her.
Using a toothpick, it is optimal to draw large elements, and then draw them with a thin brush. After finishing work, it is better to apply a protective transparent coating.
Using special stickers
Special stickers - stencils - can simplify the work of decorating nails. With their help you can create a wide variety of patterns and effects on your nails.
To use them, color is applied to the nail, which ultimately becomes a design. After this layer has dried, the stencils are glued. Cover with varnish of a different color. When this layer is completely dry, the stencil is carefully removed.
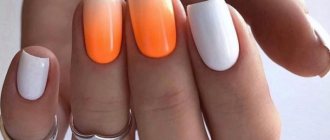
An interesting effect is obtained if you take a gradient manicure as a base option. Decorating your nails in this way will help make your manicure unusual and unique.
You can make a gradient yourself; for this you will need at least two colors of varnish in bright colors and a wide, flat fan-shaped brush. Follow the steps as shown in the picture.
How to create a gel design with spider webs
You can make an interesting design with cobwebs using any of the above tools; for some work a brush is more suitable, for others dots, it’s all a matter of practice.
The described methods of applying web gel are performed on a finished varnish coating or after applying a colored layer with the stickiness removed.
- For making chaotic or sketched rounded lines.
- Grab a little gel directly from the jar (or put a separate drop of paint on the palette).
- Using a brush or dots, draw out the required thickness of the thread, pull it to the level of the nail and, without touching the surface of the gel polish with the tool, place the web in the invented pattern. The thread is in the air all the time, and after pulling it is quickly placed on the nail.
- The dots/brush moves in relation to the nail at an angle of 90 degrees or, if more convenient, completely parallel in the air. The movements should be fast enough, but not too sharp, so that the threads do not break.
- To create rounded lines, the web is draped over the nail, but not tightly wound along the axis (remember that you will need to remove the excess).
- When the lines are completed, send them to the lamp. Once dry, complete the design or cover the lines with topcoat.
How to draw a simple design on your nails?
You can draw different patterns using different materials. The simplest and most affordable are colored varnishes. But for those who are seriously interested in decorating their nails, it is worth trying other material options.
Gel polish
With gel polish you can create a variety of patterns and effects that will last until you have to repeat the procedure of covering your nails with this material. The technique of painting with gel polish can be different: on an undried coating and on a polymerized one.
The gel polish coating technology is as follows:
- Apply primer (base layer) to the nail prepared with a buffer. If necessary, dry in a lamp.
- Apply colored gel polish. It is at this stage that differences in further actions begin. This layer can be dried and then added with a design. But you can do this before the nail goes to drying. This technique is called “wet”. Only after designing the nail does it dry in a lamp.
- Apply fixative, dry, remove stickiness.
Drawing with gel polish step by step
Acrylic paint
Acrylic is a very convenient material for nail design. It dries quickly, has no odor, and retains pigment well. Apply acrylic paint to a dried surface (varnish, gel polish, shellac, even on a natural nail). To paint your nails, you will need a brush, preferably one with non-natural bristles.
Step-by-step drawing of a flower with acrylic paint
You can also make a French jacket with acrylic and decorate it with an original floral design. The acrylic painting technique is convenient because if the pattern doesn’t work out, you can simply wash it off with water before it dries and start painting again.
In order for the nail painting to last on the nail for a long time, a transparent fixative must be applied over the design.
Using shellac
Just as in the case of gel polish, you can decorate your nails with shellac using the “wet” or “dried” technique. You can use a French manicure as a basis, which is no problem to do on short or long nails. If your nails are still short, then you should not make the French “smile” too wide. When it comes to the design, it should not be too large so as not to visually enlarge the nail plate.
Using pieces of tulle
You can get an unusual manicure if you use simple tulle. Here you can use multi-colored varnishes for the base and pattern. A subtle effect will be achieved if you use a light varnish.
The technique here is simple:
- Paint your nails with a base color (it will act as the color of the final design). Allow to dry thoroughly.
- Place a piece of tulle tightly against the nail. Carefully apply a different color of varnish on top of it. Let the layer dry. Remove the tulle.
- Cover with clear varnish.
Using a piece of tulle with a different pattern, you can get ready-made designs, which is not difficult to do.
Using decorative elements
You can create your perfect manicure without painting on your nails, but simply by correctly using decorative nail material. The color base in this design is necessary in any case, but there are no restrictions on the use of decor.
Rhinestones, stones, and foil can give your nails a special shine that cannot be duplicated by any varnish.
In order for the rhinestones to stick well to the nails, it is better to place them on gel polish that has not yet been dried. After finishing the decoration, you can safely dry it. A layer of topcoat on top is required.
There is also a special foil that applies gel polish without a sticky layer or regular dried varnish. To get a design on your nails, you should glue the foil, iron it on top and carefully remove it. The design that was formed on the foil will appear on the nail.
There is another design option with foil. To do this, purchase special thin pieces of foil (they come in different colors). They are laid out on the nail with an applique, and then secured with a colorless varnish or top coat (for gel polishes). Only with foil you can create unique patterns on your nails.
Using droplets and dots
The dot painting technique will help you create an unusual, but painfully simple manicure. This manicure can be done using varnishes of different colors, as well as gel polishes, shellac, and acrylic paints. The tools you will need are dots. An alternative is toothpicks, a needle, a ballpoint pen tip, etc.
As in previous methods of decoration, you need to apply the main color to the nails, and after it has completely dried, apply the design. The manicure will last longer if you cover the resulting result with a fixative.
Design option for marigold using drip technique
If the varnish has not yet dried, then you should use the drip painting technique. Apply varnish of a different color onto the undried varnish and stretch it with a needle (dots, toothpick). Then they are allowed to dry and coated with colorless varnish.
Source of the article: https://www.ladywow.ru/prostye-risunki-na-nogtyah.html
Sweater manicure with acrylic paint
Sweater nail designs can be done without sand. Therefore, if you were unable to buy it, then there is no need to be upset. Now we will explain step by step how to make a knitted manicure, having acrylic paint on hand:
- Get your hands in order: process the cuticle, file it, make it to the desired length, polish it, degrease it and apply a top coat.
- Apply colored gel polish, dry in a lamp, then top coat, dry again.
- Remove the sticky layer with a napkin.
- Treat the nail on which the sweater design will be with a buff, then again with a top coat, in a lamp; after that there is no need to remove the sticky layer.
- Draw a pattern with acrylic paint and dry it in a lamp. To make a winter knitted manicure look voluminous and truly resemble natural knitting, you need to apply the paint in several layers, each time drying your fingers in a lamp.
- After this, you need to remove the sticky layer from the nail.
That's the whole technique for making a sweater without using decorative powder. But the result is no less attractive.
To give your nails a matte tint, at the end you just need to apply one layer of matte gel polish and dry.
The knitted design, diluted with dots, looks very nice. They give the image airiness, fluffiness and softness.